In this guide, we will show you the steps to install numerous custom ROMs based on Android 13 onto your Poco F3 / Mi 11X / Redmi K40. When it comes to custom development, then Xiaomi has quickly become one of the most active players in this domain. In this regard, the aforementioned devices are without a shadow of a doubt at the pinnacle of this development. At the time of writing this guide, 6 customs based on the latest OS build are already up and running and plenty of others are lined up to be live sooner than later.
So the likes of themed icons for third-party apps, increased Material You theme styles QR Code scanner in Quick Settings tile, changes to media output picker, and the ability to edit clipboard texts are all on the cards. So without further ado, let’s make you aware of the steps to install these custom ROMs based on Android 13 onto your Poco F3 / Mi 11X / Redmi K40.
Table of Contents
Prerequisites to Install Android 13 Custom ROMs on Poco F3/Mi 11X/Redmi K40
The below process will wipe off all the data from your device, so take a complete device backup beforehand. Droidwin and its members wouldn’t be held responsible in case of a thermonuclear war, your alarm doesn’t wake you up, or if anything happens to your device and data by performing the below steps.
STEP 1: Install Android SDK

First and foremost, you will have to install the Android SDK Platform Tools on your PC. This is the official ADB and Fastboot binary provided by Google and is the only recommended one. So download it and then extract it to any convenient location on your PC. Doing so will give you the platform-tools folder, which will be used throughout this guide to install the LineageOS onto your Xiaomi 12/Pro/12X.
STEP 2: Download Android 13 Custom ROM for Poco F3 / Mi 11X / Redmi K40
You may now grab hold of the desired Android 13 custom ROM and its associated files for your Poco F3 / Mi 11X / Redmi K40 from below.
Pixel Experience
Download ROM: Pixel Experience
Download Recovery: Pixel Experience Recovery
Download Vendor_Boot: vendor_boot.img
Evolution X
Download ROM: Evolution X
Download Firmware: V13.0.4.0.SKHMIXM
Download Recovery: Orange Fox Recovery Project
GApps: Already Included
crDroid
Download ROM: crDroid v9.0
Download Recovery: [BOOT]3.6.2_12-RedmiK40-POCOF3-Mi11X_v6.3_A12-alioth-skkk_a616ae6b.zip
Download Firmware: V13.0.8.0.SKHEUXM
GApps: Android 13 GApps
Pixel Extended
Download ROM: Pixel Extended
Download Firmware: V13.0.8.0
GApps: Already Included
PixelPlusUI
Download ROM: PixelPlusUI
GApps: Already Included
Project Elixir
Download ROM: Project Elixir v3.2
Download Firmware: v13.0.7
GApps: Already Included
STEP 3: Unlock Bootloader on Poco F3 / Mi 11X / Redmi K40
Next up, you will have to unlock the bootloader on your device. Do keep in mind that this process will wipe off all the data and might nullify the device’s warranty as well. So if that’s all well and good, then refer to our comprehensive guide on How to Unlock the Bootloader on any Xiaomi Device.
STEP 4: Boot Poco F3 / Mi 11X / Redmi K40 to Fastboot Mode
- Connect your device to the PC via a USB cable. Make sure USB Debugging is enabled.
- Then head over to the platform-tools folder, type in CMD in the address bar, and hit Enter. This will launch the Command Prompt.

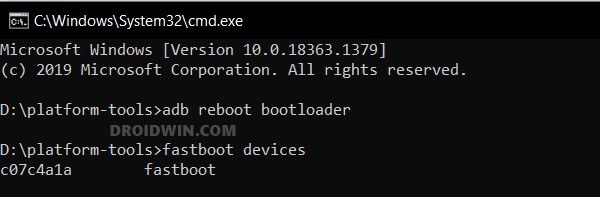
- Type in the following command in the CMD window to boot your device to Fastboot Mode
adb reboot bootloader

- Now type in the below command to verify the Fastboot Connection
fastboot devices
- If you get a device ID followed by the fastboot keyword, then the connection stands successful.

How to Flash Pixel Experience on Poco F3 / Mi 11X / Redmi K40
![]()
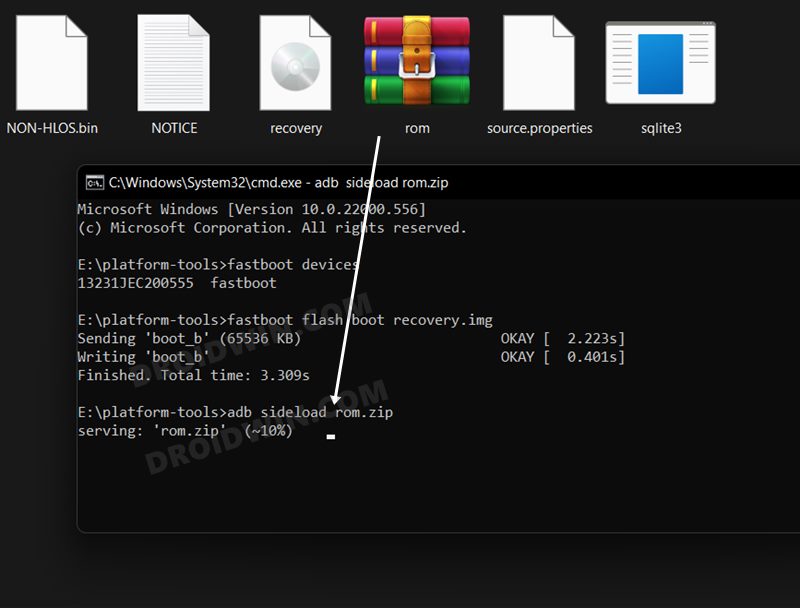
- To begin with, transfer the vendor_boot and Pixel Experience Recovery files to the platform-tools folder on your PC.
- Likewise, make sure to rename vendor_boot to vendor_boot.img, recovery to recovery.img, and ROM to rom.zip.
- Then open CMD inside platform tools and type in the below command to boot your device to Fastboot Mode
adb reboot bootloader
- Now execute the below command to flash the vendor_boot file
fastboot flash vendor_boot vendor_boot.img
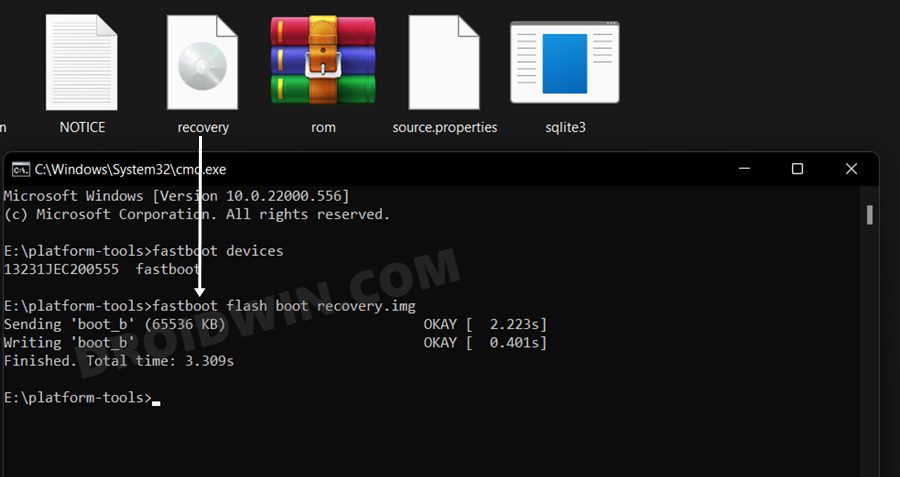
- Then type in the below command to flash the Pixel Experience Recovery:
fastboot flash boot recovery.img
- After that, reboot your device to recovery mode using the below command:
fastboot reboot-recovery
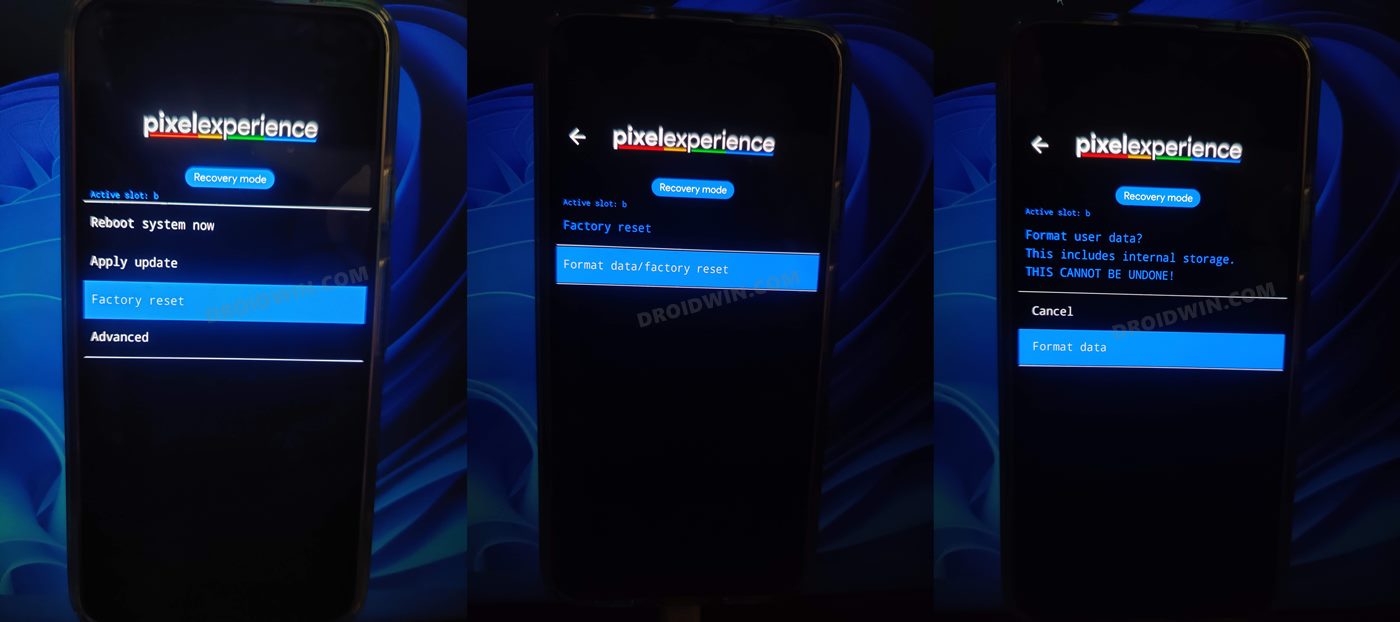
- Within recovery, tap on Factory Reset > Format data/factory reset.
- Once done, go to “Apply Update” and select “Apply from ADB”.
- Now type in the below command in the CMD window to start the sideload
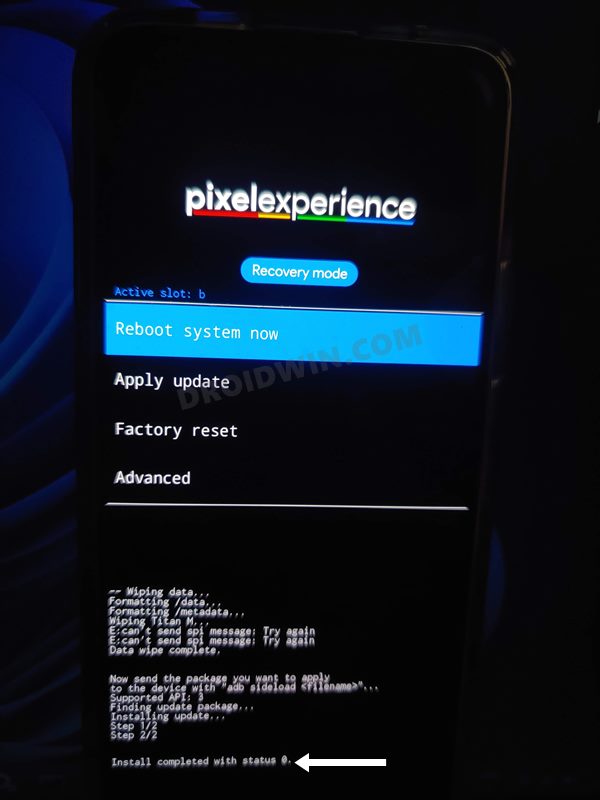
adb sideload rom.zip
- The flashing will now begin. Once done, tap on Reboot System Now.

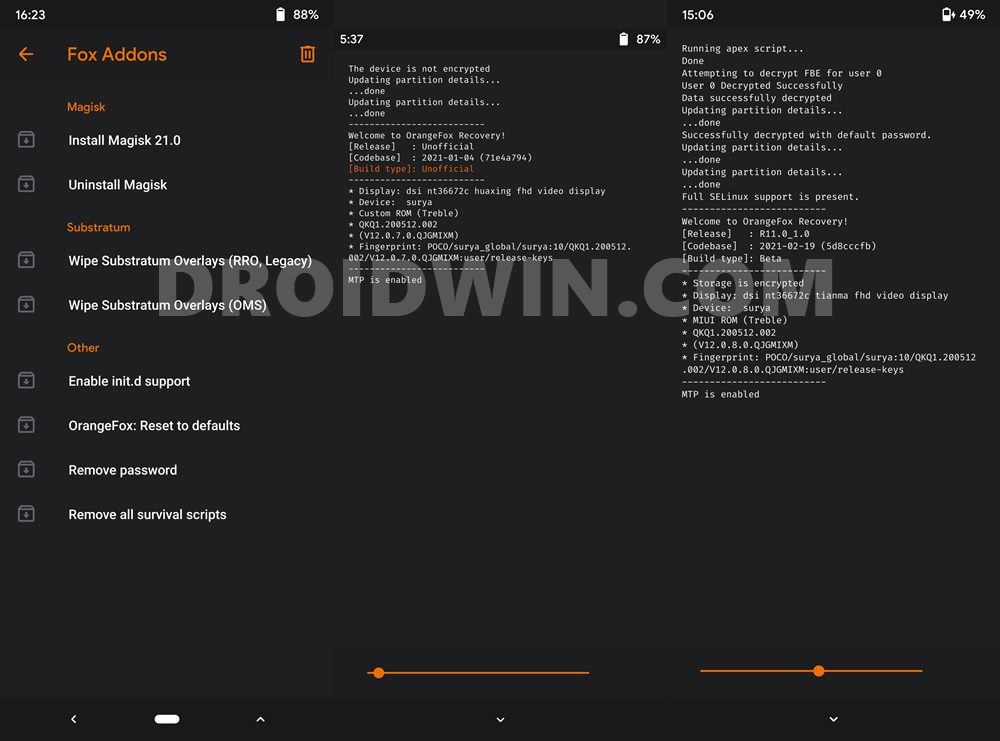
How to Flash Evolution X on Poco F3 / Mi 11X / Redmi K40

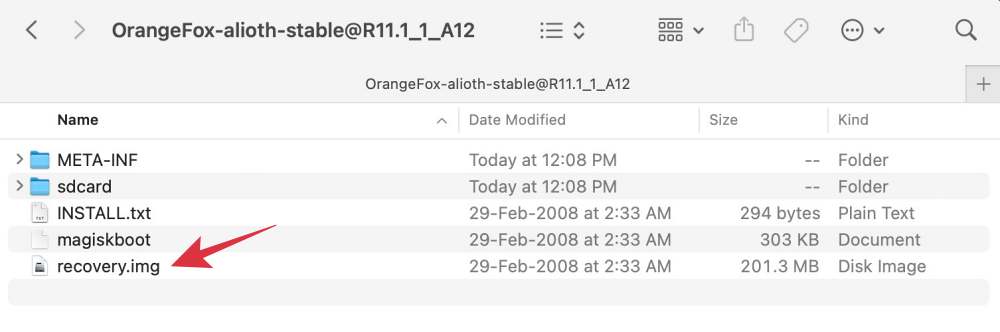
- To begin with, transfer the Orange Fox Recovery ZIP file to your device.
- Also, extract the Orange Fox Recovery ZIP and copy the recovery.img to the platform-tools folder on your PC.
- Now open CMD inside platform tools and type in the below command to boot your device to Fastboot Mode
adb reboot bootloader
- Then type in the following command to boot your device to Orange Fox Recovery:
fastboot boot recovery.img
- Now go to Install, select the Orange Fox Recovery ZIP file, and perform a right swipe to flash it.
- Once done, reboot your device to Recovery. Then go to Install, select the ROM ZIP file, and perform a right swipe to flash it.
- Again, go to Install, select the firmware ZIP file, and perform a right swipe to flash it. Once done, reboot your device to Recovery.
- Now format the data on your device. Once done, you may now reboot your device to Evolution X.
How to Flash crDroid on Poco F3 / Mi 11X / Redmi K40

- To begin with, rename the downloaded recovery to recovery.img.
- Then transfer it to the platform-tools folder on your PC.
- Now open CMD inside platform tools and type in the below command to boot your device to Fastboot Mode
adb reboot bootloader
- Then type in the following command to boot your device to custom recovery:
fastboot boot recovery.img
- Now go to Install, select the firmware ZIP file, and perform a right swipe to flash it.
- Once done, again go to Install, select the ROM ZIP file, and perform a right swipe to flash it.
- It is recommended to enable the Auto Flash TWRP. Now reboot your device to recovery.
- Then go to Install, select the GApps ZIP file, and perform a right swipe to flash it.
- After that, format your device [compulsory]. Once done you may now reboot your device to crDroid.
How to Flash Pixel Extended on Poco F3 / Mi 11X / Redmi K40
![]()
- To begin with, install the TWRP Recovery on your device.
- Then rename the firmware to firmware.zip and ROM to rom.zip.
- Then open CMD inside platform tools and type in the below command to boot your device to TWRP
adb reboot recovery
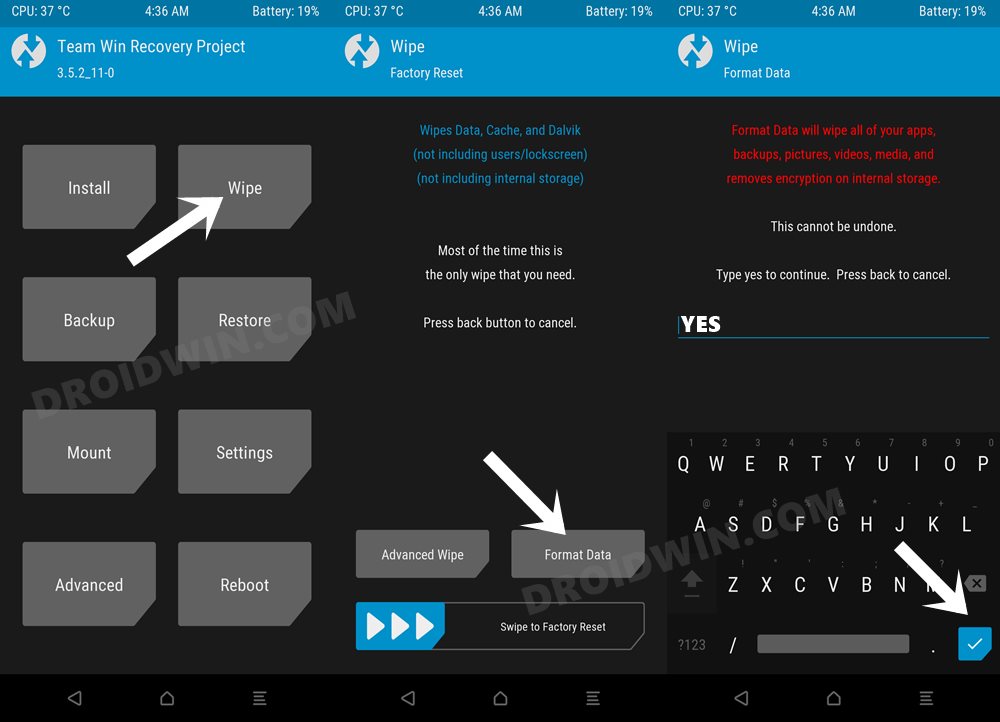
- Now go to Wipe > Format Data > type in YES > hit the checkmark at the bottom right.
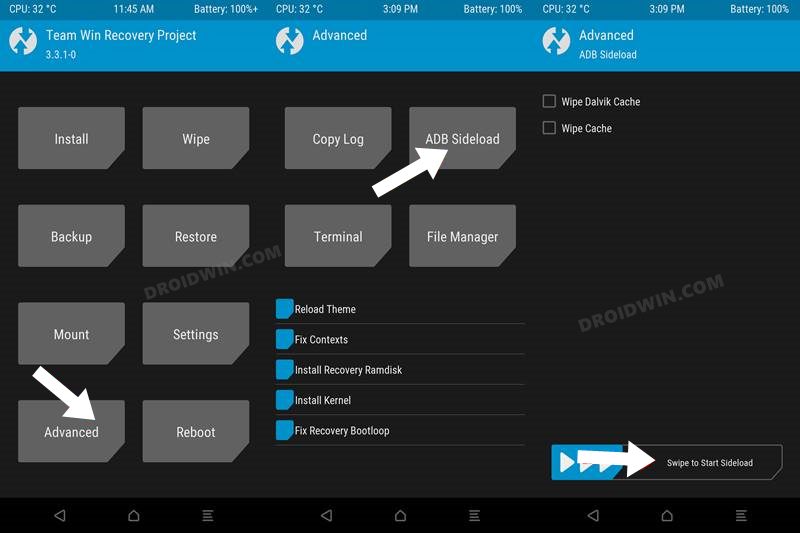
- Then go to Advanced > ADB Sideload > Perform a right swipe to initiate the sideload.
- Now type in the below command in the CMD window to sideload the firmware:
adb sideload firmware.zip
- Now reboot your device to recovery mode using the below command:
fastboot reboot-recovery
- Then go to Advanced > ADB Sideload > Perform a right swipe to initiate the sideload.
- Now type in the below command in the CMD window to sideload the ROM:
adb sideload rom.zip
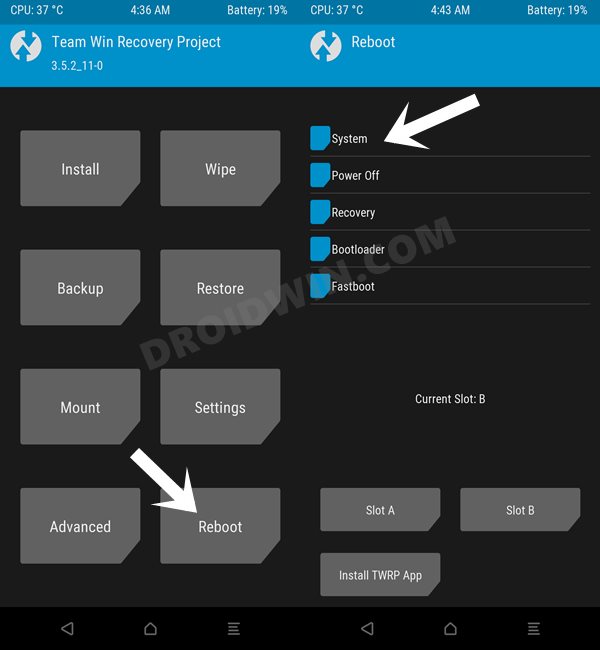
- Finally, go to Reboot and select System. Your device will now boot to Pixel Extended ROM.
How to Flash PixelPlusUI on Poco F3 / Mi 11X / Redmi K40
![]()
- To begin with, install the TWRP Recovery on your device.
- Then open CMD inside platform tools and type in the below command to boot your device to TWRP
adb reboot recovery
- Now go to Wipe > Format Data > type in YES > hit the checkmark at the bottom right.
- Then go to Install, select the ROM.ZIP file, and checkmark Flash TWRP automatically.
- Now perform a right swipe to flash the ROM. The flashing process will now begin.
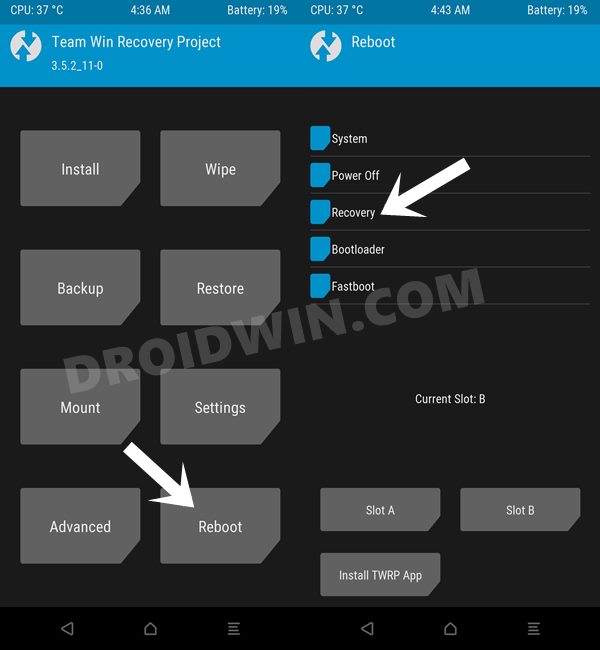
- Once done, go to Reboot and select Recovery. Your device will now reboot to TWRP.
- Finally, go to Reboot and select System. Your device will now reboot to PixelPlusUI.
How to Flash Project Elixir on Poco F3 / Mi 11X / Redmi K40

- To begin with, install the TWRP Recovery on your device.
- Then open CMD inside platform tools and type in the below command to boot your device to TWRP
adb reboot recovery
- Now go to Install, select the firmware ZIP file, and perform a right swipe to flash it.
- Again go to Install, select the ROM.ZIP file, and perform a right swipe to flash it.
- Once done, go to Reboot and select Recovery. Your device will now reboot to TWRP.
- Then go to Wipe > Format Data > type in YES > hit the checkmark at the bottom right.
- Finally, go to Reboot and select System. Your device will now reboot to Project Elixir.
That’s it. These were the steps to install numerous custom ROMs based on Android 13 onto your Poco F3 / Mi 11X / Redmi K40. If you have any queries concerning the aforementioned steps, do let us know in the comments, along with the device and ROM name. We will get back to you with a solution at the earliest.


