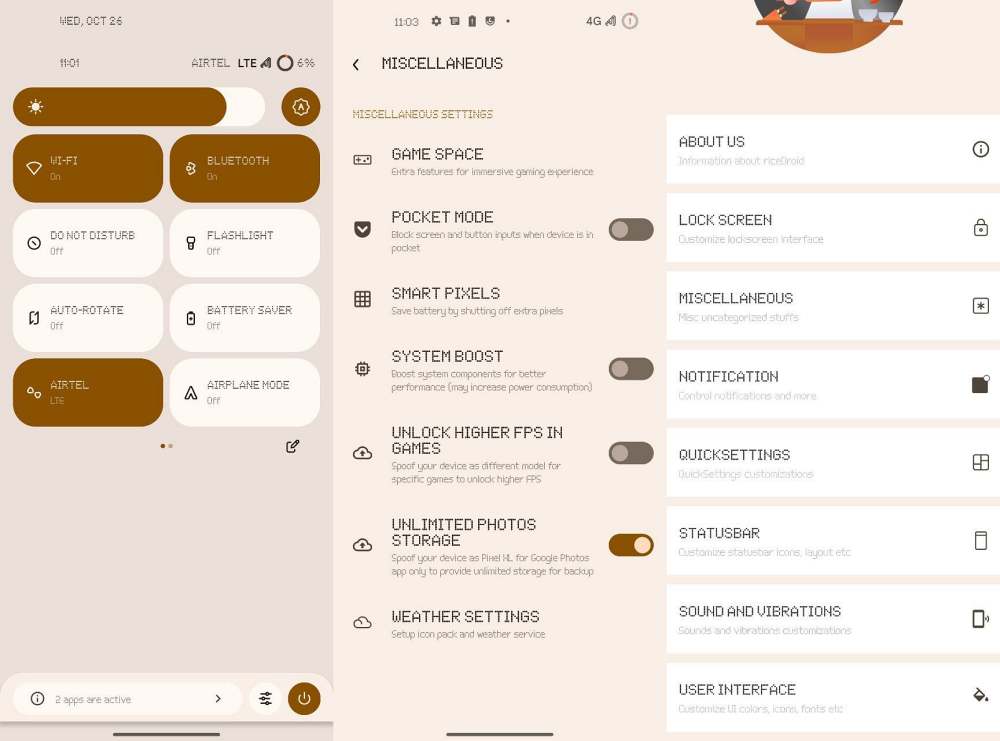
This guide will show you the steps to install numerous custom ROMs, such as Paranoid Android and RiceDroid, based on Android 13 on your Nothing Phone 1. This new entry to the competitive budget domain has managed to live up to the hype that it initially created. While this stood true for the general users, there was a niche segment of tech enthusiasts who still had a few doubts regarding the custom development support for this relatively newer player in the market.
Well, you could now put all these doubts to rest as we have been blessed with quite a few custom ROMs. While some of them are a part of the popular Paranoid family, others belong to the Android Open Source Project [AOSP]. So a higher degree of performance, battery life, and functionality are on the cards, with just the right amount of feature sets. On that note, let’s show you the steps to install various Android 13 custom ROMs on your Nothing Phone 1.
Table of Contents
The Prerequisites to Installing Custom ROMs on Nothing Phone 1

The below instructions are listed under separate sections for ease of understanding. Make sure to follow the same sequence as mentioned. Droidwin and its members wouldn’t be held responsible in case of a thermonuclear war, your alarm doesn’t wake you up, or if anything happens to your device and data by performing the below steps.
STEP 1: Install Android SDK

First and foremost, you will have to install the Android SDK Platform Tools on your PC. This is the official ADB and Fastboot binary provided by Google and is the only recommended one. So download it and then extract it to any convenient location on your PC. Doing so will give you the platform-tools folder, which will be used throughout this guide.
STEP 2: Enable USB Debugging and OEM Unlocking
Next up, you will also have to enable USB Debugging and OEM Unlocking on your device. The former will make your device recognizable by the PC in ADB mode. This will then allow you to boot your device to Fastboot Mode. On the other hand, OEM Unlocking is required to carry out the bootloader unlocking.
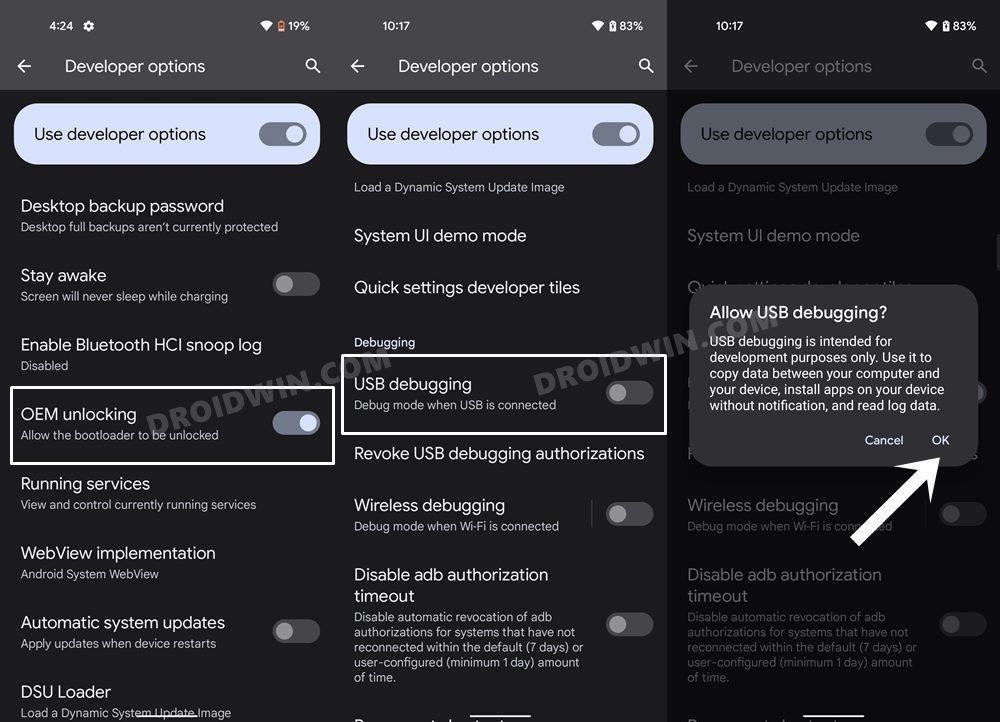
So head over to Settings > About Phone > Tap on Build Number 7 times > Go back to Settings > System > Advanced > Developer Options > Enable USB Debugging and OEM Unlocking.
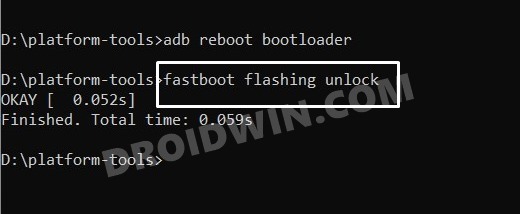
STEP 3: Unlock Bootloader on Nothing Phone 1
Next up, you will also have to unlock the device’s bootloader. Do keep in mind that doing so will wipe off all the data from your device and could nullify its warranty as well. So if that’s all well and good, then please refer to our detailed guide on Unlock Bootloader on Nothing Phone 1 [and its Critical Partition]. Once done, don’t restore the backup now as well will again have to format the device in the subsequent steps.
STEP 4: Download Android 13/14 Custom ROMs for Nothing Phone 1
- Grab hold of the desired Android 13/14 custom ROM for your Nothing Phone 1 from below.
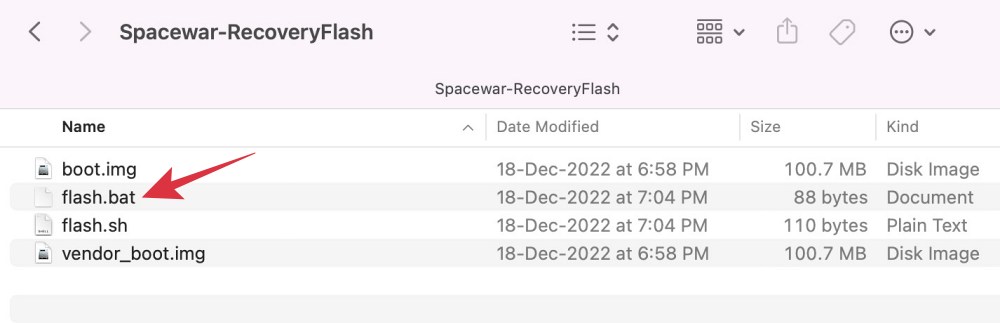
- Once downloaded, transfer the ROM and its associated files [if any] to the platform tools folder.
- Likewise, rename the custom ROM to rom.zip, so that the complete name becomes rom.zip
ANDROID 14 CUSTOM ROMS
Project Elixir
Download Link

crDroid
Download Link

matrixxOS
Download Link

Paranoid Android 14
Download Link
ANDROID 13 CUSTOM ROMs
- LineageOS 20 [Official]
Download Link - Pixel Experience
Download Link - Paranoid Android Topaz
Download Link - RiceDroid
Boot & Vendor Boot | ROM.ZIP - PixyOS
Fastboot ROM.ZIP - CrDroid
Download Link - PixelPlus UI
ROM | Boot & Vendor_Boot - LineageOS [Unofficial]
ROM | Recovery - Evolution X
ROM | Boot & Vendor_Boot - AICP ROM
ROM | Boot | Vendor_Boot - PixysOS ROM
DOWNLOAD LINK - Nameless AOSP
ROM | Dtbo, Boot, & Vendor_Boot - Xtended XT
ROM | Recovery - SuperiorOS
ROM | boot and vendor_boot
STEP 5: Boot Nothing Phone 1 to Fastboot Mode
- Now connect your device to the PC via a USB cable. Make sure USB Debugging is enabled.
- Then head over to the platform-tools folder, type in CMD in the address bar, and hit Enter. This will launch the Command Prompt.

- Type in the following command in the CMD window to boot your device to Fastboot Mode
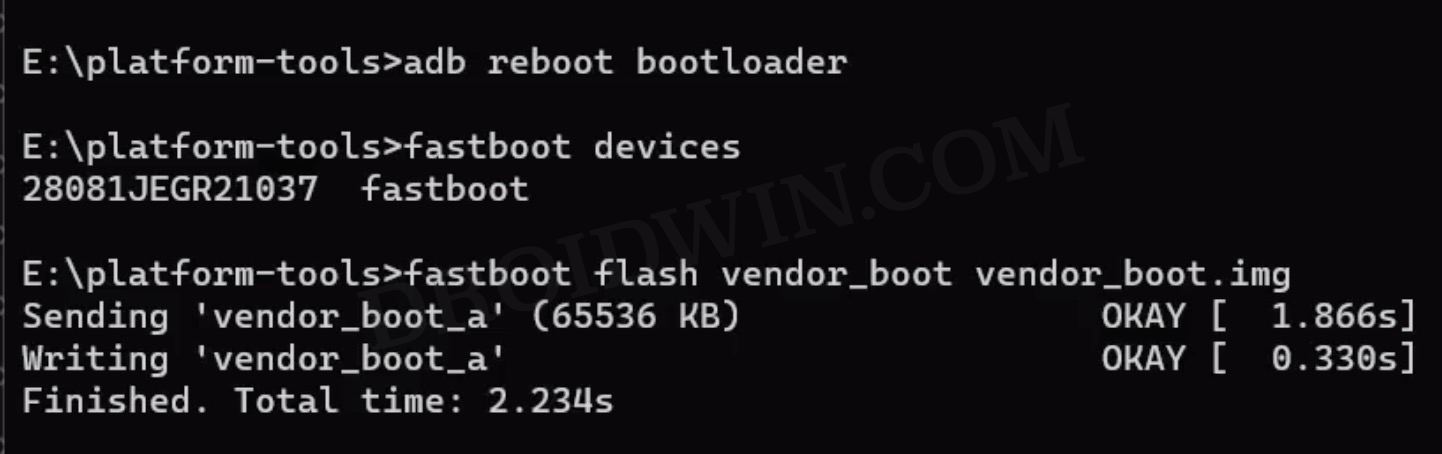
adb reboot bootloader
- To verify the Fastboot connection, type in the below command and you should get back the device ID.
fastboot devices


Install crDroid Android 14 on Nothing Phone 1
Install Matrixx Custom ROM Android 14 on Nothing Phone 1
- First off, flash vendor_boot.img via the below command:
fastboot flash vendor_boot vendor_boot.img
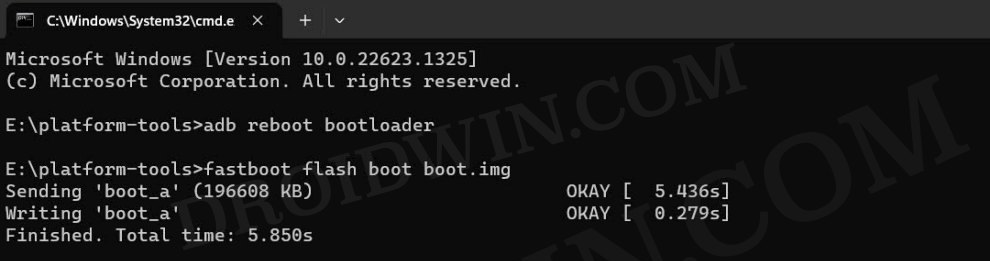
- Then flash the boot.img via the below command:
fastboot flash boot boot.img
- Now boot your device to the newly flashed Matrixx Recovery:
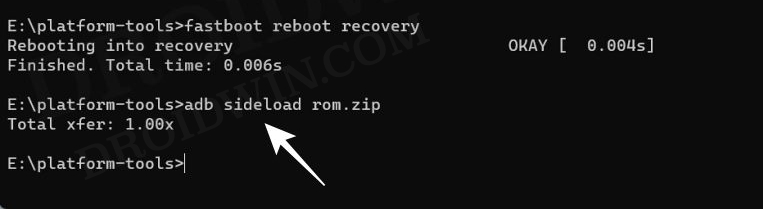
fastboot reboot recovery
- Then choose Factory Reset > Format Data/Factory Reset and do a reset.
- Once done, go to Install Update > ADB Sideload.
- Your device will now boot to the ADB Sideload Mode.
- Now type in the below command in the CMD window:
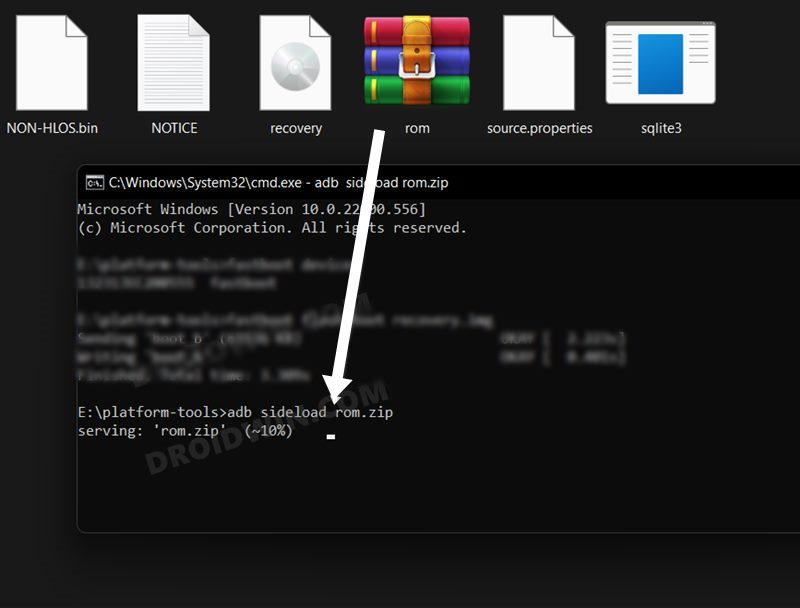
adb sideload rom.zip
- Wait for the installation to complete. Once done, select Reboot System.
- Your Nothing Phone 1 will now boot to the newly flashed Matrixx ROM.

Install Paranoid Android 14 ROM on Nothing Phone 1
Install Project Elixir Android 14 on Nothing Phone 1
Install LineageOS 20 [Official] Android 13 ROM on Nothing Phone 1
Install Pixel Experience Android 13 ROM on Nothing Phone 1
- From the Fastboot Mode, execute the below command to flash the Pixel Experience recovery onto your device:
fastboot flash boot recovery.img
- Once the flashing is complete, type in the below command to boot your device to Pixel Experience Recovery.
fastboot reboot recovery
- Now go to Factory Reset > Format Data/Factory Reset > Format Data.
- Your device will now undergo a reset. Once done, you shall get the “Data wipe complete” message.
- Once done, go to Apply Update > Apply from ADB.
- Then head over to the platform-tools folder, type in CMD in the address bar, and hit Enter.
- This will launch the Command Prompt. So type in the below command to flash the ROM file via Sideload:
adb sideload rom.zip
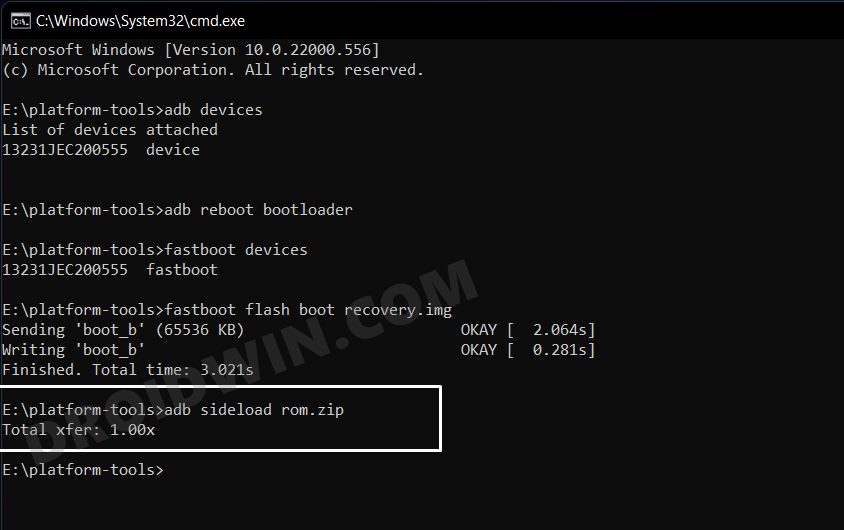
- The process will now begin and once done, you shall get the Total xfer: 1.00x message [Got an error? See FAQ below].
- Now go back to the home screen of the recovery and select Reboot System Now. Your device will now boot to the newly installed OS.
That’s it. These were the steps to install the Pixel Experience custom ROM based on Android 13 on your Nothing Phone 1. If you have any queries concerning the aforementioned steps, do let us know in the comments. We will get back to you with a solution at the earliest.
Install Paranoid Android 13 Custom ROM on Nothing Phone 1

- First and foremost, re-verify that you have checkmarked all the prerequisites listed in STEP 1 to 5 above.
- Then execute the below command to flash the ROM onto your device [replace filename accordingly]
fastboot update filename.zip
- After that, type in the below command to factory reset your device:
fastboot -w
- You may now reboot to the newly installed OS via the below command:
fastboot reboot
That’s it. These were the steps to install the Paranoid Android custom ROM based on Android 13 on your Nothing Phone 1. If you have any queries concerning the aforementioned steps, do let us know in the comments. We will get back to you with a solution at the earliest.
Install RiceDroid Android 13 Custom ROM on Nothing Phone 1
A relatively newer player in the market, RiceDroid brings in a clean stiock UI experience and respects the new Material You theming design. It has maintained a perfect equilibrium between the required features and the overall device stability. So on that note, let’s make you aware of the steps to install the RiceDroid Custom ROM based on Android 13 onto your Nothing Phone 1.
- Transfer the ROM.ZIP, boot.img, and vendor_boot.img to the platform-tools folder.
- Then execute the below command to flash the boot.img
fastboot flash boot boot.img
- Now execute the below command to flash the vendor_boot.img
fastboot flash vendor_boot vendor_boot.img
- Then boot your device to recovery mode via hardware keys or the below command
fastboot reboot recovery
- Now use the Volume keys to highlight Wipe Data/Factory Reset and press the Power key to confirm it.
- Once done, use the Volume keys to highlight Apply Update from ADB and press the Power key to confirm it.
- Then open CMD inside the platform-tools folder and execute the below command to flash the ROM [replace rom-name accordingly]
adb sideload rom-name.zip
- The flashing process will now begin. Once done, you could now reboot your device to the newly installed OS right from the recovery itself.
That’s it. These were the steps to install the RiceDroid custom ROM based on Android 13 on your Nothing Phone 1. If you have any queries concerning the aforementioned steps, do let us know in the comments. We will get back to you with a solution at the earliest.
Install Android Ice Cold Project AICP on Nothing Phone 1
- First off, type in the below command to flash the vendor_boot
fastboot flash vendor_boot vendor_boot.img
- Now, use the below command to flash the Recovery:
fastboot flash boot boot.img
- Then use the below command to boot your device to Recovery
fastboot reboot recovery
- From the Recovery, go to Factory Reset > Format Data/Factory Reset > Format Data.
- Your device will now undergo a reset. Once done, you shall get the “Data wipe complete” message.
- From the Recovery, go to Apply Update > Apply from ADB.
- Then head over to the platform-tools folder, type in CMD in the address bar, and hit Enter.
- This will launch the Command Prompt. So type in the below command to flash the ROM file via Sideload:
adb sideload rom.zip
- The process will now begin and once done, you shall get the Total xfer: 1.00x message [Got an error? See FAQ below].
- If you want to install GApps, then move over to the next step otherwise select Reboot System Now to boot to the OS.
- Go to Advanced > Reboot to Recovery. Your device will reboot to Recovery.
- Once done, go to Apply Update > Apply from ADB.
- Now type in the below command to flash the GApps file via Sideload:
adb sideload gapps.zip
- You will get a Signature Verification failed message because the GApps package isn’t signed by the ROM. That’s not an issue, just hit YES to proceed ahead.
- Once done, you may now finally reboot your device to the OS via “Reboot system now”.
- Your device will now reboot to the newly flashed OS.


Install PixysOS Android 13 Custom ROM on Nothing Phone 1

- Transfer the ROM.ZIP to the platform-tools folder.
- Then execute the below command to flash it [rename “rom-name” accordingly]:
fastboot update rom-name.zip
- Now boot your device to recovery mode via hardware keys or the below command
fastboot reboot recovery
- Then use the Volume keys to highlight Wipe Data/Factory Reset and press the Power key to confirm it.
- Finally, highlight Reboot Now via the Volume keys and press the Power key to confirm it. Your device will now boot to the newly installed OS.
That’s it. These were the steps to install the PixysOS custom ROM based on Android 13 on your Nothing Phone 1. If you have any queries concerning the aforementioned steps, do let us know in the comments. We will get back to you with a solution at the earliest.
Install crDroid Android 13 Custom ROM on Nothing Phone 1

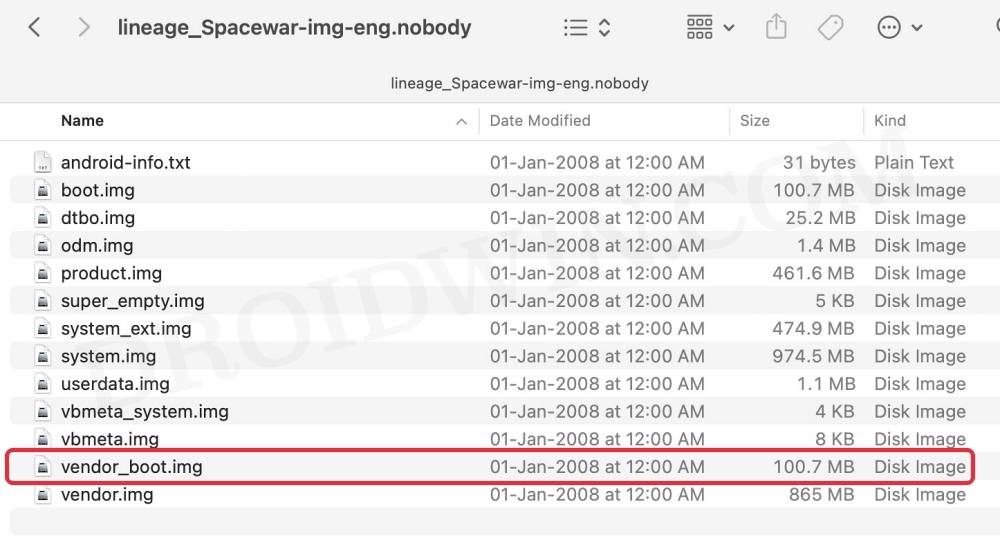
- Extract the ROM file whose name has ‘img’ in it, such as lineage_Spacewar-img-eng.nobody.zip.
- Then copy the vendor_boot.img file from there and transfer it to the platform-tools folder on your PC.
- Now open CMD inside this platform-tools folder and execute the below commands to flash the vendor_boot.img to both partitions:
fastboot flash vendor_boot_a vendor_boot.img
fastboot flash vendor_boot_b vendor_boot.img
- After that, execute the below command to flash the ROM file [replace ‘rom-name’ accordingly]
fastboot update rom-name.zip
- Finally, type in the below command to boot your device to the newly installed OS:
fastboot reboot
That’s it. These were the steps to install the crDroid custom ROM based on Android 13 on your Nothing Phone 1. If you have any queries concerning the aforementioned steps, do let us know in the comments. We will get back to you with a solution at the earliest.
Install PixelPlus UI Android 13 Custom ROM on Nothing Phone 1
![]()
- Transfer the boot.img, vendor_boot.img, and PixelPlusUI.zip files to the platform-tools folder on your PC.
- Now open CMD inside this platform-tools folder and execute the below command to flash boot.img:
fastboot flash boot boot.img
- Then execute the below command to flash the vendor_boot.img file:
fastboot flash vendor_boot vendor_boot.img
- Now execute the below command to boot your device to recovery mode and then select Apple Update.
fastboot reboot recovery
- Now rename the PixelPlusUI file to rom.zip and execute the below command to flash it
adb sideload rom.zip
- The flashing will take some time. Once done, reset your device- either from recovery or from fastboot- using the below command
fastboot -w
- Finally, you may now boot to the newly installed OS from recovery or via the below command from fastboot
fastboot reboot
That’s it. These were the steps to install the PixelPlus UI custom ROM based on Android 13 on your Nothing Phone 1. If you have any queries concerning the aforementioned steps, do let us know in the comments. We will get back to you with a solution at the earliest.
Install LineageOS Android 13 Custom ROM on Nothing Phone 1
- Download the LineageOS Recovery and ROM from STEP 4 above and transfer them to the platform-tools folder.
- Likewise, rename LineageOS Recovery to recovery.img and ROM to rom.zip.
- Now boot your device to Fastboot Mode and connect it to the PC via a USB cable.
- Then open CMD inside the platform-tools folder and execute the below command to boot your device to LineageOS Recovery
fastboot boot recovery.img
- Now select Apply Update > Apply from ADB. Then in the CMD window, execute the below command to flash the ROM:
adb sideload rom.zip
- The installation will now begin and could take a few minutes. Once done, you may now reboot your device to the newly installed OS.
That’s it. These were the steps to install the LineageOS custom ROM based on Android 13 on your Nothing Phone 1. If you have any queries concerning the aforementioned steps, do let us know in the comments. We will get back to you with a solution at the earliest.
Install Evolution X Android 13 Custom ROM on Nothing Phone 1

- Download the Evolution X ROM, Boot, and Vendor_Boot from STEP 4 above and transfer them to the platform-tools folder.
- Likewise, rename the files to rom.zip, boot.img, and vendor_boot.img respectively.
- Now boot your device to Fastboot Mode and connect it to the PC via a USB cable.
- Then open CMD inside the platform-tools folder and execute the below command to flash the boot.img file
fastboot flash boot boot.img
- After that, execute the below command to flash the vendor_boot
fastboot flash vendor_boot vendor_boot.img
- Now, type in the below command to boot your device to Recovery Mode:
fastboot reboot recovery
- From the recovery, go to Factory reset > Format data/factory reset and wait for the process to complete.
- Once done, go to Apply update > Apply from ADB. Then in the CMD window, execute the below command to flash the ROM:
adb sideload rom.zip
- The installation will now begin and could take a few minutes. Once done, you may now reboot your device to the newly installed OS.
That’s it. These were the steps to install the Evolution X custom ROM based on Android 13 on your Nothing Phone 1. If you have any queries concerning the aforementioned steps, do let us know in the comments. We will get back to you with a solution at the earliest.
Install Nameless AOSP Android 13 Custom ROM on Nothing Phone 1

- Download the Nameless AOSP ROM, Dtbo, Boot, and Vendor_Boot from STEP 4 above and transfer them to the platform-tools folder.
- Then rename the files to rom.zip, dtbo.img, boot.img, and vendor_boot.img respectively.
- Now boot your device to Fastboot Mode and connect it to the PC via a USB cable.
- Then open CMD inside the platform-tools folder and execute the below command to flash the dtbo.img file
fastboot flash dtbo dtbo.img
- Now execute the below command to flash the boot.img
fastboot flash dtbo dtbo.img
- After that, type in the below command to flash vendor_boot
fastboot flash vendor_boot vendor_boot.img
- Now, type in the below command to boot your device to Recovery Mode:
fastboot reboot recovery
- From Recovery, go to Apply update > Apply from ADB. Then in the CMD window, execute the below command to flash the ROM:
adb sideload rom.zip
- The installation will now begin and could take a few minutes. Once done, go to Factory Reset and format your device.
- Finally, you may now reboot your device to the newly installed OS.
That’s it. These were the steps to install the Nameless AOSP custom ROM based on Android 13 on your Nothing Phone 1. If you have any queries concerning the aforementioned steps, do let us know in the comments. We will get back to you with a solution at the earliest.
Install PixysOS ROM on Nothing Phone 1

- Transfer the downloaded ROM to the platform-tools folder. Likewise, rename it to rom.zip
- Then boot your device to Fastboot Mode [as explained above] and type in the below command:
fastboot -w
- Now type in the below command to flash the ROM:
fastboot update rom.zip
- Finally, use the below command to boot your device to the newly flashed OS
Install Xtended XT Android 13 Custom ROM on Nothing Phone 1

- Download the Xtended XT ROM and Recovery from STEP 4 above and transfer them to the platform-tools folder. Likewise, rename it to rom.zip.
- Now boot your device to Fastboot Mode and connect it to the PC via a USB cable.
- Then extract the recovery.zip and launch the flash-all.bat file. It will automatically flash the boot and vendor_boot files.
- Once done, open CMD inside the platform-tools folder and execute the below command to boot your device to recovery
fastboot reboot recovery
- From recovery, go to Factory reset > Format data/factory reset. Wait for the reset to complete.
- Once done, go to the Recovery home page and select Apply Update > Apply from ADB.
- Then in the CMD window, execute the below command to flash the ROM:
adb sideload rom.zip
- The installation will now begin and could take a few minutes. Once done, you may now reboot your device to the newly installed OS.
That’s it. These were the steps to install the Xtended XT custom ROM based on Android 13 on your Nothing Phone 1. If you have any queries concerning the aforementioned steps, do let us know in the comments. We will get back to you with a solution at the earliest.
Flash SuperiorOS Android 13 on Nothing Phone 1

- Make sure that the boot and vendor_boot files are present in the platform-tools folder.
- Likewise, you should have already carried out STEPS 1 to 5 listed in the prerequisites.
- Now type in the below command to flash the boot.img file
fastboot flash boot boot.img
- Then execute the below command to flash the vendor_boot.img
fastboot flash vendor_boot vendor_boot.img
- Now reboot your device to the newly installed recovery via:
fastboot reboot recovery
- From the recovery, select Install update > ADB Sideload.
- Now type in the below command in the CMD window to start the sideload
adb sideload rom.zip
- The installation will now start. Once done, do a Factory Reset from the recovery.
- Now select Reboot System Now. Your device will now boot to the newly installed OS.
That’s it. These were the steps to install the SuperiorOS custom ROM based on Android 13 on your Nothing Phone 1. If you have any queries concerning the aforementioned steps, do let us know in the comments. We will get back to you with a solution at the earliest.


