In this unbrick guide, we will show you the steps to install Android 12 onto your Asus Zenfone 8 device via Fastboot Commands. The Zenfone lineup of this OEM has always been among the most popular ones. And when it launched the eighth iteration in this series, then it managed to grab much of the limelight. Moreover, the device was launched with Android 11 out of the box. And it has already been blessed with the latest OS build. As a result, you could now welcome all the goodies that the Android 12 has in store for you.
Add to that, the OEM’s new ZenUI, and it seems to have check-marked most of the prerequisites. Moreover, these devices are quite an active player in custom development. From rooting it via Magisk patched boot.img or flashing custom ROMs and recoveries, there are a lot of tweaks that you could try out. However, all these tweaks could prove to be quite risky if not done correctly. In this regard, there is every chance of the device getting ended up in a bricked or bootloop state.
Well, even if that happens, you could easily unbrick your device and bring it back to life by flashing the stock firmware via Fastboot. So if you are a user who hasn’t yet received the Android 12 OTA and hence wants to manually flash the firmware, or are a tech geek who is looking to unbrick their device, well this guide will come in handy for both these sets of users. So without any further ado, let’s get started with the steps to install Android 12 onto your Asus Zenfone 8 device via Fastboot Commands.
Table of Contents
Install Android 12 on Asus Zenfone 8 via Fastboot Commands
The below instructions are listed under separate sections for ease of understanding. Make sure to follow in the exact same sequence as mentioned. Droidwin and its members wouldn’t be held responsible in case of a thermonuclear war, your alarm doesn’t wake you up, or if anything happens to your device and data by performing the below steps.
STEP 1: Install Android SDK

First and foremost, you will have to install the Android SDK Platform Tools on your PC. This is the official ADB and Fastboot binary provided by Google and is the only recommended one. So download it and then extract it to any convenient location on your PC. Doing so will give you the platform-tools folder, which will be used throughout this guide.
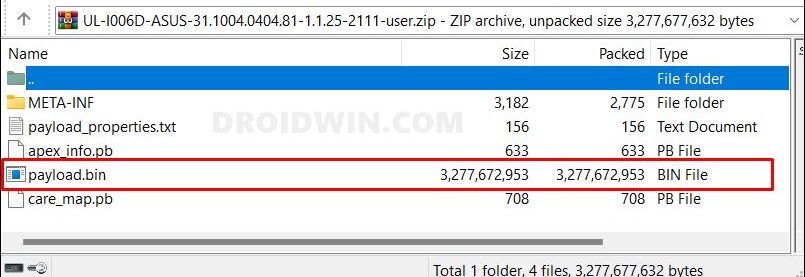
STEP 2: Download Asus Zenfone 8 Android 12 Firmware
Now download your device’s stock firmware from the Asus official page. As for this guide, I am using ZenFone 8 (ZS590KS) WW-31.1004.0404.81. Moroever, once you have downloaded the firmware, extract it to any convenient location on your PC. You shall get a couple of files, including the payload.bin, which we will be using now to install Android 12 onto your Asus Zenfone 8 device via Fastboot Commands.
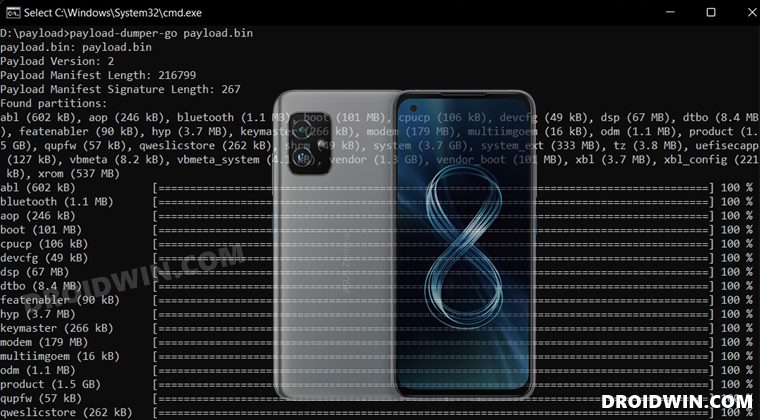
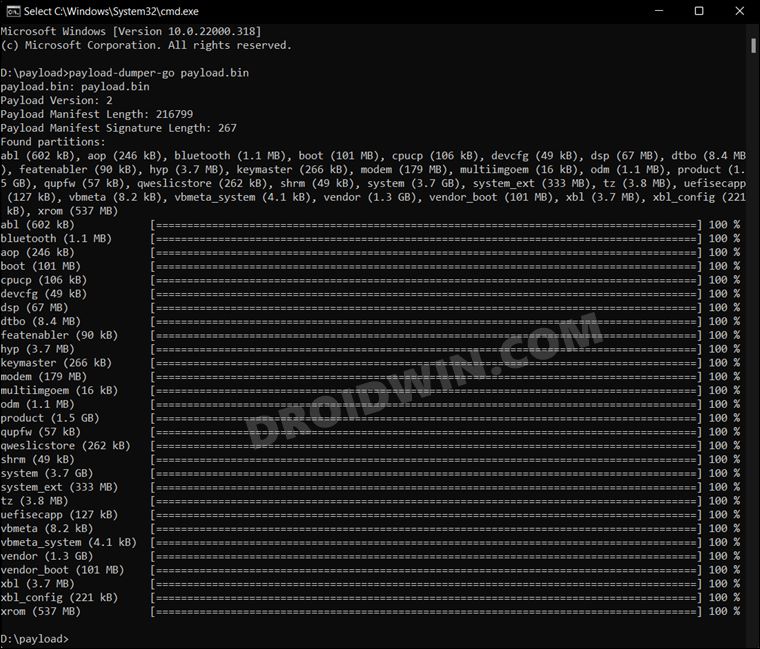
STEP 3: Extract Asus Zenfone 8 Android 12 Payload.bin File
Once you have got hold of the payload.bin file, it’s time to extract it and get the partition IMG files. These files will then be flashed to their respective partitions. So please refer to our guide on How to Extract payload.bin and get Fastboot ROM Files.
STEP 4: Transfer Asus Zenfone 8 Android 12 Fastboot ROM Files to ADB Directory
Once you have extracted the payload.bin file, you will get the required partition files in IMG format. Transfer all these files to the platform-tools folder on your PC.

STEP 5: Unlock Bootloader
If your device is already bricked/bootloop, then chances are you would have already unlocked the device’s bootloader. On the other hand, users who are looking to manually flash firmware might still have their bootloader locked.
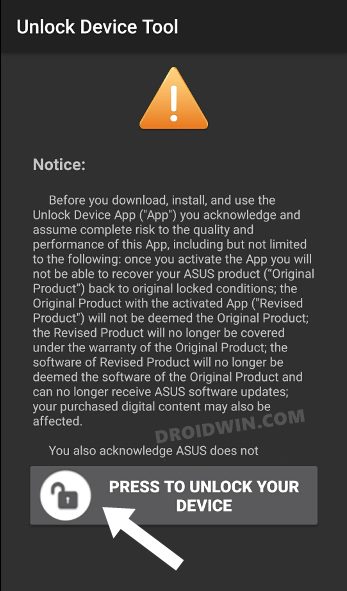
So refer to our guide on How to Unlock Bootloader on Asus Zenfone 8. However, do note that unlocking the bootloader will wipe off all the data and could also nullify the warranty. So take a complete device backup and then only proceed to the unlocking process.
STEP 6: Boot Asus Zenfone 8 to Fastboot Mode
The next step in installing Android 12 ROM onto your Asus Zenfone 8 requires your device to be booted to Fastboot Mode. We are listing the steps for both the bricked and unbricked devices. You may refer to the instructions corresponding to your device’s current state.
For Normal/Unbricked Device
- Connect your device to the PC via USB cable. Make sure USB Debugging is enabled.
- Then head over to the platform-tools folder, type in CMD in the address bar, and hit Enter. This will launch the Command Prompt.

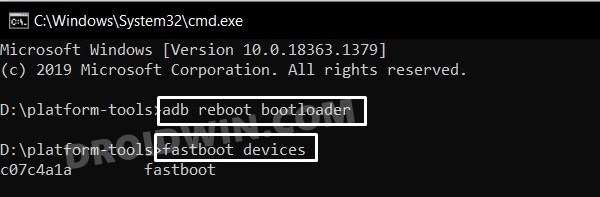
- Type in the following command in the CMD window to boot your device to Fastboot Mode
adb reboot bootloader
- To verify the Fastboot connection, type in the below command and you should get back the device ID.
fastboot devices

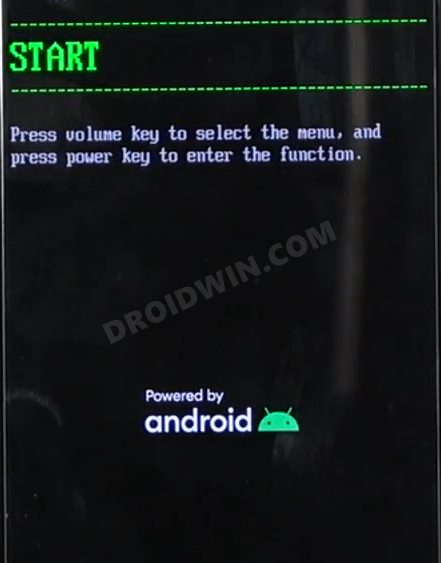
For Bricked Device
- To begin with, power off your device. However, if you aren’t able to do so, then let the battery drain out.
- After that, connect it to the charger.
- Then press and hold the Power and Volume Down (or Power and Volume Up) Keys together.
- Keeping both these keys pressed, connect your device to the PC via USB cable.
- This shall boot your device to the Fastboot Mode.
STEP 7: Install Android 12 on Asus Zenfone 8 via Fastboot Commands
- Head over to the platform-tools folder, type in CMD in the address bar, and hit Enter. This will launch the Command Prompt.
- Now type in the below command to wipe all the data from your device (this is a must in case of a bricked device).
fastboot -w
- After that, begin typing in the following commands in the CMD window, one at a time:
fastboot flash abl abl.img

fastboot flash aop aop.img

fastboot flash bluetooth bluetooth.img

fastboot flash boot boot.img

fastboot flash devcfg devcfg.img

fastboot flash dsp dsp.img

fastboot flash dtbo dtbo.img

fastboot flash featenabler featenabler.img

fastboot flash hyp hyp.img

fastboot flash keymaster keymaster.img

fastboot flash modem modem.img

fastboot flash multiimgoem multiimgoem.img

fastboot flash odm odm.img

fastboot flash product product.img

fastboot flash qupfw qupfw.img

fastboot flash qweslicstore qweslicstore.img

fastboot flash shrm shrm.img

fastboot flash system system.img

fastboot flash system_ext system_ext.img

fastboot flash tz tz.img

fastboot flash uefisecapp uefisecapp.img

fastboot flash vbmeta vb,eta.img

fastboot flash vbmeta_system vbmeta_system.img

fastboot flash vendor vendor.img

fastboot flash vendor_boot vendor_boot.img

fastboot flash xbl xbl.img

fastboot flash xbl_config xbl_config.img

fastboot flash xrom xrom.img
- Finally, execute the below command to boot your device to the OS:
fastboot reboot
That’s it. These were the steps to install Android 12 onto your Asus Zenfone 8 device via Fastboot Commands. If you have any queries concerning the aforementioned steps, do let us know in the comments. We will get back to you with a solution at the earliest.


Osmani
I have error from “fastboot flash odm odm.img”
Yogesh Khetani
Wow! It works actually but lags and some bugs.