In this guide, we will show you the steps to unlock the bootloader on your Vivo X60/Pro/+. This device from Vivo beholds an impressive specs sheet. Just a sneak peek into that sheet and you will be able to get hold of its slew of noteworthy features. Some of them include Snapdragon 888 5G chipset under the hood, 120Hz refresh rate, up to 12GB RAM, and 55W fast charging.
However, in the custom development, there wasn’t much going on as the initial gateway of bootloader unlocking was complicated way too much even for the tech enthusiast. But thanks to some great work from the developers, you could now easily unlock the bootloader on your Vivo X60/Pro/+ device. And in this guide, we will show you how to do just that. Follow along for the steps.
Table of Contents
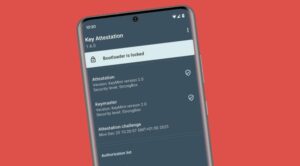
Benefits and Risks of Unlocking the Bootloader
Unlocking the bootloader is the gateway to extract the maximum benefits of Android’s open-source ecosystem. For example, you will be able to install a custom ROM or flash a custom recovery like TWRP. Likewise, you will also be able to get access to the system partition as well as administrative privileges by rooting your device via Magisk. This will then allow you to flash Magisk Modules, Xposed Framework, Substratum Themes, and Viper4Android among others.
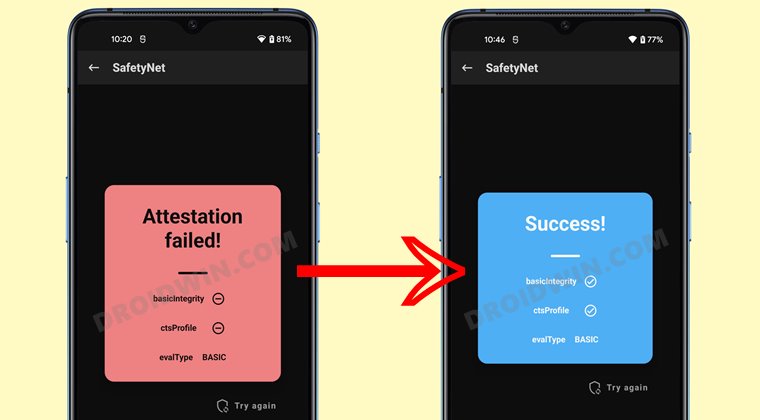
However, carrying out these tweaks brings in a few uninvited risks as well. To begin with, it will wipe off all the data and could nullify the device’s warranty as well. Along the same lines, it will degrade the Widevine L1 certification to L3, thereby preventing you from streaming content in HD [FIXED]. The SafetyNet will be triggered as well [FIXED], thereby preventing you from using banking apps [FIXED]. So if that’s well and good then let’s get started with the steps to unlock the bootloader on your Vivo X60/Pro/+.
How to Unlock Bootloader on Vivo X60/Pro/+
The below instructions will wipe off all the data from your device, so take a backup beforehand. Likewise, it might also nullify the device’s warranty. Droidwin and its members wouldn’t be held responsible in case of a thermonuclear war, your alarm doesn’t wake you up, or if anything happens to your device and data by performing the below steps.
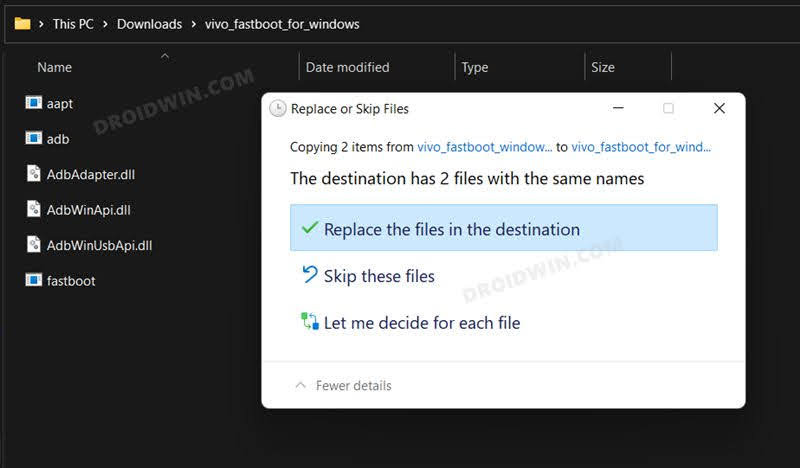
STEP 1: Download Modified ADB & Fastboot
- To begin with, download and extract the modified ADB and Fastboot Tool.
- Then download the modified Fastboot Binary [Credits: XDA Senior Member Naveen Singh].
- Now extract it inside the same folder where you had extracted the above tool.
- It will now ask you to replace the AdbWinApi.dll and fastboot.exe files, reply YES.

STEP 2: Enable USB Debugging and OEM Unlocking
Next up, you will also have to enable USB Debugging and OEM Unlocking on your device. The former will make your device recognizable by the PC in ADB mode. This will then allow you to boot your device to Fastboot Mode. On the other hand, OEM Unlocking is required to carry out the bootloader unlocking process.
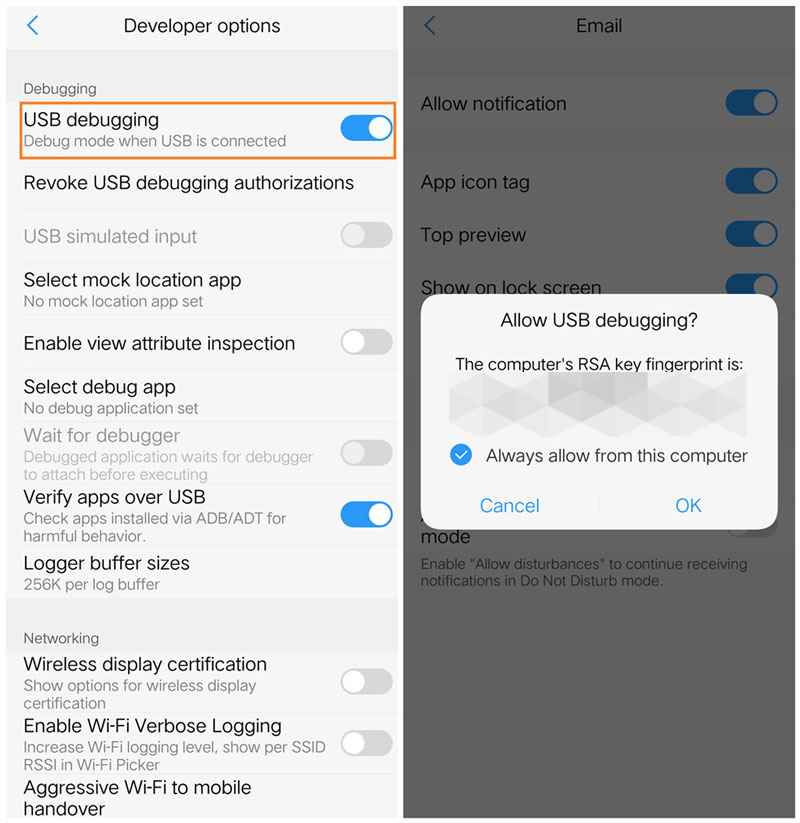
So head over to Settings > About Phone > Tap on Build Number 7 times > Go back to Settings > System > Advanced > Developer Options > Enable USB Debugging and OEM Unlocking.
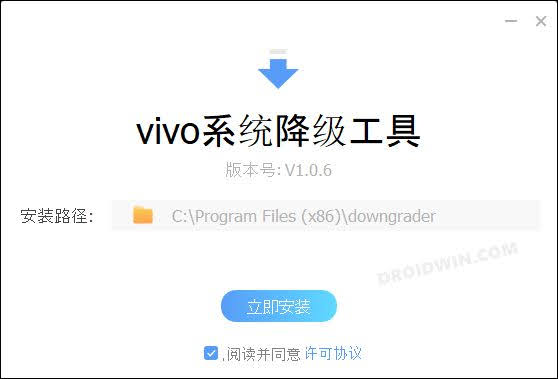
STEP 3: Downgrade to OriginOS
The process of unlocking the bootloader didn’t work out on the latest OS build. So you will have to downgrade the device to OriginOS 1.0 and then carry out the process. For that, you may use the official Vivo Downgrade Tool. However, do keep in mind that the tool is in Chinese. I used Google Lens to carry out the image translation wherever required.
STEP 4: Boot Vivo X60/Pro/+ to FastbootD Mode
- Now connect your device to the PC via USB cable. Make sure USB Debugging is enabled.
- Then head over to the ADB & Fastboot folder, type in CMD in the address bar, and hit Enter.
- This will launch the Command Prompt. Launch another Command Prompt window similarly.

- Type in the following command in any one of the CMD windows to boot your device to FastbootD Mode
adb reboot fastboot
- After that, use the below command to reboot to the FastbootD Mode.
fastboot reboot fastboot
STEP 5: Unlock Bootloader on Vivo X60/Pro/+
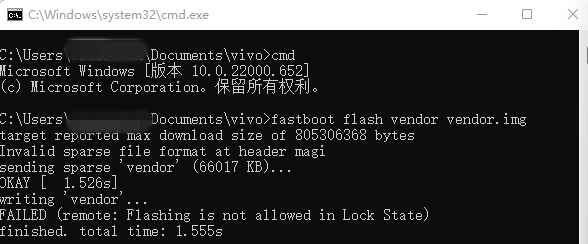
- To begin with, download any partition IMG file and transfer it to the ADB & Fastboot folder [Why? See FAQ below]. For this guide, we are using the vendor.img.
- Likewise, make sure you have two CMD windows opened in the ADB & Fastboot folder.
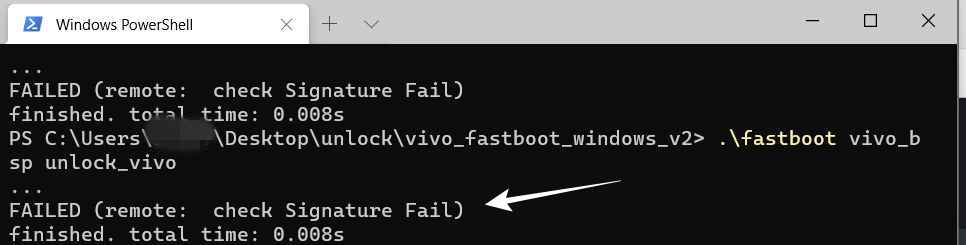
- Now execute the below command in the first CMD window to initiate the unlock process [it will fail as of now, not an issue]
fastboot vivo_bsp unlock_vivo
- Then switch over to the second command prompt window and execute the below command [Since your bootloader is currently locked, the flashing will give an error, that is completely normal]:
fastboot flash vendor vendor.img
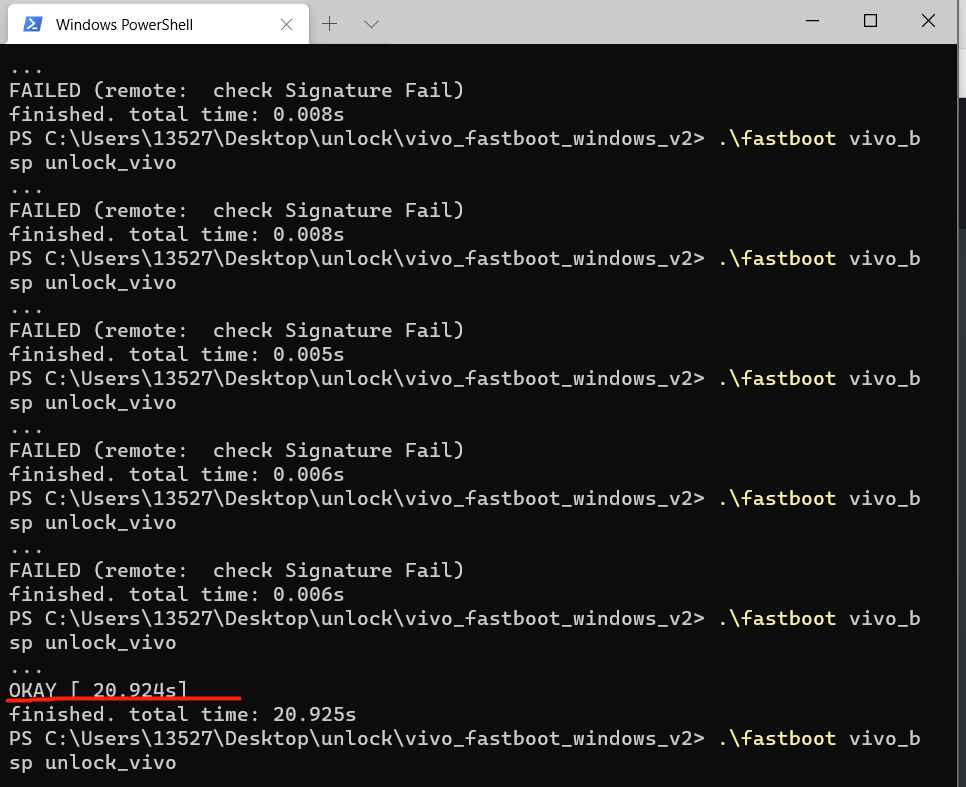
- Now switch back to the first CMD window and keep on executing the below unlock command until you get the Okay Finished message.
fastboot vivo_bsp unlock_vivo
- Your device will undergo a data wipe, unlock the bootloader, and finally boot to the OS. You may also use the below command to boot the device to the OS:
fastboot reboot
That’s it. These were the steps to unlock the bootloader on your Vivo X60/Pro/+. If you have any queries concerning the aforementioned steps, do let us know in the comments. We will get back to you with a solution at the earliest.
FAQ: Why Did we Flash Partition File to Unlock The Bootloader
The vendor.img file that we flashed acted as a dummy file that was only needed to initiate the flashing process in the device’s FastbootD Mode. Moroever, since the file wasn’t successfully flashed because the bootloader was still locked at that point in time, you could use any file to perform this action. Just make sure to change the command accordingly. Moroever, you could use the file from any device you want [since it wouldn’t actually be flashed, it shouldn’t be a cause of concern], however, it is generally not advised to do so.