In this guide, we will show you the steps to uninstall Bixby from your Galaxy Watch 4. This smartwatch from the South Korean conglomerate is the first one in its lineup to bring in Google’s in-house OS. However, in spite of that, it was really surprising to note that it didn’t support the Silicon Vally giant’s virtual assistant app. While the smartwatch did have its own assistant in the form of Bixby, but let’s admit it, it was nowhere near the one Google has to offer.
Fast forward to today, and Google has now officially rolled out the Assistant app for Galaxy Watch 4. So welcoming it onto your watch is just a few taps away. Moreover, you could also remap the home key to invoke Assistant by performing the press and hold gesture. By default, this feature has been assigned to Bixby, but since we are now using Assistant, it only makes sense to assign this shortcut to the latter.
Talking about which, since we are anyways going to use the Assistant, there’s not much point in keeping Bixby on the watch either. So shouldn’t it be better to bid it adieu from our watch for good? Well, if you also echo this thought, then this guide shall help you out. In this tutorial, we will show you the steps to uninstall Bixby from your Galaxy Watch 4. Follow along.
Table of Contents
How to Uninstall Bixby from Galaxy Watch 4

The below instructions are listed under separate sections for ease of understanding. Make sure to follow the same sequence as mentioned.
STEP 1: Install Android SDK
First and foremost, you will have to install the Android SDK Platform Tools on your PC. This is the official ADB and Fastboot binary provided by Google and is the only recommended one. So download it and then extract it to any convenient location on your PC. Doing so will give you the platform-tools folder, which will be used throughout this guide.

STEP 2: Enable ADB Debugging in Galaxy Wach 4
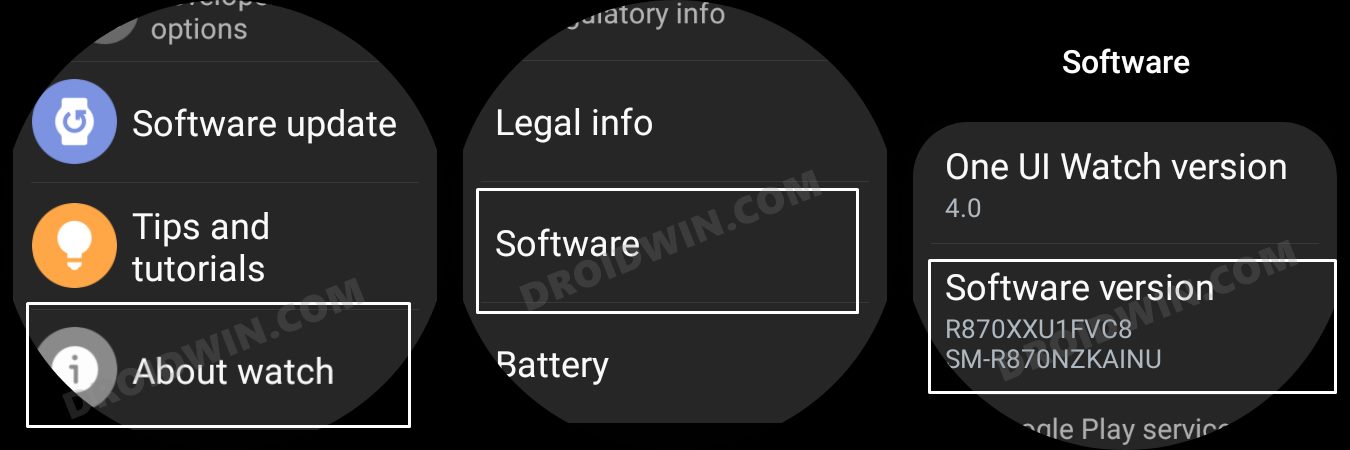
- Head over to the Settings > About Watch > Software and tap Software Version 7 times.

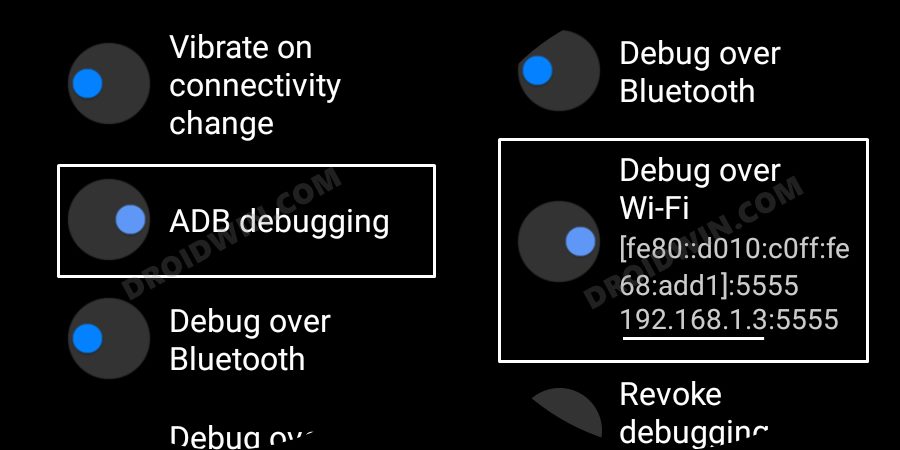
- Then go to Developer Options and enable the toggle next to ADB Debugging.
- After that, scroll down a little bit and enable the toggle next to Debug over WiFi.
- It will now bring up the IP Address, note it down somewhere [do not include the port number, i.e. values after the colon].
- For example, if the entire value is 192.168.1.3:5555, then your IP will be 192.168.1.3.
STEP 3: Connect Galaxy Watch 4 to PC via ADB Command
- Head over to the platform-tools folder, type in CMD in its address bar, and hit Enter. This will launch Command Prompt.
- Now type in the below command in this CMD window [make sure to replace IP accordingly].
adb connect IP
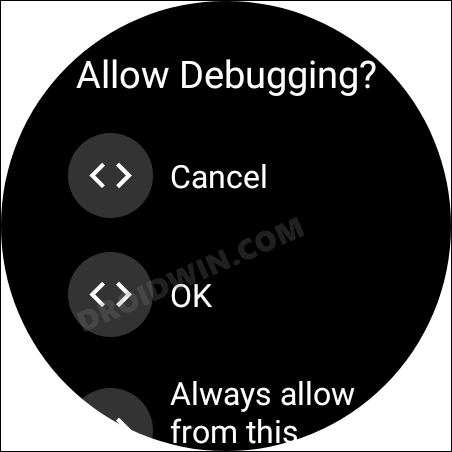
- You will now get a prompt on your watch, tap OK or Always Allow from this computer.
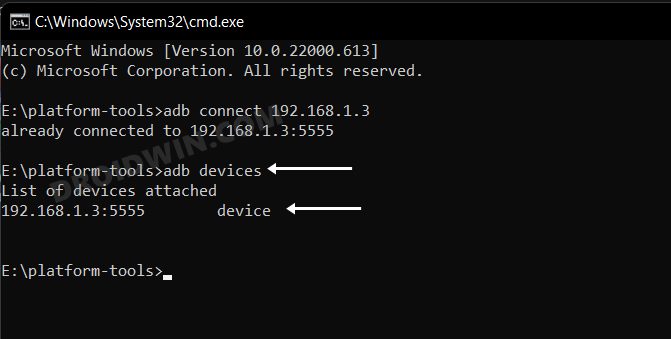
- Finally, execute the below command to verify the ADB Connection between your watch and PC
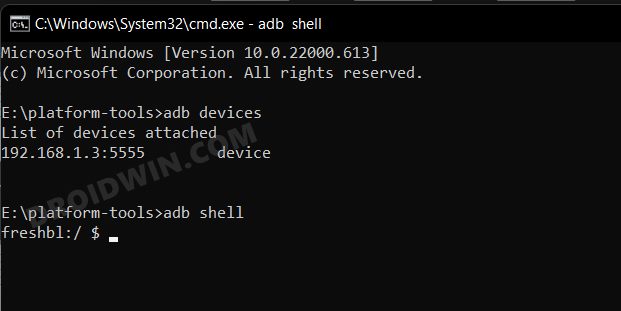
adb devices
- You will now get your IP Address and port number, followed by the ‘device’ keyword. This signifies that the connection has been successfully established.


STEP 4: Uninstall Bixby from Galaxy Watch 4 via ADB Commands
- To begin with, enable the shell environment using the below command
adb shell
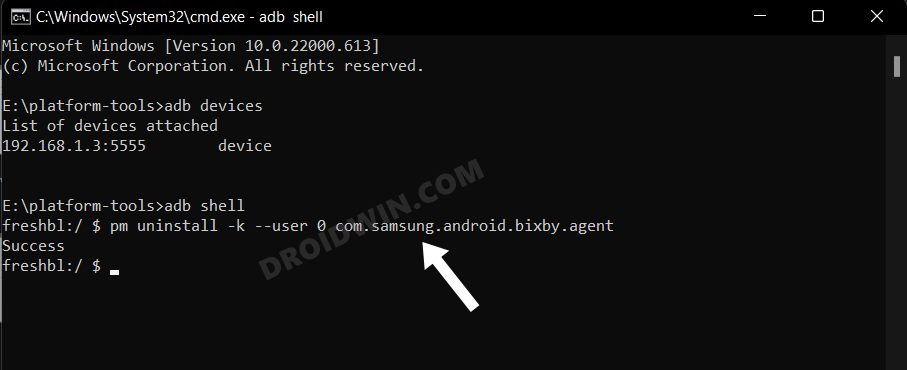
- Then execute the below command to uninstall Bixby from your watch.
pm uninstall -k --user 0 com.samsung.android.bixby.agent
How to Reinstall Bixby in Galaxy Watch 4
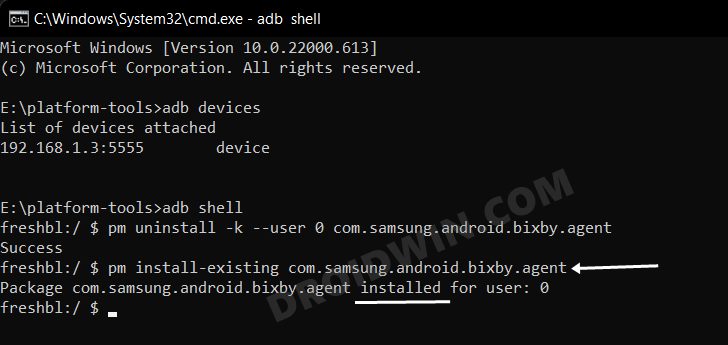
If at any point in time, you wish to revert the decision and reinstall Bixby, then repeat STEP 1 to 3, and then execute the below two commands
adb shell
pm install-existing com.samsung.android.bixby.agent
That’s it. These were the steps to uninstall Bixby from your Galaxy Watch 4. Likewise, we have also listed the steps to reinstall the app. If you have any queries concerning the aforementioned steps, do let us know in the comments. We will get back to you with a solution at the earliest.


