In this guide, we will show you the steps to root your Samsung Galaxy S23 Ultra via Magisk. The South Korean giant has just added three new devices to its flagship domain. And the initial reception is mostly on the positive side, with the camera quality being the talk of the town. If we shift our attention towards custom development, then the S series has always been known to be among the most active players in custom development.
And its twenty-third iteration has rightly carried forward this legacy. You could now gain administrative privileges by rooting your Galaxy S23 Ultra via Magisk. However, since this is the initial phase, you wouldn’t be able to carry out the generic steps of extracting AP from firmware, patching it via Magisk, and flashing it via Odin. Rather, you will have to opt for a slightly different approach, at least for now. So without further ado, let’s get started.
Table of Contents
Benefits and Risks of Rooting

Once you root your device, you will be in a position to flash a plethora of mods. These include the likes of Fox Magisk Modules, Substratum Themes, Xposed Framework via LSPosed, and Viper4Android among others. Along the same lines, you could also flash a custom kernel and implement your desired CPU profile. However, such tweaks do come with a few risks as well.
To begin with, rooting requires you to unlock the bootloader- which will wipe off all the data and will trip the Knox [while there’s no way to escape this, you could still use some security features using this nifty method]. Likewise, SafetyNet will be triggered [FIXED] which will result in your inability to use banking apps [FIXED]. So if all that’s well and good, then let’s get started with the steps to root your Samsung Galaxy S23 Ultra device via Magisk patched AP file.
Root Samsung Galaxy S23 Ultra via Magisk [Recommended]
This is the generic method of rooting the Samsung device, similar to how you would have done it in the past. When the device was launched, Magisk had a few issues in patching the AP.tar file and that is why we used the pre-patched method [refer to the next method]. But with the latest Magisk version 26, all this has been addressed and you could start off with the below steps to root your Samsung Galaxy S23 Ultra via Magisk patched AP file in the traditional way.
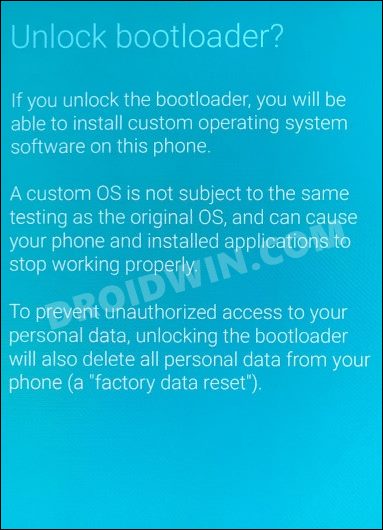
STEP 1: Unlock Bootloader
First and foremost, you will have to unlock the bootloader on your device. Do note that doing so will trip Knox and reset your device. If that’s well and good, then you may refer to our guide on How to Unlock Bootloader on Galaxy S23/Plus/Ultra
STEP 2: Download Galaxy S23 Ultra Stock Firmware
Next up, you will have to download the stock firmware for your device. could use the Frija Tool, SamLoader Tool, or websites such as SamMobile. As for this guide, let’s proceed with the Frija Tool. So check out our comprehensive guide on How to Download Samsung Stock Firmware/ROM via Frija Tool. Or you may refer to the below instructions as well:
- To begin with, download the Frija Tool and extract it to any convenient location on your PC.
- Then launch the tool and type in your device’s Model Numer and CSC Code. [Read: How to Find My Device’s CSC Code].
- Now click on the Check Update button and it shall bring up the latest available firmware.
- Finally, click on the Download button, select the directory where you wish to download the firmware, and hit Save.
- The downloading process will now begin. Once done, the tool will then decrypt the firmware.
- Once the decryption is complete, it shall spell out the Download Complete message.
- Now go to the folder where you have downloaded the firmware and extract it.
- Upon extraction, you should get the AP, BL, CP, CSC, and HOME_CSC files.
- We will be using these files (except for HOME_CSC) to root your Samsung Galaxy S23 Ultra via Magisk.
STEP 3: Patch Galaxy S23 Ultra AP via Magisk
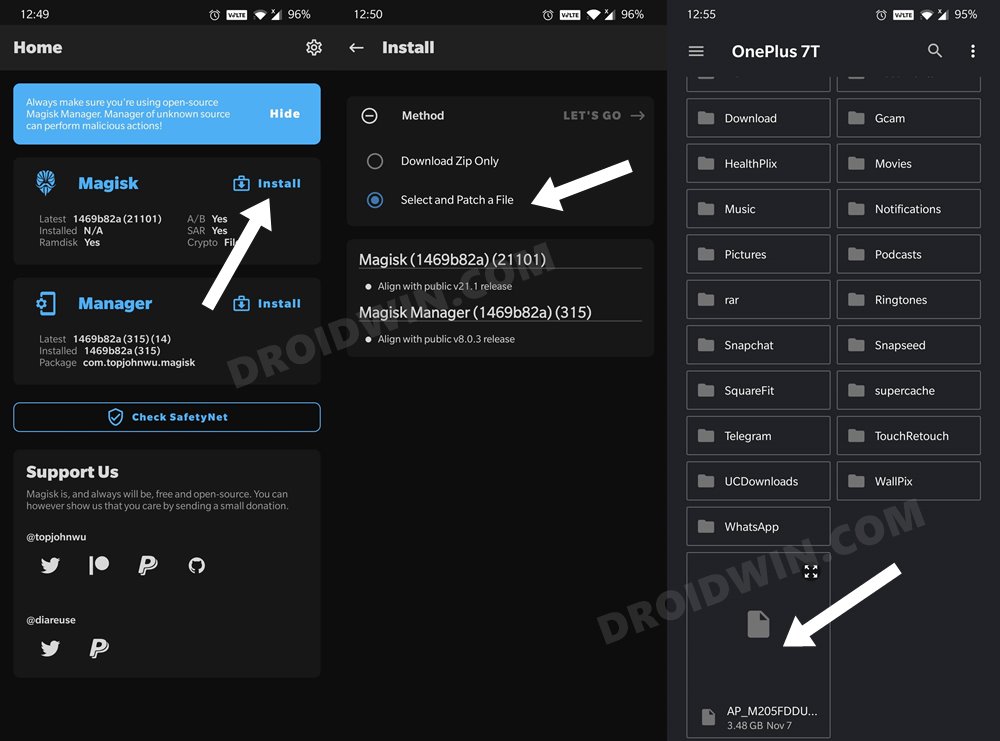
- To begin with, transfer the AP file from the extracted firmware folder over to your device.
- Then download and install the latest version of the Magisk App.
- Now launch the app and tap on the Install button next to Magisk.

- Now choose Select and Patch a File, navigate to the AP TAR file and select it.
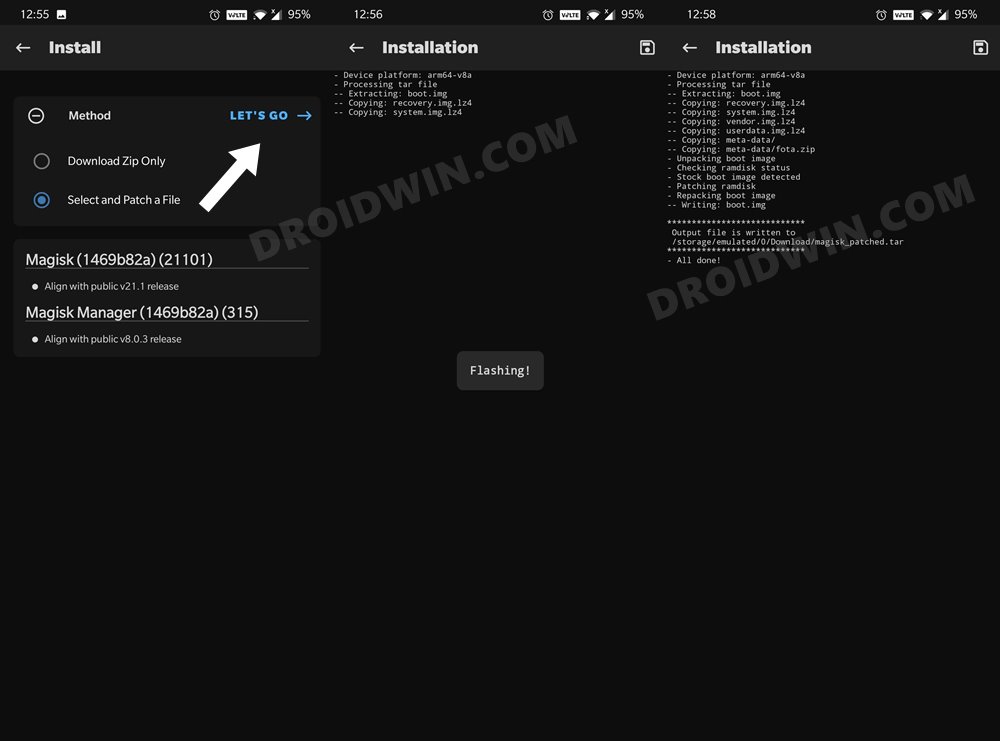
- Then tap on the Let’s Go button situated at the top right and wait for the patching to complete.

- Once done, you should get the patched AP file named magisk_patched_ [random_number].tar under the Downloads folder.
STEP 4: Send Patched AP File to PC
You will now have to transfer this patched AP file to your PC. However, the normal USB method is known to cause some issues. Therefore, you should instead opt for the ADB Pull method. Here’s how it could be done:
- To begin with, download Android SDK Platform Tools and extract it to any convenient location on your PC.

- Then head over to this platform-tools folder, type in CMD in its address bar, and hit Enter. This shall launch the CMD window.

- Now connect your device to the PC via USB cable. Also, enable USB Debugging from Developer Options.
- Next up, use the below command to transfer the patched AP file to your PC (make sure to replace the random strings accordingly)
adb pull /sdcard/Download/magisk_patched_[random_strings]
STEP 5: Boot Galaxy S23 Ultra to Download Mode
You will now have to boot your S23 Ultra device to Download Mode so that Odin is able to identify it and hence allows us to carry out the flashing of the patched AP file. So refer to our guide to Boot any Samsung Device to Download Mode. Or refer to our below direct instructions:
- Start by powering off your device.
- Then press and hold Vol Up + Vol Down together and connect your device to the PC via USB cable.

- As soon as you see the Warning message on your device, release the pressed keys.
- Finally, press the Volume Up key once and your device will be booted to Download Mode.
STEP 6: Install Odin
- To begin with, download the Odin Tool from this link.
- Then extract it to a convenient location on your PC.

- After that, head over to the folder where you have extracted the tool.
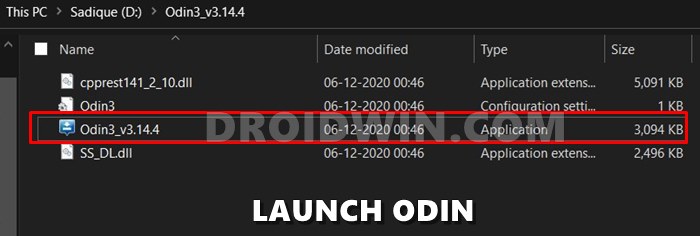
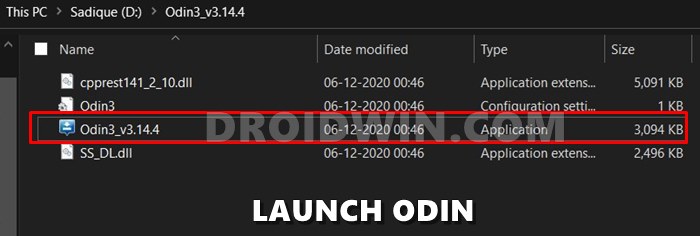
- Finally, double-click on the Odin3_v3.14.4 EXE file to launch the tool.
STEP 7: Flash Patched AP file via Odin and Root Galaxy S23 Ultra
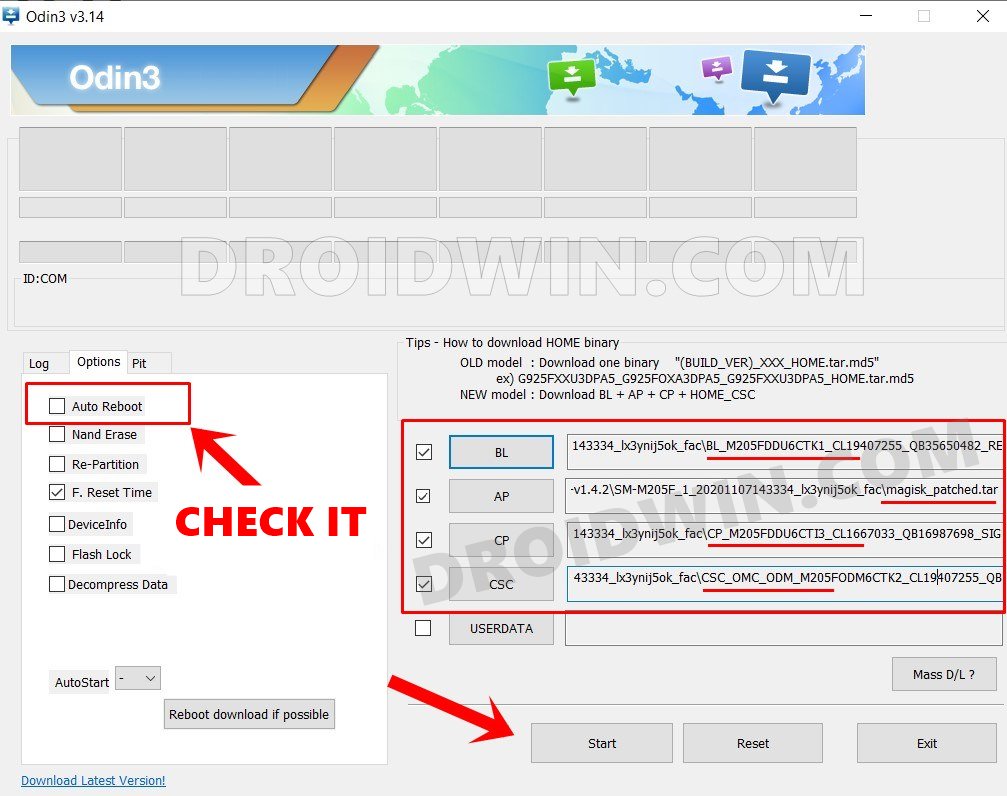
- To begin with, launch the Odin tool on your PC.
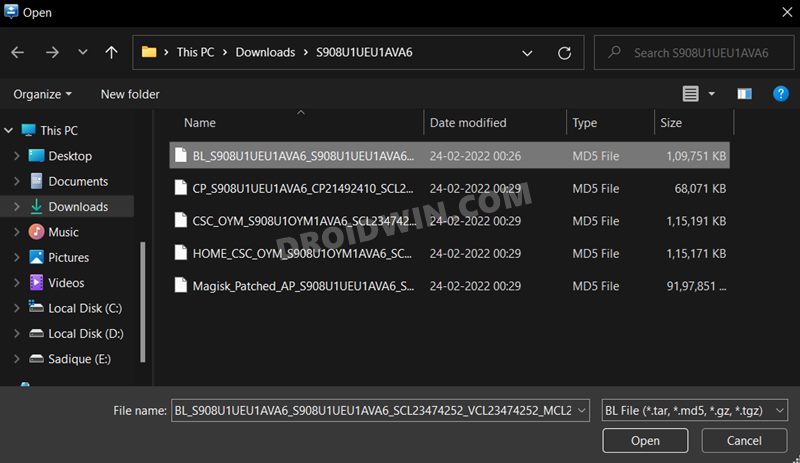
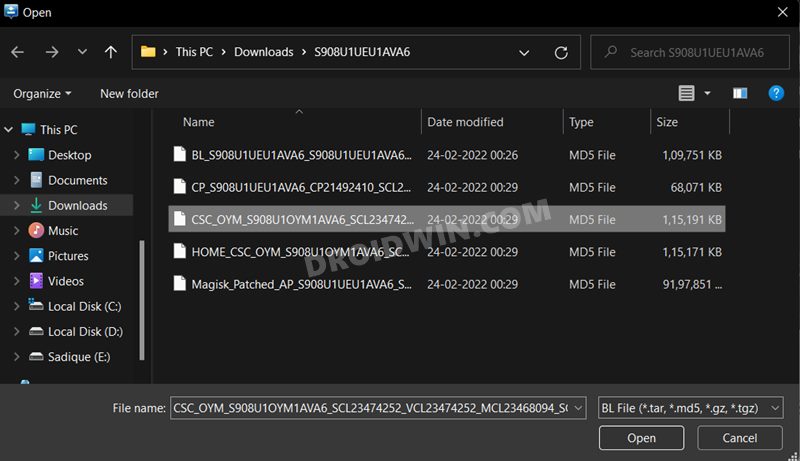
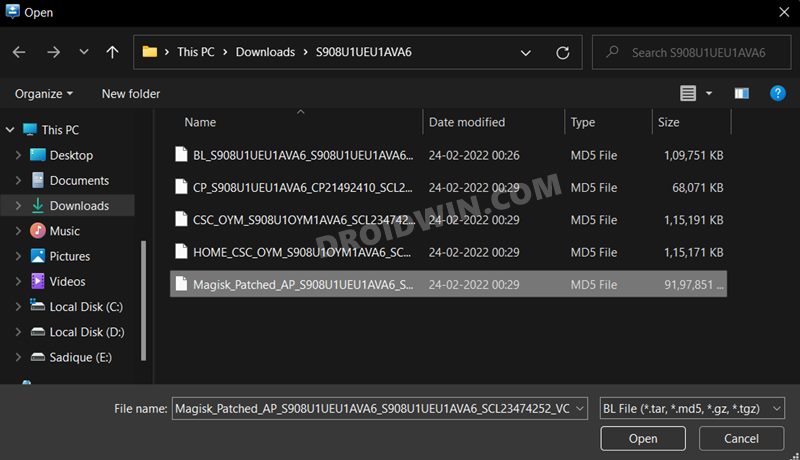
- Then click on the BL button, navigate to the extracted firmware folder and select the BL file.

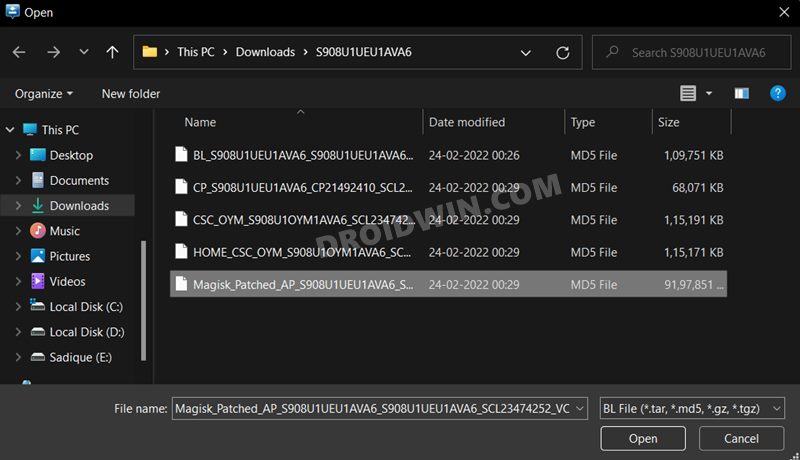
- After that, click on the AP button, navigate to the patched AP.tar file and select it.

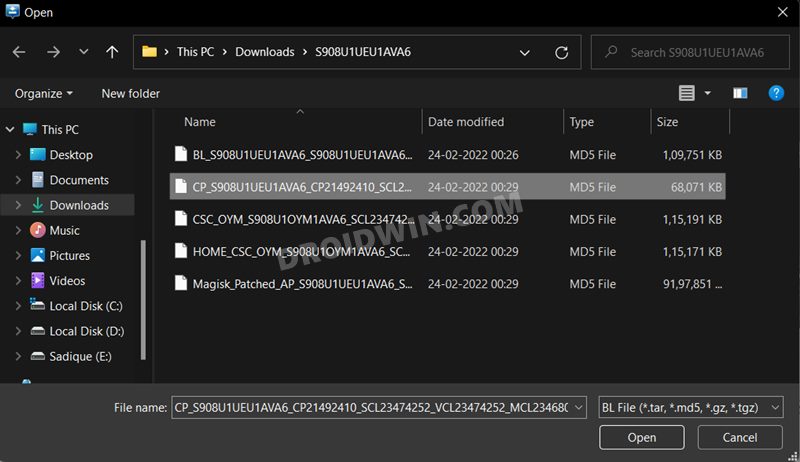
- Next up, click on the CP button, navigate to the extracted firmware folder and select the CP file.

- Then click on the CSC button, navigate to the extracted firmware folder and select the CSC file [the normal CSC, not the HOME_CSC].

- Once all the files have been loaded, click on the Start button. The flashing process will now begin and could take a few minutes.

- Once done, you should get the PASS!‘ message. Likewise, your device will automatically boot to the OS.

STEP 8: Install Magisk Dependencies
- Once your device is booted to the OS, download and install Magisk [download version 26+].
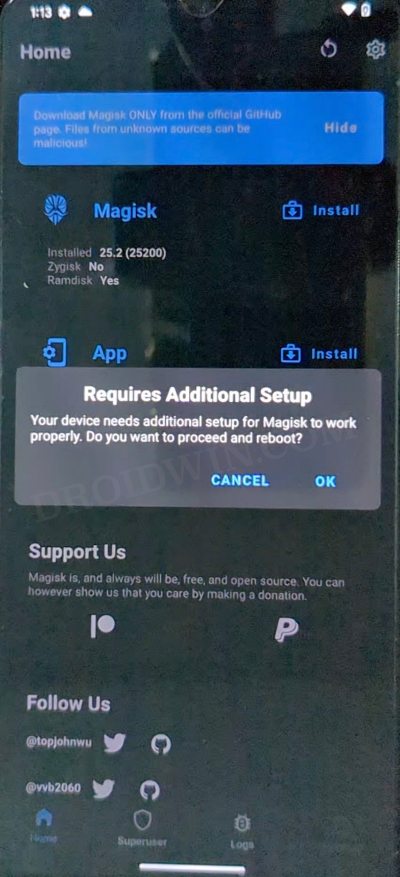
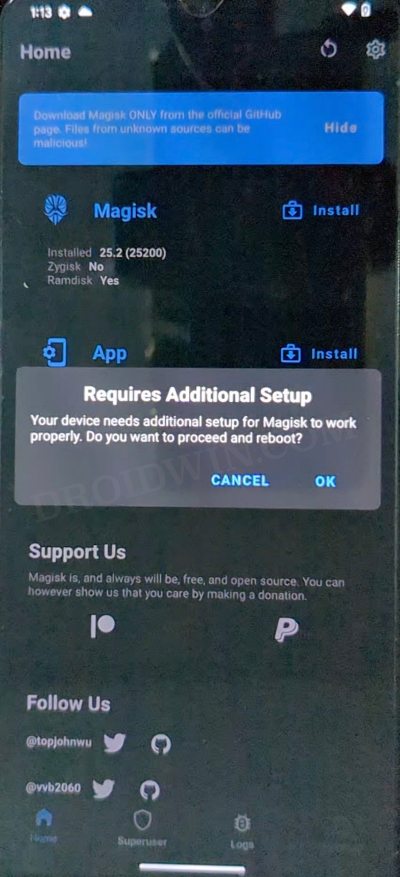
- Then launch it. It will ask to carry out additional setup, tap OK.

- Magisk will restart your device and install the required dependencies.
- Once done, your device will automatically boot to the rooted OS.
- That’s it. Your Galaxy S23 Ultra is now rooted via Magisk.
Root Samsung Galaxy S23 Ultra via Pre-Patched AP
Do note that this process is specifically for S23 U (S918B) and the device should have firmware version S918BXXU1AWA6 installed. Droidwin and its members wouldn’t be held responsible in case of a thermonuclear war, your alarm doesn’t wake you up, or if anything happens to your device and data by performing the below steps.
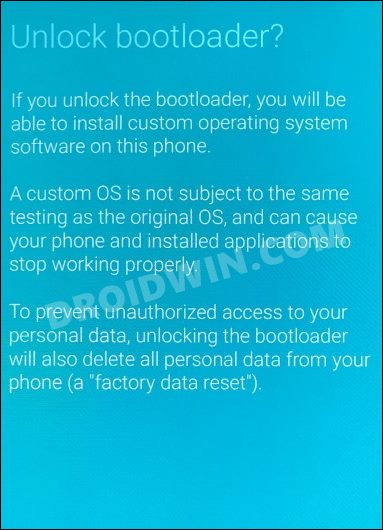
STEP 1: Unlock the Bootloader on Galaxy S23 Ultra
First and foremost, you will have to unlock the bootloader on your device. Do note that doing so will trip Knox and reset your device. If that’s well and good, then you may refer to our guide on How to Unlock Bootloader on Galaxy S23/Plus/Ultra
Boot Galaxy S23 Ultra to Download Mode
You will now have to boot your Galaxy S23 Ultra to Download Mode so that Odin is able to identify it and hence allows us to carry out the flashing of the patched AP file. So refer to our guide to How to Boot Galaxy S23/Plus/Ultra to Download Mode [3 Methods]. Or refer to our below direct instructions:
- Power off your device. Then press and hold Vol Up + Vol Down together and connect your device to the PC via a USB cable.

- As soon as you see the Warning message on your device, release the pressed keys.
- Finally, press the Volume Up key once and your device will be booted to Download Mode.
Download Root Binary
As discussed before, as of now, the usual process of extracting AP and patching it via Magisk will not work [due to some compatibility issues with Magisk in its current state]. Rather, you will have to get hold of the pre-patched AP file from below and subsequently flash it. So download the package and extract it to any convenient location on your PC [Credits: XDA Recognized Developer Dr. Ketan].
Download Root Binary: Root_S918_S23U_WA6_V5
Install Odin
- To begin with, download the Odin Tool from this link.
- Then extract it to a convenient location on your PC.

- After that, head over to the folder where you have extracted the tool.
- Finally, double-click on the Odin3_v3.14.4 EXE file to launch the tool.
Flash Magisk Pre-Patched AP
- To begin with, launch the Odin tool on your PC.
- Then click on the AP button, navigate to the patched AP.tar file, and select it.

- It will now be loaded, so click on the Start button. The flashing process will now begin and could take a few minutes.
- Once done, you should get the PASS!‘ message.

Reset via Recovery
Once the patched AP has been flashed, you will now have to boot your device to Recovery Mode and then reset your device. To do so, you could either refer to our detailed guide on How to Boot Galaxy S23/Plus/Ultra To Recovery Mode [2 Methods] or check out the shorter instructions given below:
- Press and hold the volume down button and the power button,
- Then release the power button when you see the Samsung logo.
- Keep holding the volume down button until you see the recovery screen.
- Release the Volume Down button as well and you’re now in Recovery Mode.

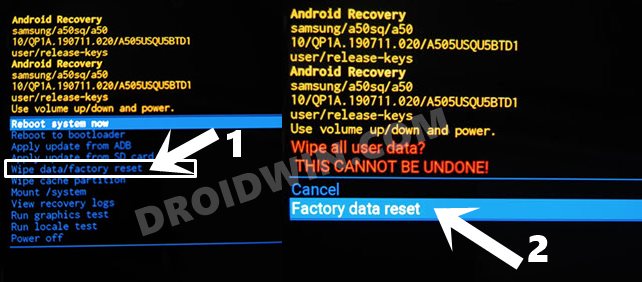
- Now use the Volume Keys to highlight Wipe Data/Factory Reset and press the Power key to confirm it.
- Then use the Volume Keys to select Yes and press the Power key to confirm it. Wait for the reset to complete.
- Once done, use the Volume Keys to select Reboot System Now and press the Power key to confirm it.
Install Magisk
- Once your device is booted to the OS, download and install Magisk.
- Then launch it. It will ask to carry out additional setup, tap OK.

- Magisk will restart your device and install the required dependencies.
- Once done, your device will automatically boot to the rooted OS. That’s it.
These were the steps to root your Samsung Galaxy S23 Ultra via Magisk. If you have any queries concerning the aforementioned steps, do let us know in the comments. We will get back to you with a solution at the earliest.







Samuel Sunk
Now i have a Briefbeschwerer.
Thank you!!!!!!!!!!!!!!!!!
lebigmac
Hi. I personally wouldn’t trust any dubious pre-rooted files from the dark web.
Why don’t you root your stock boot images yourself?
It’s really easy to root the Samsung Galaxy S23 Ultra all by yourself. Just follow this brand new tutorial by lebigmac @
https://androidforums.com/threads/how-to-root-samsung-galaxy-s23-ultra-with-magisk.1346737/
Gerry Roston
Nothing against TWRP, but I thought the method described here does not require it, however, the section on installing Magisk seems to require TWRP. Am I missing something?
amar
after rooting while restarting the phone, is there any alert for root and boot loader unlocking ?