In this guide, we will show you the steps to reset BIOS on your Windows 11 PC. The Basic Input/Output System, or more popularly known as BIOS, is a type of firmware stored in the motherboard and is the first thing that boots up when you start your PC. After this, the BIOS configures the hardware and then allows the drive to boot the OS. It beholds quite a few technical sections related to Boot, Security, and other Advanced tweaks.
Along with that, you could also change System Configuration, enable Virtualization Technology, change the boot order and tweak various hardware settings (such as those related to USB ports, webcam, or the hard drives) via the BIOS. Likewise, you could also overclock or underclock the CPU or change the iGPU and dGPU settings. However, all these tweaks are quite risky and might lead to a few issues.
If not done correctly, then it could even prevent the OS from booting up. In those instances, the only way out is to reset the BIOS. Along the same lines, if you want to remove the boot password, then also you will need to reset the BIOS. All in all, there could be quite a few reasons why you would need to carry out this task. So without further ado, let’s get started with the guide to reset the BIOS on your Windows 11 PC.
Table of Contents
How to Reset BIOS in Windows 11
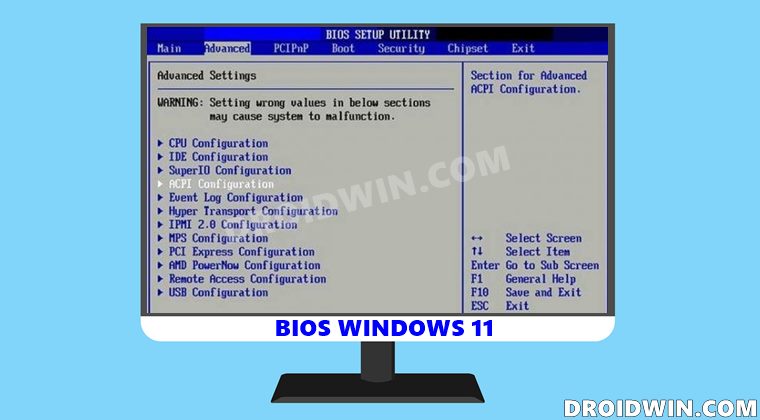
The below instructions are listed under separate sections for ease of understanding. Make sure to follow in the exact same sequence as mentioned. Droidwin and its members wouldn’t be held responsible in case of a thermonuclear war, your alarm doesn’t wake you up, or if anything happens to your PC and data by performing the below steps.
Method 1: Reset Windows 11 BIOS when PC is Booting Up
If you could boot your PC to the OS and hence could access Windows 11, then here’s how to reset the BIOS:
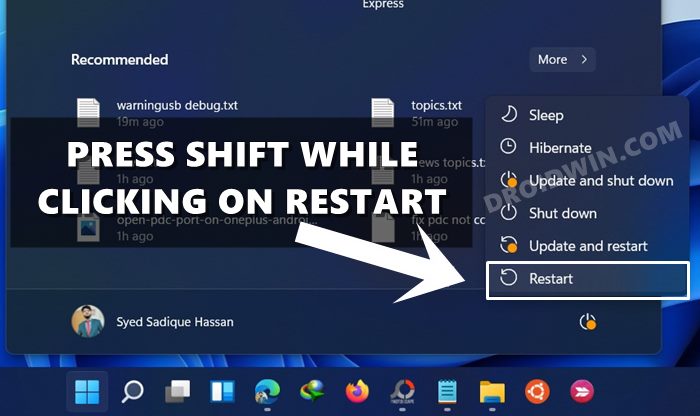
- Head over to the Start Menu and click on the Power icon.
- Then while pressing the Shift key, click on Reset.

- Your PC will now boot up to the Advanced Startup screen.
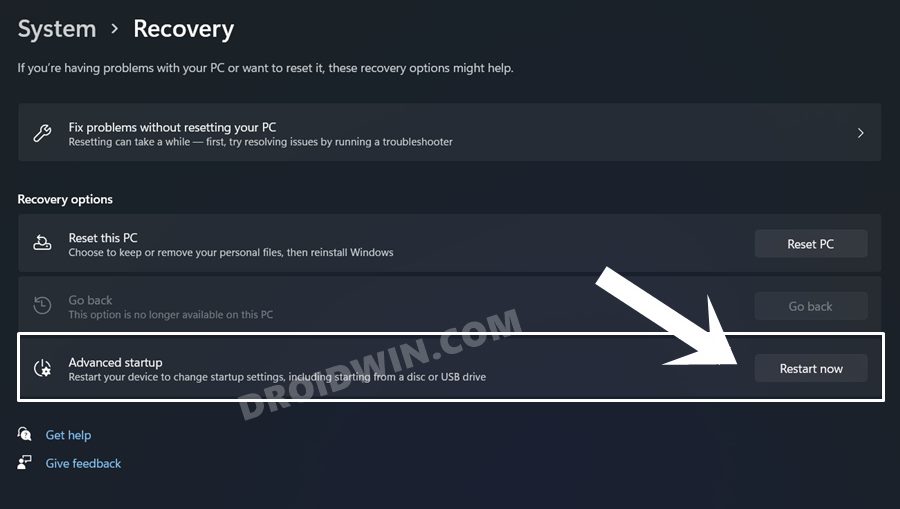
If that doesn’t work out, then you could also manually boot to the Advanced Startup from Settings > Windows Update > Advanced options > Recovery > Restart now.

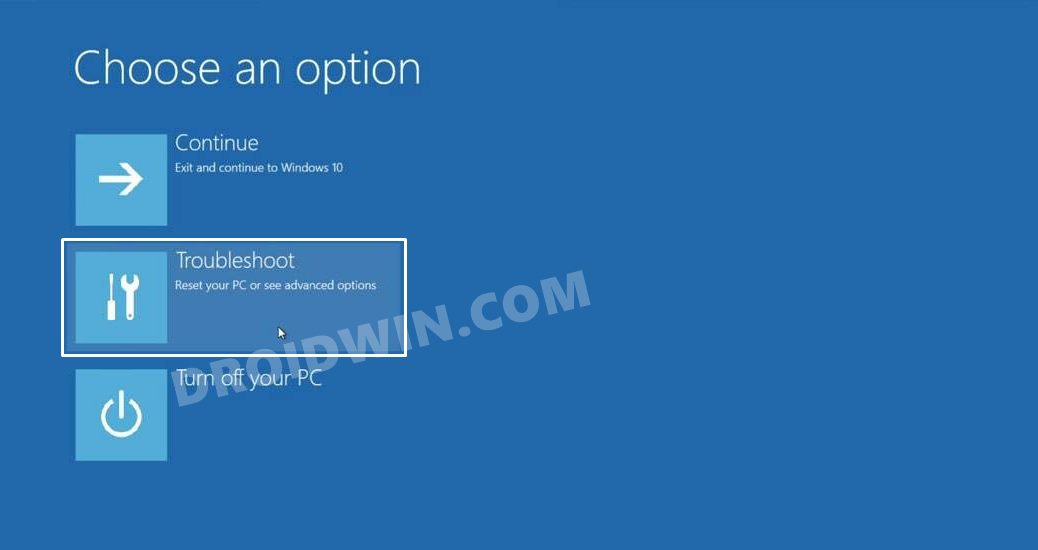
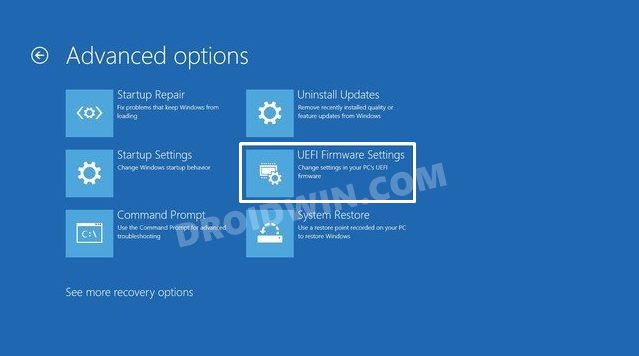
- Now click on Troubleshoot.

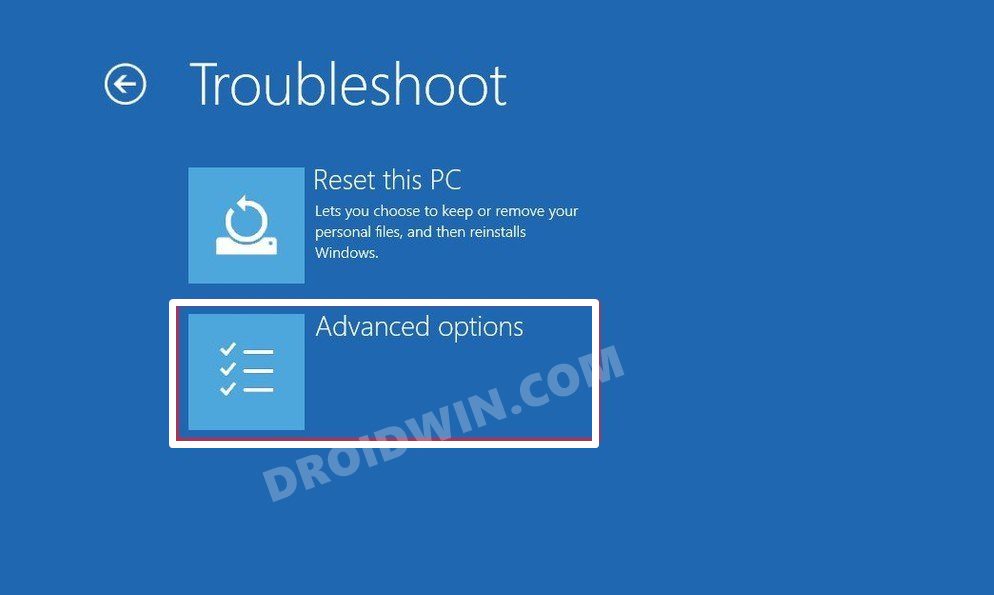
- Then click on Advanced Options.

- After that, click on UEFI Firmware Settings.

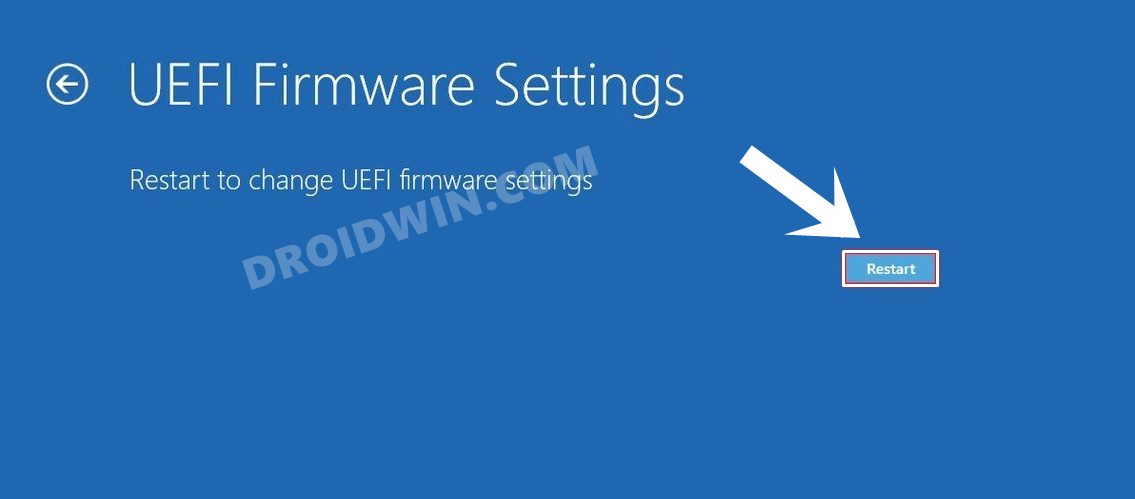
- Click Restart and your PC will boot to the BIOS menu.

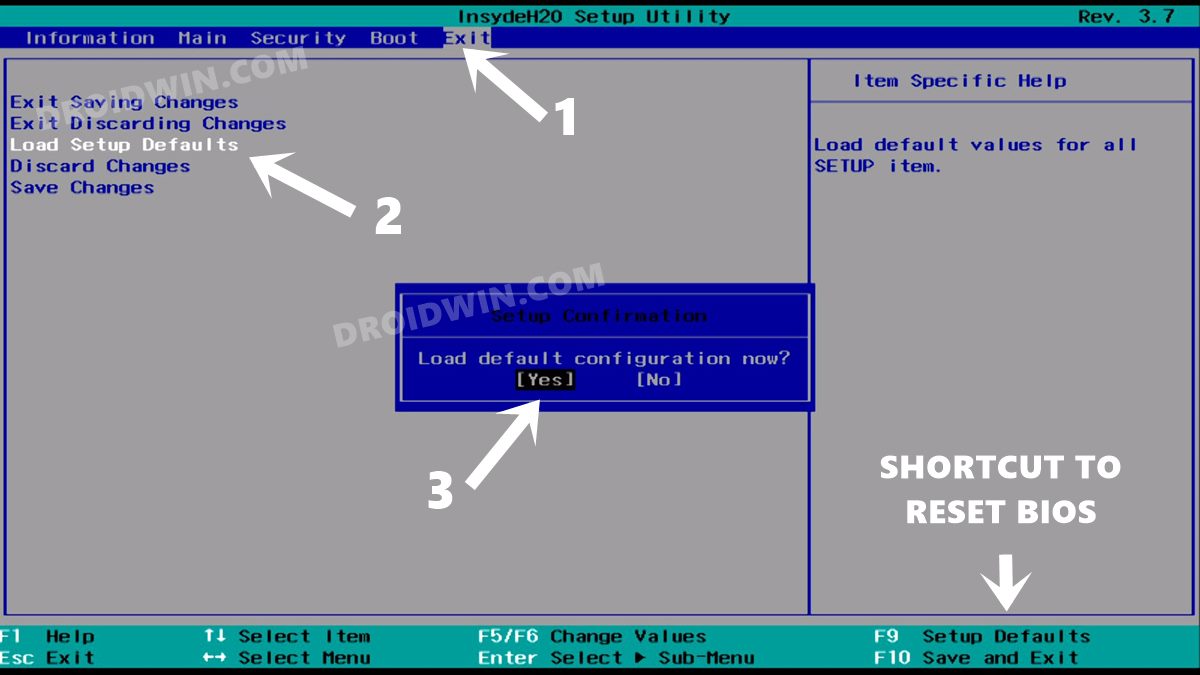
- Now go to the Exit tab via the arrow keys.
- Select Load Setup Defaults and hit Enter.

You could also do so via the F9 shortcut key (or the one that is mentioned in the bottom menu of your BIOS screen).
- Finally, select Yes in the confirmation dialog box.
So these were the steps to reset BIOS on your Windows 11 PC when you can acess the OS. Let’s now check out the second scenario- when the OS is inaccessible.
Method 2: Reset Windows 11 BIOS when PC is Not Booting Up
In some cases, your PC might not be able to boot to the OS or access any Windows feature. If that’s the case with you as well, then here’s how to reset the BIOS without interacting with the OS.
- As soon as your PC boots up, keep on pressing the below mentioned key corresponding to your laptop’s manufacturer:
- Acer: Del or F2
- Asus: Del or F10
- Dell: F2 or F12
- HP: F10
- Lenovo: F1 or F2
- If your PC is not listed here, then you could try out the Del, F2, or F10 keys. Moreover, you might also need to press the FN keys alongside the Function key.
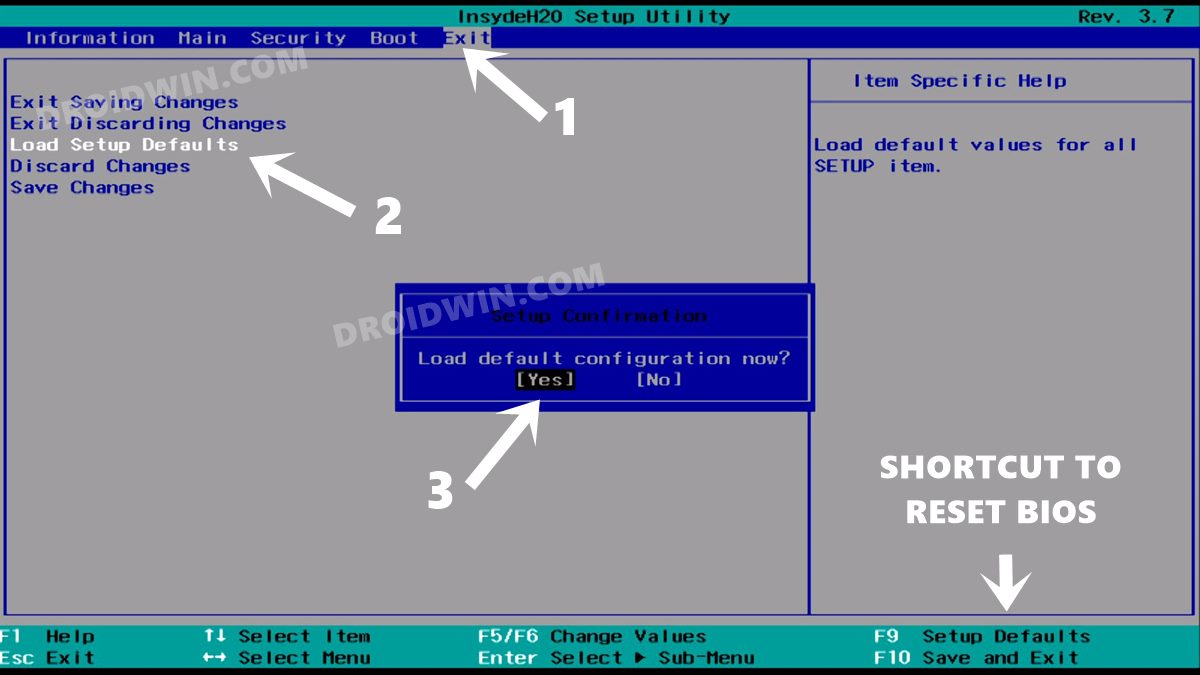
- Your PC shall now boot to the BIOS menu. Go to the Exit tab, select Load Setup Defaults, and press Enter.

You could also do so via the F9 shortcut key (or the one that is mentioned in the bottom menu of your BIOS screen).
- Finally, click Yes in the confirmation dialog box that appears.
That’s it. These were the steps to reset BIOS on your Windows 11 PC. If you have any queries concerning the aforementioned steps, do let us know in the comments. We will get back to you with a solution at the earliest.
