This guide will show you the steps to limit the maximum refresh rate to 96HZ via ADB Commands. The ability of the screen to refresh itself 120 times per second seemed a far-fetched reality at one point in time. But many devices seem to have joined this bandwagon and it no longer counts as a device’s USP. Well, smartphones have now even started to touch the 144 mark. In all of this, there has always been an ever-lasting debate going on. And that is regarding the optimal refresh rate that one should opt for.
Look, there’s no denying the fact that the higher the refresh rate, the more will be fluidity and smoothness in the user experience. However, it comes at a cost, and that is in the form of excessive battery drainage. To counter this issue, you could opt for an adaptive refresh rate. Your device will then only opt for the higher range refresh rate in graphics extensive tasks, such as while playing games. On the other hand, when you are reading an article on the web, the rate would automatically go down.
However, some users have said that even when they carrying out resource-intensive tasks, they want the FPS’s maximum value to be caped at 96Hz as opposed to 120Hz. This will act as an equilibrium value where you wouldn’t have to sacrifice much on either the performance front or on the battery domain. So if you also echo the same thought process, then this guide shall come in handy. In this tutorial, we will show you the steps to limit the maximum refresh rate to 96HZ via ADB Commands.
Table of Contents
How to Limit Maximum Refresh Rate to 96Hz via ADB

The below instructions are listed under separate sections for ease of understanding. Make sure to follow in the exact same sequence as mentioned.
STEP 1: Download Android SDK
First and foremost, you will have to install the Android SDK Platform Tools on your PC. This is the official ADB and Fastboot binary provided by Google and is the only recommended one. So download it and then extract it to any convenient location on your PC. Doing so will give you the platform-tools folder, which will be used throughout this guide.

STEP 2: Enable USB Debugging
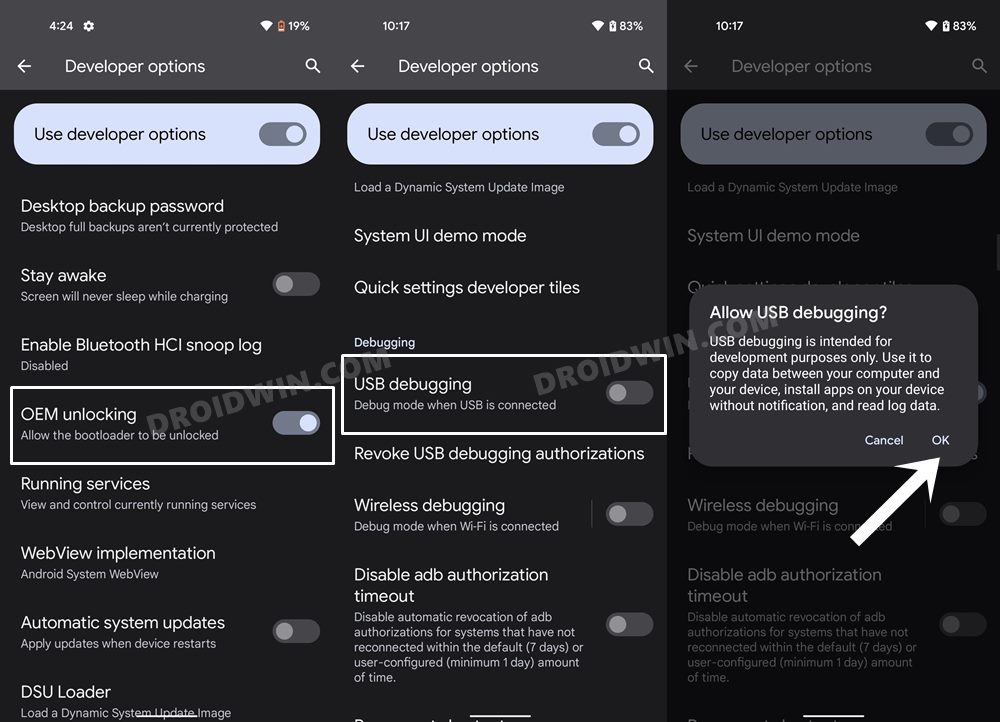
Next up, you will have to enable USB Debugging on your device so that it is recognizable by the PC in ADB mode. So head over to Settings > About Phone > Tap on Build Number 7 times > Go back to Settings > System > Advanced > Developer Options > Enable USB Debugging.

STEP 3: Verify ADB Connection
- To begin with, connect your device to the PC via USB cable. Make sure USB Debugging is enabled.
- Then head over to the platform-tools folder, type in CMD in the address bar, and hit Enter. This will launch the Command Prompt.

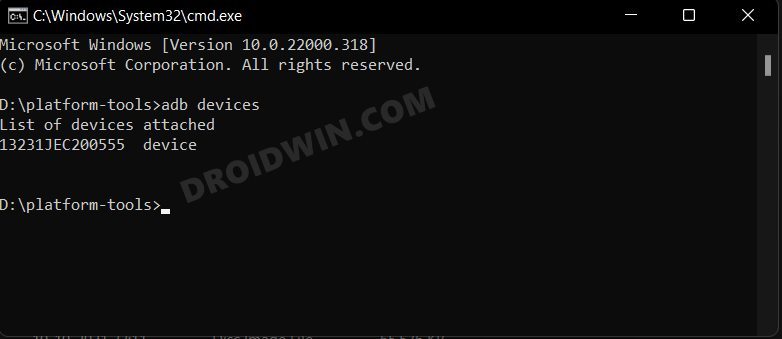
- Now in the following command in the CMD window to verify the ADB connection:
adb devices

- if you get the device ID, then the connection stands successful and you are good to go ahead. However, if the connection isn’t successfully established, then do check out our guide on How to Fix All ADB and Fastboot Errors.
STEP 4: Limit Maximum Refresh Rate to 96Hz via ADB
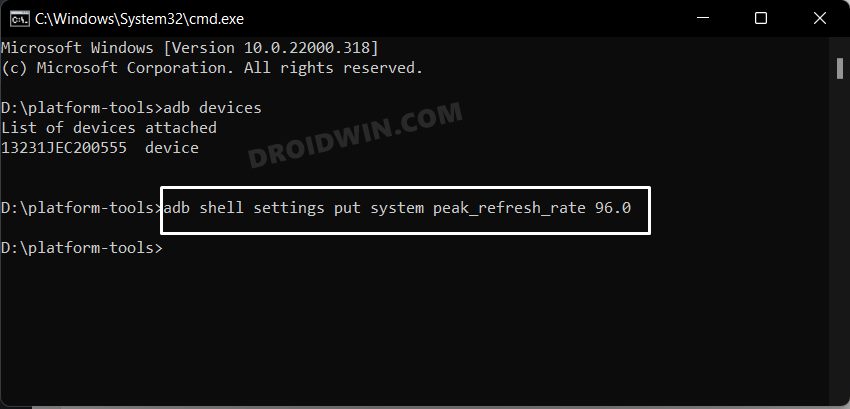
Now just execute the below ADB command in the CMD window to limit the maximum refresh rate to 96Hz. The refresh rate will still stay adaptive, it’s just that the maximum value will be capped at 96Hz. In other words, your device’s display will oscillate between 1Hz and 96Hz. So on that note, here’s the command that you need to execute:
adb shell settings put system peak_refresh_rate 96.0

That’s it. These were the steps to limit the maximum refresh rate to 96Hz via ADB Commands. The commands have been successfully tested on Galaxy S20 and it should work across all Android devices (obviously the device should be having a 120hz refresh rate in the first place). On that note, we round off this guide. If you have any queries concerning the aforementioned steps, do let us know in the comments. We will get back to you with a solution at the earliest.


