In this guide, we will show you the steps to install the root certificates on your Windows 11 PC. Root Certificates are digital certificates that are issued by the Certificate Authority. It verifies the websites and software over their credibility and if they checkmark the required prerequisites, it puts virtual a stamp of authority over them. As far as their updates are covered, Microsoft automatically updates them via the Trusted Root Certificate List using its Updates channel.
But if you paused the Windows update or haven’t installed it for quite some time, then the certificate might reach the end of its shell life pretty soon. And once it expires, the associated apps and programs wouldn’t be able to function along the expected lines. Even the web browser might constantly throw in the expired certificate prompts and prevent you from accessing the required website. To rectify these issues, you should update the existing (and about to expire) certificates or install the new ones on your Windows 11 PC. And in this guide, we will show you how to do just that. Follow along.
Table of Contents
How to Install Root Certificates in Windows 11

Given hereby are the steps to download and install root certificates from the Serialized Certificate Store Format (SST) as well as the Serialized Certificate Trust List (STL). You may refer to the section that is in sync with your requirement.
Install Certificates in Windows 11 via SST
First off, we will show you how to download the certificates from the Serialized Certificate Store Format files. After that, the steps to install them (individual or all at once) will be discussed. Follow along.
Download SST Root Certificates
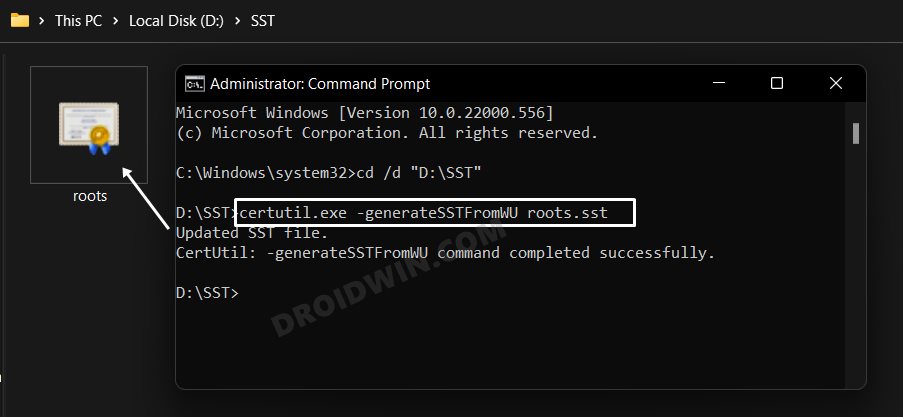
- Head over to the folder where you wish to download the certificate.
- Then launch CMD as an administrator and change its directory to that folder (via the cd command).
- Now type in the below command to download the Root certificates in an SST File:
certutil.exe -generateSSTFromWU roots.sst

Install All SST Certificates
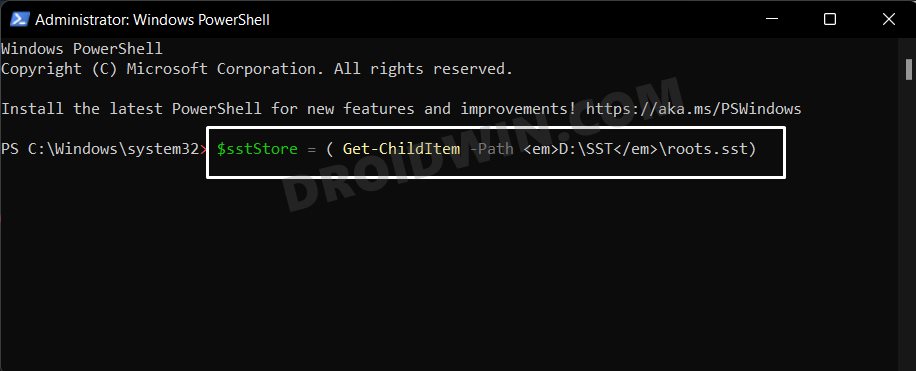
- If you wish to install all the certificates that are a part of the SST file, then refer to the below instructions:
- Head over to the Start Menu, search Powershell, and open it.
- Now execute the below command, make sure to replace CertificatePath accordingly:
$sstStore = ( Get-ChildItem -Path <em>CertificatePath</em>\roots.sst)
- All the certificates inside that SST package will now be installed on your Windows 11 PC.
Install Particular SST Certificate
If you want to install a particular certificate from the SST bundle, then here’s what you need to do:
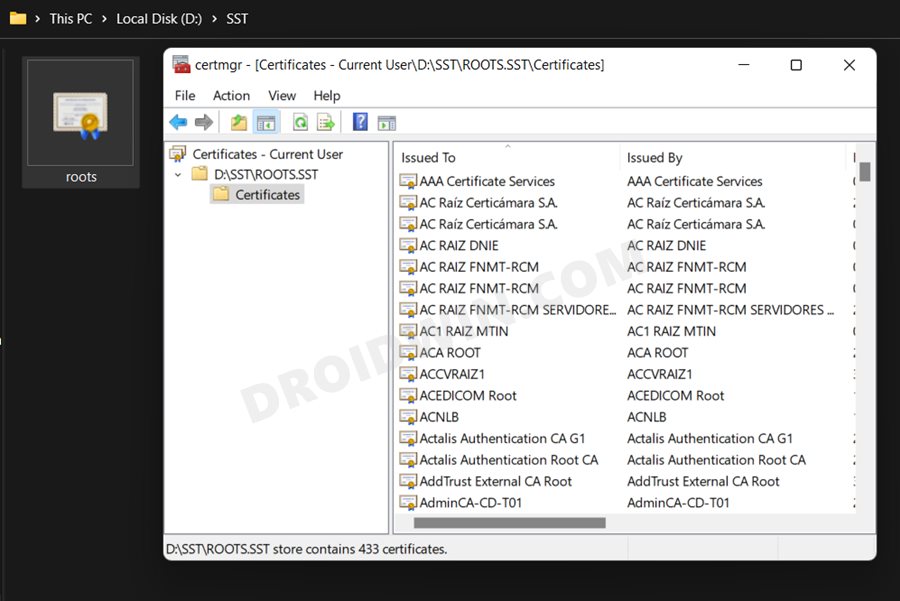
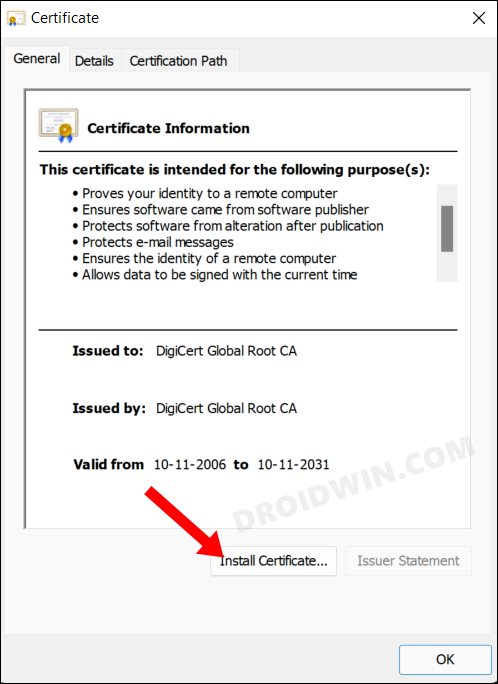
- Double click to launch the downloaded root SST certificate.
- Then double-click on the certificate of your choice.
- Now click on the Install Certificate button.
- That specific root SST certificate will now be installed on your Windows 11 PC.
Install Certificates in Windows 11 via STL
- To begin with, download the STL Certificate pack directly from the Windows Server.
- Once downloaded, extract it to any convenient location on your PC.
- Then go to that folder’s address bar, type in CMD, and hit Enter.
- After that, execute the below command in the CMD window that opens:
certutil -addstore -f root authroot.stl
- The certificates inside the STL package will now be installed on your Windows 11 PC.

How to View Installed Root Certificates in Windows 11
Now let’s verify where the root certificates have been successfully downloaded and installed on your PC. There are two different methods to do so- via Powershell and using Microsoft Management Console (MMC). The Powershell method is shorter and easier to execute, however, it gives the results in a cluttered form, thereby making it difficult to understand.
On the other hand, the MMC method does take a few additional seconds, but the end results would be simplified and easy to understand. Anyways, we have listed both these methods below, you may refer to the desired one.
Via Powershell
- Head over to the Start Menu, search Powershell, and launch it as an administrator
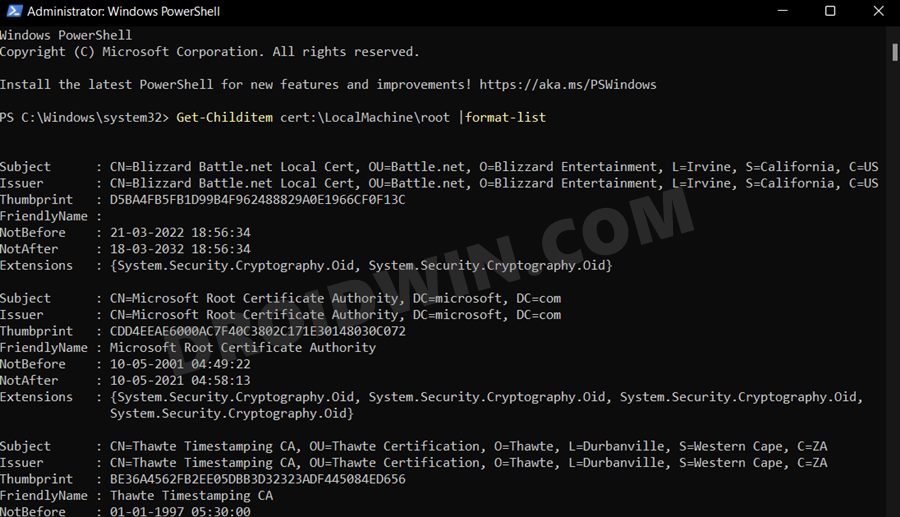
- Then execute the below command in the PowerShell to get a list of all the certificates:
Get-Childitem cert:\LocalMachine\root |format-list
- If you only want the list of expired certificates, then execute the following command:
Get-ChildItem cert:\LocalMachine\root | Where {$_.NotAfter -lt (Get-Date).AddDays(40)}
Via Microsoft Management Console
- Bring up the Run dialog box via Windows+R shortcut keys.
- Then type in the below command and hit Enter to open the Management Console:
mmc.exe
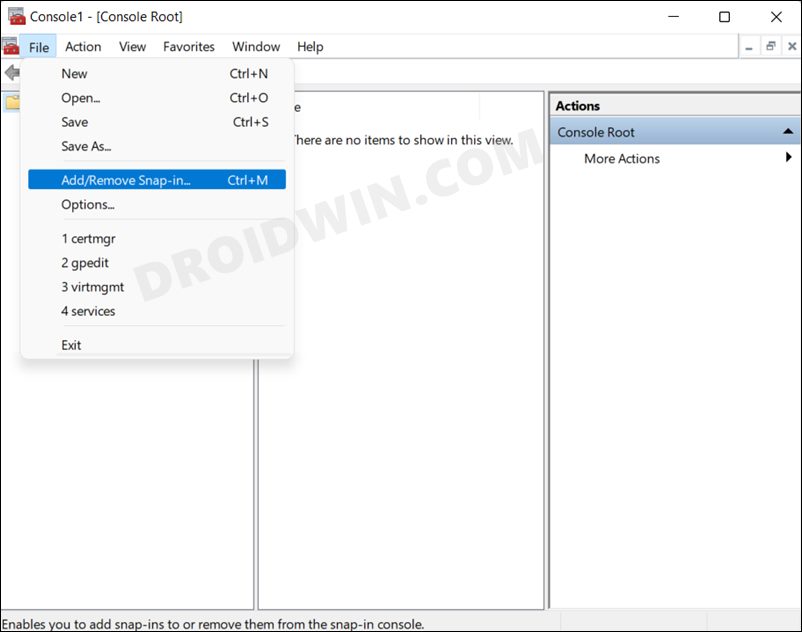
- After that, click on File > Add/remove snap-in.
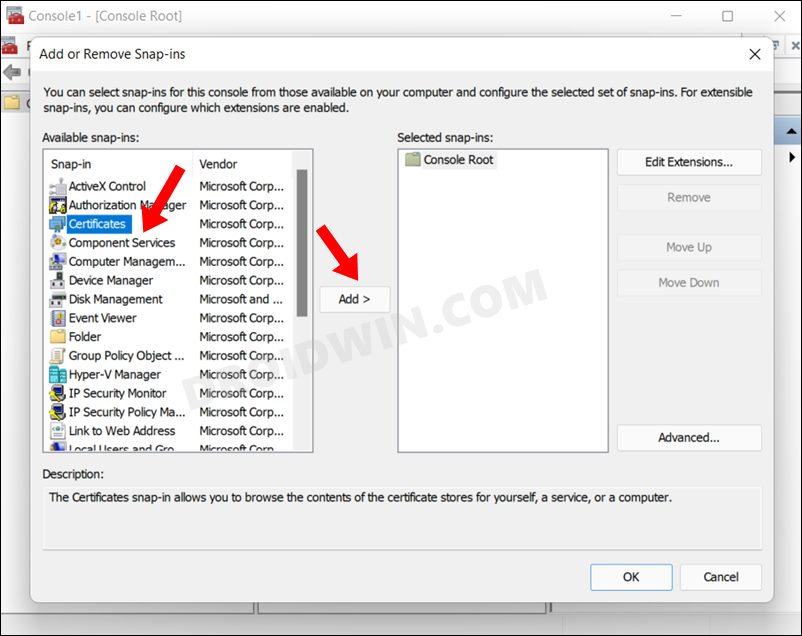
- Now select Certificates and hit the Add button.
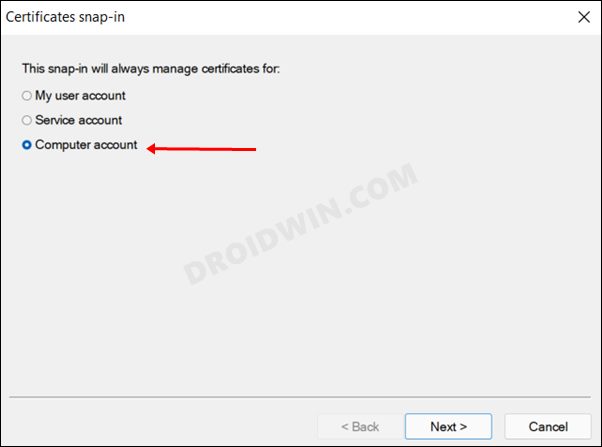
- Then select Computer account and click Next.
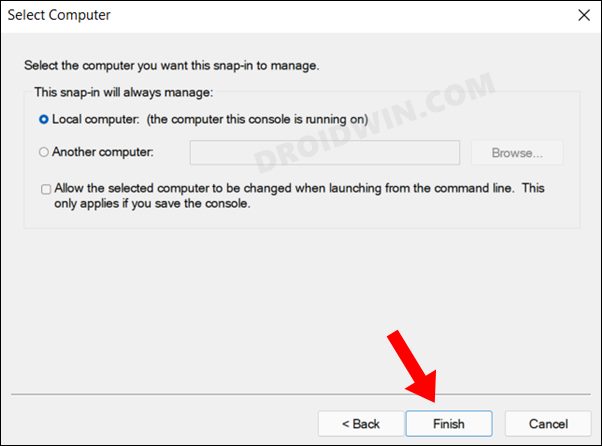
- Now select Local Computer and hit Finish.
- After that, head over to the following location from MMC left side menu bar
Certificates (Local Computer) > Trusted Root Certification Authorities > Certificates
- You will now be able to view the list of all the expired and active certificates.
That’s it. These were the steps to install/update certificates in Windows 11. Likewise, we have also listed the steps to check the active and expired certificates. If you have any queries concerning the aforementioned steps, do let us know in the comments. We will get back to you with a solution at the earliest.


