In this guide, we will show you two different methods to install the HttpCanary Certificate on your Android device. HttpCanary is a handy package capture software that provides a convenient method to copy data, and capture packets in window mode. Likewise, it can also format JSON and implement injection interception and other operations.
While you could install this certificate without root, but it will be installed as User Trusted. To make it System Trusted you will need to have root access. [Without root, you will need to install Parallel Space to grab SSL/TLS encrypted packets, which is a way too complex methodology and beyond the scope of this guide]. So without further ado, let’s check out the two methods to install the HttpCanary Certificate on your Android device.
How to Install HttpCanary Certificate on Android
If your device isn’t rooted, then refer to our guide on How to Root Android via Magisk Patched Boot. once done, you may then start off with the below steps. Droidwin and its members wouldn’t be held responsible in case of a thermonuclear war, your alarm doesn’t wake you up, or if anything happens to your device and data by performing the below steps.
Method 1: Using Magisk Module
It is the easier of the two methods and just requires you to flash a Magisk Module.
- To begin with, download the HttpCanary module [credits: XDA Member spyboy].
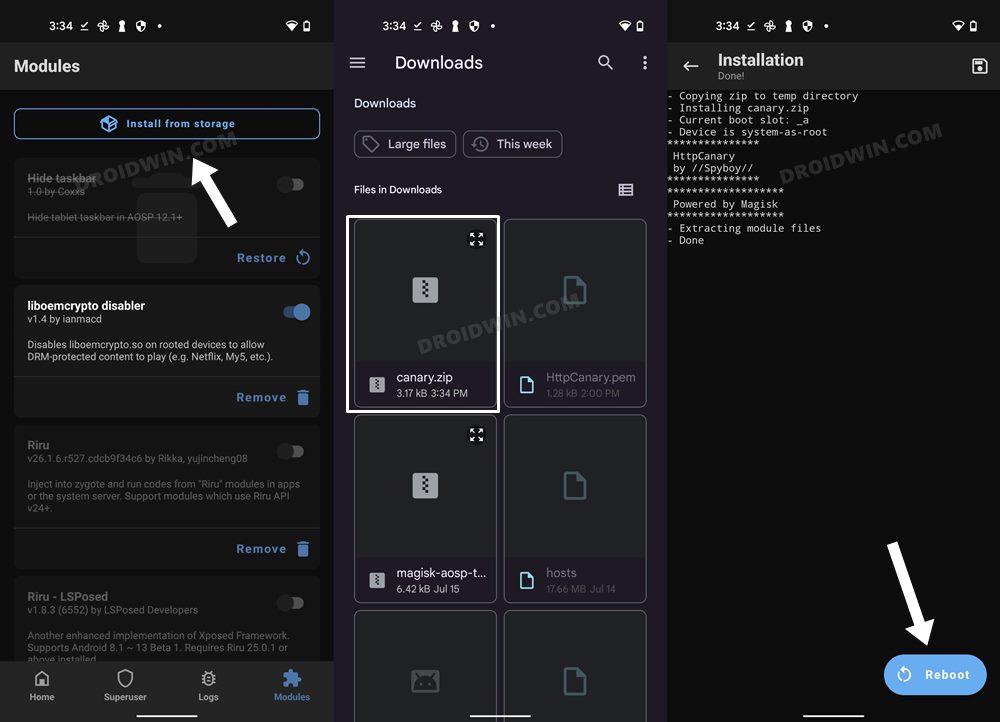
- Then launch the Magisk App and go to the Modules section.
- After that, tap on Install from Storage, navigate to the HttpCanary module and select it.
- It will now be flashed onto your device. Once done, hit the Reboot button.
- That’s it. The HttpCanary Certificate is now installed as a system certificate on your Android device.
Method 2: Manual Installation
Whatever steps the Magisk Module did in the above method, we will be doing the same now, albeit manually. It is a lengthier process than the above-listed one, but if you aren’t convinced with the flashing of the mod and like to take things under your granular control, then this method should be your go-to choice.
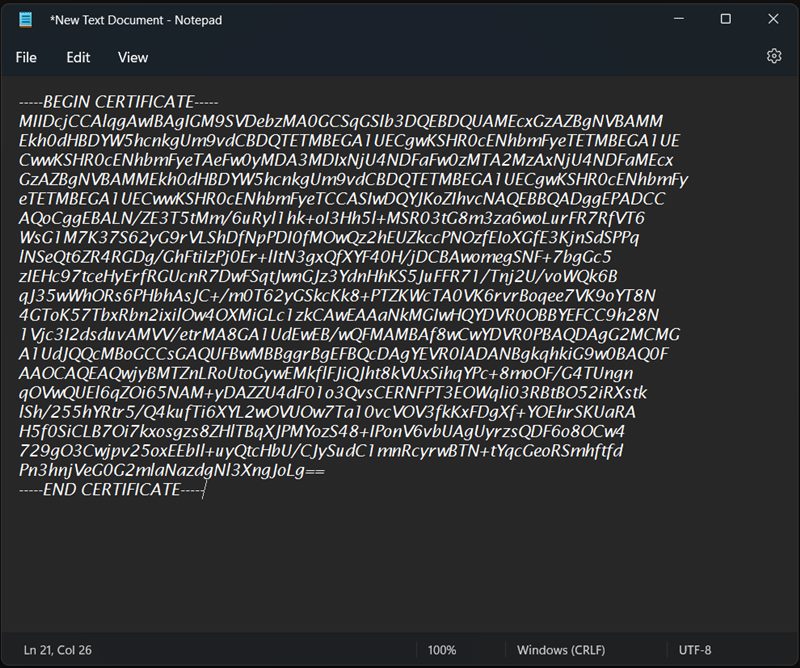
- Copy-paste the contents of the HttpCanary Certificate into a notepad file [Credits: Stack Overflow user safwan-ljd].
- Then go to File > Save as and change the Save as type to All Files.
- After that, name the file HttpCanary.pem and hit Save. Then transfer this file to your device.
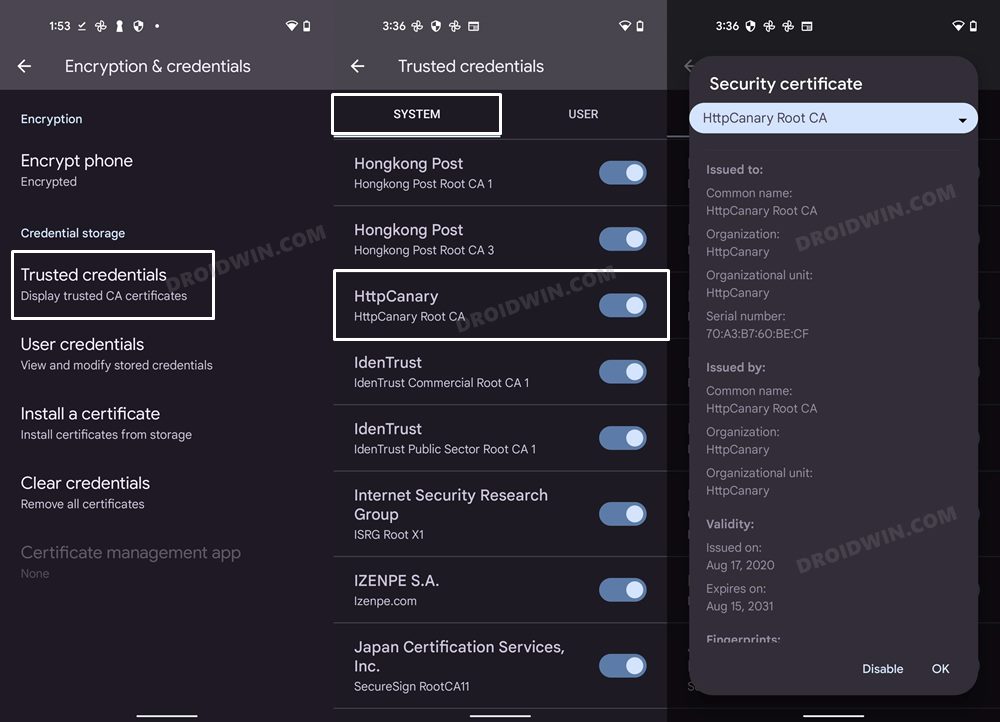
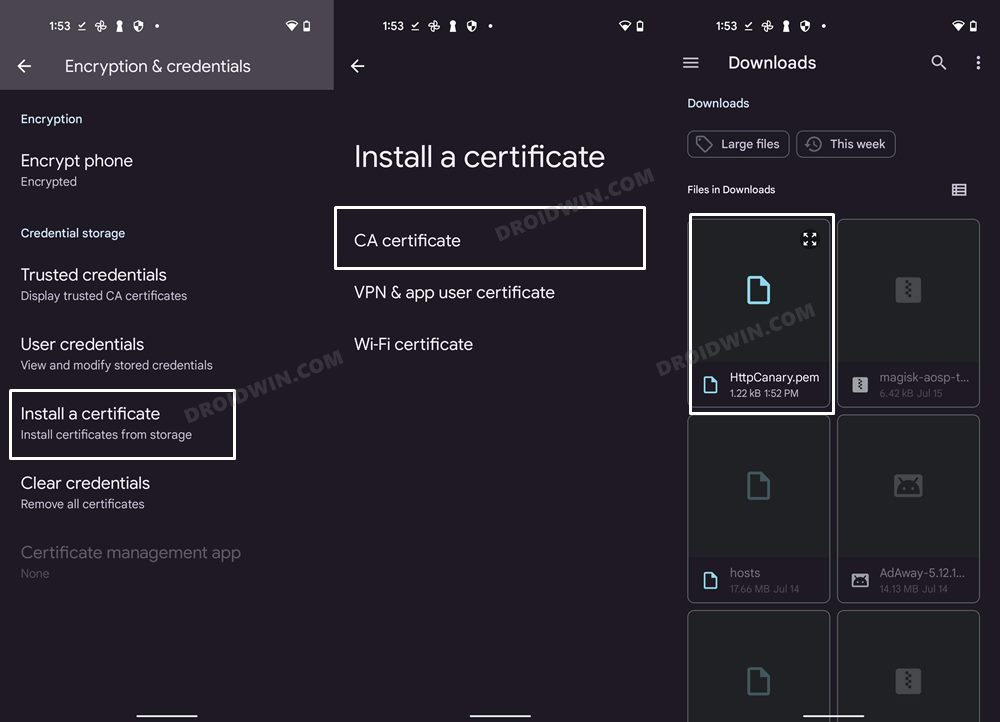
- On your phone, go to Settings > Security > Encryption & Credentials > Install a certificate > CA certificate.
- Then select HttpCanary.pem and it will be installed as a user certificate. Let’s now convert it to a system certificate.
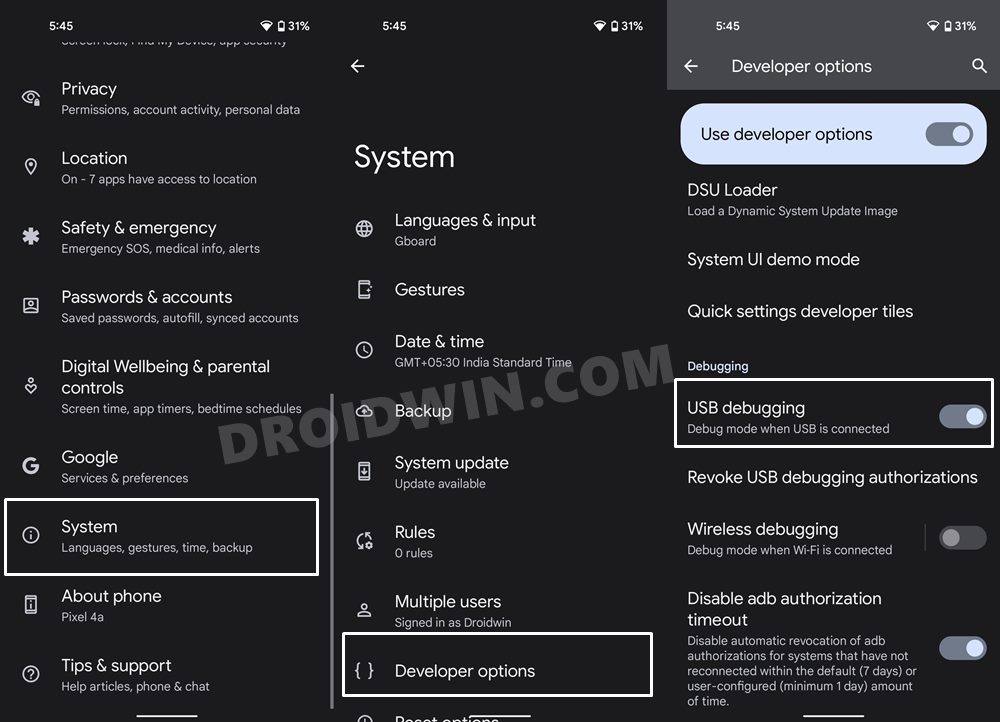
- So enable USB Debugging on your device and connect it to your PC via USB cable.
- After that, download and extract Android SDK Platform Tools on your PC.
- Then launch CMD inside this folder and execute the below command to open the shell environment
adb shell
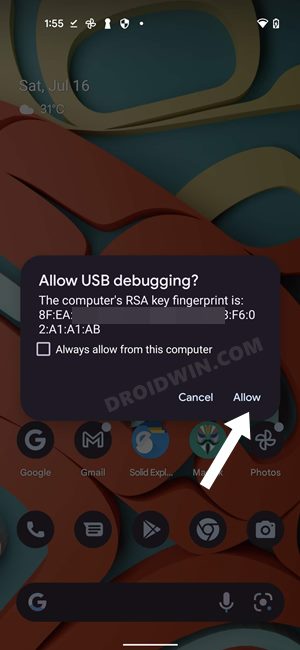
- You will get a Debugging Prompt on your device, tap Allow/Grant.
- After that, execute the below command to open the root environment
su
- You will get a SuperUser request on your device, tap Grant.
- After that, execute the below commands, one at a time-
mount -o rw,remount /
cp -f /data/data/com.guoshi.httpcanary/cache/HttpCanary.pem /system/etc/security/cacerts/87bc3517.0
chmod 644 /system/etc/security/cacerts/87bc3517.0
touch /data/data/com.guoshi.httpcanary/cache/HttpCanary.jks
chmod 600 /data/data/com.guoshi.httpcanary/cache/HttpCanary.jks


That’s it. HttpCanary certificate is now installed as a system certificate on your Android device. So on that note, we round off this guide. If you have any queries concerning the aforementioned steps, do let us know in the comments. We will get back to you with a solution at the earliest.
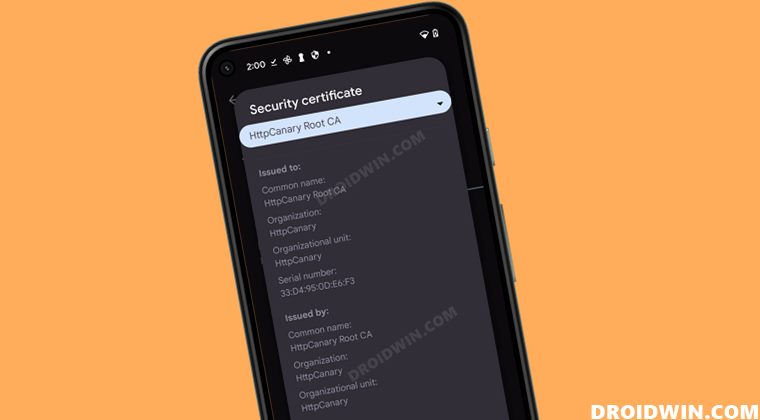
How to Verify if HttpCanary certificate is installed
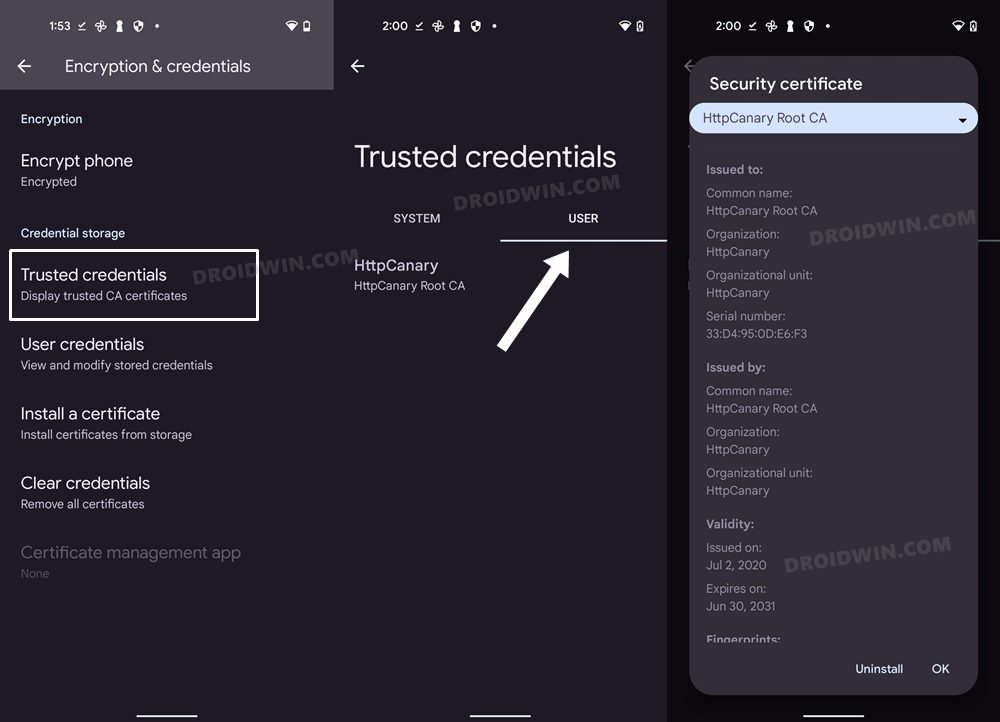
- If you have installed it as a User Certificate, then you could verify it via Encryption & Credentials > Trusted Credentials > User and tap on HttpCanary.
- On the other hand, if you have installed it as a System Certificate, then you could verify it via Encryption & Credentials > Trusted Credentials > System and tap on HttpCanary.
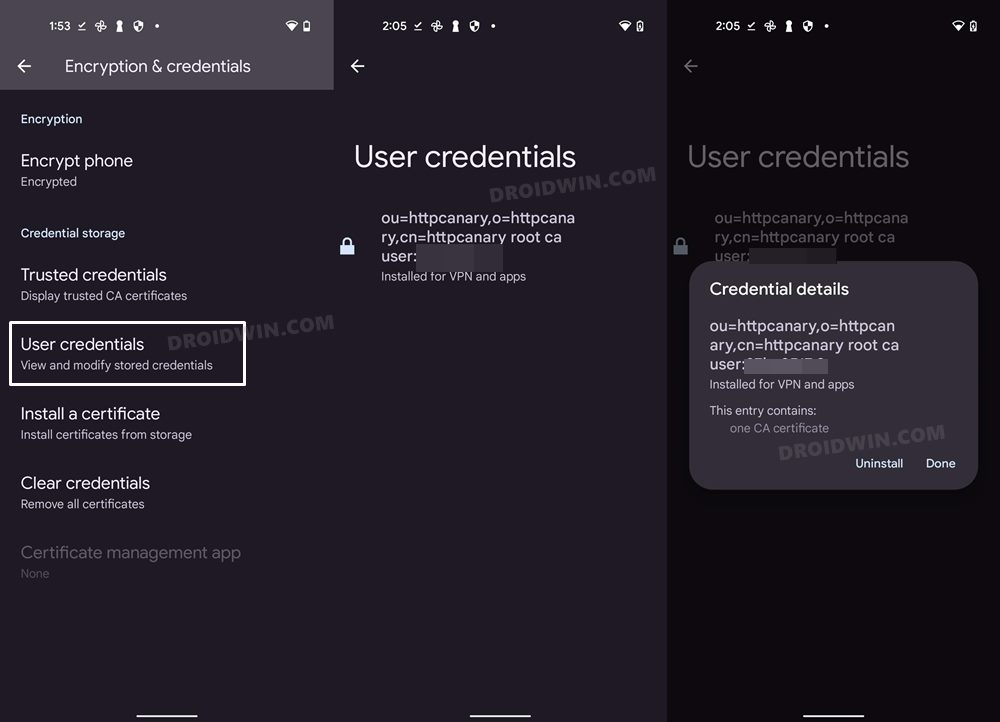
- You could also go to Encryption & Credentials > User Credentials and check out some of the other details.
How to Uninstall HttpCanary certificate on Android
There are quite a few different ways to uninstall the HttpCanary certificate from your Android device. You should refer to the one that you had initially used to install the certificate in the first place.
Uninstalling as User Certificate
If you have installed it as a user certificate, then go to Encryption & Credentials > Trusted Credentials > User tab and tap on HttpCanary. Then tap on the Uninstall button followed by OK in the confirmation dialog box.
Uninstalling as System Certificate
On the other hand, if you have installed it as a system certificate, then go to Encryption & Credentials > Trusted Credentials > System tab and tap on HttpCanary. Then tap on the Disable button followed by OK in the confirmation dialog box.
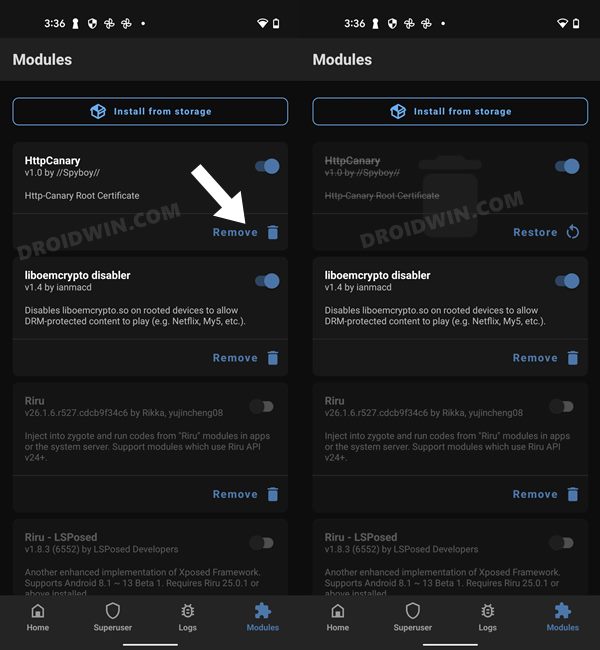
Uninstalling as Magisk Module
If you have installed it as a Magisk Module, then launch the Magisk App and go to the Modules section. Then hit the Remove button next to the HttpCanary module and restart your device for the module [and hence the certificate] to be removed.