In this guide, we will show you the steps to install Android 12 Beta 5 on the OnePlus 9 and its Pro variant. When it came to the best stock OS experiences, the offering from OnePlus was probably right there at the top. Maintaining an equilibrium between the device’s stability and features, it managed to checkmark all the prerequisites that one could have asked for. At the same time, it also made sure that the customizations and tweaks don’t end up bloating the device.
But why are we talking about all this in the past tense? Well, this is because OnePlus would no longer be supporting the stock OxygenOS. Rather it has now adopted Oppo’s ColorOS as the underlying OS scheme. The hints for the same were already there considering how the former was bringing in devices that were nearly a carbon copy of Oppo. But even then, it doesn’t change the fact that hardly anyone would welcome this change (we aren’t exaggerating any facts).
So what else could be done to distance ourselves from the ColorOS? Well, there’s always the option to fall back to Custom ROMs. But today, we will be taking an alternate route by helping you in introducing the latest build of the clean and stock AOSP build onto your device. In this guide, we will show you how to install Android 12 Beta 5 on the OnePlus 9/9 Pro devices. Follow along for this journey, as it’s going to be an intriguing one!
Table of Contents
What’s New in Android 12 Beta 5?
Just to recap, the Silicon Valley giants have introduced a plethora of new and interesting features in the twelfth iteration of the OS. These include the massive UI revamp thanks to the Material You design. Likewise, there’s a Wallpaper-based UX Theming that will pick up the major color from the wallpaper and theme it across various device components (such as the Notifications panel and Settings menu). Then there is an addition of the Privacy Dashboard as well.

This will tell you the date and time when an app asked for the location, camera, and microphone permissions. Moreover, there are some new accessibility features as well. These include the likes of Camera Switch that allows you to take full control of your device via your facial gestures. And you could now welcome all these features onto your device. Given here are the detailed instructions to install Android 12 Beta 5 on the OnePlus 9/9 Pro devices.
How to Install Android 12 Beta 5 on OnePlus 9 & 9 Pro?

The below instructions are listed under separate sections for ease of understanding. Make sure to follow in the exact same sequence as mentioned. Moreover, the below process requires a complete device wipe/reset. So please take a backup of all the files on your device beforehand. Droidwin and its members wouldn’t be held responsible in case of a thermonuclear war, your alarm doesn’t wake you up, or if anything happens to your device and data by performing the below steps.
STEP 1: Install Android SDK

First and foremost, you will have to install the Android SDK Platform Tools on your PC. This is the official ADB and Fastboot binary provided by Google and is the only recommended one. So download it and then extract it to any convenient location on your PC. Doing so will give you the platform-tools folder, which will be used throughout this guide to install Android 12 Beta 5 on the OnePlus 9/9 Pro devices.
STEP 2: Enable USB Debugging and OEM Unlocking
Next up, you will also have to enable USB Debugging and OEM Unlocking on your device. The former will make your device recognizable by the PC in ADB mode. This will then allow you to boot your device to Fastboot Mode. On the other hand, OEM Unlocking is required to carry out the bootloader unlocking process.
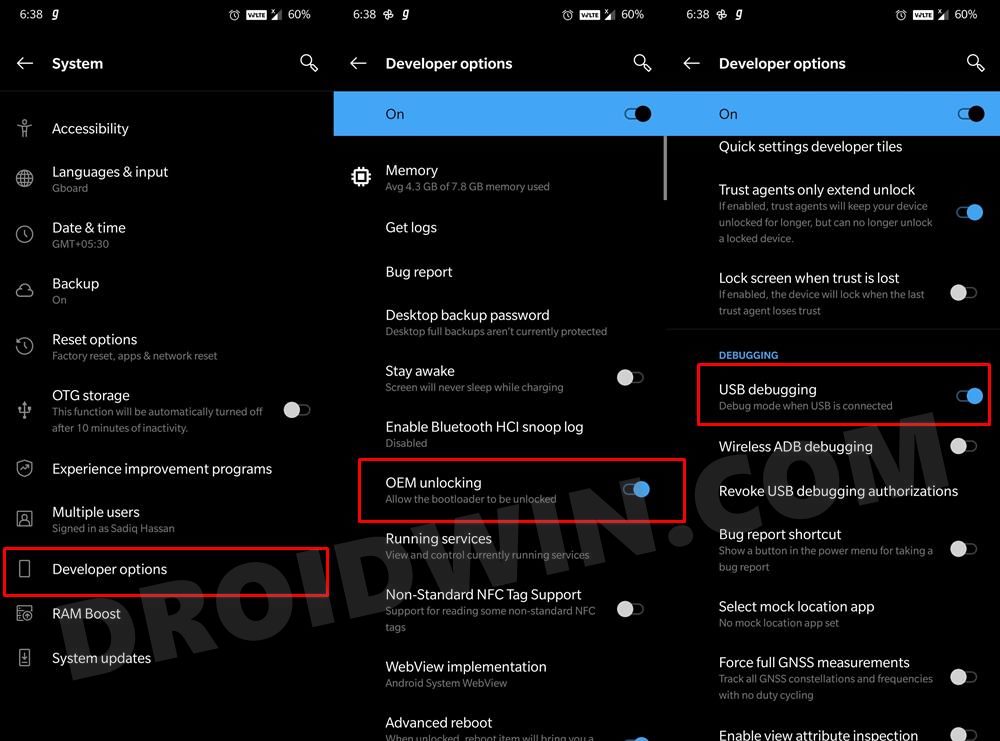
So head over to Settings > About Phone > Tap on Build Number 7 times > Go back to Settings > System > Advanced > Developer Options > Enable USB Debugging and OEM Unlocking.
STEP 3: Unlock Bootloader
Next up, you will also have to unlock the device’s bootloader. Do keep in mind that doing so will wipe off all the data from your device and could nullify its warranty as well. So if that’s all well and good, then please refer to our detailed guide on How to Unlock Bootloader on OnePlus 9, 9 Pro, and 9R.
STEP 4: Download Android 12 Beta 5 for OnePlus 9/Pro
- You may now grab hold of the latest OS build from the below link:
Android 12 Beta 5 Pixel 5 GSI for OnePlus 9/Pro: Download Link
- Once downloaded, extract the ROM file, copy the corresponding system.img file and transfer it to the platform-tools folder on your PC.
- Next up, you will also have to disable verification by flashing the VB-Meta file. So download it from the below link as well:
VB-Meta.img for OnePlus 9/Pro: Download Link
- Once downloaded, transfer it to the platform-tools folder as well.
STEP 5: Boot to Fastboot Mode
- Now connect your device to the PC via USB cable. Make sure USB Debugging is enabled.
- Then head over to the platform-tools folder, type in CMD in the address bar, and hit Enter. This will launch the Command Prompt.

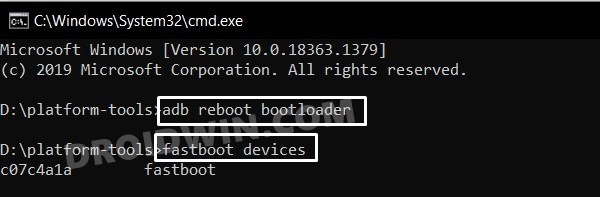
- Type in the following command in the CMD window to boot your device to Fastboot Mode
adb reboot bootloader
- To verify the Fastboot connection, type in the below command and you should get back the device ID.
fastboot devices

STEP 6: Set Slot A as Active
For the sake of uniformity, let’s set Slot A as the active one and then install Android 12 Beta 5 on the OnePlus 9/9 Pro devices.
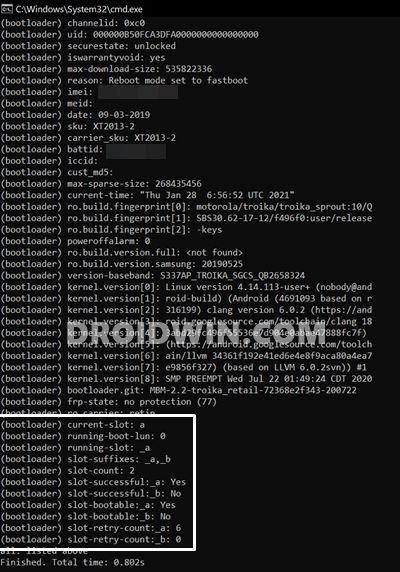
- To do so, execute the below command in the CMD window that is opened inside the platform-tools folder:
fastboot getvar all
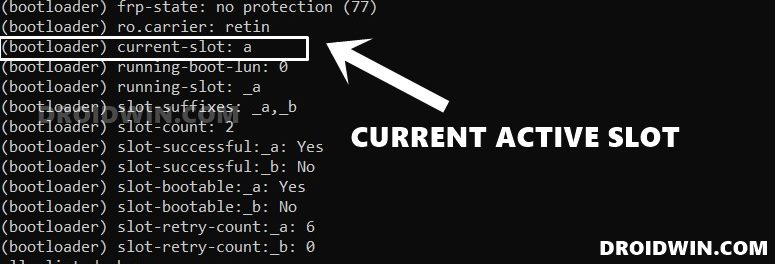
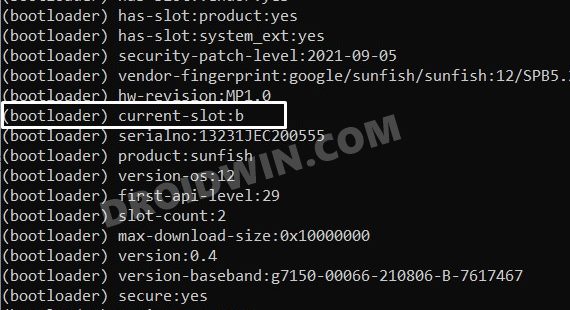
- Now refer to the (bootloader) current-slot value. If you get the below result,
(bootloader) current-slot: a
- Then you are already on the A slot. So you may now move over to STEP 7. However, if the value is as follows:
(bootloader) current-slot: b
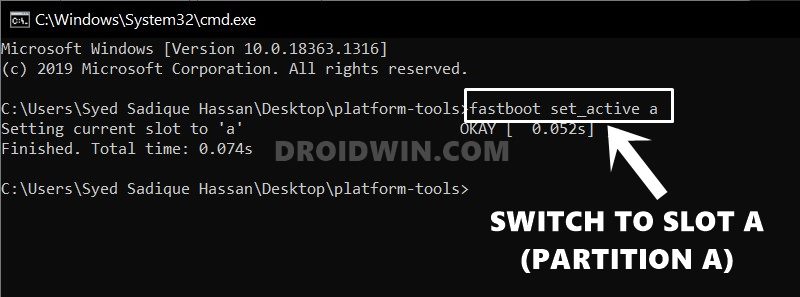
- Then you are currently on Slot B and you need to switch it to A. So use the below command for that:
fastboot set_active a
STEP 7: Install Android 12 Beta 5 on OnePlus 9/Pro Via Fastboot
Make sure that the vbmeta.img and system.img are placed inside the platform-tools folder. Likewise, the CMD window should also be opened inside this folder platform-tools itself. if that’s well and good, then let’s proceed with the flashing instructions:
- To begin with, execute the below command to boot your device to FastbootD Mode:
fastboot reboot fastboot
- After that, copy-paste the below command in the CMD window:
fastboot delete-logical-partition product_a
- You may now install the Android 12 Beta 5 on OnePlus 9/Pro using the below command:
fastboot flash system system.img
- Next up, you will have to perform a factory reset. So use the below command for that:
fastboot -w
- After that, you will have to disable verification by flashing the vbmeta.img file, using the following command:
fastboot --disable-verification flash vbmeta vbmeta.img
- Finally, you may now reboot your device to the newly installed OS via the below command
fastboot reboot

That’s it. These were the steps to install the Android 12 Beta 5 on the OnePlus 9 and its Pro variant. Do share your usage experience of this ROM with us in the comments section below. Likewise, all your queries are welcomed in the comments.