In this guide, we will show you various methods to fix the issue of the camera or webcam not working in Windows 11. Ever since the work from home trend became the new normal, we saw a massive rise in the usage of video conferencing apps. Be it Zoom, Meets/Hangouts, Teams, Cisco or even the older players like Slack and Skype, each one of them witnessed quite a sharp jump in their user base. From the user’s perspective, to effectively use these apps, you need to check-mark just two prerequisites.
These include a decent internet connection and a working webcam. Unfortunately, not many are able to qualify for the second requirement. A slew of complaints has lined regarding the user’s inability to use the camera on the latest iteration of the OS. If you are also getting bugged with this issue, then fret not. In this guide, we will show you numerous methods to fix the camera or webcam not working issue in Windows 11. So without any further ado, let’s get started.
Table of Contents
How to Fix Camera/Webcam Not Working in Windows 11
Do note that there’s no universal fix as such. You will have to try out each of the below-mentioned workarounds and see which one works best in your favor. So keeping that in mind, follow along with the instructions.
FIX 1: Re-Establish the Connection
Before moving ahead to any of the advanced fixes, we would suggest you try out the basic tweaks first. In this regard, re-establishing the webcam connection with your PC should be the first step forward. So if you are using a wired webcam, then make sure that the connection stands firm. You should also consider unplugging the USB cable and then re-plugging it back in.
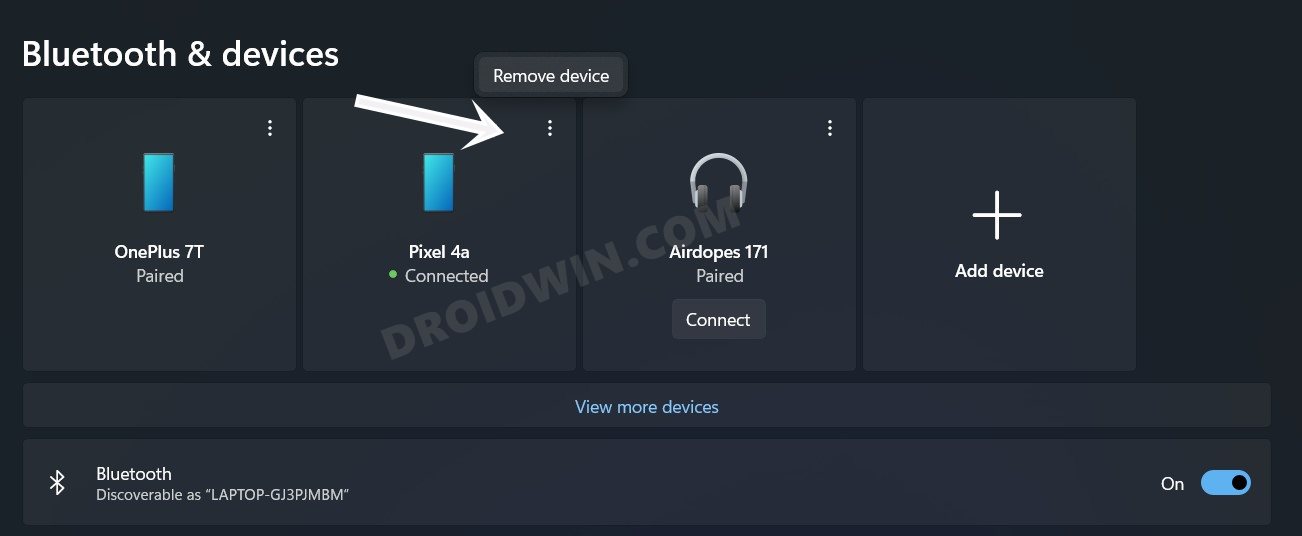
On the other hand, for wireless webcam, verify that the Bluetooth connection has been successfully established. To do so, try disabling and then and re-enabling the Bluetooth connection for the concerned webcam. Here’s how:
- For that, head over to Settings > Bluetooth and Devices and verify that it shows the camera as connected.
- Then click on the overflow icon situated at its top right and select Remove Device.

- Now re-pair the camera with your PC and verify if the webcam not working issue in Windows 11 has been fixed or not.
FIX 2: Verify Camera Permissions
Next up, you should also double-check that the camera has been granted all the necessary permissions. If that is not the case, then various third-party and desktop apps wouldn’t be able to use the webcam in the first place. So proceed ahead with the below instructions to enable the required camera permissions:
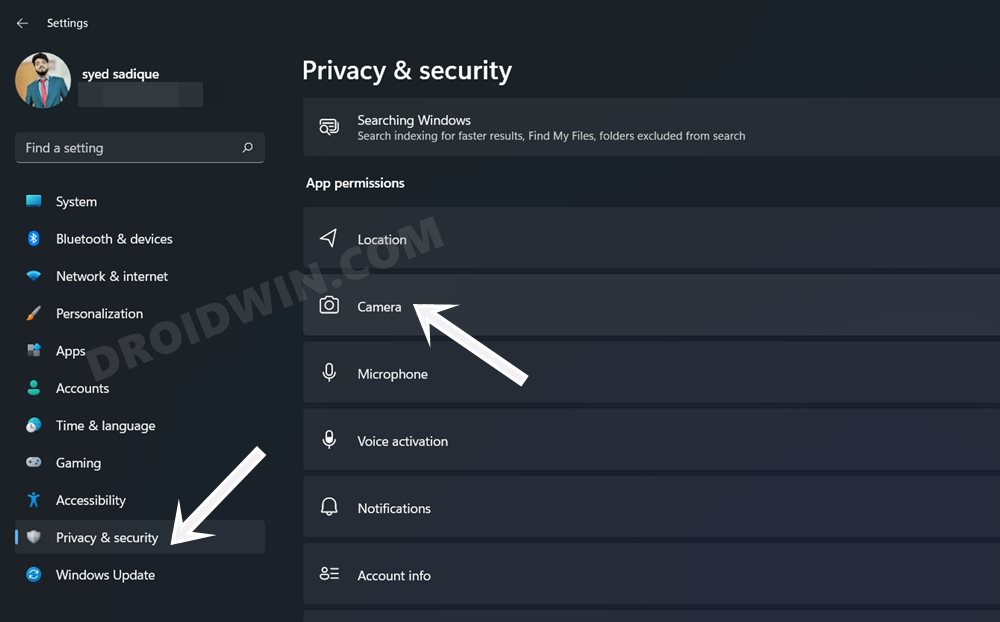
- Use the Windows+I shortcut keys to open the Settings menu.
- Then select Privacy & Security from the left menu bar.
- Now go to Camera under the App Permissions section.
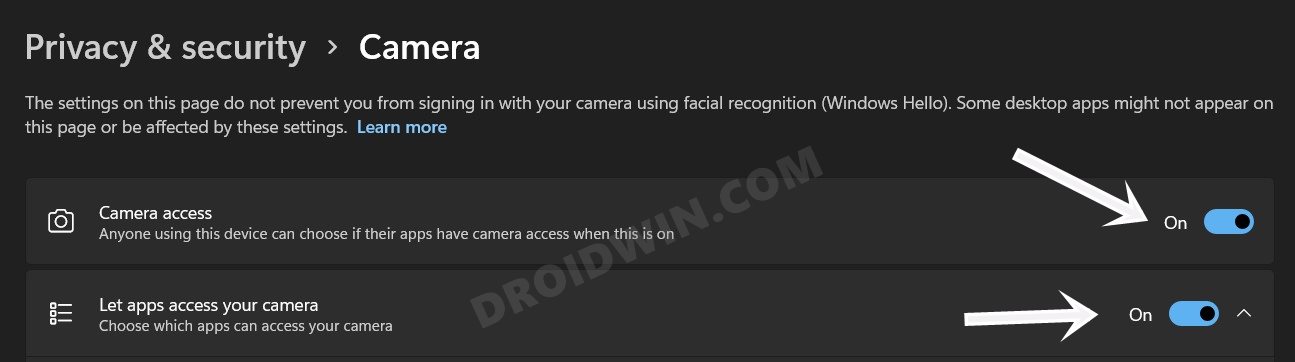
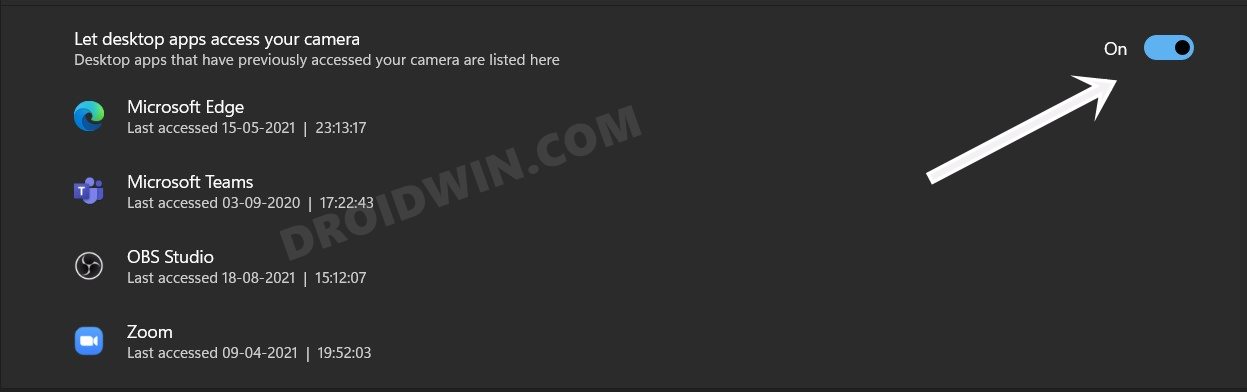
- Make sure that both the ‘Camera access’ and ‘Let apps access your camera’ options are turned on.
- Likewise, also consider enabling the ‘Let desktop apps access your camera’ option.
- Once done, check if the camera or webcam not working issue in Windows 11 has been fixed or not.
FIX 3: Temporary Disable Antivirus/Firewall
In some instances, your antivirus app or even the Firewall might act a little bit overprotective and could disable some of the webcam’s functionality. Let’s first check if that is the case or not (the below instructions are listed for the Windows Defender):
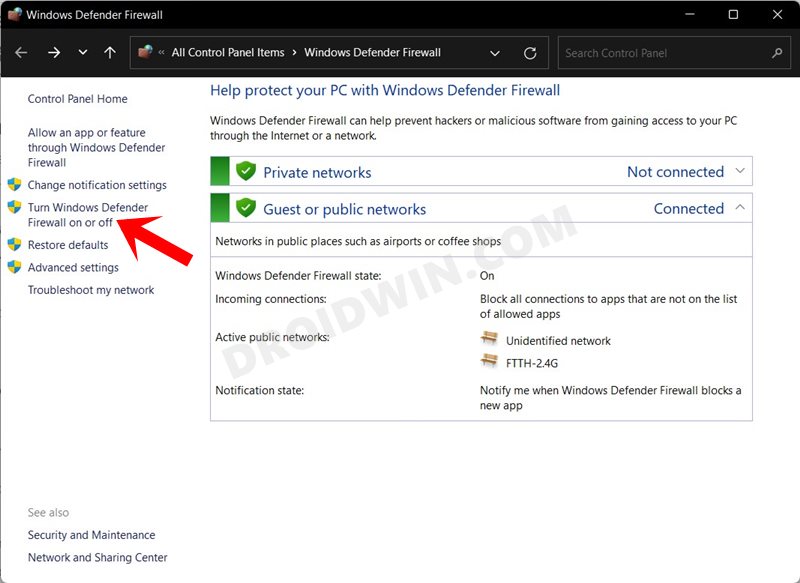
- To begin with, head over to the Start Menu, search Windows Defender Firewall, and open it.
- Then click on ‘Turn Windows Defender Firewall on or off’ from the left menu bar.
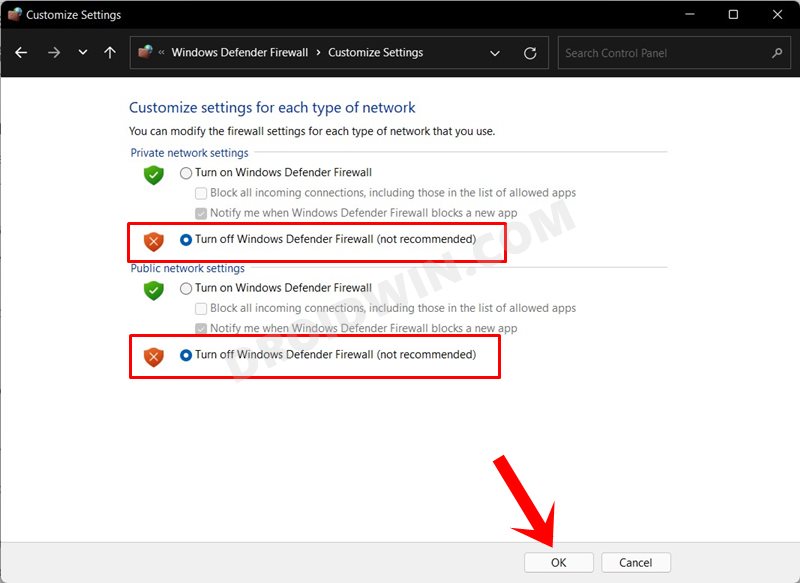
- Now select ‘Turn Off Windows Defender’ under both the Public and Private Networks.
Once that is done, check if the webcam is working well and good. If your answer is in the affirmative, then the issue is indeed with the Firewall. So you should either consider disabling it during the course of camera usage or add the camera app to its exclusion list (recommended).
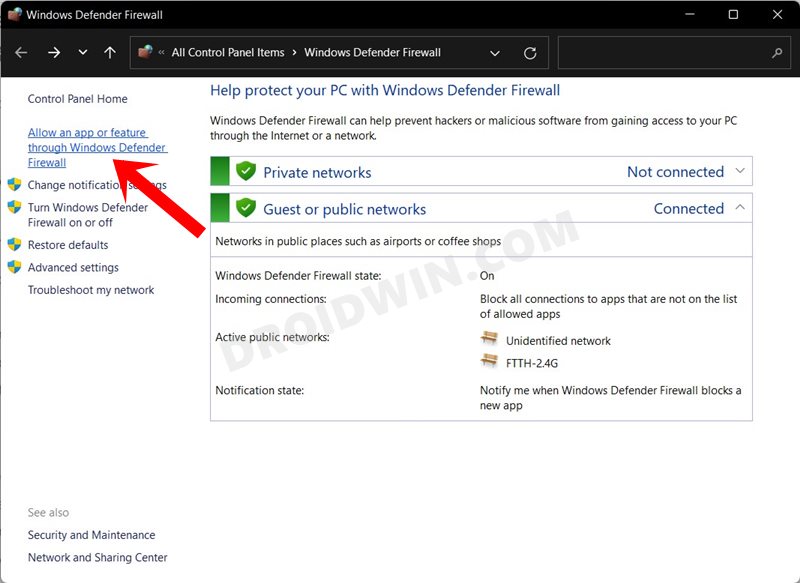
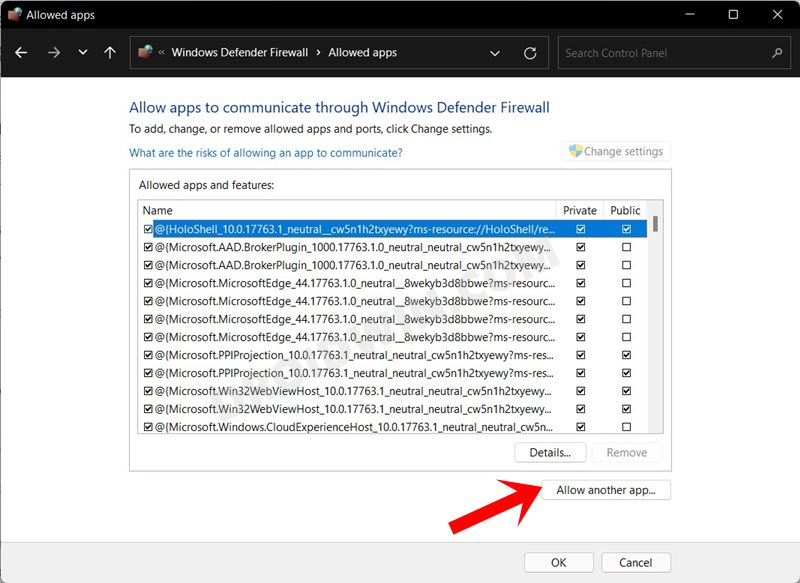
- To carry out the latter task, go to the Windows Defender Firewall home and click on ‘Allow an app or feature through Windows Defender Firewall’ situated at the left menu bar.
- Now if you find your app in the list, uncheck it and hit OK. On the other hand, if the app is missing, then click on the Allow Another App button, navigate to the app’s EXE file and select it.
- Finally hit OK to add it to the whitelist. Once done, verify whether the camera or webcam not working issue in Windows 11 is fixed or not.
FIX 4: Reset Camera App
In some instances, the issue might be related to the app, rather than the webcam. In this regard, we have already taken the first step of enabling the required permissions. The next course of action should be to reset the app that is trying to access the camera. This is because if the app’s data or its settings get corrupted, then it could conflict with the usage of the camera. Hence, resetting the app might be the need of the hour. So follow along for the step to do the same:
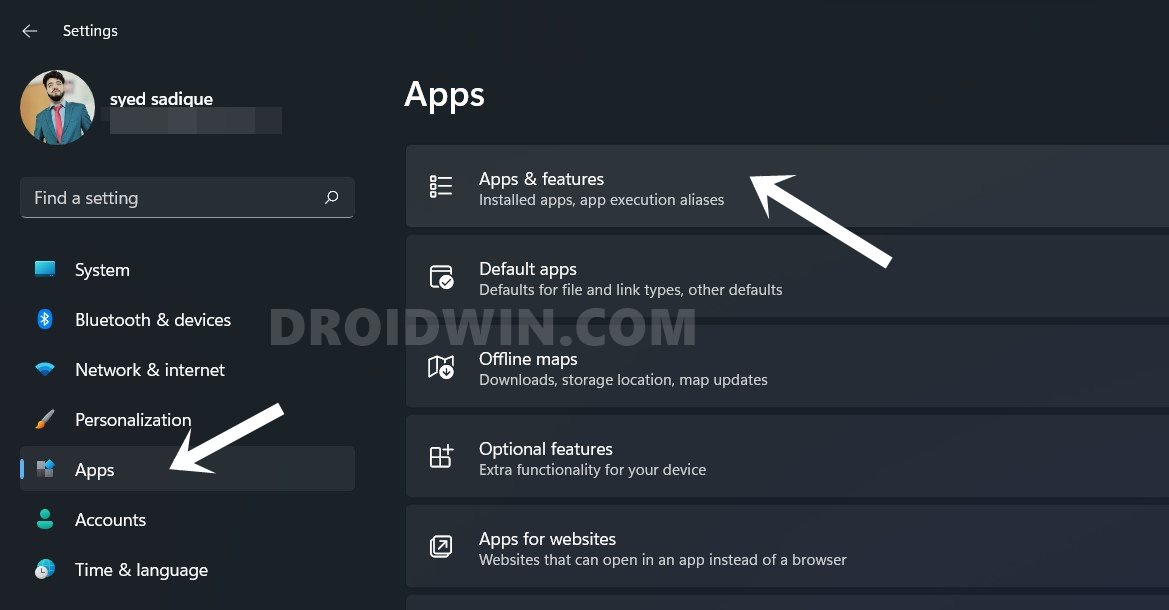
- Bring up the Settings menu via Windows+I shortcut keys.
- Then select Apps from the left menu bar and go to Apps and Features.
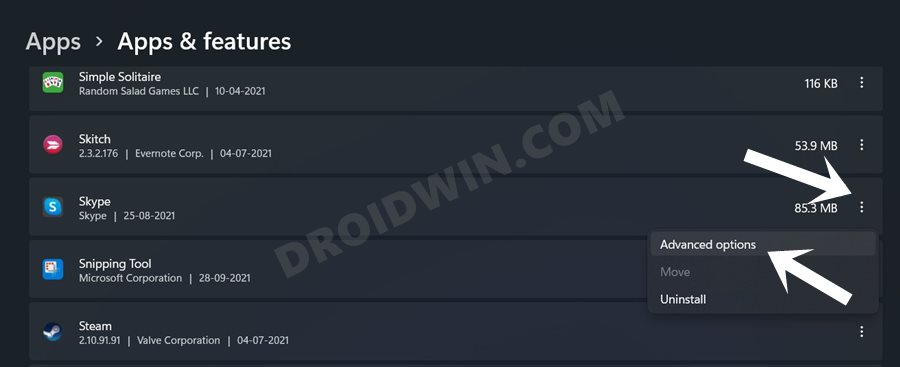
- Scroll to the concerned camera app, click on the overflow icon next to it, and select Advanced Options.
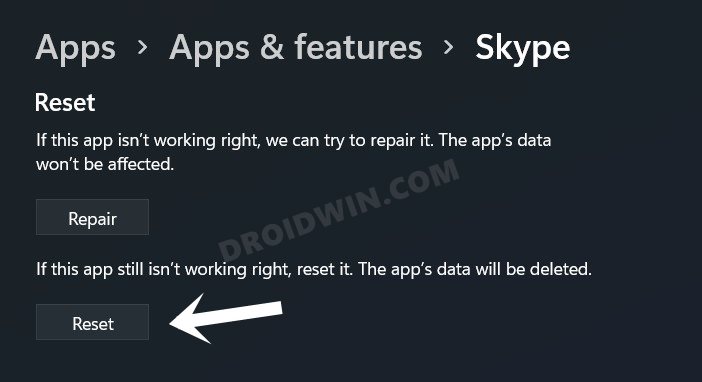
- Now scroll to the Reset section and click on the Reset button.
- Finally, reply in the affirmation in the confirmation dialog box that appears.
Once the app is reset, launch it and then set it up from scratch. Then check if it manages to fix the camera or webcam not working issue in Windows 11.
FIX 5: Update Webcam Drivers
If you are using an old or outdated version of the webcam drivers, then it is sure to cause a few issues with the proper functioning of the camera. Therefore, the best route forward is to update these drivers to the latest build, which could be done as follows:
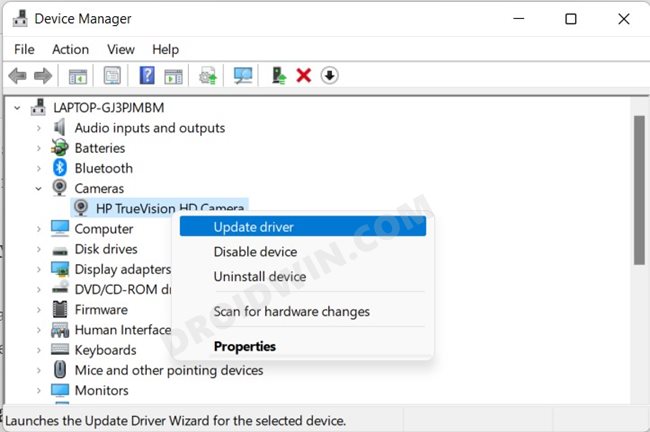
- Right-click on the Start menu and select Device Manager.
- Now expand the Cameras section, right-click on your camera, and select Update Driver.
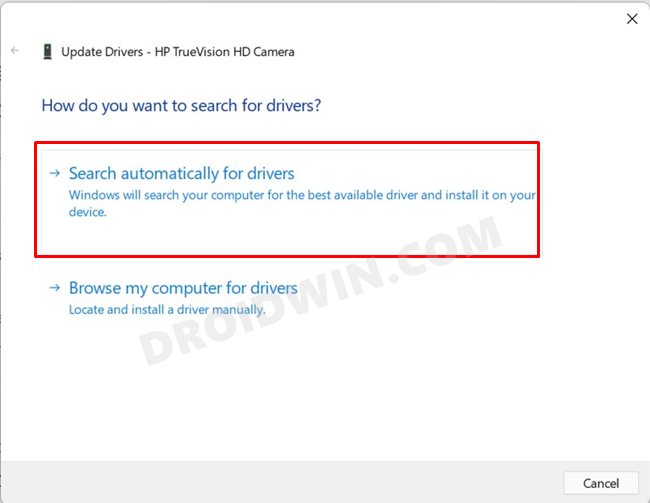
- Then click on Search Automatically for drivers.
- Windows will now search for the latest webcam drivers, download and install them.
- Once done, restart your PC and then check if it fixes the camera or webcam not working issue in Windows 11.
FIX 6: Re-Enable Webcam
The next method calls for disabling and then re-enabling your PC’s webcam. Doing so shall give it a fresh environment to work upon, which, in turn, could rectify the underlying issue as well. In this regard, there are two different approaches to re-enable the webcam and we have listed both of them below. You may refer to the one that you find easier to deal with.
Via Settings Menu
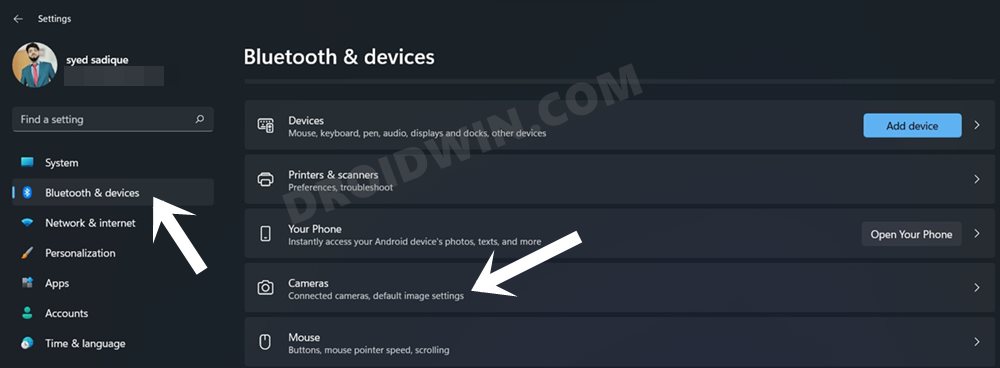
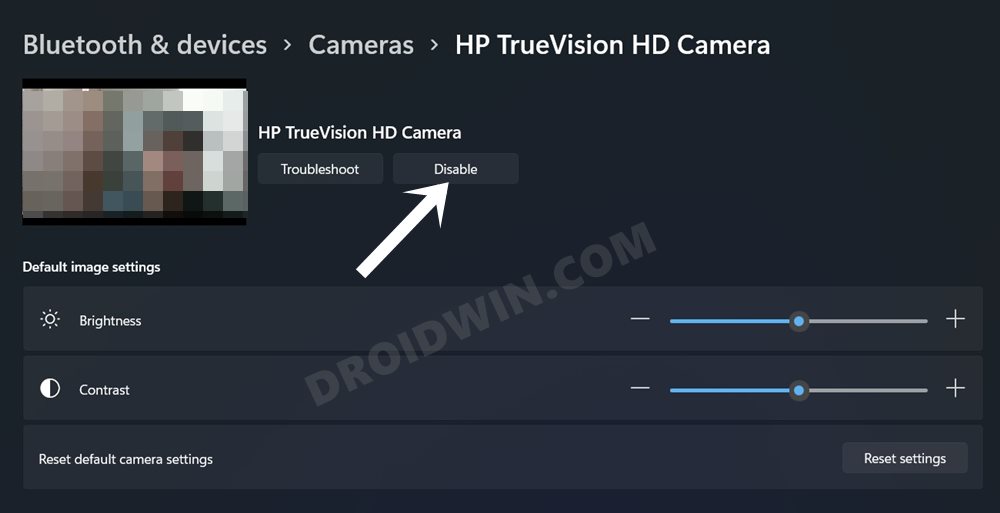
- Use the Windows+I shortcut keys to open the Settings menu.
- Then select Bluetooth and Devices from the left menu bar and go to Camera.
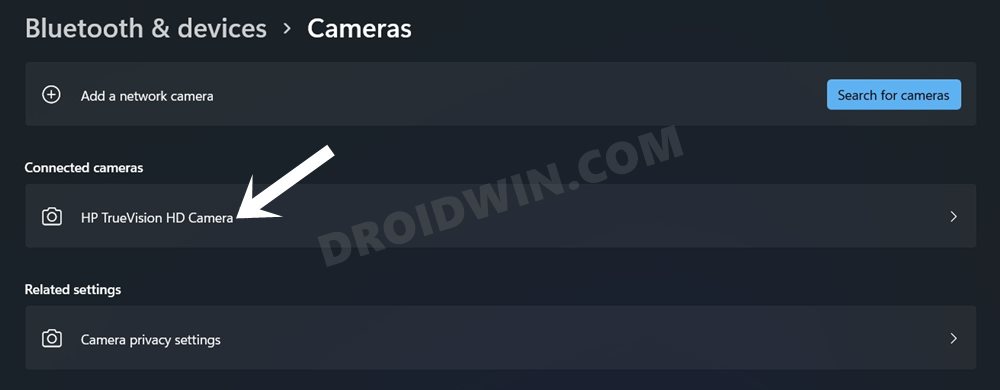
- Now select your webcam under the connected camera section.
- Then click on the Disable button, wait for a few seconds and then click Enable.
- Check if fixes the camera or webcam not working issue in Windows 11.
Via Device Manager
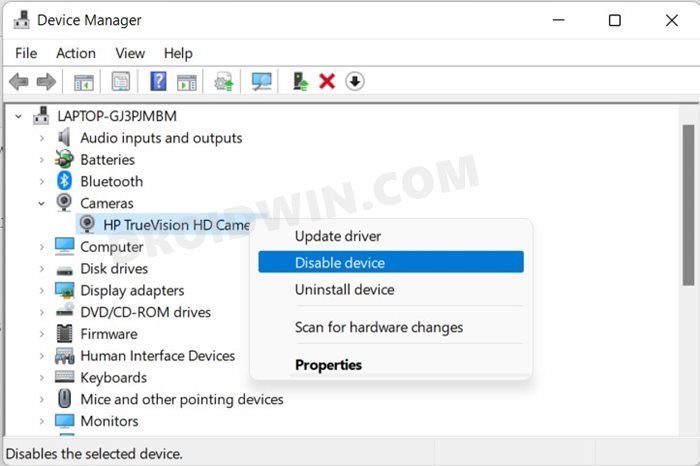
- Use the Windows+X shortcut keys and select Device Manager.
- Then expand the Cameras section, right-click on your camera and select Disable Device.
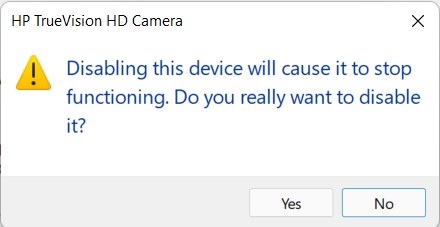
- You will now get a confirmation message, click Yes.
- Wait for a few seconds, right-click on your camera, and select Enable Device.
- Verify if it ends up fixing the camera or webcam not working issue in Windows 11.
So with this, we round off the guide on how you could fix the camera or webcam not working issue in Windows 11. We have shared six different methods for the same. Do let us know in the comments section which one spelled out success for you.


