In this guide, we will show you the steps to extract the boot.img file for root via DSU Sideloader. When it comes to rooting the device, you’ll have to extract the boot.img from the stock firmware, patch it via Magisk, boot your device using it, and finally use Magisk’s Direct Install to permanently obtain root. However, there are a few OEMs as well as a few less popular devices whose firmware isn’t available on the internet. So how could you grab its boot.img file?
Well, there exists a couple of nifty workarounds that should help you get the boot.img file directly from the firmware which is currently installed on your device, most of which are already covered in this guide. And now, we will be discussing another nifty method that should help you get this job done as well. Though it’s a slightly lengthier approach, but at the end of the day, it will give you your boot.img for rooting purposes. So on that note, let’s get started.
How to Extract Boot.img for Root via DSU Sideloader

- Download a GSI ROM that comes with built-in root permission
For example: system-squeak-arm64-ab-vanilla.img.xz
- Then install that ROM via the DSU Sideloader app.

- Once done, enable USB Debugging on your device and connect it to your PC.
- Then download and extract Android SDK Platform Tools.
- Now open the CMD window and type in the below command
adb shell
- You’ll get a prompt on your device, tap Allow/OK. Then type in the below command:
su
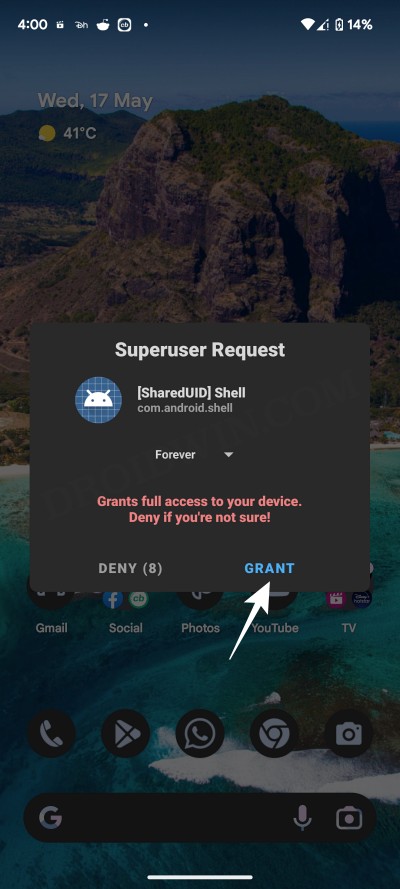
- You’ll get a SuperUser prompt, tap Allow/OK. Now type in the below command:
cd /dev/block/bootdevice/by-name/
- After that, execute the below command:
mkdir /sdcard/backup_img
- Finally, execute the following three commands: [press Enter after every command]
for file in *; do if [[ "${file}" = boot* ]]; then dd if=/dev/block/bootdevice/by-name/"${file}" of=/sdcard/backup_img/"${file}".img ; else continue ; fi done - A backup_img folder will now be created on Internal Storage. Go there and you should see the boot.img files.
- You could now use this boot.img file to patch it via Magisk and flash it via Fastboot to obtain the root.


That’s it. These were the steps to extract the boot.img file for root via DSU Sideloader. If you have any queries concerning the aforementioned steps, do let us know in the comments. We will get back to you with a solution at the earliest.