In this guide, we will show you two different methods to enable VoLTE and VoWiFi on your Xperia 1 III. This device from Sony beholds an impressive specs sheet. With Snapdragon 888 chipset under the hood, 12GB RAM, 120Hz refresh rate, and 30W Fast charging, its rise to fame were there for everyone to see.
However, some users have had a tough time trying to use the Voice over LTE and Voice over WiFi functionality on this device. If you are also in the same boat, then this guide shall help you out. Given here are two different methods through which you could enable VoLTE and VoWiFi on your Xperia 1 III.
Table of Contents
How to Enable VoLTE and VoWiFi in Xperia 1 III

Before trying out any of these two methods, it is recommended to take a complete device backup beforehand. Droidwin and its members wouldn’t be held responsible in case of a thermonuclear war, your alarm doesn’t wake you up, or if anything happens to your device and data by performing the below steps.
Enable VoLTE and VoWiFi in Xperia 1 III using Magisk
- To begin with, you will have to root your device: How to Root Sony Devices via Magisk and Boot.sin File.
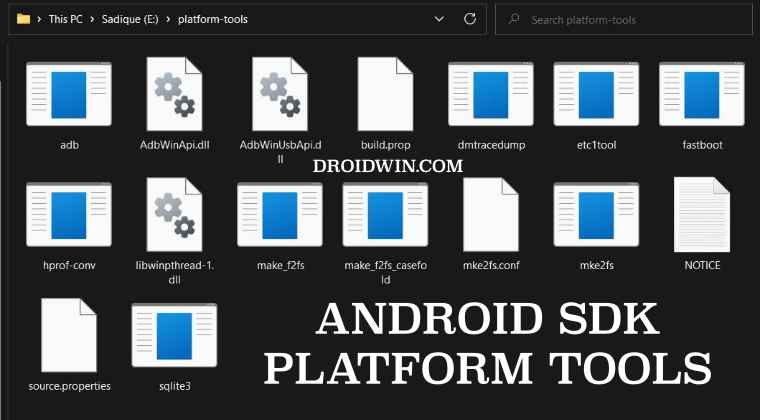
- Next up, download and extract Android SDK Platform Tools on your PC.

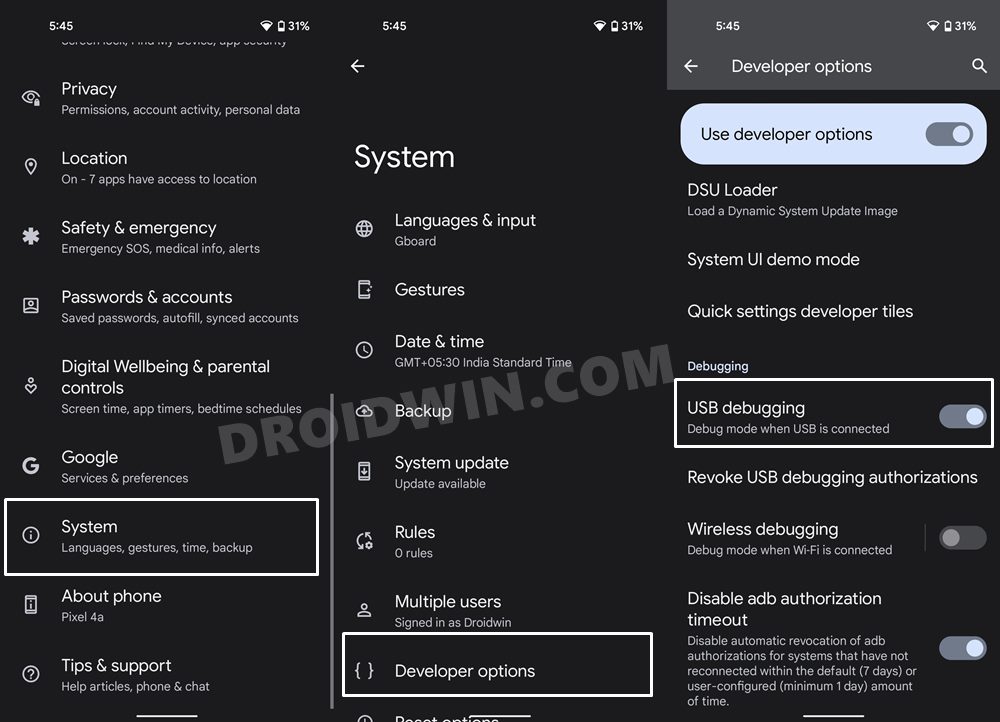
- After that, enable USB Debugging on your device and connect it to the PC via USB cable.
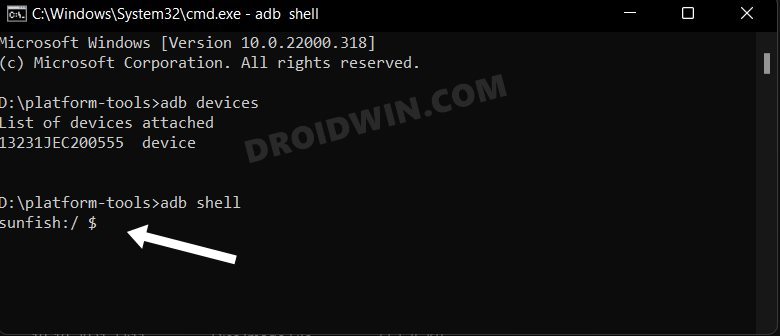
- Now go to the platform-tools folder address bar, type in CMD, and hit Enter.
- This will launch Command Prompt. So execute the below command to open the shell environment
adb shell
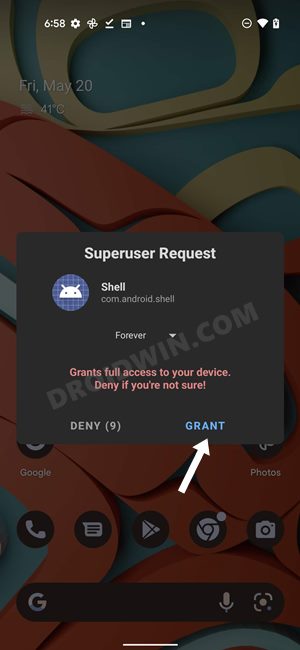
- You may now get a prompt on your device, tap Allow/OK. Then execute the below command:
su
- You will now get a Magisk SuperUser prompt on your device, tap Allow/Grant.
- Finally, execute the below command to enable VoLTE/VoWiFI on your device:
setprop persist.dbg.ims_volte_enable 1; setprop persist.dbg.volte_avail_ovr 1; setprop persist.dbg.vt_avail_ovr 1; setprop persist.dbg.wfc_avail_ovr 1

Enable VoLTE and VoWiFi in Xperia 1 III via MBN File
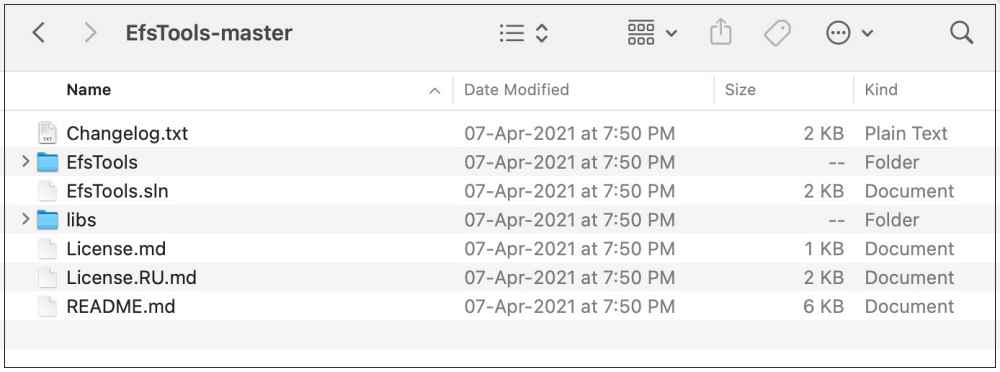
- To begin with, download and extract the EFSTools on your PC.
- Then download and extract the Android SDK Platform Tools on your PC.
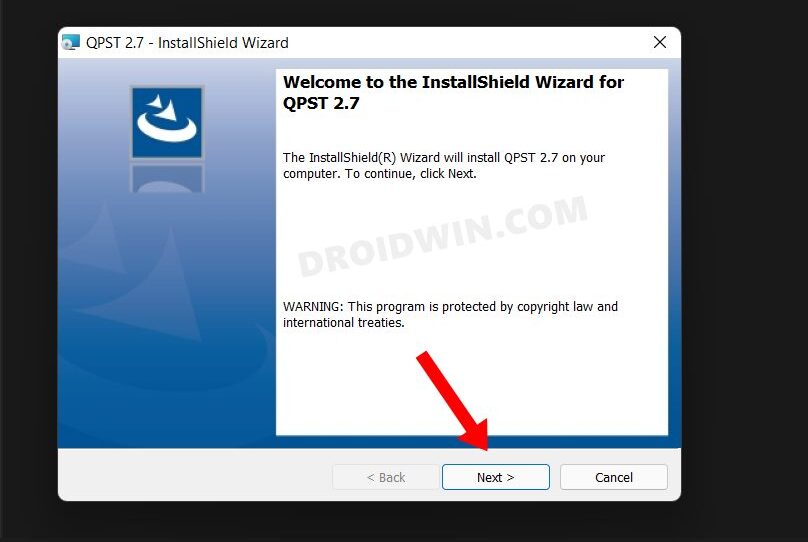
- After that, download and extract the QPST Tool on your PC.
- Now download and install the Qualcomm USB Diagnostic Port Drivers.
- Then download the MBN file for your device from below [Credits: XDA Senior Member anmolkakkar]
JIO Modem File: mcfg_sw_reliance.zip
Airtel Modem File: mcfg_sw_airtel.zip
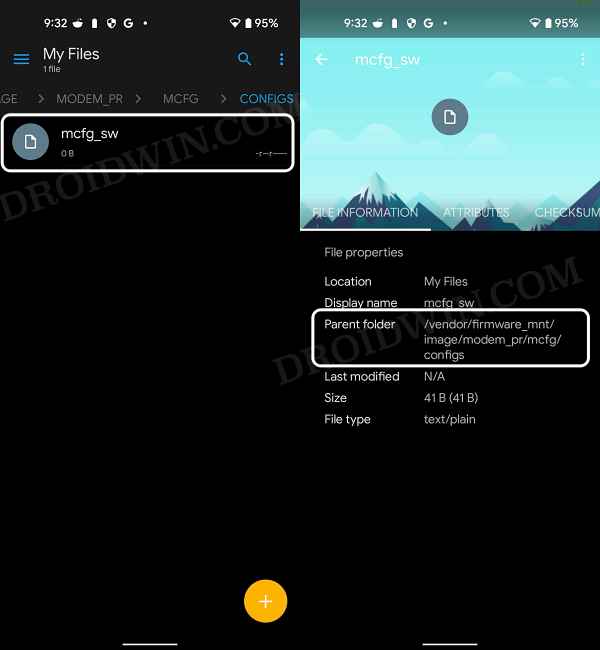
- Note: If you want to manually extract the MBN file, then go to this location and grab it:
/vendor/firmware_mnt/image/modem_pr/mcfg/configs/mcfg_sw - Once you have downloaded the modem ZIP file, rename it to mbn and transfer it to the EFSTools folder.
- Now open Command Prompt inside the platform-tools folder and execute the below command:
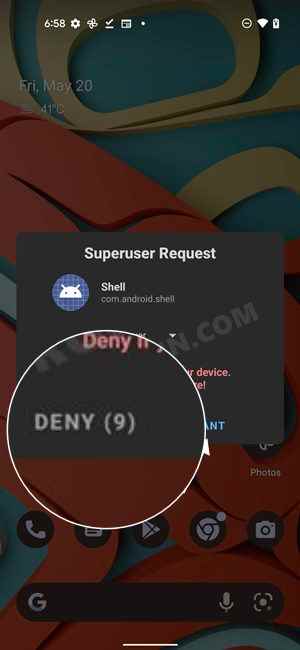
adb shell setprop persist.usb.eng 1
- You will get an Allow Access prompt, tap on Deny.
- Now open Device Manager and you should see your device name listed three times.
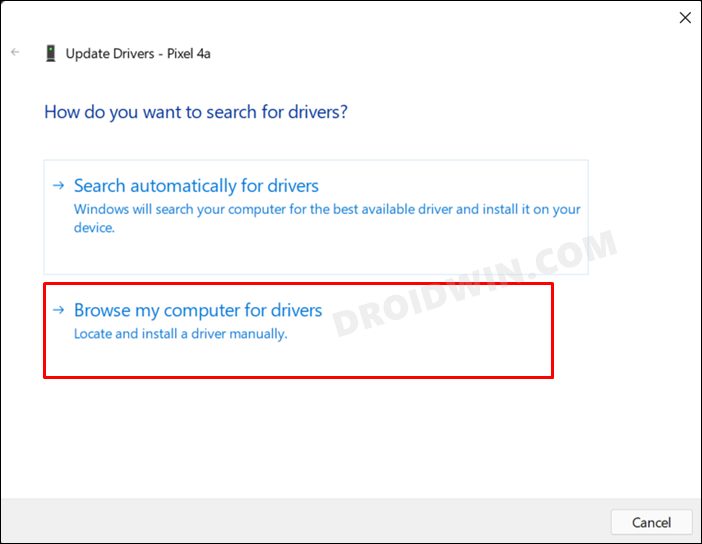
- Right-click on the first one and select Update Driver > Browse my computer for Drivers.
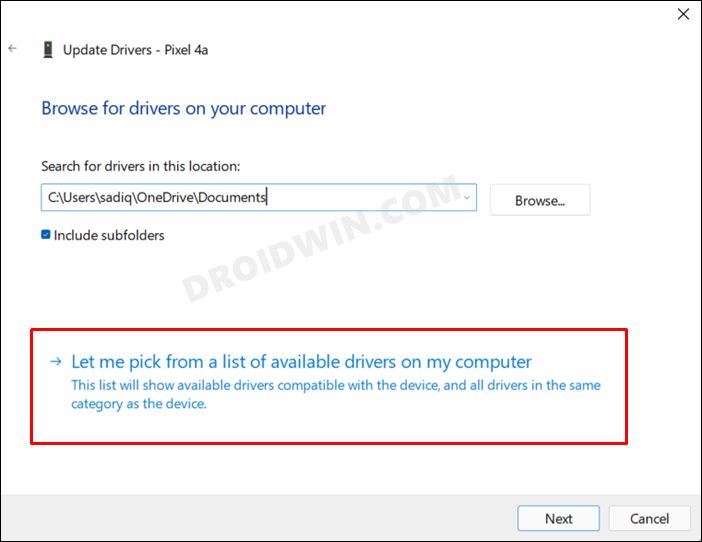
- Then select Let me pick from a list of available drivers on my computer.
- Then select Qualcomm USB diagnostic 9091 and hit Next. Do the same for the other two devices listed there.
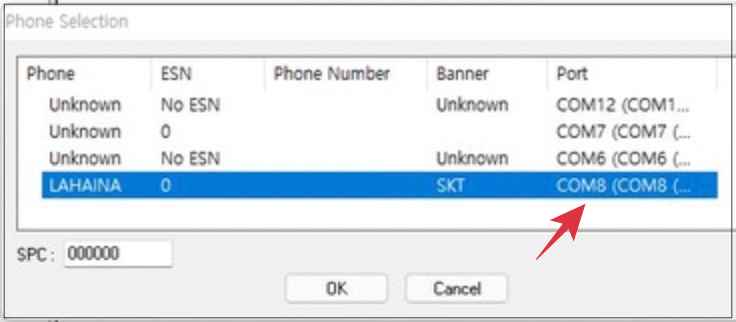
- Now launch QPST Configurator and select the COM port that corresponds to your device codename [LAHAINA].
- Then go to Device Manager and disable all the other ports, except for the one that has LAHAINA.
- Now launch Command Prompt inside the EFSTools folder and execute the below command
./EfsTools.exe efsInfo
- Then execute the below command to flash the MBN file:
./EfsTools.exe uploadDirectory -i mcfg_sw.mbn -o / -v
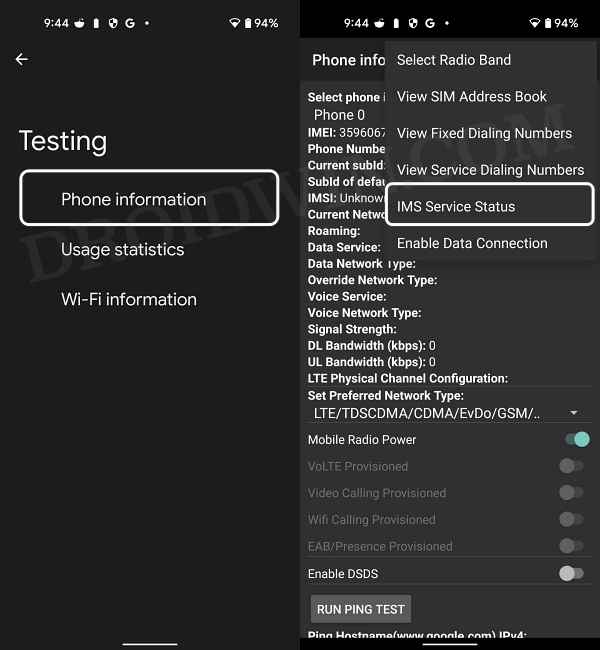
- Once done, reboot your device. Then bring up the dialer and type in the below code:
*#*#4636#*#*
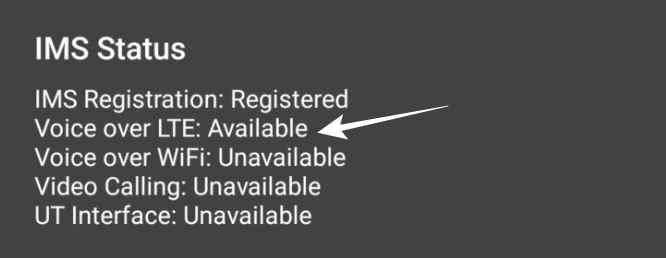
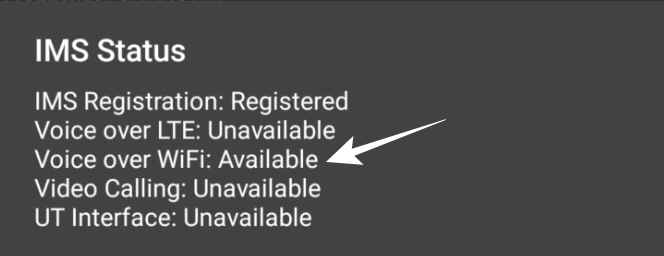
- Now select Phone Information. Then tap on the overflow icon situated at the top right and select IMS Status.
- You could now verify the Voice over LTE and Voice over WiFi status.
- When WiFi is disabled, you will see Available next to Voice over LTE.
- On the other hand, when WiFi is enabled, you will see Available next to Voice over WiFi.
That’s it. These were the two different methods to enable VoLTE and VoWiFi on your Xperia 1 III. If you have any queries concerning the aforementioned steps, do let us know in the comments. We will get back to you with a solution at the earliest.


kathirpriyan
hi sir my phone sony xperia 1 iii SOG03 MODEL. software version: 61.2.d.0.130 KDDI-K1 – USER.. VoLTE not Support . I M AIRTEL USER IN INDIA . how to Enable VoLTE provisioned flag.. any option sir?
Chethan kumar H
Hi, I have Xperia 5 iii Xqbq62 Variant. I want to know how to get airtel volte, Voltwifi and 5G working for this model. Any temp root solution available for this device ? Also how to root without loosing drm keys.
reju
it will also work with xperia 1ii?