In this guide, we will show you the steps to enable the two-button navigation menu on your device running Android 12. The twelfth iteration of the OS has bought in quite a few new and intriguing features. Among them, it’s the UI revamp that has managed to grab most of the limelight. The new Material You design in combination with the Wallpaper based theming engine has completely redesigned the look and feel of the OS. Then the privacy improvements and some nifty accessibility features like Camera Switch are also worth commendable.
![]()
However, there was one feature present in Android 9 but has since been removed from the OS. Yes, we are talking about the two-button navigation gestures. As of now, you only get two gesture styles- swipe navigations and 3 button navigation styles. While the reason behind the removal of the two-button navigation gestures from Android 12 is anyone’s guess, fortunately, there does exist a nifty workaround through which you could enable it back on. And this guide shall show you how to do just that. So without further ado, let’s get started.
How To Enable Two Button Navigation in Android 12
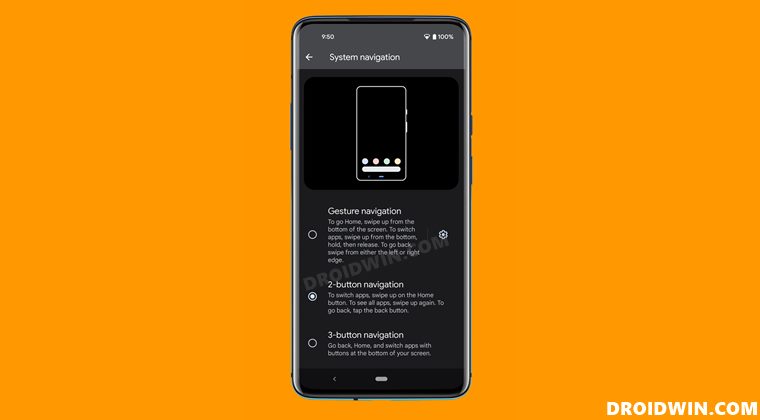
There’s only one prerequisite that your device needs to checkmark- it needs to be rooted. If you haven’t done so, then you may refer to our below guides. Once your device is rooted, you may then proceed with the instruction steps that follow:
- How to Root Android 12 via Magisk patched boot.img (without TWRP)
- How to Root Pixel Devices via Magisk on Android 12
To begin with, download the Two-Button Navigation Magisk Module [Credits: XDA Forum Moderator rwilco12]. There will be two versions of that module- short and standard. The short one will have a smaller navigation menu whereas the standard one will give you the standard sized navigation menu bar. You may download the one as per the requirement.
- Once you have downloaded the module, transfer it to your device.
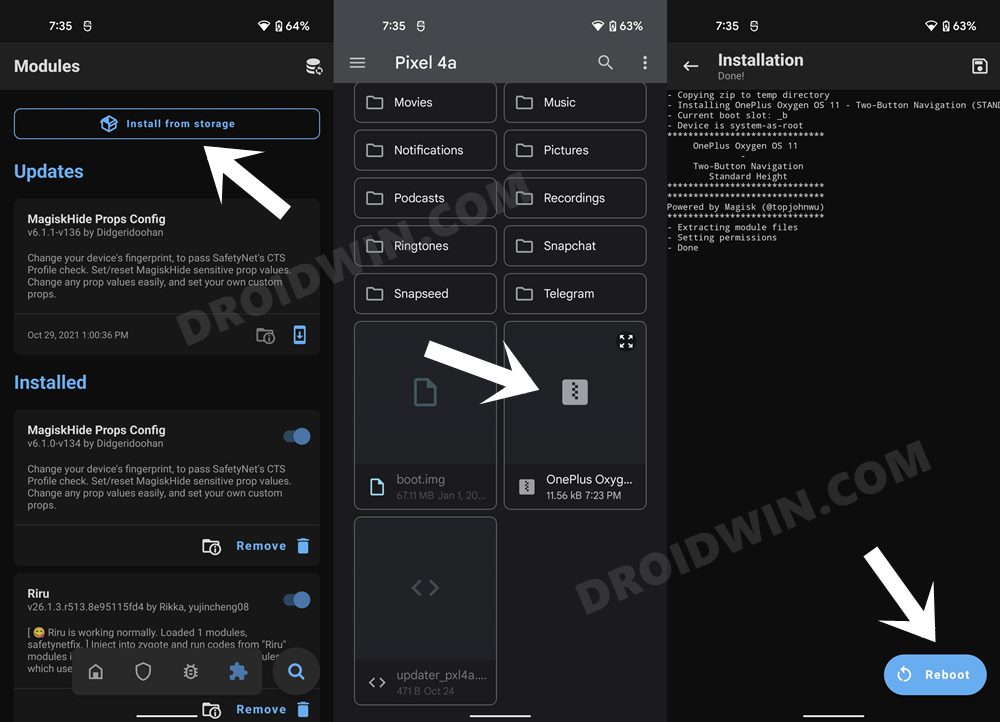
- Then launch the Magisk App and go to its Modules section.
- Tap on the Install from Storage button, navigate to the downaldoed module and select it.

- The module will now be flashed. Once done, tap on the Reboot button for the module to be active.
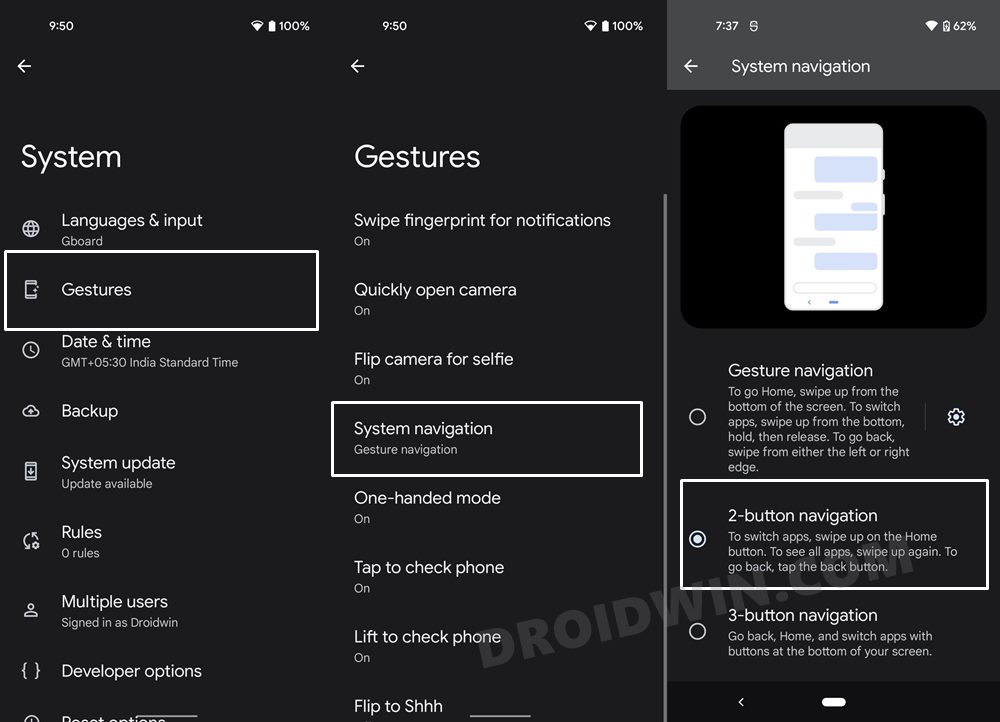
- Once the device boots up, go to Settings > System > Gestures.
- Then go to System Navigation and you should now see the 2-button navigation option. Just select it to make it active.

That’s it. These were the steps to enable the two button navigation menu on your device running Android 12. If you have any queries concerning the aforementioned steps, do let us know in the comments. We will get back to you with a solution at the earliest.
FAQ 1: Cannot Activate Two Button Navigation menu on my Android 12 Device
If even after flashing the above Magisk Module you don’t see the 2-button navigation option, then you will have to take the help of the ADB Command to activate it. Here’s how (just double-check that the Module has been successfully flashed beforehand):
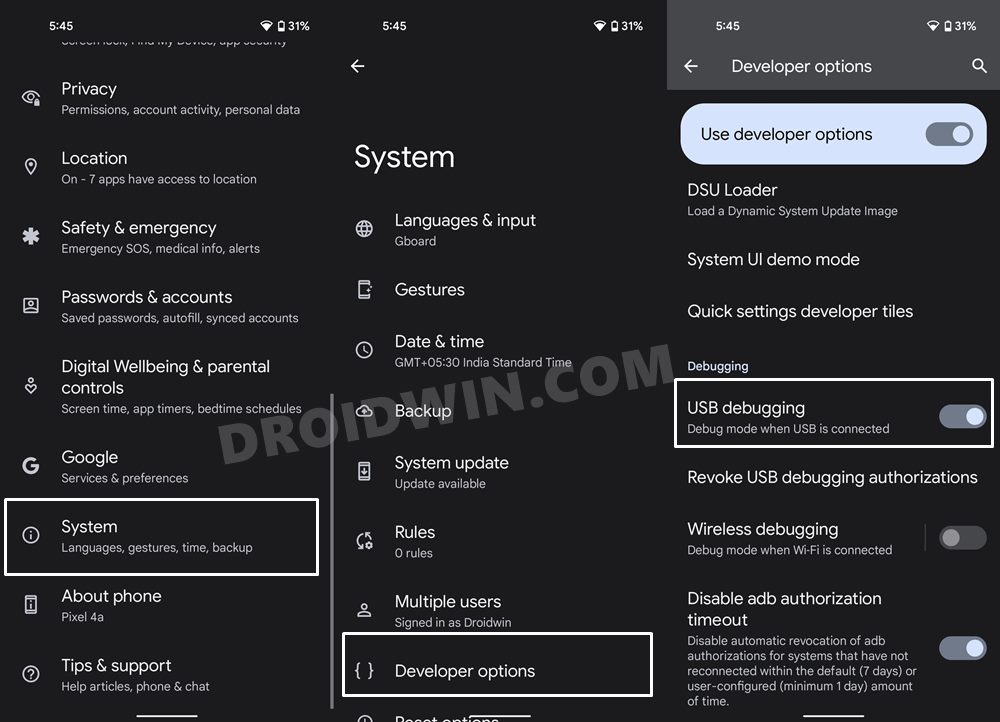
- To begin with, enable the USB Debugging on your device.

- Then download the Android SDK Platform Tools and extract it to any convinient location on your PC.

- Upon extraction, you should get the platform-tools folder. Go to this folder’s address bar, type in CMD and hit Enter. This shall launch the Command Prompt window.

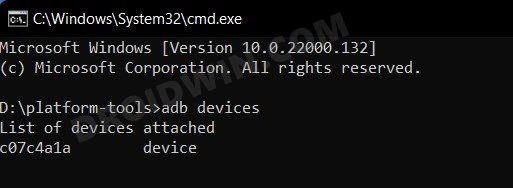
- Now type in the below command to verify the ADB Connection:
adb devices

- If you get the device ID then the connection stands successful. However, if you face any error, then refer to our guide to How to Fix All ADB and Fastboot Errors.
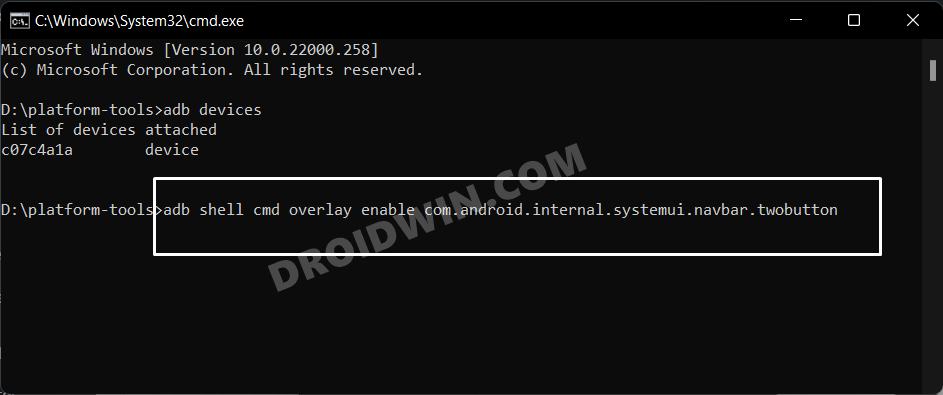
- Finally, execute the below command to enable the 2-button navigation option on your Android 12 device:
adb shell cmd overlay enable com.android.internal.systemui.navbar.twobutton

That’s it, the command should have enabled the two button navigation menu on your device running Android 12. Just go to Settings > System > Gestures > System Navigation and select the 2-button navigation option to activate it. And with that, we round off this guide. All your queries are welcomed in the comments below.




Enzo
Hi Mr Sadique Hassan,
Just wonder if you also can come out with the method of hiding navigation bar during using the three button bar? Previously i using the 3rd party app that using the overscan feature, but after google updated to android 11 all methods are gone and i really hate the fullscreen navigation
Thank you