In this guide, we will show you the steps to dual-boot two operating systems on your Android device. Dual Booting has been in practice for long in the PC domain, with the likes of Windows and Linux running simultaneously. if we talk about the same in the smartphone category, then there have been a few instances in the past where tech enthusiasts were able to carry out this task. But such was the complications involved that not many preferred to give it a try.
Fortunately, the process has now been extremely simplified and you could now get this job done without even using your PC or the need for a rooted device. Moreover, you could easily dual boot a stock ROM alongside a custom ROM or even two custom ROMs together on your Android device. So without further ado, let’s show you how all of this could be carried out.
Table of Contents
How to Dual Boot on Android [Run two Custom ROMs together]

To perform a dual boot, we will be creating your current ROM as the primary one. In this regard, it is recommended that your current base ROM should be a stock ROM, but I have tried it on a few AOSP ROMs as well, and the tweak worked well and good across that as well. So before proceeding ahead, make sure you already have a base ROM installed [any will do, for the sake of reference, I’m using Pixel Experience as the base ROM]. Once you have the base ROM ready, let’s proceed ahead to dual-boot it with another ROM.
This second ROM will be a GSI ROM and you have a plethora of options to choose from, including all the popular AOSP ROMs and official Google GSI ROMs too. While the process will not wipe off any data, it is still recommended to take a backup of all the data, just to be on the safer side. Droidwin and its members wouldn’t be held responsible in case of a thermonuclear war, your alarm doesn’t wake you up, or if anything happens to your device and data by performing the below steps.
- To begin with, unlock the bootloader on your Android device.
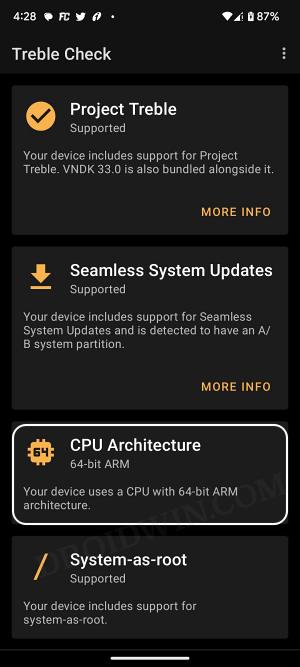
- Then install the Treble Check app and check out the results under the CPU Architecture section.

- Then download and install the Shizuku app from Play Store.
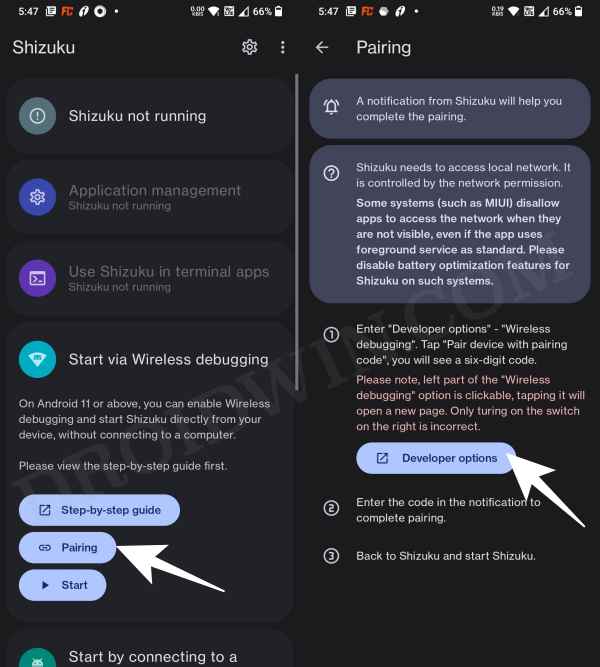
- Now launch it and tap on Pairing > Developer options.
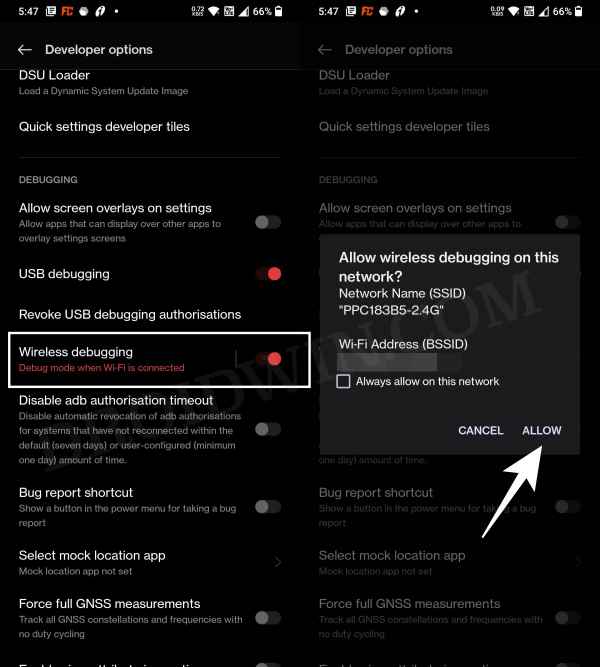
- Now enable the toggle next to Wireless Debugging.
- Then checkmark Always allow on this network and hit Allow.
- Now go back to the app and tap on Pair device with pairing code.
- You will now get a six-digit code as well as a prompt from Shizuku to type in that code.
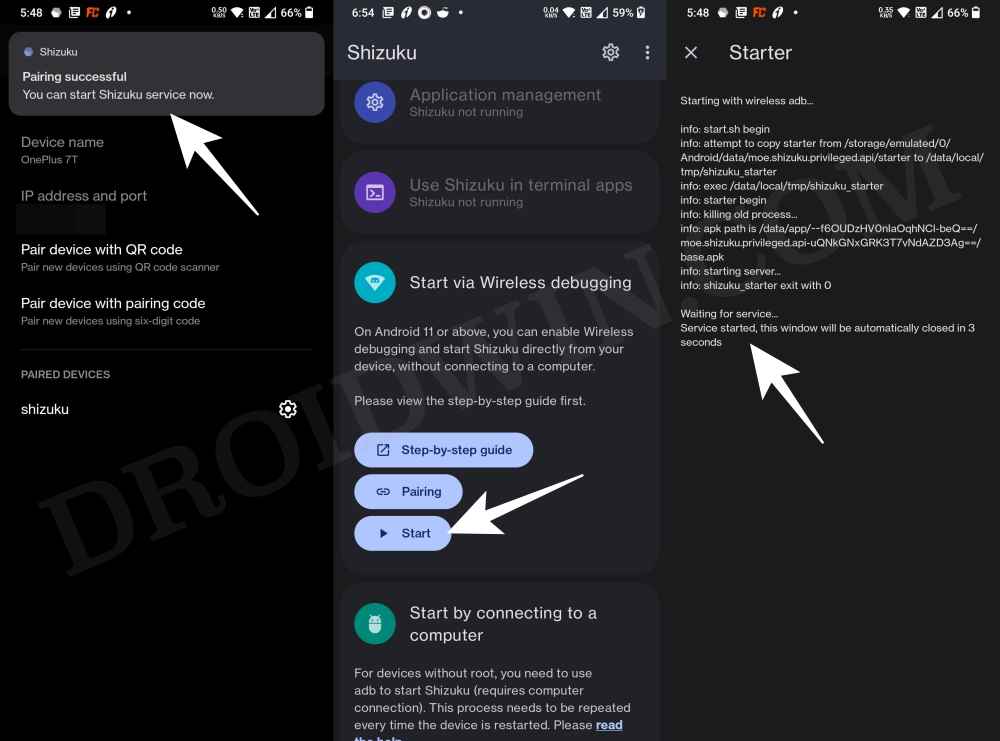
- So type in the code in that prompt and hit Enter. You should now get the Paring Successful message.
- Now go back to the app’s home screen and tap Start. It will now start the service and will notify you of the same.
- To verify, make sure you are getting the “Shizuka is running” message on its home page.
- Now download and install the DSU Loader App from GitHub.
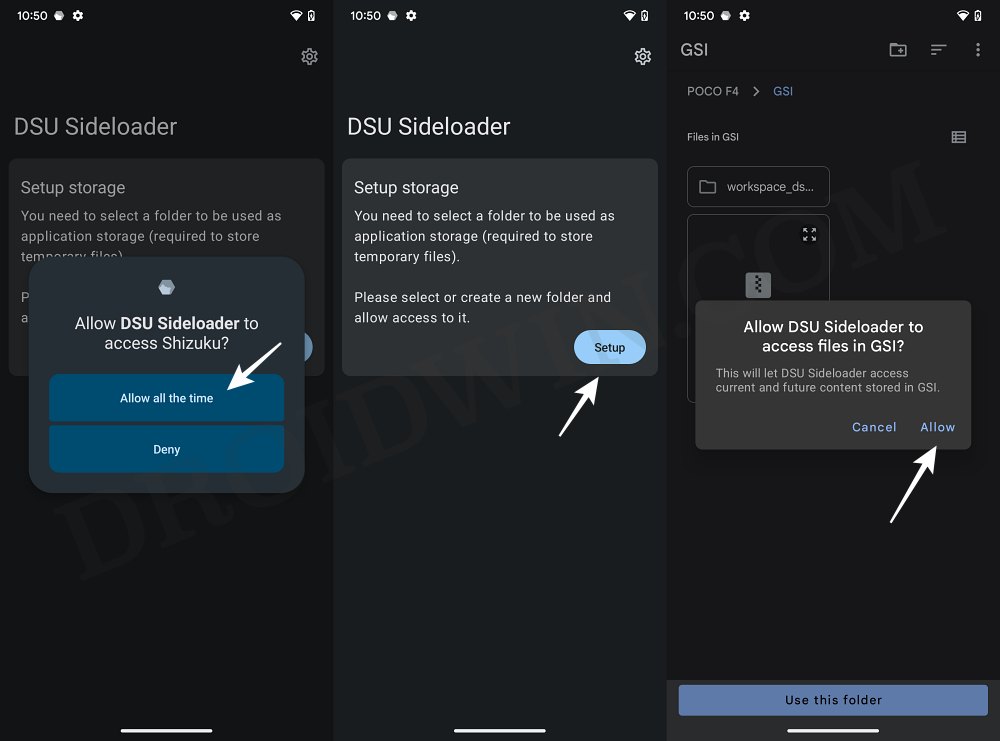
- Then launch DSU Loader, you’ll get a Shizuku prompt, tap Allow.
- Now download the desired GSI for your device from here: Custom GSIs | Official Google GSIs.
- Make sure to download the GSI that corresponds to your CPU Architecture [see STEP 2 above].
- Then create a new folder in the Internal Storage, name it GSI, and place the downloaded GSI ROM there.
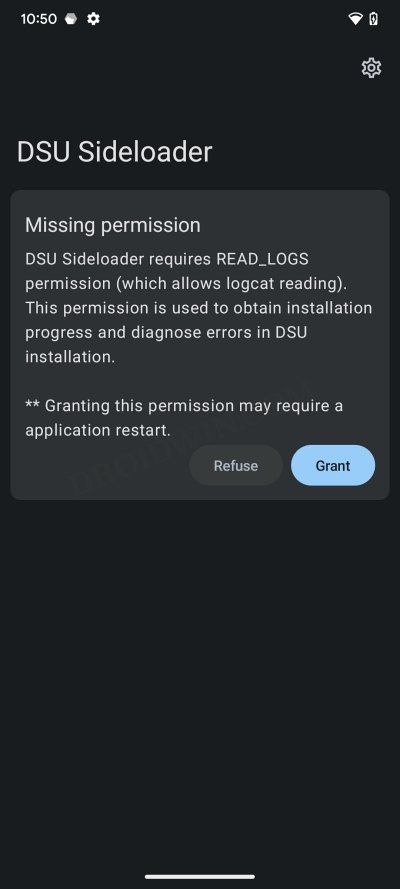
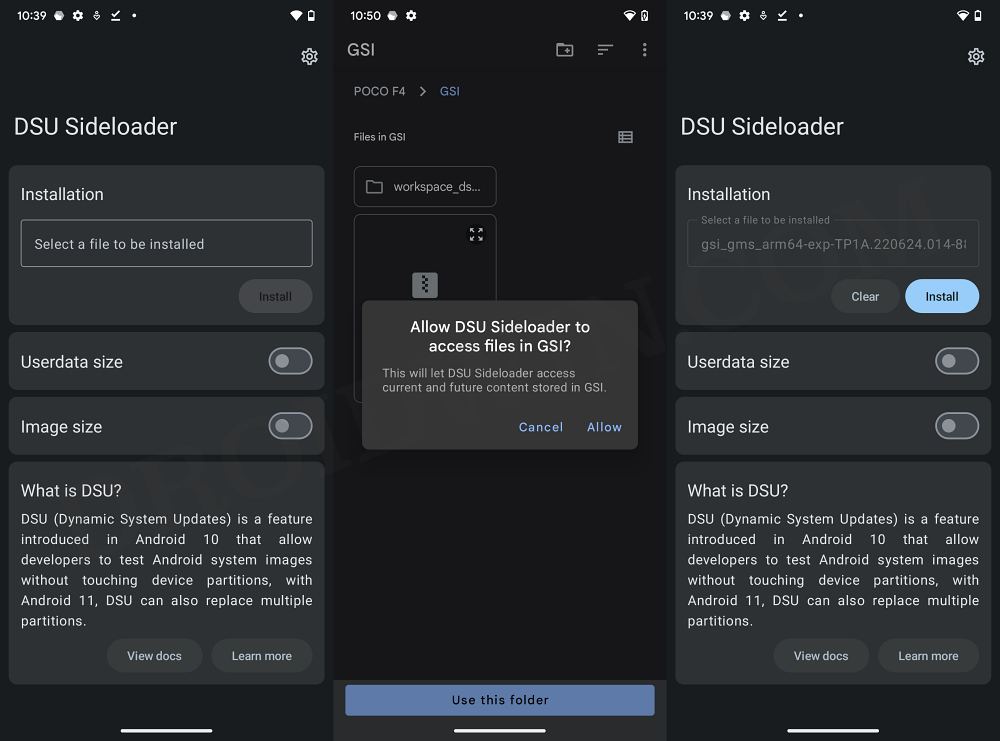
- Now go back to the DSU Loader App. You’ll now get the Missing Permission prompt, tap Grant.
- Once done, tap on Select a file to be installed. Then navigate to the downloaded GSI ROM and select it.
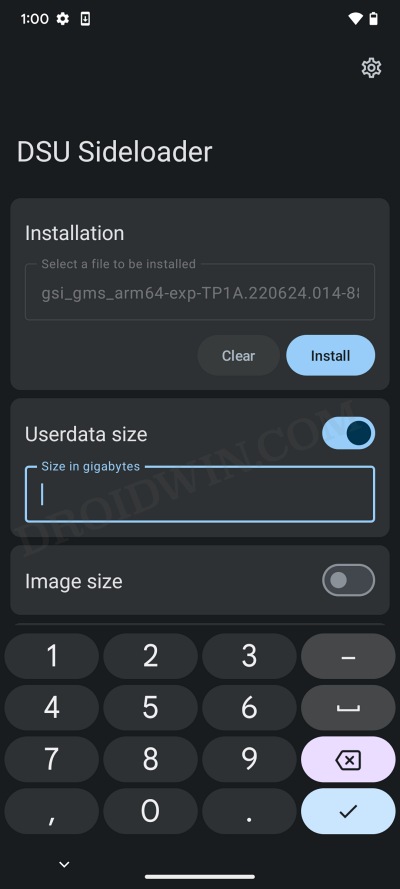
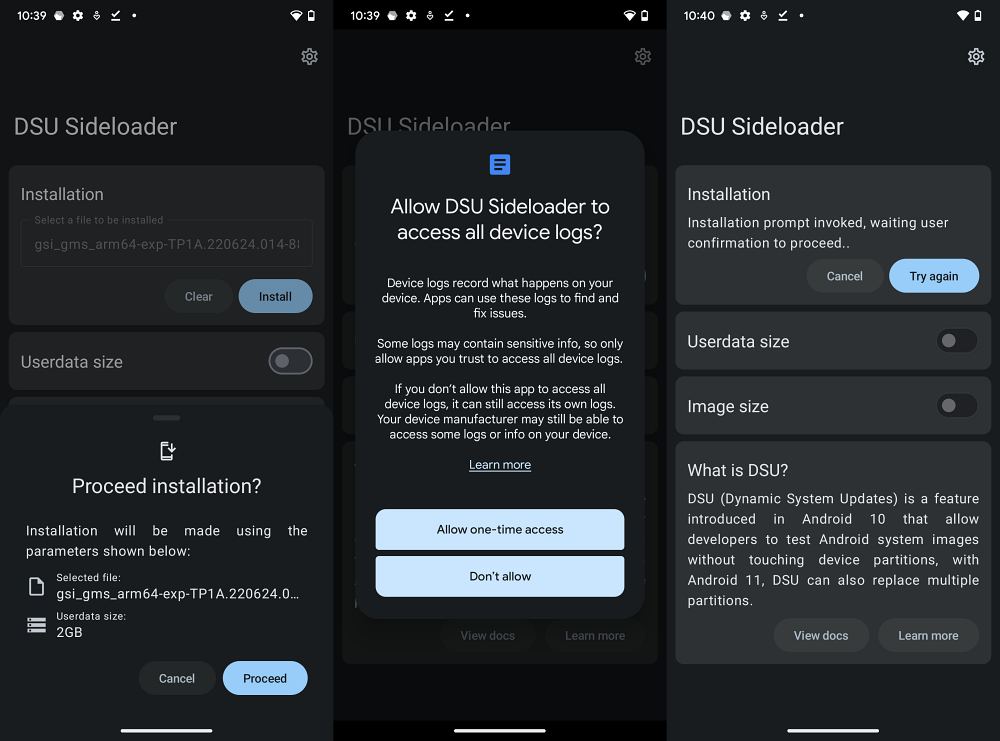
- By default, the GSI ROM will be given a data partition of 2GB. If you want to expand it, then enable the toggle next to Userdata size and type in the desired value in gigabytes.
- While you could grant it as much storage as you want [the more the better], however, some Android device limits the storage to 40% of the total storage value.
- Once that is done [Image Size should be left untouched], hit Install > Proceed.
- You will now get a prompt, tap Allow one-time access and hit Try Again. The flashing will now start and it could take a few minutes.
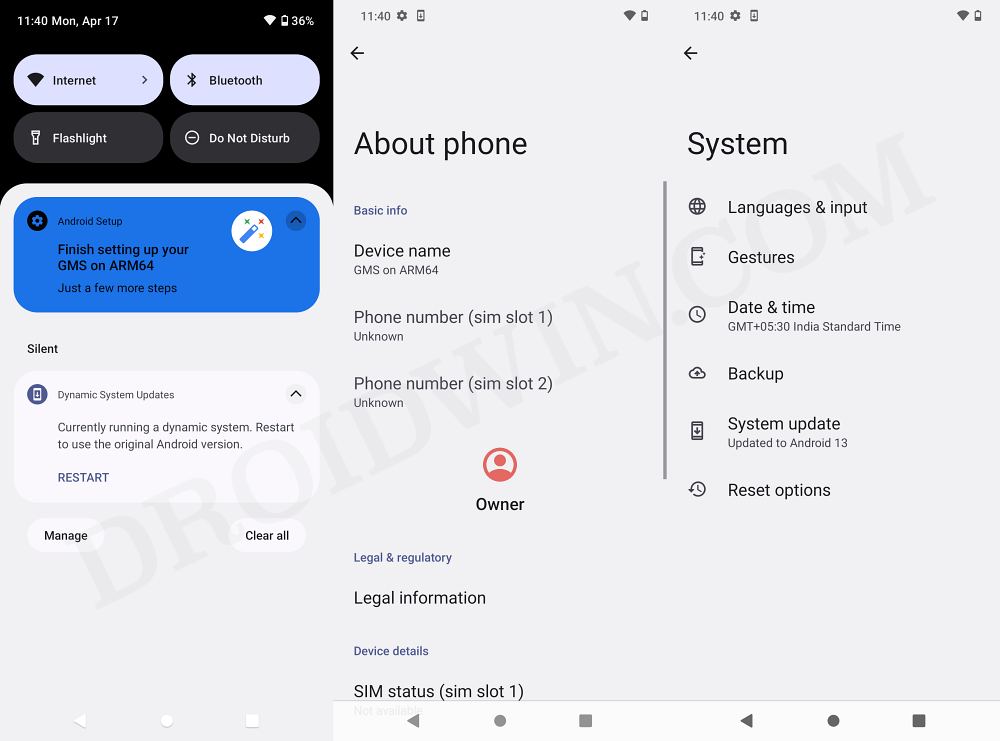
- Once done, just restart your device. Your device will now reboot to the newly installed GSI. Set it up as per your convenience and install the apps of your choice.
- Once you are done using the GSI ROM, just do a restart and you will be back to the stock ROM. To go back to the GSI ROM once again, simply do another restart!
Google Android 13 GSI Dual Booted with Pixel Experience - All the files, apps, and data stored in the GSI data partition could only be accessed when you are booted to the GSI ROM. It could not be accessed from the stock ROM [and vice versa].
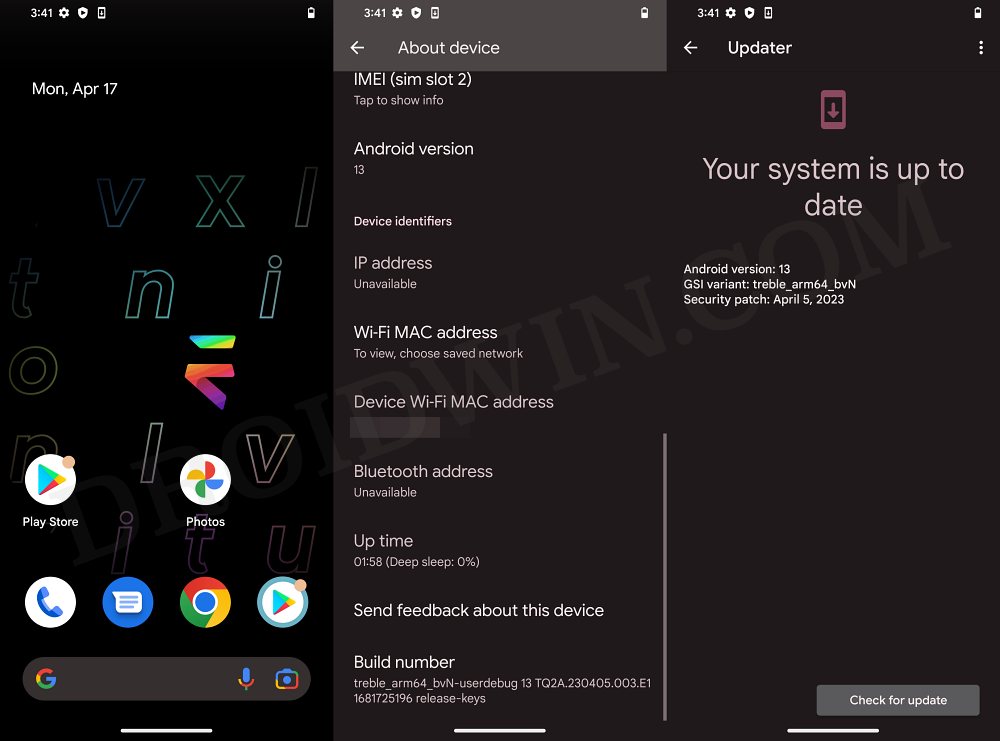
Evolution X Dual Booted with Pixel Experience

Video Guide to Dual Boot Two Custom ROMs on Android
Fix Device Stuck while booting GSI ROM
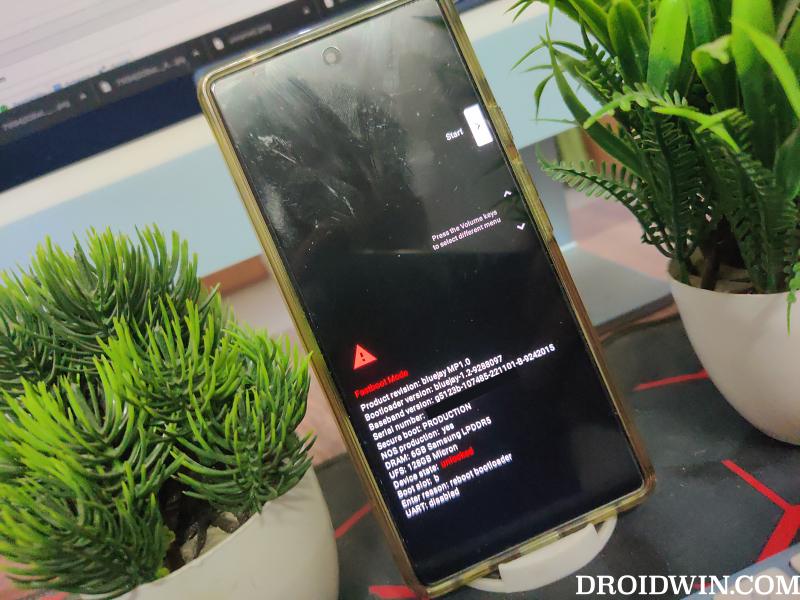
In some cases, the DSU Loader will be able to successfully flash the ROM but your device might not boot into it. Well, it’s nothing to worry about as the app will force reboot your device and it will then automatically boot to the primary OS. Once it does boot to the OS, you should boot your device to Fastboot Mode and then disable verity checks by flashing the vbmeta.img. Here’s how it could be carried out:
- To begin with, connect your device to the PC via a USB cable. Make sure USB Debugging is enabled.
- Then head over to the platform-tools folder, type in CMD in the address bar, and hit Enter. This will launch the Command Prompt.

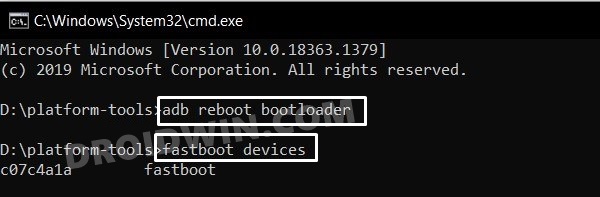
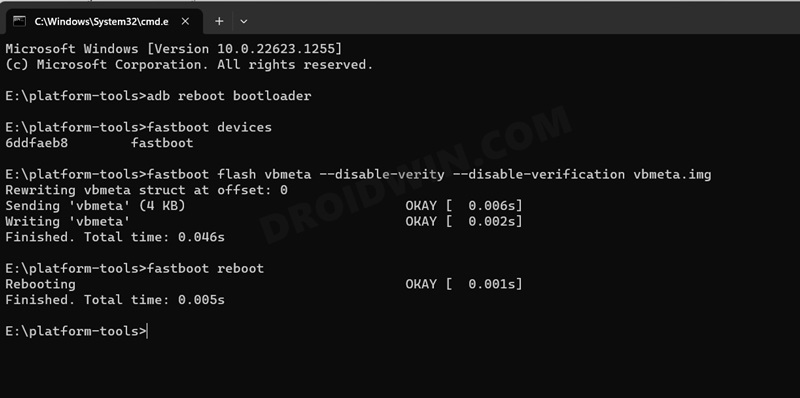
- Type in the following command in the CMD window to boot your device to Fastboot Mode
adb reboot bootloader
- To verify the Fastboot connection, type in the below command and you should get back the device ID.
fastboot devices
- If you are not getting any device ID, then install the Fastboot Drivers.
- Moving on, now download the vbmeta.img from here and transfer it to the platform tools folder.
- Then type in the below command to flash vbmeta and hence disable verity checks:
- Now execute the below command to boot your device to the OS:
fastboot reboot
- You may now reflash the GSI ROM using the DSU Loader app and there will be no issues this time around.
How to Uninstall/Remove GSI ROM
In my testing, after uninstalling the DSI Sideloader app and even after removing the GSI ROM file from my device, the device was still able to switch to the GSI ROM upon just a simple reboot. So the only way of removing/uninstalling GSI from your Android device was by performing a factory reset. Doing so will wipe off all the data, so make sure to take a backup beforehand.


