In this guide, we will show you the steps to downgrade Spotify and disable its automatic updates across Android, Windows, and Mac. When it comes to music streaming services, then there’s no denying the fact that Spotify is the biggest player in the market. it beholds a slew of nifty functionalities up its sleeves, with the Spotify Connect feature managing to grab the attention of the masses. However, in spite of all the goodies attached, it isn’t free from its fair share of issues either.
While the frequency of these issues isn’t on the higher side, but when it happens, it usually takes atleast a week for the developer to iron out the underlying bugs. And that is quite a lot of wait time. Fortunately, more often than not, you could easily rectify this issue by downgrading Spotify to its earlier sable build. And in this guide, we will show you how to do just that, across Android, Windows, and Mac. So without further ado, let’s get started.
Table of Contents
How to Downgrade Spotify on Android and Disable Automatic Updates

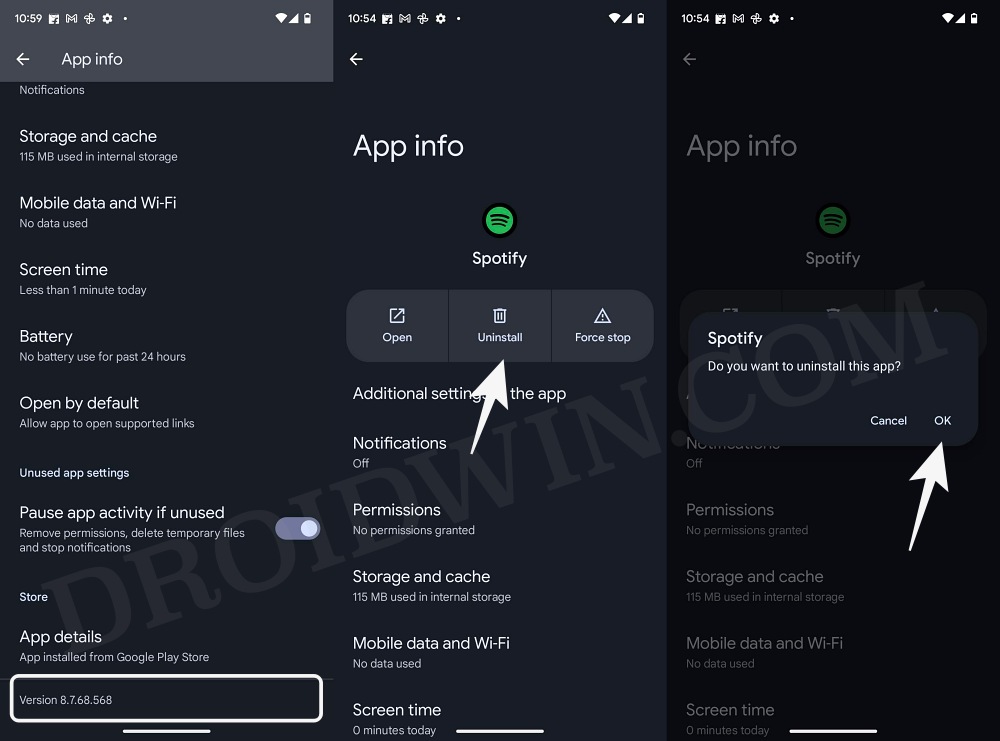
- Head over to Settings > Apps > See All Apps and select Spotify.
- Then scroll to the bottom and note down its current version number.
- After that, tap on Uninstall > OK in the confirmation prompt.

- Once the app has been uninstalled, download the older version from APK Mirror.
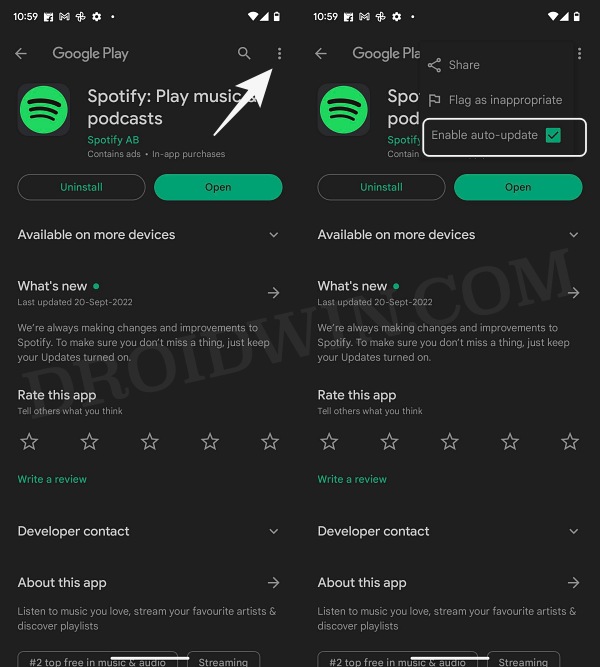
- Then install it but do not launch it. Rather go to its Play Store page.
- Now tap on the overflow icon situated at the top right and uncheck Enable auto-update.
- That’s it. These were the steps to downgrade Spotify and disable its automatic updates on Android.
How to Downgrade Spotify on Windows and Disable Automatic Updates
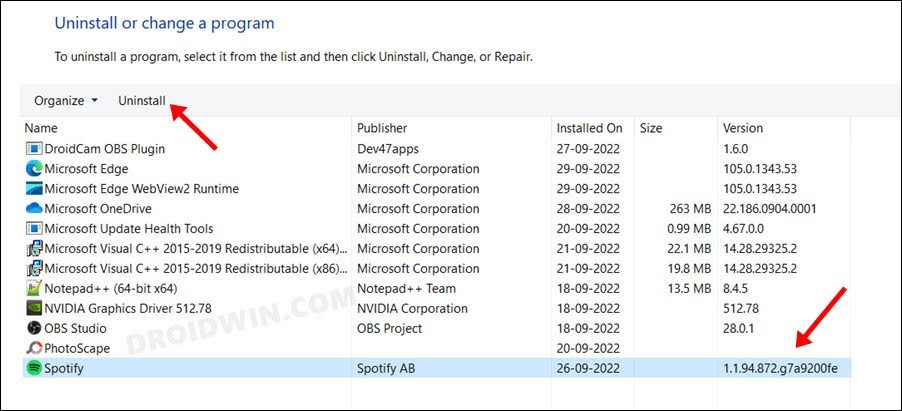
- Head over to the Start Menu, search Spotify, and hit Uninstall.
- You will be taken to the Control Panel page, note down the app’s version number.
- Then select it from the list and click on Uninstall.
- Once the app has been removed, download its older version from here.
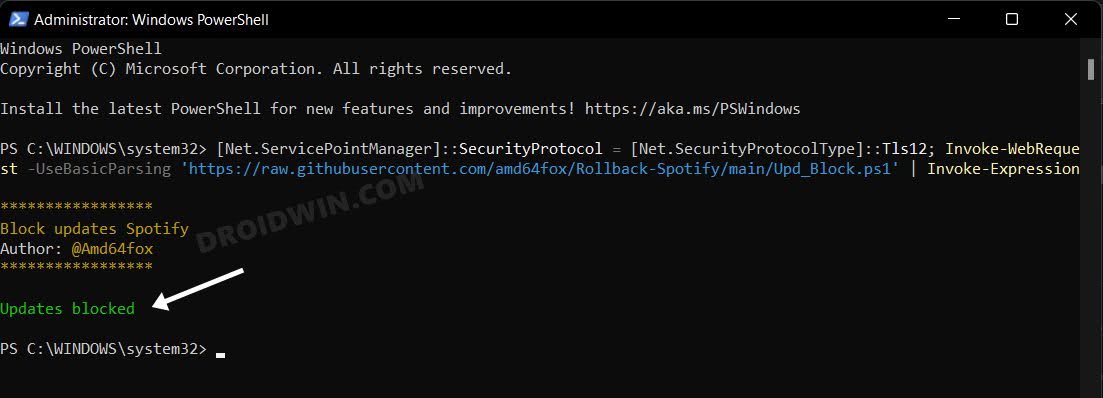
- Then install the app but do not launch it. Rather open PowerShell as an administrator.
- Then execute the below command to disable its auto-updates:
[Net.ServicePointManager]::SecurityProtocol = [Net.SecurityProtocolType]::Tls12; Invoke-WebRequest -UseBasicParsing 'https://raw.githubusercontent.com/amd64fox/Rollback-Spotify/main/Upd_Block.ps1' | Invoke-Expression
- That’s it. These were the steps to downgrade Spotify and disable its automatic updates on your Windows PC.
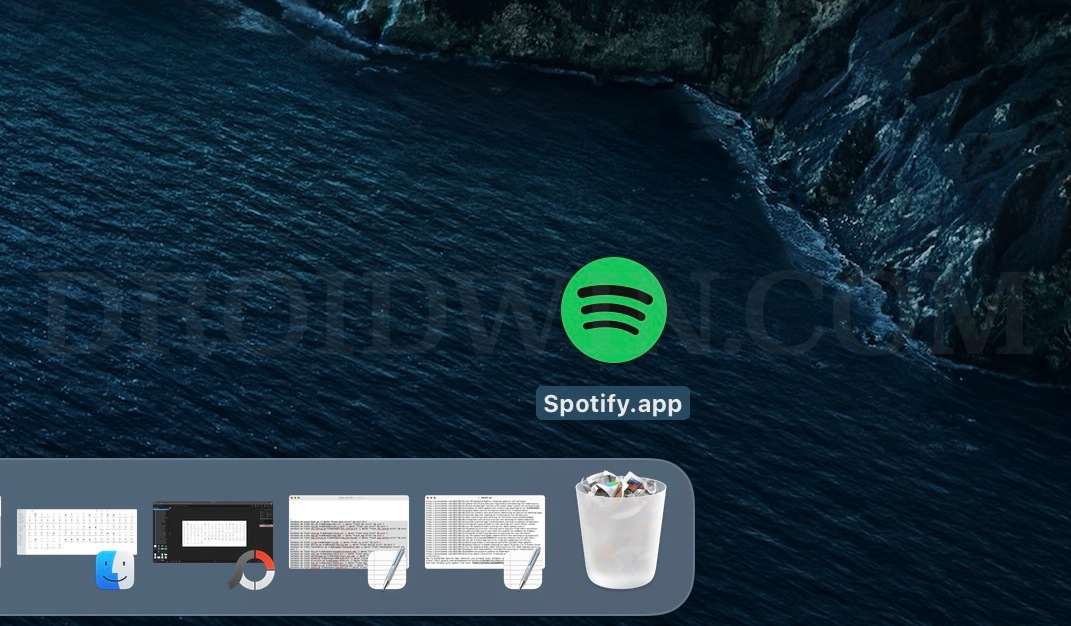
How to Downgrade Spotify on Mac
- Open the Finder window and go to Applications.
- Then drag and drop the Spotify app to the bin to uninstall it.
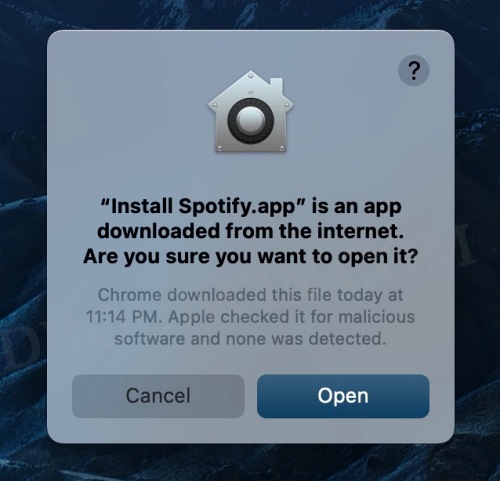
- Once done, download an older version of Spotify from here.
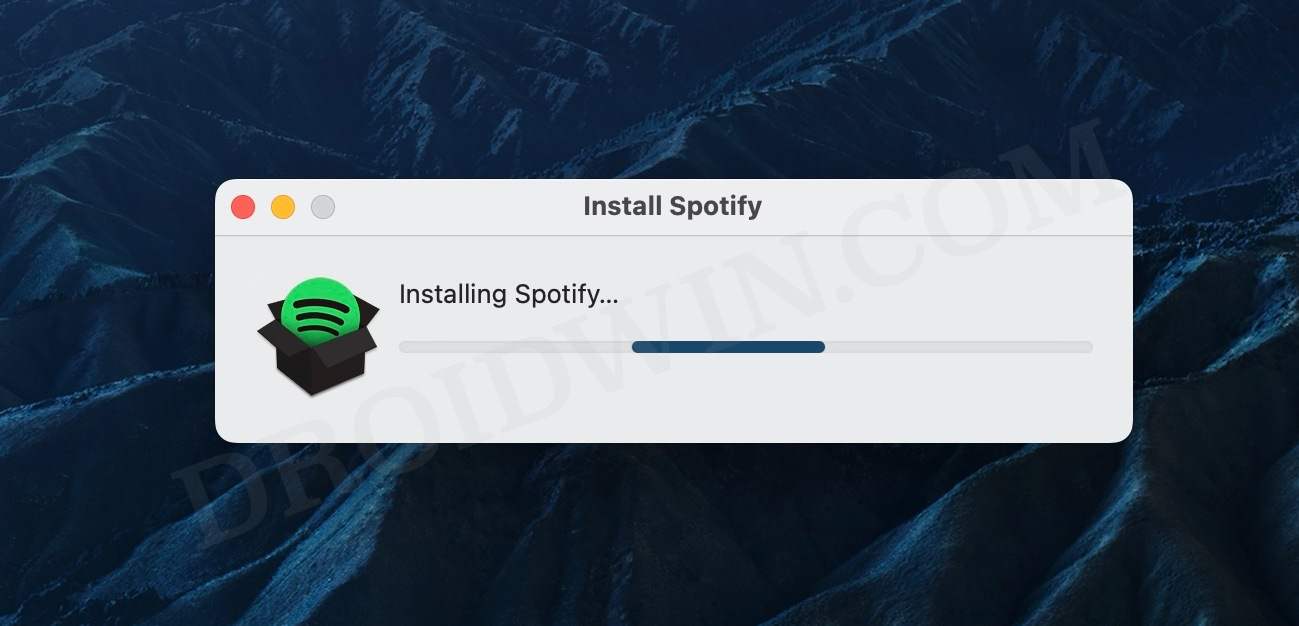
- Then launch the setup and click Open in the confirmation prompt.
- That’s it. The older version of Spotify will now be installed on your Mac.
So these were the steps to downgrade Spotify and disable its automatic updates across Android, Windows, and Mac. If you have any queries concerning the aforementioned steps, do let us know in the comments. We will get back to you with a solution at the earliest.


dodo
hi, would my playlists be gone?
Chris
Worked great for me on Win10. Thank you!
waesrf
Thanks a lot… doesnt work at all.
John Mc
You don’t actually give instructionsas to prevengting automatic updated for the Mac OS.
Mike
Hello,i`d like to know how can i return back to enable the update of spotify on windows, if sometime i change my mind ….thanks anyway,for your advices ! …