In this guide, we will show you the steps to change font style or apply custom fonts on your Android device. Barring a few smartphones [such as Pixel], nowadays most OEMs come built-in with a slew of customization features. From applying custom themes to changing the app icons and wallpapers or even switching to a different font, the possibilities stand endless.
But if we talk about the fonts, then it is slightly limited in number. On top of that, some OEMs don’t even allow uploading and using your own custom fonts. Well, this is where this guide will come in handy. In this tutorial, we will show you the detailed steps to change font style or apply custom fonts on your Android device. So without further delay, let’s get started.
How to Change Font/Apply Custom Font in Android

Before starting, make sure that your device is rooted via Magisk. If you haven’t done so yet, then check out our guide on How to Root Android 13 via Magisk Patched Init_Boot/Boot. Once done, you may then start off with the below steps. Moreover, if the below module doesn’t have the font of your choice, then you may also manually add it via the instructions given in this guide: Add Custom Fonts on Android without using any Magisk Module!
- Download the Font Manager Magisk module and transfer it to your device.
Direct Download Link [GitHub Page]
- Then launch the Magisk app, go to Modules, and tap on Install from Storage.

- Now select the Font Manager module and it will be flashed. Once done, hit Reboot.
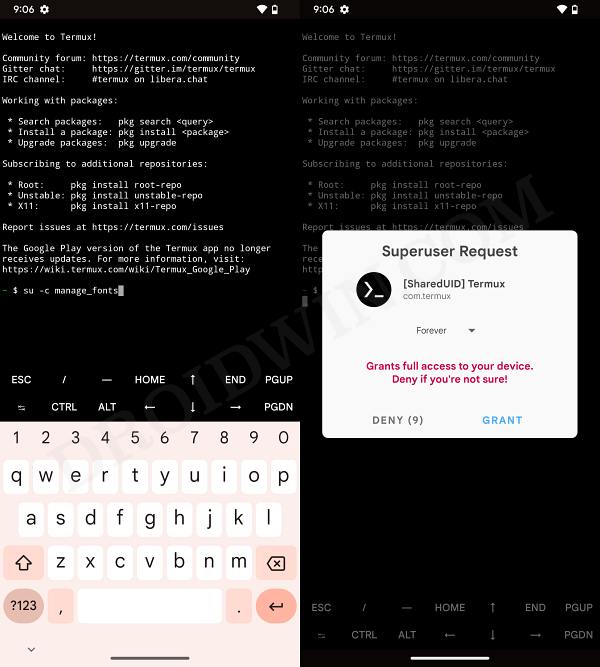
- Once it boots up, download and install the Termux app from Play Store.
- Then launch it and execute the below command [you will get a Magisk prompt, tap Grant]
su -c manage_fonts
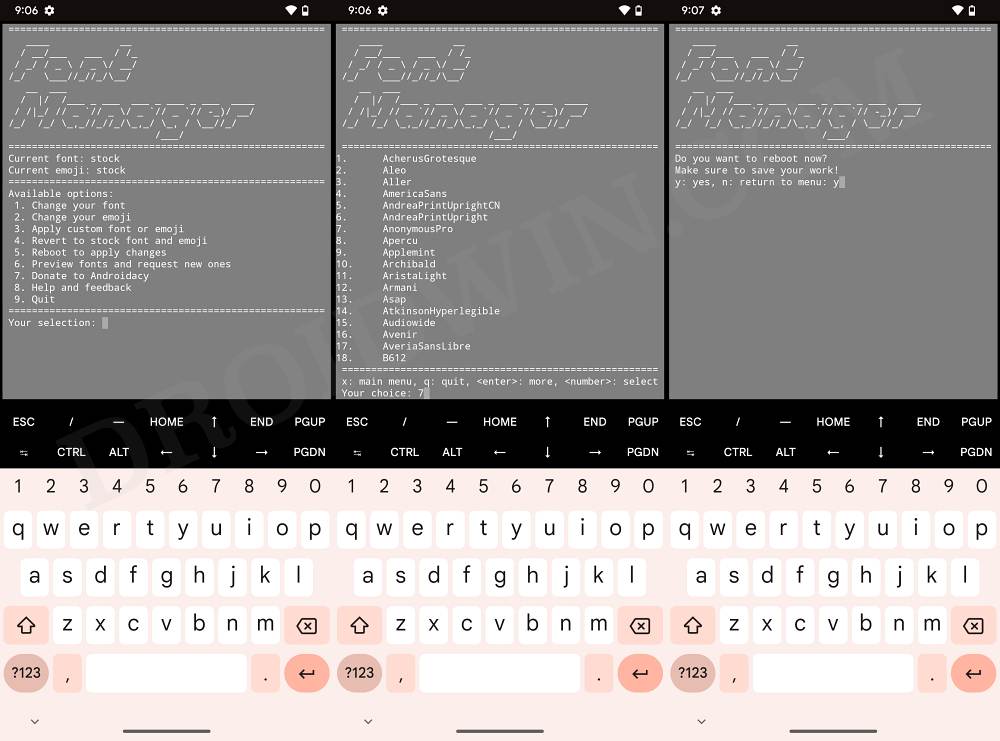
- Now type 1 if you want to select from preset custom fonts and hit Enter.
- Then type in the desired number next to the font that you want to install.
- Finally, hit Y to reboot your device and the newly installed font to be active.
- On the other hand, if you want to upload a custom font, then type 3 in the font main menu.
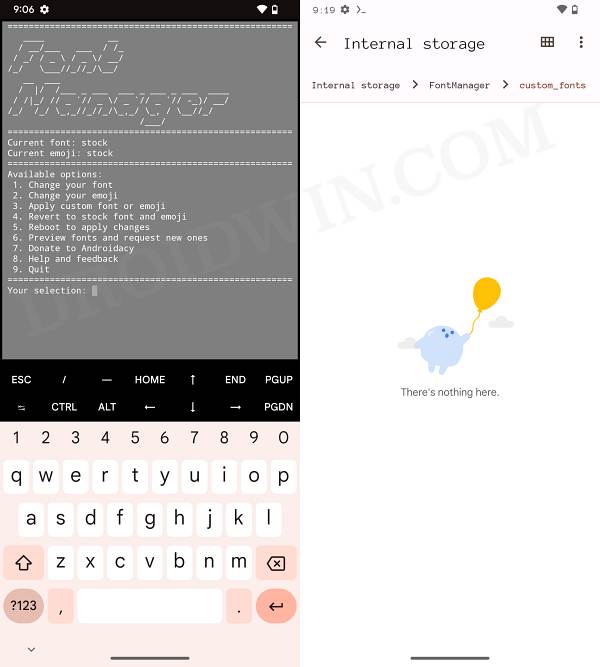
- It will now create a directory in Internal Storage > Font Manager > custom_fonts.
- So go to that folder and place your custom font file there. Once done, again type 3 in the font main menu.
- It will now pick up the font from the custom_fonts directory and then install it.
- Finally, type Y to restart your device and the new font to be active.

These were the steps to change font style or apply custom fonts on your Android device. If you have any queries concerning the aforementioned steps, do let us know in the comments. We will get back to you with a solution at the earliest.


