In this guide, we will show you the steps to change the DNS Server Address in Windows 11. When you want to open a particular website, you just need to type in the associated domain name, such as google.com. However, the web browser doesn’t deal with these plain text formats, rather it requires the unique IP address that is linked to that site, such as 192.168.0.1.
But since it is near about impossible for us humans to remember these numerical IP Addresses corresponding to every site, we have been blessed with the liberty to just enter the domain name and the rest is taken care of by the DNS. In other words, the Domain Name System translates domain names to their IP addresses so that the web browser could understand the request and hence load the required website.
So this DNS could also be referred to as the Internet Phonebook that beholds the IP Address of all the websites. As a result, whenever you type in a URL into the web browser, the latter straightaway refers to this book to find out the associated IP. With this, you would have got a decent idea regarding the functioning of the DNS. Now let’s address the elephant in the room: why is there a need to change the DNS Server in Windows 11?
Table of Contents
Why Should I Change the DNS Server?
By default, your Internet Service Provider would have automatically assigned you a DNS. So why should you then go the extra mile to change this DNS address? Well, it is due to the plethora of benefits involved. If you switch to a third-party DNS service, then you might get an additional boost in the network speed, as well as protection against DNS attacks (phishing scams, cache poisoning, DNS Hijacking, etc).
In some instances, you might also be able to access the geo-restricted contents, though all these ‘features’ ultimately depend on the DNS Service you settle for. Then there were a few users who decided to change the DNS just because their default DNS data was getting corrupt at regular intervals which required flushing it every now and then.
To overcome this issue, they simply switched over to a third-party DNS service. Well, there could be a plentitude of reasons why you might need to carry out this task. So without any further ado, let’s now make you aware of the steps to change the DNS Server Address in Windows 11. Follow along.
How to Change DNS Server Address in Windows 11
Two of the most popular DNS Severs includes the offering from Google and Cloudflare. And in this guide, we will be sharing the DNS Addresses of both these services as well as their implementation steps. Let’s get started.
- To begin with, head over to the Start Menu, search Control Panel, and open it.
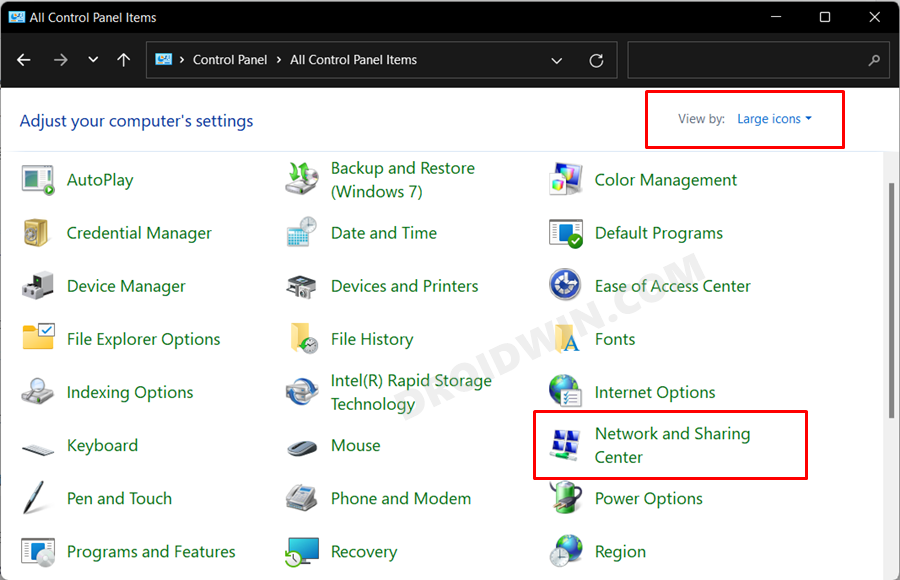
- Then change the View by type to Large Icons from the top-right menu and click on Network and Sharing Center.

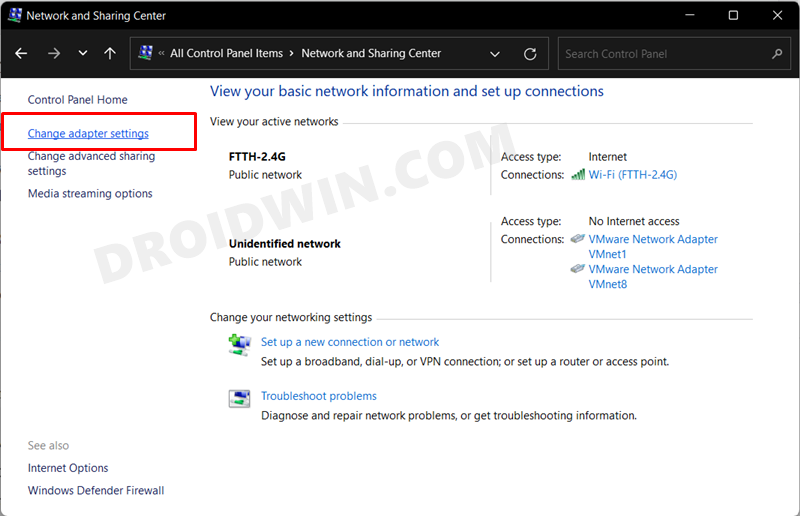
- After that, click on the Change adapter settings option from the left menu bar.
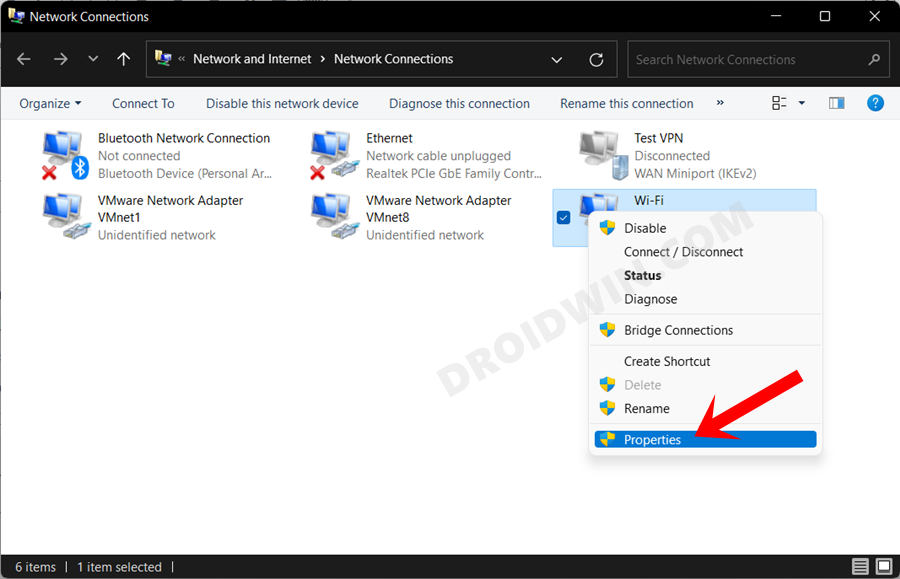
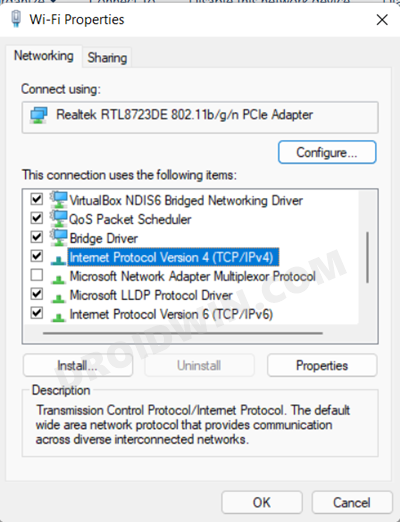
- Now right-click on your currently connected network and select Properties.
- Scroll to the Internet Protocol Version (TCP/IPv4) and double-click on it to open its Properties.
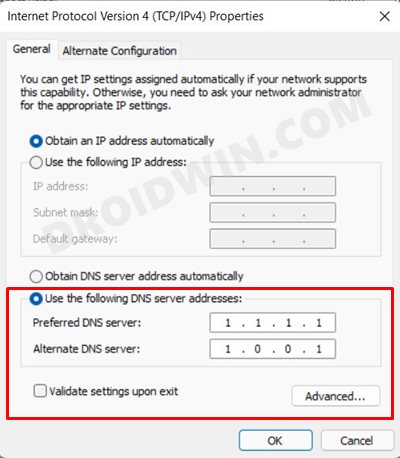
- After that, select Use the following DNS Server Address and input the desired DNS Server Address values (you may refer to the below section for the same).
- Once you have entered the desired DNS server address, click OK.
- Now just restart your browser once and that’s it, you have successfully changed the DNS Server Address in Windows 11.
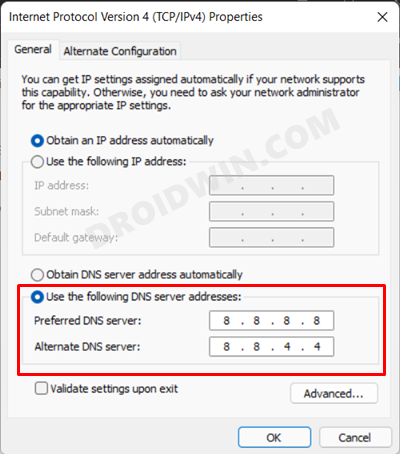
Use Google Public DNS Servers
- Preferred DNS Server: 8.8.8.8
- Alternate DNS Server: 8.8.4.4

Use Cloudflare DNS Servers
- Preferred DNS Server: 1.1.1.1
- Alternate DNS Server: 1.0.0.1
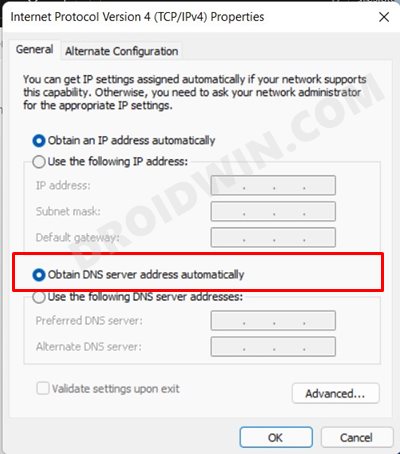
How to Switch Back to Default DNS Server
If you no longer wish to use the third-party DNS Server and want to revert to the default one provided by the ISP, then bring up the Internet Protocol Version (TCP/IPv4) Properties and select Obtain DNS Server Address automatically. Now restart your browser once to complete the process.
Concluding Remarks
So with this, we conclude the guide on how you could change the DNS Server Address in Windows 11. We have listed the Server Address for both Gooogle and Cloudflare. Moreover, we have also shared the instructions to switch to the default DNS Server. If you have any queries concerning the aforementioned steps, do let us know in the comments. We will get back to you with a solution at the earliest.


