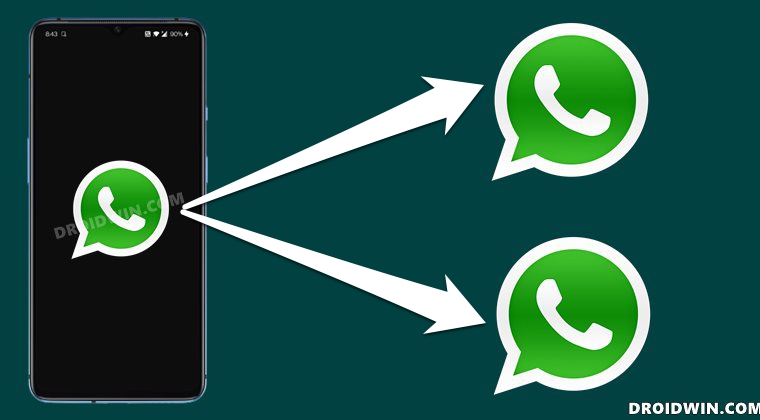
In this guide, we will show you the steps to add any app to the parallel app space on your OnePlus device. The Parallel Apps feature is among the most underrated features in the Android ecosystem. For the unawares, it allows you to create two instances of the same app. But both these instances would be completely isolated from one other.
The app’s data, settings, and other related features would be in complete isolation from one another. Whatever changes you make to one app wouldn’t be reflected in the other one. So you could create two instances of WhatsApp, and log in to each of them via different phone numbers. Well, I don’t need to document the benefits that you could accrue from it. So with such a plethora of perks attached, many OEMs have baked their feature onto their OS.
And OnePlus has done the same with their OxygenOS. However, there’s a caveat attached- the apps that you could add to parallel space are limited in numbers. But there exists a tweak through which you could bypass this limitation. And this guide shall make you aware of just that. So without further ado, let’s check out the steps to add any app to the parallel app space in OnePlus OxygenOS.
Table of Contents
How to Add any App to Parallel Apps in OnePlus
The below instructions are listed under separate sections for ease of understanding. Make sure to follow in the exact same sequence as mentioned.
STEP 1: Install Android SDK
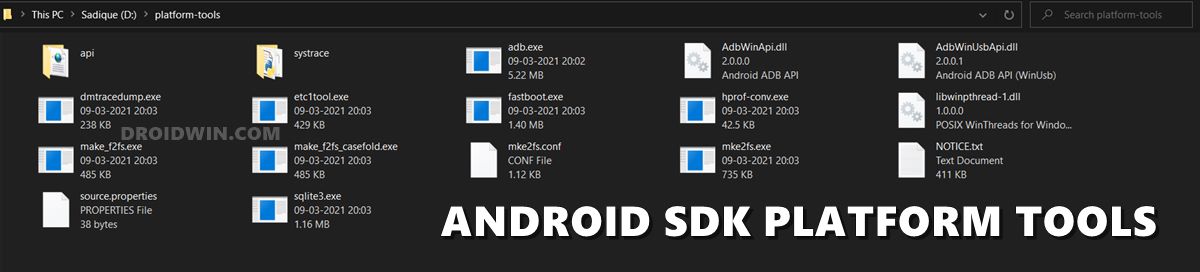
First and foremost, you will have to install the Android SDK Platform Tools on your PC. This is the official ADB and Fastboot binary provided by Google and is the only recommended one. So download it and then extract it to any convenient location on your PC. Doing so will give you the platform-tools folder, which will be used throughout this guide.
STEP 2: Enable USB Debugging
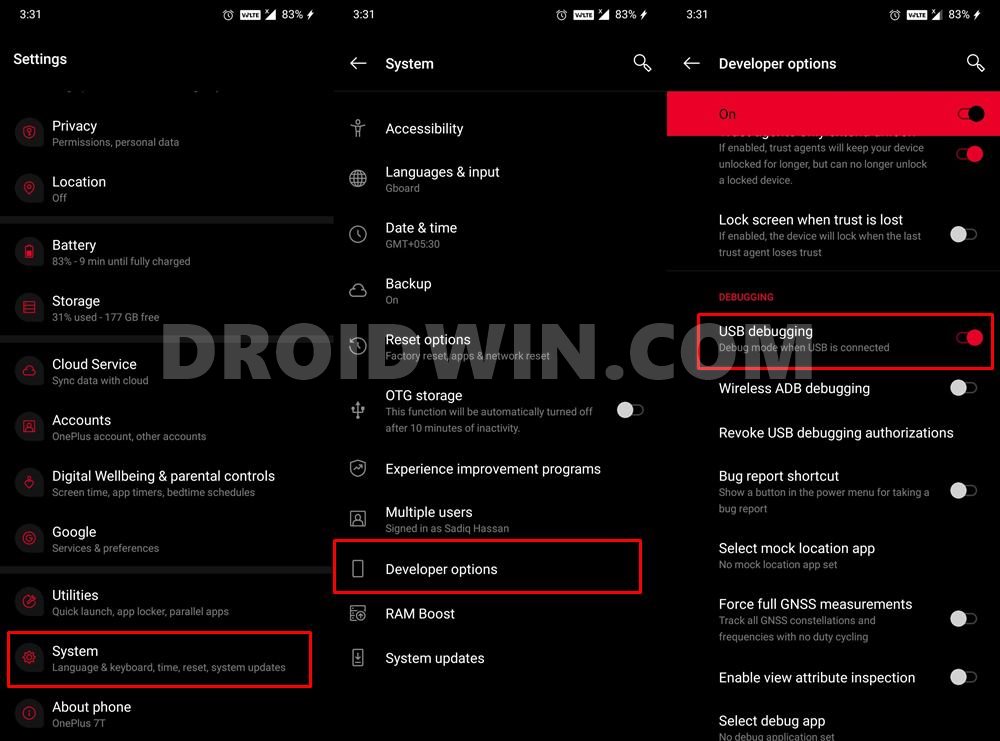
Next up, you will also have to enable USB Debugging on your device. This will make your device recognizable by the PC in ADB mode. So head over to Settings > About Phone > Tap on Build Number 7 times > Go back to Settings > System > Advanced > Developer Options > Enable USB Debugging.
STEP 3: Disable Verify Apps over USB
You will also have to disable the app installation’s verification over USB. This method is used to check all the apps that are being installed via ADB whether they are safe or not. As of now, since we will be dealing with the apps that are already installed on your device, so you may (or rather should) consider disabling them.
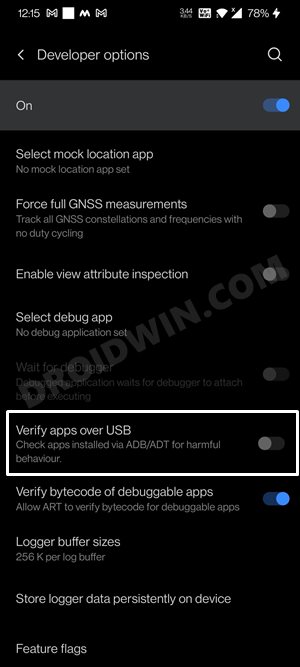
Another important reason to disable it is that if you don’t do so, then the Command Prompt will be stuck at the Performing Streamed Install message and you wouldn’t be able to proceed ahead. To do so, head over to Developer Options, scroll to the Debugging section, and disable the toggle next to Verify Apps over USB. Once done, you may move over to the next step to add the app to the parallel app space on your OnePlus device.
STEP 4: Verify ADB Connection
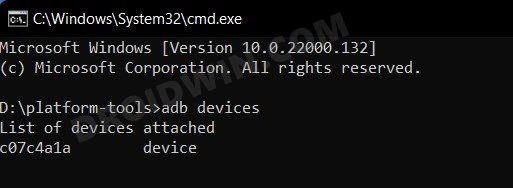
- Connect your device to the PC via USB cable. Make sure USB Debugging is enabled.
- Then head over to the platform-tools folder, type in CMD in the address bar, and hit Enter. This will launch the Command Prompt.

- Type in the following command in the CMD window to verify the ADB Connection
adb devices
- If you get the device ID [alphanumeric string] followed by the device keyword, then the connection stands successful.
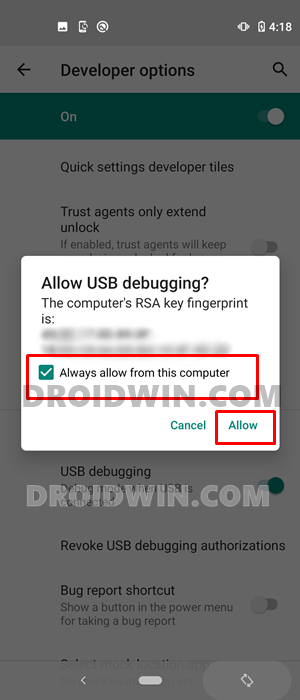
- However, if you have got the Unauthorized keyword, then check your device, you would have got a prompt, tap on Allow.

STEP 5: Get a List of Installed Apps
Let’s now bring up a list of all the installed app’s package names. For that, type in the below command and hit Enter.
adb shell pm list packages
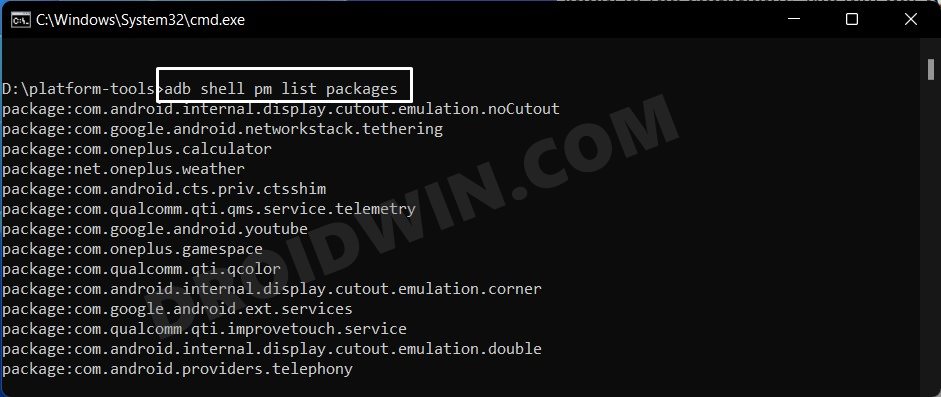
Now copy the package name of the app that you wish to extract. Don’t include the package keyword, but copy everything after that. For example, in the case of WhatsApp, the package name will be com.whatsapp.
STEP 6: Find App’s Installation Location
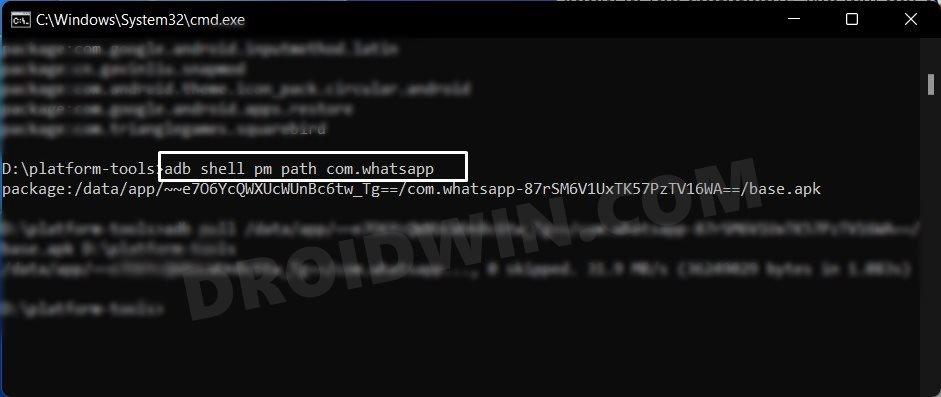
- Next up, we will have to get hold of the app’s installation directory, that is, the location where the app is present on your device. So use the below command syntax:
adb shell pm path app-package-name
- For example, if you want to find the installation directory of WhatsApp, then the above command will transform to:
adb shell pm path com.whatsapp
- You will now get the app’s installation directory, copy it (again, don’t copy the package keyword). As a reference, the directory of WhatsApp is:
/data/app/~~e7O6YcQWXUcWUnBc6tw_Tg==/com.whatsapp-87rSM6V1UxTK57PzTV16WA==/base.apk
STEP 7: Extract APK of Installed App
- Finally, use the below syntax to extract the APK file of the installed Android app on your device:
adb pull path-of-app extraction-path
- Replace path-of-app with the app’s location directory that you got from the above section. Then replace extraction-path with the path where you want this APK file to be placed.
- As soon as you execute the above command, you shall get the associated APK file under the extraction path location. It will be named base.apk.
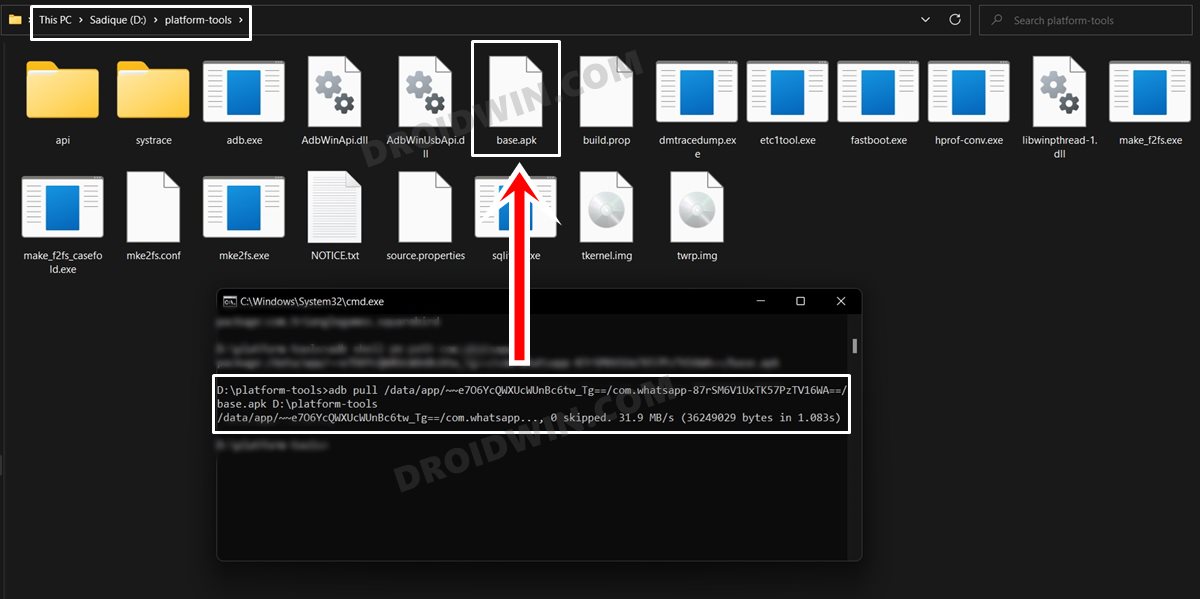
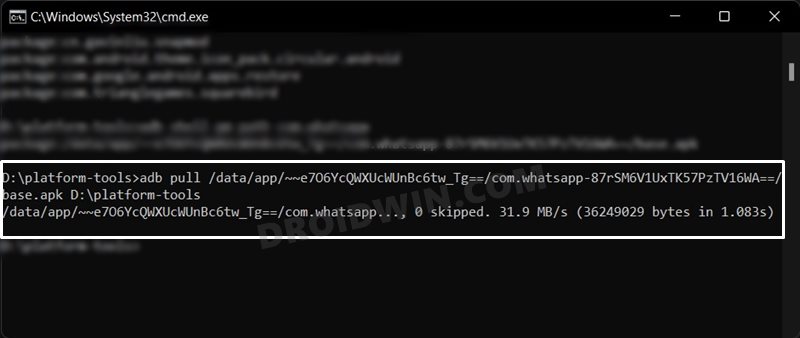
- For example, if I take the WhatsApp installation directory that I got from Step 6 and assign the APK extraction location inside the platform-tools folder (which is installed in D:\platform-tools), then the above command transform to:
adb pull /data/app/~~e7O6YcQWXUcWUnBc6tw_Tg==/com.whatsapp-87rSM6V1UxTK57PzTV16WA==/base.apk D:\platform-tools
STEP 8: Add App to Parallel Apps Space in OnePlus
- First off, make sure that the extracted app (base.apk) is placed inside the platform-tools folder. If that is not the case, then do so right away.
- Then use the below syntax to add the app to parallel space on your OnePlus device:
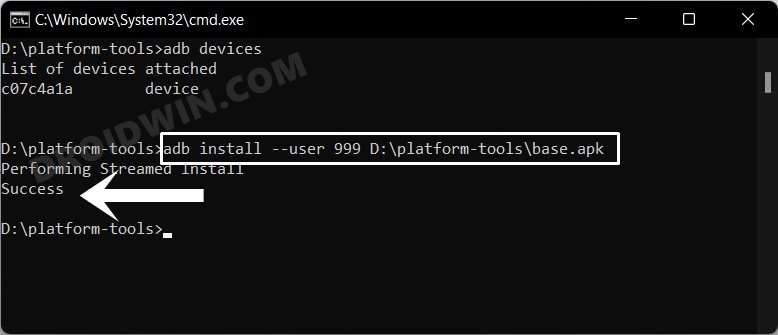
adb install --user 999 app-location-and-name
- In my case, the extracted app’s location is D:\platform-tools and the name of the app is base.apk. So the above command transforms to:
adb install --user 999 D:\platform-tools\base.apk
- Once you execute the said command, you shall get the Performing Streamed Install message followed by Success [if you get stuck here, then re-check that the Verify Apps over USB option is disabled, as mentioned in STEP 3]. And with that, your task stands complete!
So this was all from this guide on how you could add any app to parallel apps in OnePlus. If you have any queries concerning the aforementioned steps, do let us know in the comments. We will get back to you with a solution at the earliest.


