In this guide, we will show you various methods to fix the issue of Google Chromecast being unable to connect to the Wi-Fi network. When it comes to streaming devices, then there’s hardly an iota of a doubt that the offering from the Silicon Valley giant is the best in this domain. Just plug it into the HDMI port and you could then easily stream all your content over to the big screen.
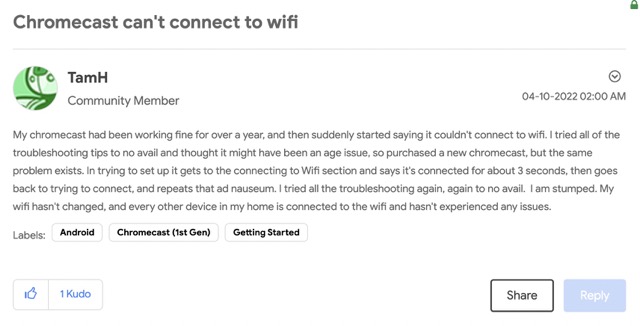
However, in spite of all the goodies attached, it isn’t free from its fair share of issues either. From the inability to cast YouTube videos to firmware updates being stuck at 0%, it has gone through quite a few roadblocks. However, none have proved to be as infuriating as the inability of Google Chromecast to connect to a Wi-Fi network.
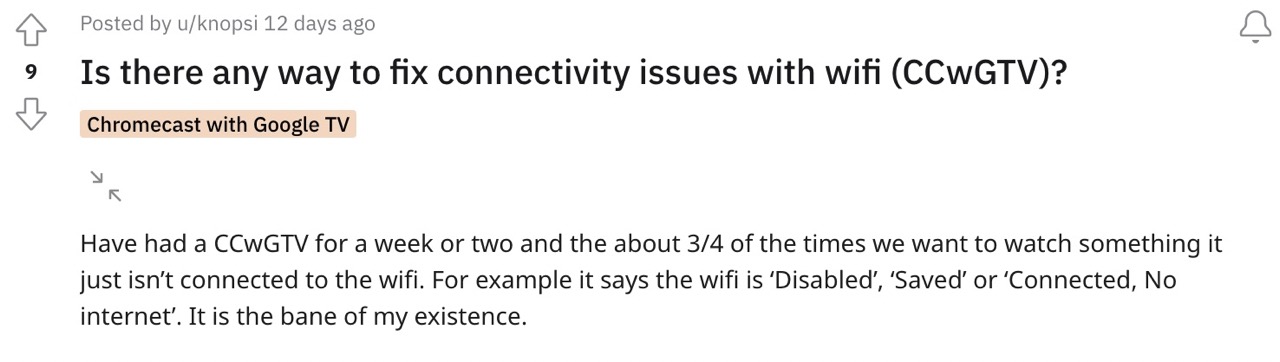
When that happens, you might get the “Chromecast is connected but not registered” or “cannot reach the internet”. As a result of which, you would be unable to use this service altogether. On the optimistic side though, there does exist a few nifty workarounds that shall help you rectify this issue. So without further ado, let’s check them out.
Table of Contents
How to Fix Google Chromecast cannot to Wi-Fi
It is recommended that you try out each of the below-mentioned workarounds and then see which one spells out success for you. So with that in mind, let’s get started.
FIX 1: Restart Devices
First and foremost, you should restart the router as well as the Chromecast. Here’s how it could be done:
- For restarting the Router- you could either do so wirelessly or unplug it from the power socket.
- As far as Chromecast is concerned, unplug it from the HDMI port on your device as well as from the power socket.

Credits: Google - Now wait for a minute and then re-plug both the devices.
- Check if it fixes the issue of Google Chromecast being unable to connect to the Wi-Fi network.
FIX 2: Toggle WiFi Bands
Next up, you should try changing the WiFi bands from 2.4GHz to 5 Gz or vice versa. Here’s how it could be done. [Screenshots credit: D-Link].
- To begin with, type in one of the four IP Addresses in the web browser to access the router homepage.
192.168.0.1
192.168.1.1
192.168.2.1
192.168.1.100
- Then input the ID and password. It could be the combination of any one of these
ID: <blank> PASSWORD: <blank>
ID: admin PASSWORD: admin
ID: <blank> PASSWORD: admin
ID: admin PASSWORD: <blank>
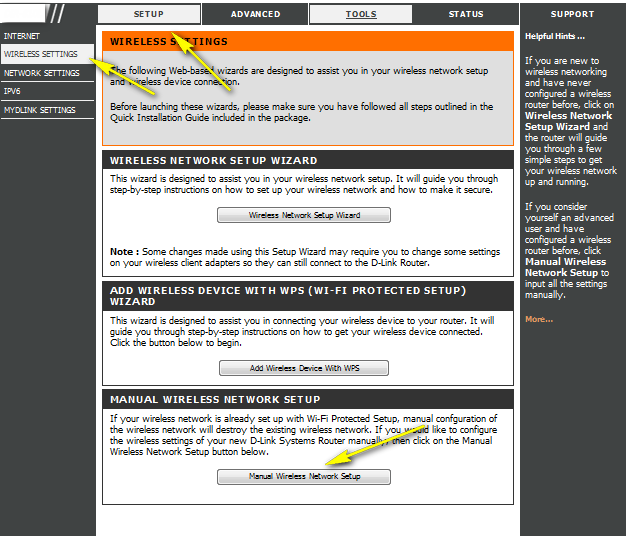
- Then go to the Setup tab and click on Wireless Settings from the left side.
- After that, click on the Click Manual Wireless Network Setup button.
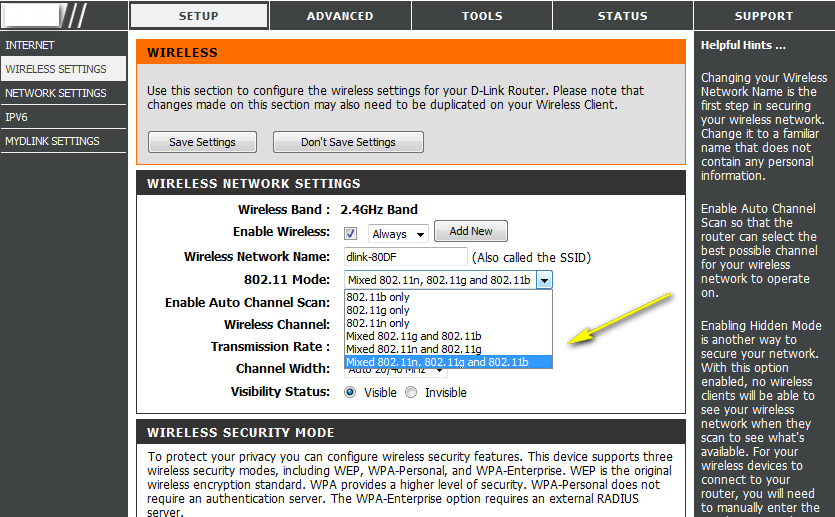
- Now, if you wish to select 2.4GHz, then choose 802.11b, 802.11g, 802.11n, 802.11b/g/n, or one of its combinations.
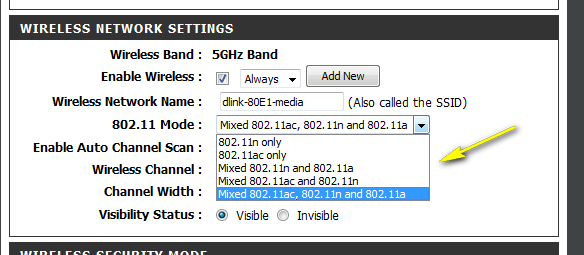
- On the other hand, for 5GHz, select 802.11a, 802.11c, or 802.11a/c.
- Once done, save the changes and check if it fixes the issue of Google Chromecast cannot to Wi-Fi.
FIX 3: Change WiFi Channel
If you are using 2.4ghz, then there are 11 channels, and each one has 20 MHz available. So corresponding to 20MHz, you should use either channels 1, 6, or 11. On the other hand, for 5GHz, there are 20, 40, and 80MHz channels. corresponding to 20MHz, you should use channel 36 or 40, for 40MHz use channels 38, 46,151, 159, and for 80MHz use channel 42 or 155.
But what is the optimal channel? While there isn’t any best channel as such, but being on 2.4GHz and using change 6 or 11 gives out the best result for the Chromecast [personal experience]. So on that note, here’s how you could change the WiFi channel. [Screenshots credit: D-Link].
- To begin with, type in one of the four IP Addresses in the web browser to access the router homepage.
192.168.0.1
192.168.1.1
192.168.2.1
192.168.1.100
- Then input the ID and password. It could be the combination of any one of these
ID: <blank> PASSWORD: <blank>
ID: admin PASSWORD: admin
ID: <blank> PASSWORD: admin
ID: admin PASSWORD: <blank>
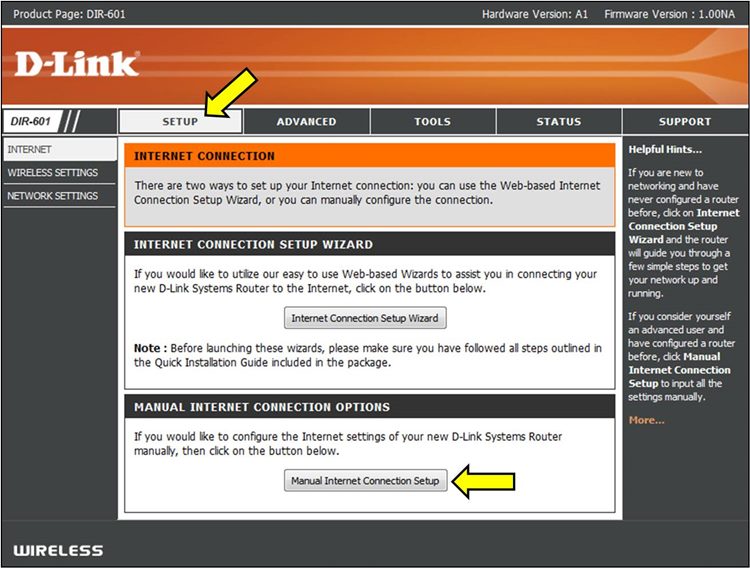
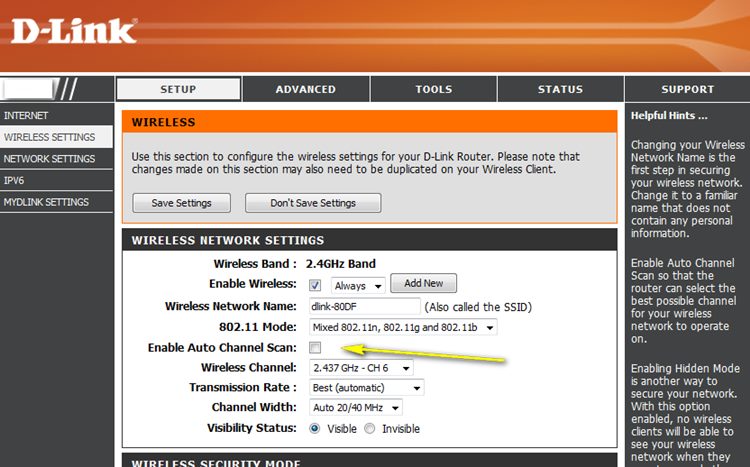
- Next up, scroll to the bottom and click on Manual Internet Connection Setup.
- Now uncheck Enable Auto Channel Scan.
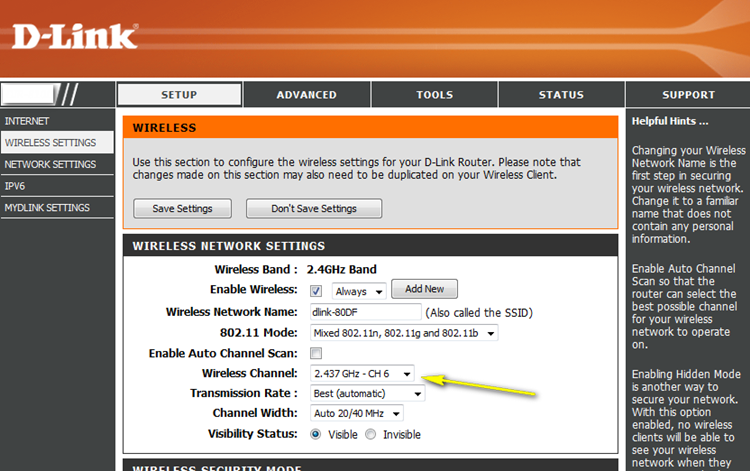
- After that, select the desired channel from the Wireless Channel drop-down.
- Finally, save the changes and check if it fixes the issue of Google Chromecast cannot to Wi-Fi.
FIX 4: Add Chromecast to New Home
Next up, you should consider creating a new Home profile and then adding your Chromecast to that new Home. Here’s how it could be done:
- Pick up a second device (Android or iPhone, both will do) and install the Google Home App on it.
- Make sure that it is on the same network as your Chromecast as well as your first device.
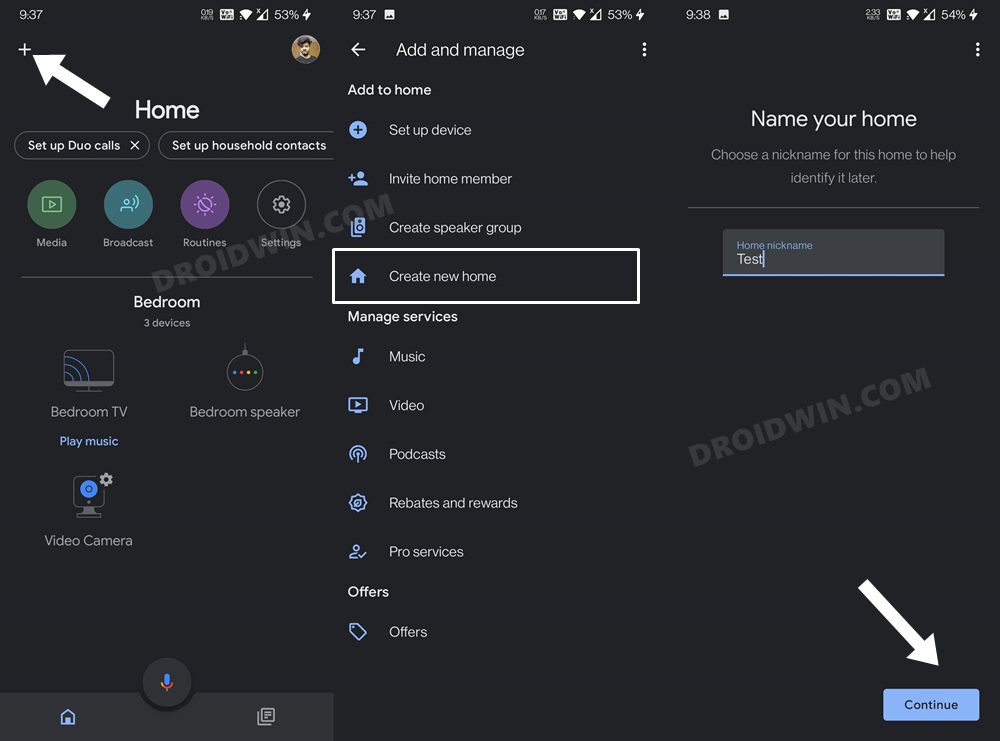
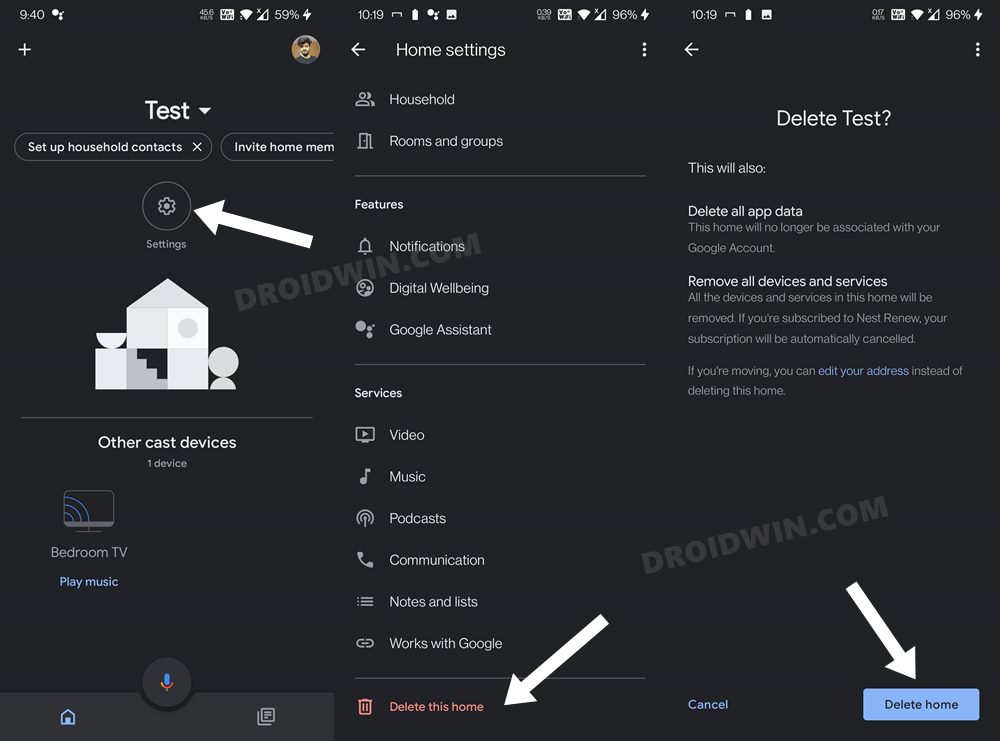
- Now launch the Home app and tap on the plus icon present at the top left.
- Then select Create New Home. Give it a name of your choice (let’s say Test) and hit Continue.
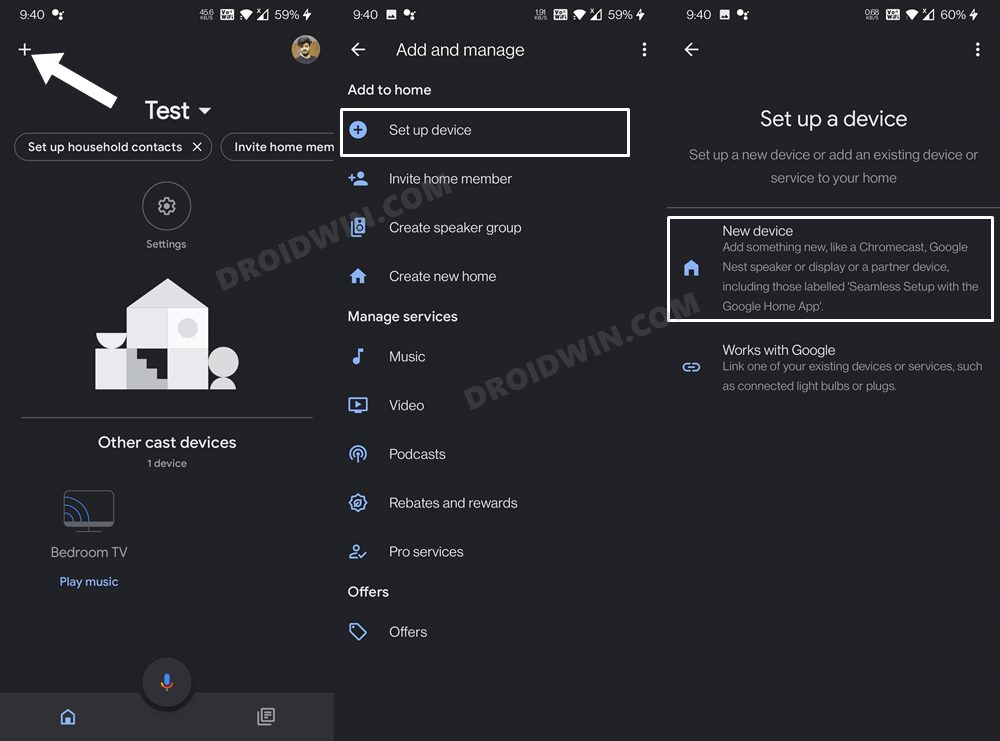
- Once you are in this profile, tap on the plus button at the top left and select Set up Device.
- After that, select New Device and proceed with the on-screen instructions to add your Chromecast device.
- Once done, try installing the firmware update and it should have fixed the Google Chromecast update stuck at 0% error.
- So once the firmware update is installed, you could now transfer this Chromecast to your original profile.
- Then delete the Test profile by going to Settings > Delete this home. That’s it.
FIX 5: Factory Reset Chromecast
If none of the aforementioned methods managed to fix the issue of Chromecast getting disconnected on casting a YouTube video, then your last course of action should be to factory reset Chromecast. This will revert all the settings back to their default state, exactly how it came out of the box. This, in turn, could end up rectifying the issue of Chromecast being unable to connect to the WiFi network. So refer to any of the two methods listed below to reset this device.
Method 1: Reset Chromecast from Device
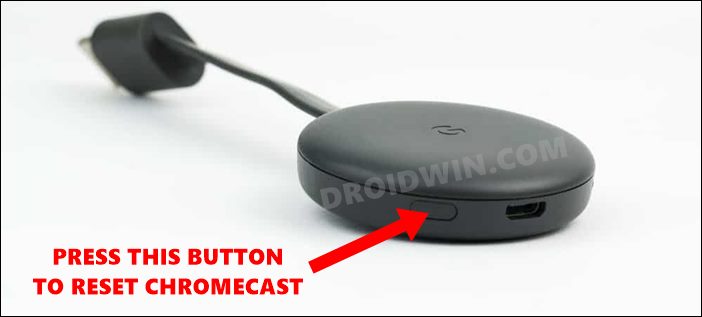
- To begin with, plug in the Chromecast to your TV.
- Then hold down the button on the side of the Chromecast for a few seconds.
- The LED will start blinking orange. When it turns white, release the button
- The reset is now successful and your Chromecast will now restart from scratch.
Method 2: Reset Chromecast via Google Home App
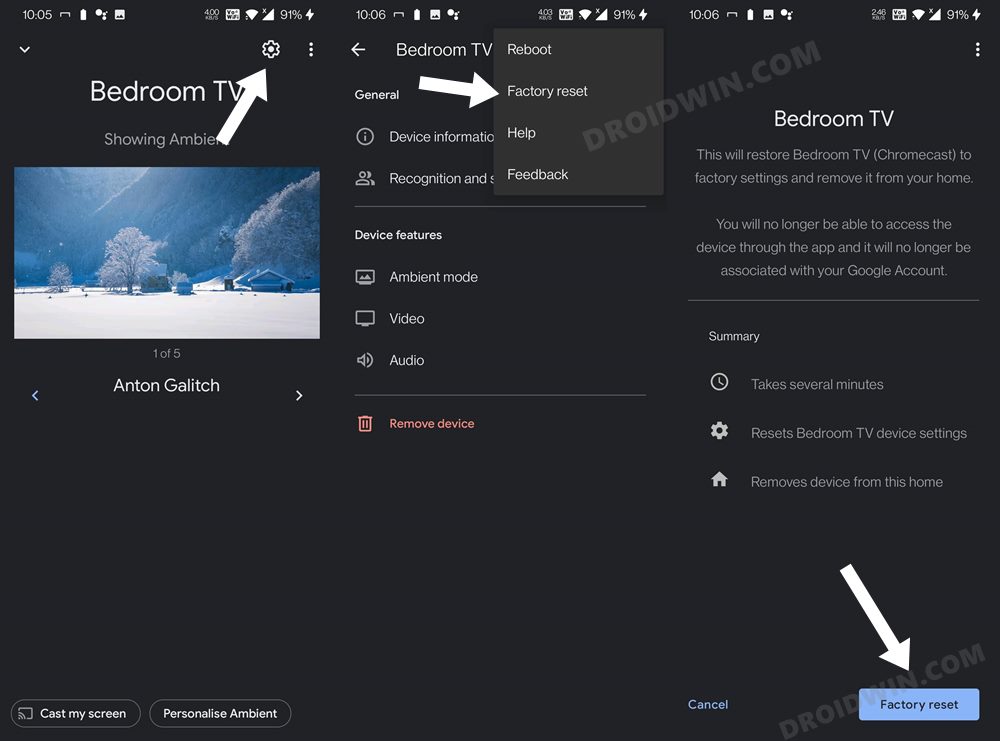
- Launch the Google Home App and select the Chromecast device from the list.
- After that, hit the Settings button and tap on the overflow icon situated at the top right.
- Then select Factory Reset from the menu that appears.
- Finally, hit the Factory Reset button and wait for the process to complete.
- Once done, set up Chromecast and you may now start streaming content via it without any roadblocks.
That’s it. These were the five different methods that shall help you fix the issue of Google Chromecast being unable to connect to the Wi-Fi network. If you have any queries concerning the aforementioned steps, do let us know in the comments. We will get back to you with a solution at the earliest.