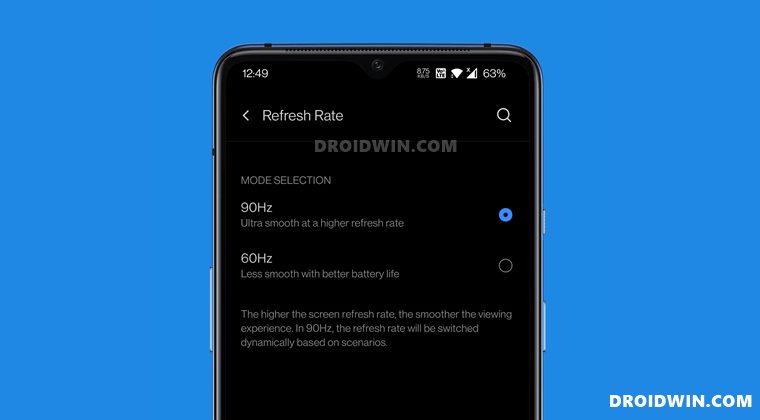
In this guide, we will show you the steps to force the 90Hz refresh rate on OnePlus 7/7T/Pro devices. The seventh iteration from this popular OEM bought about plenty of reasons to cheer about. While it had its downs on the software side in recent months, but its feature set still bought in plenty to cheer about. Likewise, the display was equally impressive in its own rights. The AMOLED screen with 515 Pixel Per Inch display came with a 90Hz refresh rate.
Along the same lines, it gives you the option to lower down this rate to 60Hz. This could be accessed from Display > Advanced > Refresh Rate. If you prioritize a smooth viewing experience, then 90 was the go-to choice. However, it would then mean that you would have to sacrifice the battery percentage. As a result, some users wished to stick with the lower 60Hz. While that is all well and good, there exists a glaring issue with 90Hz. This isn’t fixed but rather a variable refresh rate.
As a result, it would automatically degrade to 60Hz in places where the higher rate wasn’t required. While this sounds like a great idea on paper and could even end up saving some battery juice, but that shouldn’t have been the de-facto choice. Rather, if a user is going to choose 90Hz, then he or she already knew the implications. So the device shouldn’t automatically make a switch to the lower 60, until and unless the user specifically instructs it to do so.
If you also echo this thought, then this guide is here to help you out. You could now force the 90 refresh rate onto your OnePlus 7/7T/Pro devices. As a result, all the apps would respect this decision and would only use the higher 90Hz, unless you manually change it to 60Hz from Display > Advanced > Refresh Rate. Well, this is what should have been right from the start, but since that is not the case, let’s manually do so right away.
How to Force 90Hz Refresh Rate on OnePlus 7/7T/Pro
- To begin with, download the Android SDK Platform Tools and extract it to any convenient location on your PC.
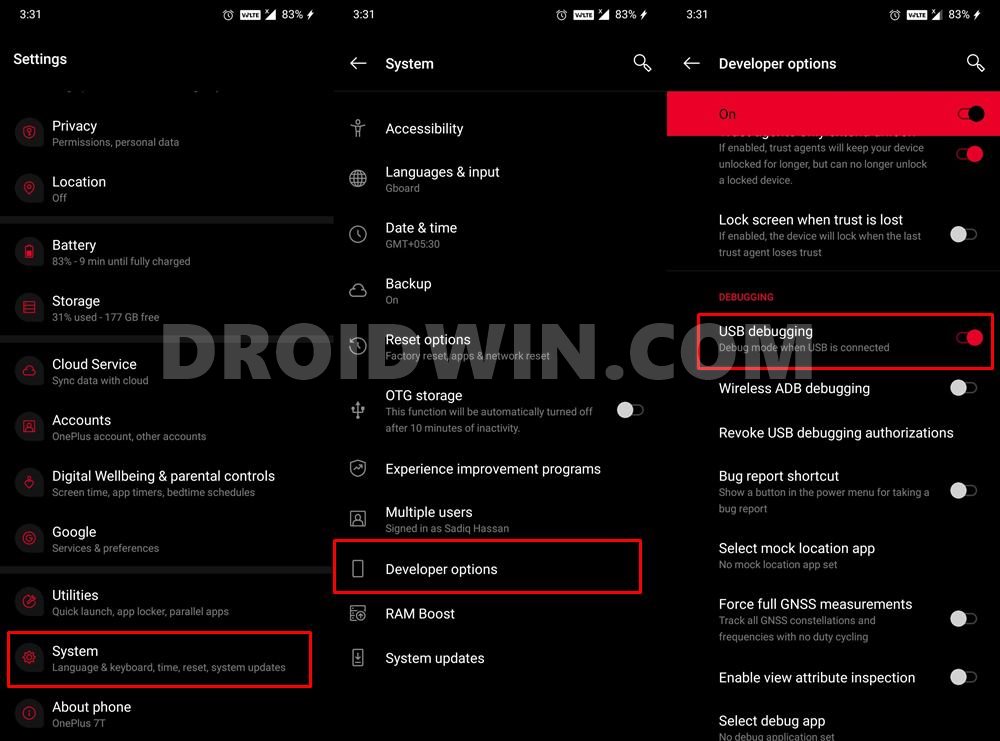
- Then enable USB Debugging on your OnePlus. For that, go to Settings > About Phone > Tap on Build Number 7 times > Go back to Settings > System > Developer Options > Enable USB Debugging.

- Now head over to the platform tools folder, type in CMD in the address bar, and hit Enter. This will launch the Command Prompt.
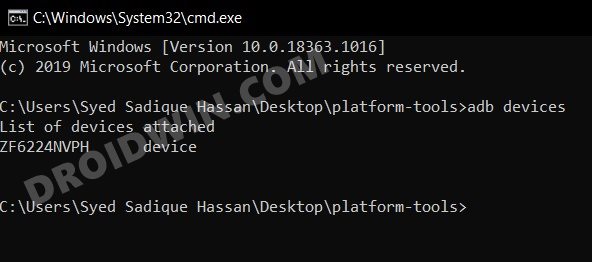
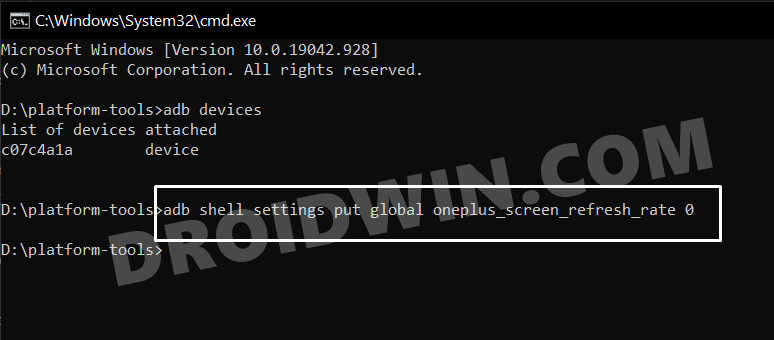
- Execute the below command in this CMD window to verify if the ADB Connection is successful or not:
adb devices
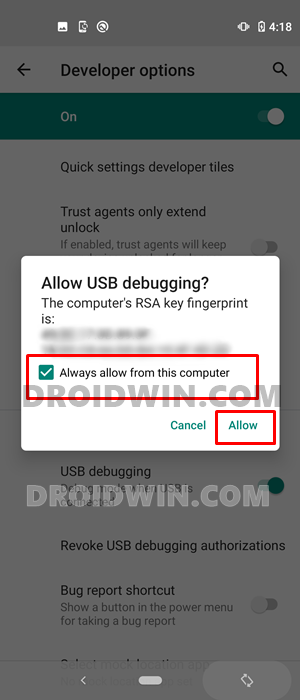
- If this is the first time you are executing the above command, then you might get a prompt on your device, tap on Allow.
- Finally, copy-paste the below command and your task stands complete:
adb shell settings put global oneplus_screen_refresh_rate 0

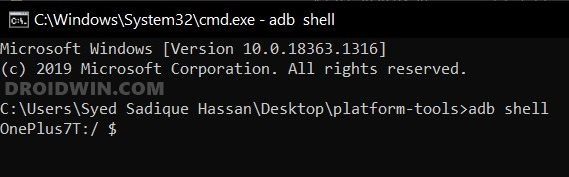
If you face any issues in executing the above command, then break it down into two separate commands. First off, execute the adb shell command. Doing so shall show your device codename in the CMD window (see below image). Once that happens, copy-paste the rest of the command, i.e. settings put global oneplus_screen_refresh_rate 0
So this was all from this guide on how to force the 90Hz refresh rate on OnePlus 7/7T/Pro devices. If you have any queries concerning the aforementioned steps, do let us know in the comments. We will get back to you with a solution at the earliest. [Read Next: How to Increase FPS Rate of Games on Android [Root].


Rogers
After checking “Disable permission monitoring”, it is still giving the same error.
Exception occurred while executing ‘put’:
java.lang.SecurityException: Permission denial: writing to settings requires:android.permission.WRITE_SECURE_SETTINGS
at com.android.providers.settings.SettingsProvider.enforceWritePermission(SettingsProvider.java:2640)
at com.android.providers.settings.SettingsProvider.mutateGlobalSetting(SettingsProvider.java:1632)
at com.android.providers.settings.SettingsProvider.insertGlobalSetting(SettingsProvider.java:1586)
at com.android.providers.settings.SettingsProvider.call(SettingsProvider.java:588)
at android.content.ContentProvider.call(ContentProvider.java:2473)
at android.content.ContentProvider$Transport.call(ContentProvider.java:521)
at com.android.providers.settings.SettingsService$MyShellCommand.putForUser(SettingsService.java:382)
at com.android.providers.settings.SettingsService$MyShellCommand.onCommand(SettingsService.java:278)
at com.android.modules.utils.BasicShellCommandHandler.exec(BasicShellCommandHandler.java:97)
at android.os.ShellCommand.exec(ShellCommand.java:38)
at com.android.providers.settings.SettingsService.onShellCommand(SettingsService.java:50)
at android.os.Binder.shellCommand(Binder.java:970)
at android.os.Binder.onTransact(Binder.java:854)
at android.os.Binder.execTransactInternal(Binder.java:1226)
at android.os.Binder.execTransact(Binder.java:1163)
Bilal
Hey there! This was very helpful but I’m wondering how to go back to the previous settings, do I just toggle from settings? Or do I have to run another command?
Surya teja reddy
I have an exception which says exception occured while executing ‘put’
CK
search for the “Disable Permission Monitoring” and enable the option and then try it should work.