In this guide, we will show you the steps to force a 120Hz refresh rate when Gboard is opened. Having a 120hz refresh rate was once counted among the luxuries that only a flagship could offer, however, that notion has long been changed with even mid-budget devices boasting of this higher refresh rate [well, except some Pixel devices!]. In this regard, there exist two different refresh rate strategies that OEMs provide: Adaptive and Fixed.
As is evident from their names, the Adaptive Refresh rate oscillates between the minimum and maximum refresh rates depending on the app you are currently interacting with, whereas Fixed will use a constant refresh rate throughout. Some users do like to fix the rate at 120hz in order to get a rich, fluid, and stutter-free usage experience.
However, some users have voiced their concern that even after fixing the refresh rate at 120hz, it still tends to drop down to 60Hz when using Gboard inside any app such as WhatsApp or Telegram. if you are also currently facing this issue, then this guide will show you the steps to force a 120Hz refresh rate when Gboard is opened. Follow along.
How to Force 120Hz Refresh Rate when Gboard is opened
- To begin with, download and install the Set Edit app from Play Store.
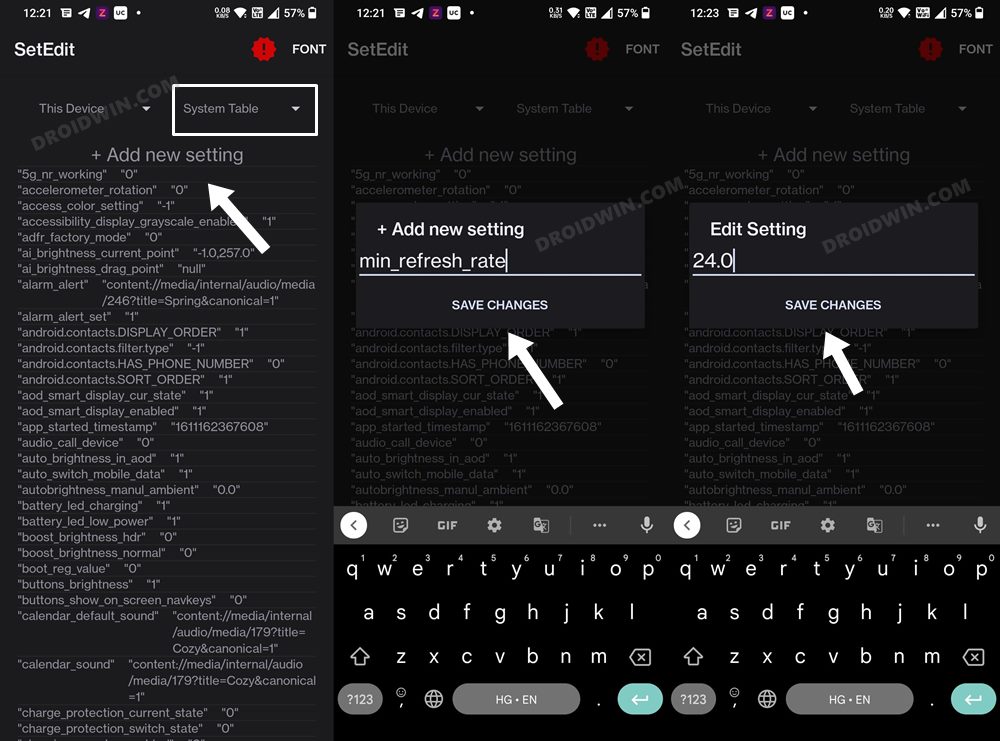
- Then launch it and select System Table from the top right.
- Now tap on Add New Setting, name it min_refresh_rate, and hit Save Changes.
- It will now ask you to enter the value, type in 24.0, and hit Save Changes.

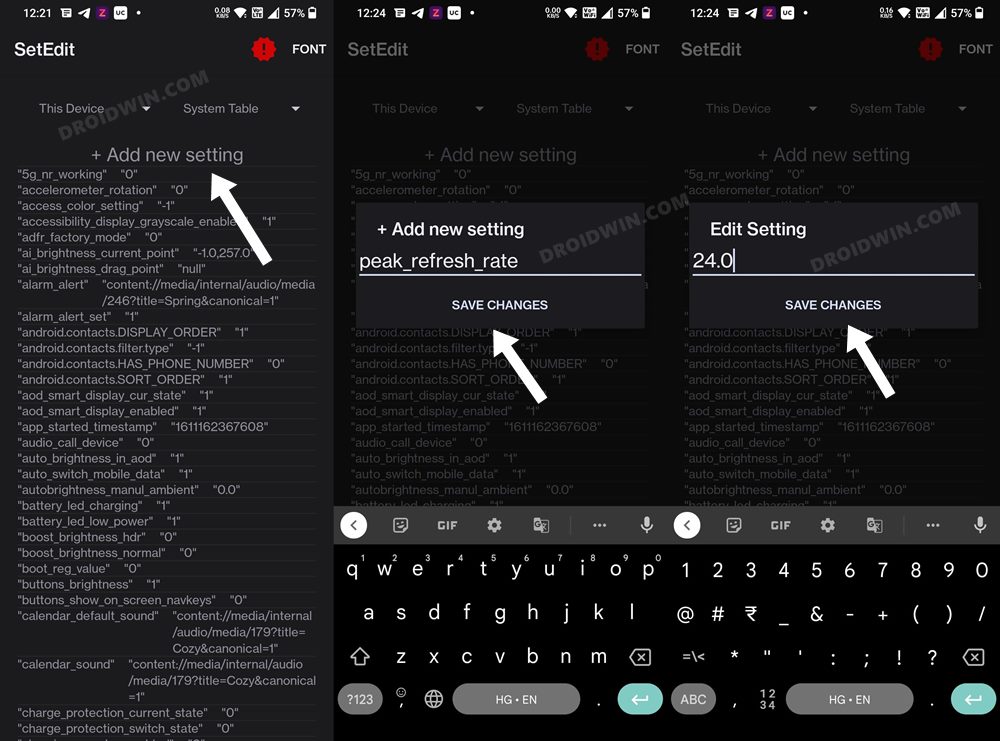
- Again, tap on Add New Setting. This time name it peak_refresh_rate and hit Save Changes.
- Assign it the same 24.0 value as well and tap on the Save Changes button.
- Now open Gboard inside any app and the refresh rate will stick to 120hz.
Why did we choose 24.0? Well, by assigning it a random and unsupported value, we are [kind of] breaking the refresh rate. As a result of which, the OS won’t be able to adjust this rate, and hence stick with the maximum available rate. A more obvious approach would have been to directly assign 120Hz to both the min_refresh_rate and peak_refresh_rate.
However, we gave that a try and it didn’t work out as expected. So assigning it an unsupported value is the best tweak. Talking about tor methods, there does exist a third-party app named AutoHZ available on Play Store but it is paid, doesn’t have many positive reviews, and most importantly doesn’t work with Android 12 devices. So ADB might be your best bet.
How to Revert the Change
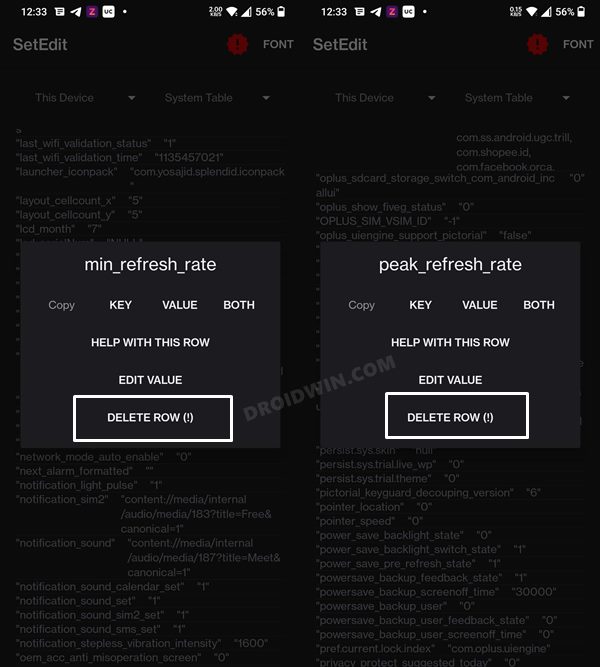
If at any point in time, you wish to revert the change [due to additional battery drain or any other specific reason], then just delete both these parameters. To do so, long press on min_refresh_rate and select Delete Row. Likewise, do the same for peak_refresh_rate.
So with that, we round off the guide on how you could enable the 120Hz refresh rate in Gboard. If you have any queries concerning the aforementioned steps, do let us know in the comments. We will get back to you with a solution at the earliest.


