In this tutorial, we will show you revert or go back to Stock ROM from a GSI ROM. The steps are valid for all Android devices, running any Android version. Furthermore, we will be discussing two methods for the same- via Fastboot Command and TWRP Recovery. proceed with the environment you feel more comfortable in. Apart from that, we also have another guide on this topic, it is recommended that you should have a look at that one as well: How to Revert to Stock ROM from GSI ROM (Universal Guide). The steps and methods are completely different than this one, but the ultimate stop is the same- to get you back to the stock ROM from a GSI ROM.
For most of the users that own a device bereft of custom development, GSI ROMs are the only way route. We could get all the experience that a custom ROM has to offer, right via a GSI build. The issue is mostly with Exynos chipset devices. Since they don’t make the source code public, the developers face a hard-time building up ROMs for these devices. Although this chipset was initially only limited to Samsung devices, many Motorola Android One devices have strangely adopted it as well. So the goodies that the Android One devices bring in with itself disappear with the absence of custom developments.
Anyways, if your device is Project Treble supported, then GSI was, is, and will forever be the best escape route. But there’s a common issue that we have heard from a lot of device owners having a GSI build installed- there isn’t much development going on with these ROMs and hence they get kind of bored with them after a short while. Well, I can’t comment on that but what I can comment on is the fact that if you echo these feelings as well, then you have landed at the right place. In this tutorial, we will show you how to go back to the stock ROM from a GSI ROM via Fastboot or TWRP. Follow along.
EDITOR’S CHOICE
- Install Android 11 Beta on GSI Supported Project Treble Devices
- How to Flash Stock Firmware via Fastboot Commands
- Install Custom ROMs on any Android Device- Includes A/B Partition
- [GUIDE] Flash ROMs/Magisk/TWRP/Kernels on A/B Partition Devices
Table of Contents
How to Go Back to Stock ROM from GSI ROM
So here is the thing. If you have flashed a GSI ROM, then you are using a system.img that has been flashed on top of your stock firmware. So the major modification has only been made to the system partition (unless have you performed modifications to vendor or boot partition). You can revert to stock firmware using fastboot or TWRP because both of them could be used to flash the system image file to the said partition.
So with that said, here is how you go back to Stock ROM from a GSI ROM. Please go through the steps exactly as mentioned, a slight deviation and you might end up with a boot looped or bricked device. In that case, DroidWin or any of its members won’t be held responsible. But if that happens, just drop in your issues in the comments, we are always there to help you out.
Prerequisites
- Download and install the Android SDK Platform Tools on your PC. This is needed so that your PC recognizes your device in ADB and Fastboot mode.
- Enable USB Debugging on your device. This is needed to recognize your device in ADB mode. USB Debugging for this guide will be needed to boot your device to fastboot and TWRP mode. If you know the hardware key combinations for the same, then you could skip it. [ALSO READ: Enable USB Debugging on a Broken Android Device’s Screen? Here’s a Workaround]
- Extract the system.img from the stock firmware. Keep in mind that you should flash the same version of the system.img file that you had before you flashed the GSI build.
- [OPTIONAL] If you have made any changes to the boot and vendor partitions, then extract both of them from the stock firmware as well.
- [COMPULSORY] Likewise, you will also need the vbmeta file to re-enable AVB and dm-verity otherwise the device will reboot in fastboot mode only.
- Once you have both files, proceed with the below steps to revert to stock ROM from the GSI ROM. We will start with the Fastboot method first, followed by the TWRP. Proceed with the one you feel more comfortable with.
TWRP COLLECTION GUIDES
- How to Root Android Devices Without TWRP Recovery
- How to Permanently Install TWRP without TWRP ZIP File (only using TWRP.img file)
- Fix TWRP Error 7 (While Flashing Custom ROM via TWRP)
- How to Root Android Devices via TWRP Recovery
Flashing Stock ROM over GSI via Fastboot
- Place all the extracted files from the stock firmware inside the platform-tools folder.
- Inside the same folder, type in CMD in the address bar and hit Enter. This will launch the Command Prompt.

- Now execute the below command to boot your device to fastboot mode:
adb reboot bootloader
- Now type in the below code to check if the device has been successfully booted to fastboot mode:
fastboot devices
- If you get an alpha-numeric code followed by the fastboot keyword, then your device has been booted to fastboot.
- Now, you will have to factory reset your device. To do so, type in the below code:
fastboot -w
- [COMPULSORY] Next up, you will have to flash the system image file, the below code will come in handy in that case:
fastboot flash system system.img
- [OPTIONAL] If you have made changes to the vendor partition as well, then flash the stock vendor as follows:
fastboot flash vendor vendor.img
- [OPTIONAL] Similarly, you will have to flash the boot image if any changes have been made to the said partition. The below code will come in handy for that:
fastboot flash boot boot.img
- [COMPULSORY] Next, we will have to flash the vbmeta file as well.
fastboot flash vbmeta vbmeta.img
- Finally, you could now boot your device to the system:
fastboot reboot
- That is it. You have successfully flashed the stock firmware from GSI ROM. The steps were carried out via Command Prompt. If you wish, you could also do the same via TWRP Recovery. Follow the below steps for that.


Don’t Miss: How to Edit any Webpage, Website, or even WhatsApp Chats (Both Sent and Received)!
Flashing Stock ROM over GSI via TWRP
The thing with this method is that you still need the Command Window to flash the VBMeta file. This is because while you could flash the boot.img in boot partition and system.img inside the system partition, TWRP doesn’t provide the option to flash files inside the VBMeta partition. So to flash this file, we will be taking the help of fastboot commands.
With that said, here are the steps to get back to stock ROM from GSI ROM via TWRP. Just keep in mind that the same rule follows here as well. If you have modified the vendor and boot partition as well, then you will have to extract both these files from the stock firmware. Otherwise, we will be needing the stock boot.img and vbmeta files only.
- Transfer the system.img, vendor.img, and boot.img file to your device. On the other hand, transfer the VBMeta file to the platform-tools folder.
- Inside the same folder, type in CMD in the address bar and hit Enter. This will launch the Command Prompt.
- Now type in the below command to boot your device to TWRP Recovery:
adb reboot recovery
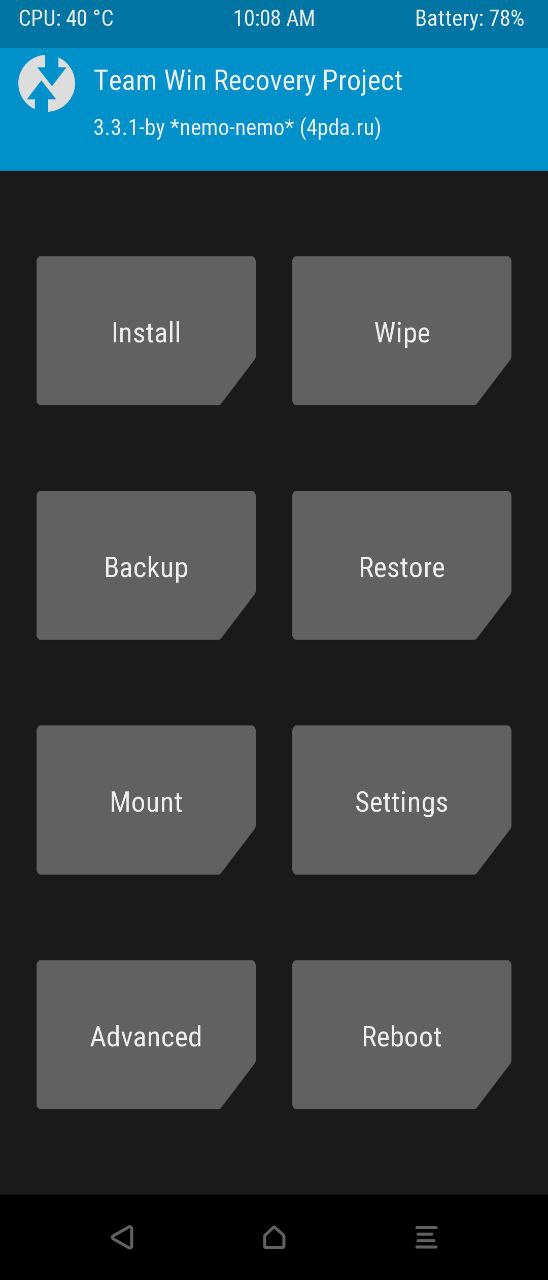
- Within the TWRP home screen, head over to the Wipe section > Advanced Wipe > select Dalvik, Cache, and Data.
- Then go back to the TWRP home screen, go to Install, and tap on the Select Image button situated at the bottom.
- [COMPULSORY] Navigate to the system.img file and in the partition screen that appears, select System. With this, the system.img will be flashed to the System partition.
- [OPTIONAL] Likewise, flash the vendor.img to vendor partition and boot.img to the boot partition.
- Now is the time to flash the vbmeta. As already mentioned, we cannot flash it via TWRP, and will rather need the help of fastboot command.
- So from your TWRP home screen, go to Reboot and select Bootloader. With that, your device will be booted to fastboot mode.
Fastboot Mode in Xiaomi - Execute the below command to check for the successful boot of your device to fastboot mode:
fastboot devices
- If you get an alphanumeric string of codes along with the fastboot text, your connection to fastboot mode is successful.
- Let’s now proceed ahead with flashing the vbmeta file. Make sure you have transferred it to the platform-tools folder. Type in the below command to flash the vbmeta.img file to the vbmeta partition:
fastboot flash vbmeta vbmeta.img
- When that is done, you could now reboot your device to the OS. To do so, just enter the below command:
fastboot reboot

That is it. With this, you have successfully reverted from the GSI ROM to the stock ROM/firmware. If you have any queries concerning any of the aforementioned steps, do drop in your queries in the comments section below. Likewise, if you any other GSI or stock ROM related errors, issues, or doubts, do share with us, we are here to clear all your doubts.
ANDROID TIPS AND TRICKS
- How to Install OTA Updates in Rooted Android Device
- How to Disable Screenshot Captured Notification and Sound without Root
- Various Build.Prop Tweaks [Android 4.4 and above]
- 15 Amazing Tweaks for Google Chrome Browser for Android


