In this guide, we will show you how to fix the issue of root not working on your Android device after flashing the Magisk patched boot.img file. Using an open-source OS has a plethora of benefits in itself. And right there at the top is the ability to gain administrative rights and access to the system partition. To achieve any of these two, you need to root your device. For that, there are two different approaches. The first one by directly flashing the Magisk ZIP (which is now part of the Magisk App) via TWRP Recovery.
However, not every device comes with a working custom recovery. As a result, they try out the second method. This involves patching the stock boot.img file via Magisk and then flashing it via Fastboot Commands. However, there are some concerned users who have reported that even after flashing the Magisk patched boot.img file, the root isn’t working on their devices. If you are also going through this issue, then this guide shall help you rectify this issue. Follow along.
- Root Android 11 via Magisk Patched boot.img (without TWRP)
- How to Root Android Devices Without TWRP Recovery
- How to Fix TWRP Error 1 on any Android Device
- Fix Magisk patched boot.img issue while Rooting Android 11
Table of Contents
Fix Root not working after flashing Magisk patched boot.img
Do keep in mind that there isn’t any universal fix as such. You might have to try out each of the below-mentioned methods, one by one until it spells out success for you. Droidwin and its members wouldn’t be held responsible in case of a thermonuclear war, your alarm doesn’t wake you up, or if anything happens to your device and data by performing the below steps.
Match Firmware Number and Boot.img Version
One of the major reasons for this error is when you tend to flash an incorrect version of the stock boot. img. For the unawares, you need to extract the stock boot.img file from the same firmware number that is currently installed onto your device.
You could check the same via the device’s About Phone > Build Number section. Once you have verified that the firmware version matches, you may refer to our below guides to extract the boot.img from stock firmware. See if it is able to fix the root not working issue after flashing Magisk patched boot.img
- How to Extract payload.bin and get the stock boot image file
- Guide to Extract Fastboot Images from Realme/Oppo OZIP Firmware
- How to Extract Boot.img from LG KDZ or DZ Firmware
Verify ADB and Fastboot Drivers
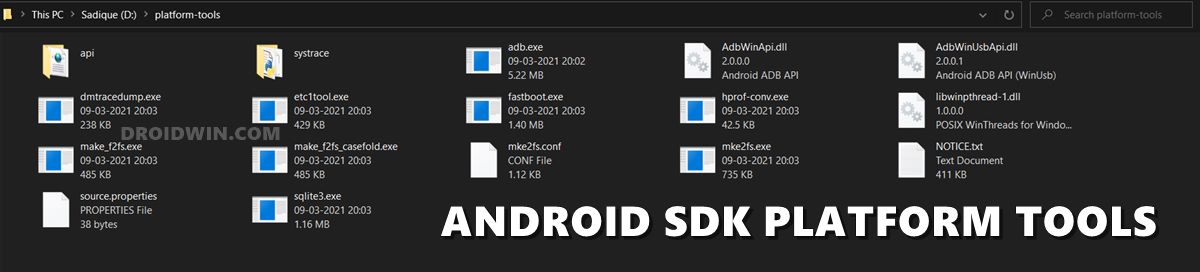
While there are a plethora of third-party ADB Tools, it is highly recommended that you only use the official one provided by Google. So download and install the Android SDK Platform Tools on your PC.
- Then extract it to any convenient location on your PC.

- Likewise, transfer the patched boot.img to this platform-tools folder itself.
- Then head over to this folder’s address bar, type in CMD in its address bar, and hit Enter.
- This shall now launch the Command Prompt. window.
- Now execute the correct fastboot commands (refer to the below section for the commands) to flash the patched boot.img file.
- See if it fixes the root not working issue after flashing the Magisk patched boot.img.

You may also try installing the Android USB drivers and the Android Bootloader Interface Drivers (needed for Fastboot/Bootloader Mode) to rectify this underlying issue.
Use Correct Fastboot Commands to flash Magisk boot.img
With the inception of the A/B partition, there have been quite a lot of under the hood changes. For some, it has now become a more challenging task in flashing custom binaries. And it could well be the case that you are using the Fastboot Commands for a single partition when infact you need to flash it to both the partitions. We are sharing the commands for both these scenarios, check if your device is A/B or A-only, and then use the command accordingly:
- Execute the below command if you want to flash the patched boot.img to just one slot:
fastboot flash boot magisk_patched.img
- On the other hand, use the following two commands if your device is A/B (OnePlus 7 series requires these commands):
fastboot flash boot_a magisk_patched.img
fastboot flash boot_b magisk_patched.img
If you still have any doubts regarding these instructions, you may refer to our detailed guide on this topic: Patch Stock Boot Image via Magisk and Flash it using Fastboot. Likewise, if you have a custom recovery such as TWRP installed, then you may also make use of the same to flash Magisk patched. Refer to this guide: How to Flash Stock and Magisk Patched Boot.img via TWRP. So, try out these tweaks and see if it fixes the issue of root not working after flashing the Magisk patched boot.img.
Use Magisk Canary
In some instances, the stable Magisk build is known to cause a few issues, especially with Android 11. Therefore, it is recommended to try out the Canary build. Do keep in mind that this is an unstable build, and you might face a few issues (although I haven’t face any till now). Here’s how it could be done:
- To begin with, download and install Magisk Canary onto your device.
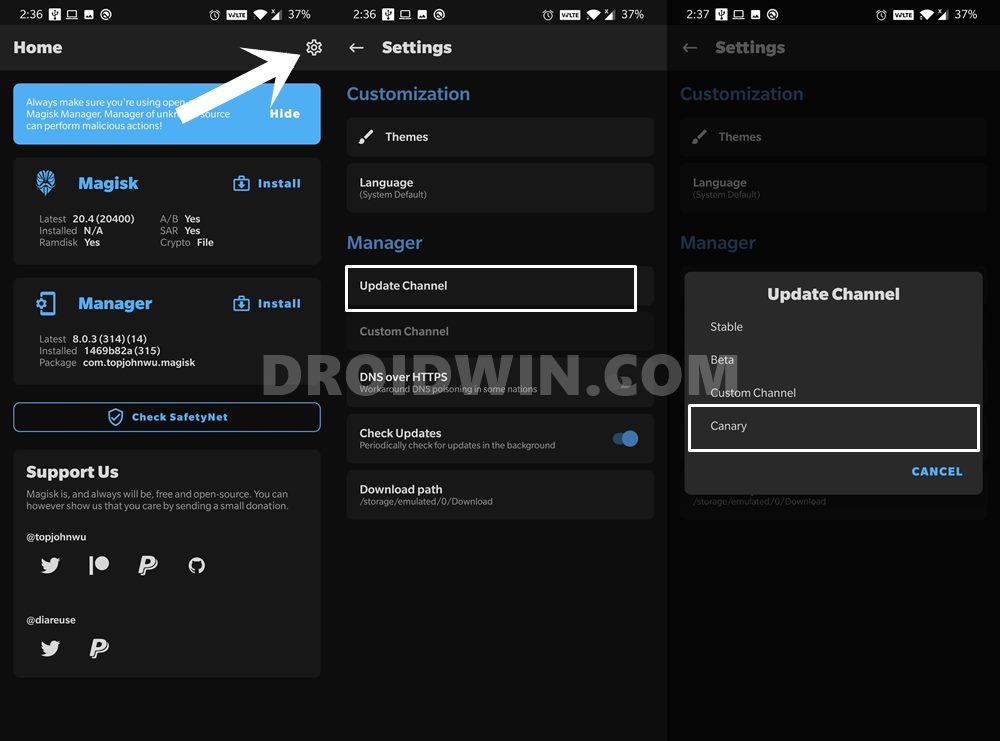
- Then launch it and tap on the Settings icon situated at the top right.
- Go to the Update Channel section and select Canary.
- Once that is done, retry patching the boot.img file, flash it via Magisk, and then flash it via Fastboot.
So this was all from this guide on how to fix the root not working issue after flashing the Magisk patched boot.img. If you have any queries concerning the aforementioned steps, do let us know in the comments. We will get back to you with a solution at the earliest.


c0deur
I have moto G60, used https://forum.xda-developers.com/t/guide-root-motorola-with-magisk-unlocked-bootloader-non-twrp-method.4222583/#post-84347105 this method.
Everything worked fine, but after boot the device’s touch was unresponsive.
Francis V
Thank you very much, i didn’t know that i had to flash magisk_patched img file to boot_a and boot_b, now i rooted my Moto G7 Play Stock ROM
Asim Khan
After patch boot.img with canary i flash it flash was done but it’s also not working.
My Device is
Vivo S1 Android 11 version
Chipset: MT6768
This is My Patched boot canary install log.👇
– Device platform: arm64-v8a
– Installing: 32fc34f9 (24101)
– Copying image to cache
– Unpacking boot image
Parsing boot image: [/data/user_de/0/com.topjohnwu.magisk/install/boot.img]
HEADER_VER [1]
KERNEL_SZ [10069967]
RAMDISK_SZ [36856986]
SECOND_SZ [0]
RECOV_DTBO_SZ [93268]
OS_VERSION [9.0.0]
OS_PATCH_LEVEL [2019-07]
PAGESIZE [2048]
NAME []
CMDLINE [bootopt=64S3,32N2,64N2 product.version=PD1913F_EX_A_1.6.8 fingerprint.abbr=9/PPR1.180610.011 buildvariant=user]
CHECKSUM [634d8edd00f63b142709f38c5ad1e3e39da8b4ca000000000000000000000000]
KERNEL_DTB_SZ [103781]
KERNEL_FMT [gzip]
RAMDISK_FMT [gzip]
VBMETA
– Checking ramdisk status
Loading cpio: [ramdisk.cpio]
– Stock boot image detected
– Patching ramdisk
Loading cpio: [ramdisk.cpio]
Add entry [init] (0750)
Create directory [overlay.d] (0750)
Create directory [overlay.d/sbin] (0750)
Add entry [overlay.d/sbin/magisk32.xz] (0644)
Add entry [overlay.d/sbin/magisk64.xz] (0644)
Patch with flag KEEPVERITY=[true] KEEPFORCEENCRYPT=[true]
Loading cpio: [ramdisk.cpio.orig]
Backup mismatch entry: [init] -> [.backup/init]
Record new entry: [overlay.d] -> [.backup/.rmlist]
Record new entry: [overlay.d/sbin] -> [.backup/.rmlist]
Record new entry: [overlay.d/sbin/magisk32.xz] -> [.backup/.rmlist]
Record new entry: [overlay.d/sbin/magisk64.xz] -> [.backup/.rmlist]
Create directory [.backup] (0000)
Add entry [.backup/.magisk] (0000)
Dump cpio: [ramdisk.cpio]
Loading dtbs from [kernel_dtb]
Patch @ 0153750D [736B69705F696E697472616D667300] -> [77616E745F696E697472616D667300]
– Repacking boot image
Parsing boot image: [/data/user_de/0/com.topjohnwu.magisk/install/boot.img]
HEADER_VER [1]
KERNEL_SZ [10069967]
RAMDISK_SZ [36856986]
SECOND_SZ [0]
RECOV_DTBO_SZ [93268]
OS_VERSION [9.0.0]
OS_PATCH_LEVEL [2019-07]
PAGESIZE [2048]
NAME []
CMDLINE [bootopt=64S3,32N2,64N2 product.version=PD1913F_EX_A_1.6.8 fingerprint.abbr=9/PPR1.180610.011 buildvariant=user]
CHECKSUM [634d8edd00f63b142709f38c5ad1e3e39da8b4ca000000000000000000000000]
KERNEL_DTB_SZ [103781]
KERNEL_FMT [gzip]
RAMDISK_FMT [gzip]
VBMETA
Repack to boot image: [new-boot.img]
HEADER_VER [1]
KERNEL_SZ [10069145]
RAMDISK_SZ [37262688]
SECOND_SZ [0]
RECOV_DTBO_SZ [93268]
OS_VERSION [9.0.0]
OS_PATCH_LEVEL [2019-07]
PAGESIZE [2048]
NAME []
CMDLINE [bootopt=64S3,32N2,64N2 product.version=PD1913F_EX_A_1.6.8 fingerprint.abbr=9/PPR1.180610.011 buildvariant=user]
CHECKSUM [a01ea898e1f82fb93e655852212ed41a84863f91000000000000000000000000]
****************************
Output file is written to
/storage/emulated/0/Download/magisk_patched-24101_c5GZl.img
****************************
cp: can’t preserve ownership of ‘busybox’: Operation not permitted
cp: can’t preserve ownership of ‘magisk32’: Operation not permitted
cp: can’t preserve ownership of ‘magisk64’: Operation not permitted
cp: can’t preserve ownership of ‘magiskboot’: Operation not permitted
cp: can’t preserve ownership of ‘magiskinit’: Operation not permitted
– All done!