In this guide, we will show you various methods to mitigate the issue of Google Drive Local Search Indexing Not Working in Stream Mode. The Google Drive for Desktop app provides you with two different file handling options- Stream Mode and Mirror Mode. As is evident from their name, if you choose the former option, then all your files will only be stored in the clouds. On the other hand, in the Mirror Mode, all your files will also be stored on your desktop, apart from the clouds.
Out of these two modes, it’s the Mirror mode that is preferred by most of the users, and understandably so. However, right after the Search Engine giants decided to replace the Backup & Sync with this Drive for Desktop app, everything went for a toss. While a few bugs and issues were always along expected lines, what came as a shocker to literally everyone was the removal of the ability to search Drive “streamed” files on your PC.

Across both Windows and macOS Spotlight, local indexing of Goole Drive files isn’t being shown in the search results. The reason why the Silicon Valley giants decided to implement this change is beyond anyone’s understanding. And the only silver lining among the dark clouds is the fact that there do exist a few workarounds that might help you fix the issue of Google Drive Local Search Indexing Not Working in Stream Mode. So without any further ado, let’s check them out.
Table of Contents
How to Fix: Google Drive Local Search Indexing Not Working in Stream Mode?

Do keep in mind that all the below-mentioned methods are just workarounds. None of them would actually fix this issue as this is a server-side change. So on that rather non-optimistic approach, let’s get started.
FIX 1: Modify System Indexing Directory
Google Drive for desktop app displays all the files inside a network drive (which points to a localhost server). Then the files that you choose to store locally on your PC are stored in the cache system. So what you could do is manually add this cache folder location directory to the OS indexing catalog and then check out the results. Here’s how:
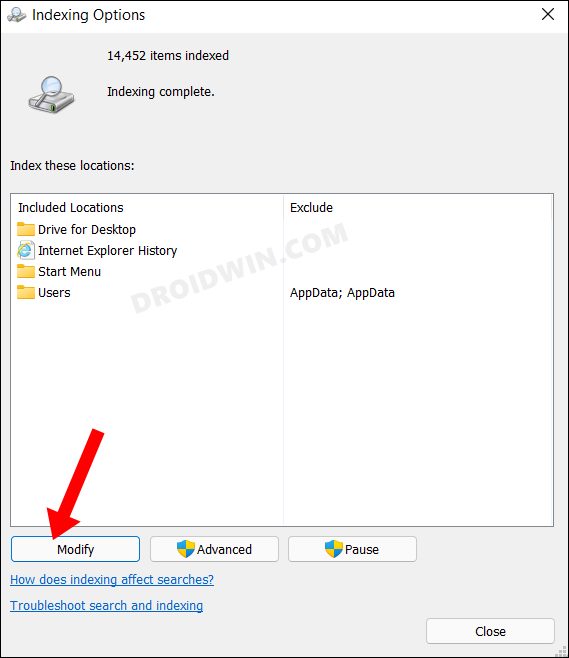
- Head over to the Start Menu, search Indexing Options, and open it.
- After that, click on the Modify button situated at the bottom left.

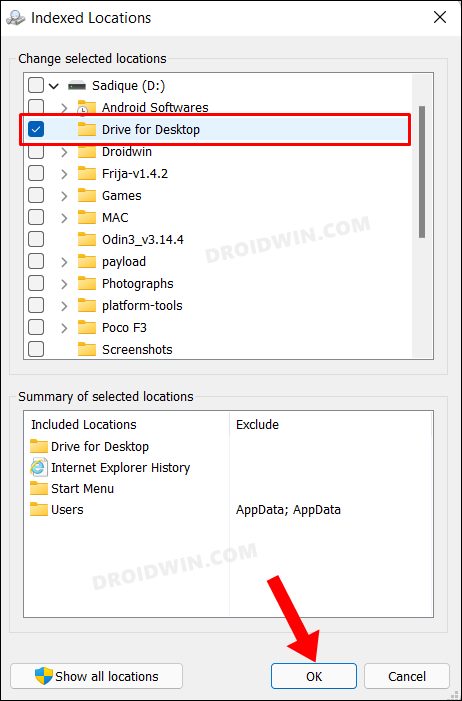
- Then checkmark the Drive cache directory and hit OK.
- Check if it fixes the Google Drive Local Search Indexing Not Working in Stream Mode.
FIX 2: Index My Drive folder in Spotlight Preferences
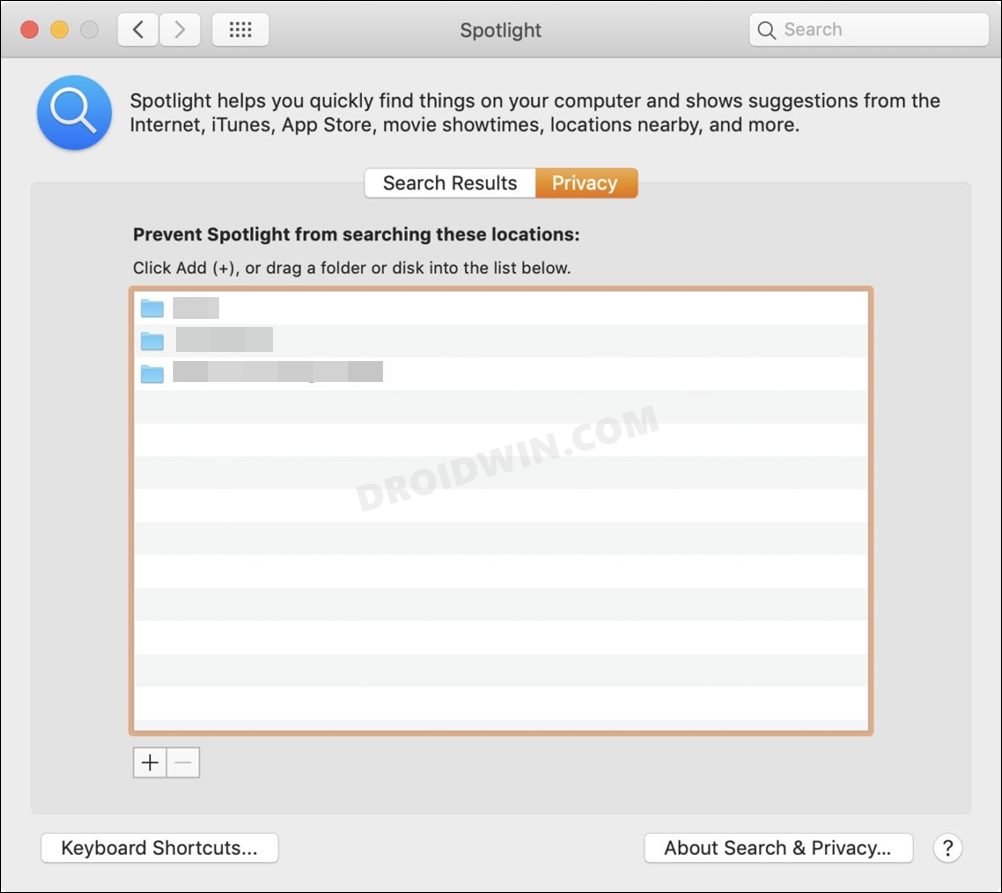
- As is evident from the title, you could also try indexing the My Drive folder on your Mac’s Spotlight Preferences, but with a little tweak.
- So start off by dragging the “My Drive” folder to Spotlight’s Privacy list. Then remove it from that list.
- This will make Spotlight reindex the folder, but the entire process could take a minute or two.
- Once done, verify whether the Google Drive Local Search Indexing Not Working in Stream Mode has been fixed or not.
FIX 3: Using Explorer Search Bar
For some users, it was using the Windows File Explorer search bar that did the trick. The major downside with this trick is that the Explorer literally takes ages in finding the desired files, which was usually done in seconds by the Backup and Sync Tool.

But now that tool is no longer available, you could opt for this method. So launch File Explorer via Windows+E shortcut keys and then type in the desired file name. Check if it is able to index and locally search that Google Drive streamed file or not.
FIX 4: Mirror Files via Cloud Only Account
If there are only a few folders that you store on the clouds then you could opt for this nifty workaround that you could opt for. What you need to do is to set up a second “cloud-only” Google account and then transfer ownership of folders/files you want to exist only in the cloud to that account. After that, you could use the Drive for Desktop app in Mirror mode and this will then make the Spotlight/Windows Search work.
This is because the search would now be taking place locally and the Drive app has no issues in indexing locally stored files. However, the two biggest downsides of this method are that this process will exhaust a considerable bandwidth and would also take up too much storage space on your PC. So if that’s well and good, then refer to the below instructions to try it out.
- To begin with, have a second Google account ready. This will act as a cloud-only account.
- Then transfer the ownership of all the files or folders that you want should remain in the clouds over to this cloud-only account.
- For that, open the Drive website and select the file that you wish to transfer to someone else.
- Then click on Share and send the file to your cloud-only account.
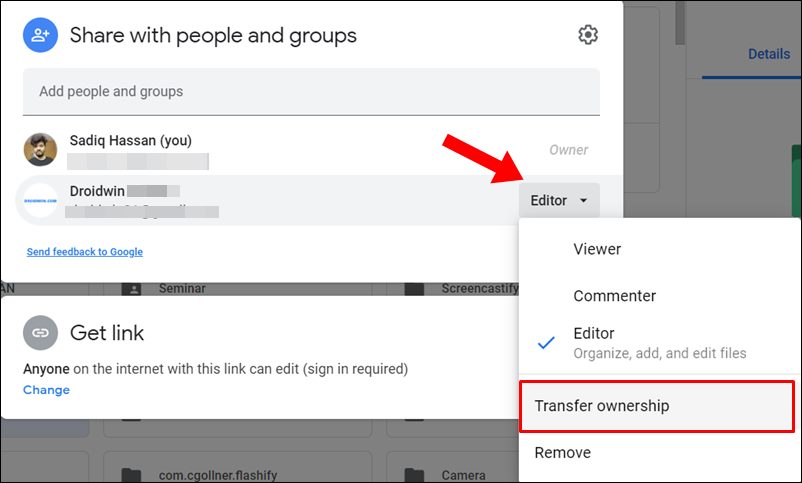
- After that, again click on Share but this time click on the drop-down arrow next to the Share button.
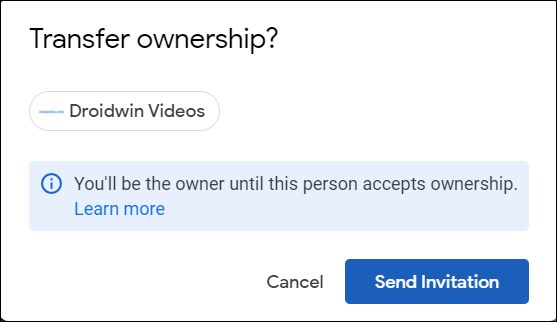
- Now click Transfer ownership > Send invitation. Now open your cloud-only account and accept the Invitation.
- Once that is done, launch the Drive for Desktop and make sure that you are signed in with your primary account (and not the cloud-only account).
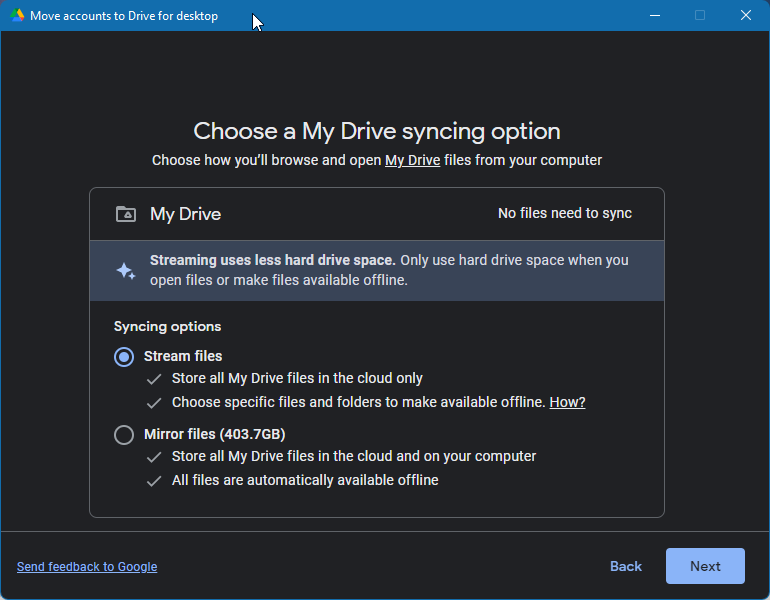
- After that, change the Mode from Stream to Mirror.
- Drive will now begin downloading all the files locally on your PC and this process would take time.
- Once done, all your files will be in a local folder and you could now easily use the Search/Spotlight feature.
FIX 5: Using Codes, Scripts, and Tools
Another course of action that you could take is to force the Drive client to locally index streamed files with the help of third-party tools, or Python script, or a JavaScript Code.
Using Python Script
You could also carry out this task via a Python script. You could get hold of the detailed explanation at the Apple Stacks Exchange Forums. The shorter explanation follows below. Do note that this is a temporary workaround and Google will remotely implement its own changes on top of ours inside the core_feature_config file. So it’s better to search your desired files as soon as the process gets completed.
- To begin with, close the Drive for Desktop app on Mac.
- Then download this Python script file on your Mac. You may open the file and reverify the credibility of the code yourself.
- Save this file as change_gdrive_smb_port.py and then transfer it to the Python installation directory.
- Now execute this file. It will give you a prompt as soon as it finds an account.
- Likewise, it will then ask which port to change that account’s SMB port to. Make sure that this port is unused.
- Now launch the Drive for Desktop app and relaunch the “mdutil -i on” command that the script would have given you.
- Wait for a few minutes as Spotlight will now start indexing the Google Drive files. Once done, the process stands complete.
Using JavaScript
You also have the option of using JavaScript code to create and mount an indexable volume (by mounting localhost), then forcing Drive to reindex files and finally restarting the client. The entire explanation and usage instructions could be found at GitHub and you could have a sneak peak of the code below as well.
#!/bin/bash

echo -e '\033[37;44m'"\033[1m"---- port ----"\033[0m";

PORT=$(mount | grep GoogleDrive | grep -o -E '\d{5}')
echo PORT: $PORT

echo -e '\033[37;44m'"\033[1m"---- mount ----"\033[0m";

if [ ! -d "/Volumes/Google Drive" ]; then
  osascript -e "try" -e "mount volume \"smb://DRIVE@localhost:$PORT\"" -e "end try"
else
  echo already mounted
fi

mount | grep Google

echo -e '\033[37;44m'"\033[1m"---- dir ----"\033[0m";

DIR=$(sudo ls /private/var/db/Spotlight-V100/LocalVolumes/)
echo DIR: $DIR

if sudo [ ! -d "/private/var/db/Spotlight-V100/LocalVolumes/smb%3A%2F%2FDRIVE@localhost%3A$PORT%2FGoogle%2520Drive" ]; then
  sudo mv /private/var/db/Spotlight-V100/LocalVolumes/$DIR /private/var/db/Spotlight-V100/LocalVolumes/smb%3A%2F%2FDRIVE@localhost%3A$PORT%2FGoogle%2520Drive && echo renamed || echo rename failed
else
  echo already exists
fi

sudo ls -la /private/var/db/Spotlight-V100/LocalVolumes/ | grep Google

echo -e '\033[37;44m'"\033[1m"---- exclude ----"\033[0m";

for d in \
    "/My Drive/Documents" \
    "/My Drive/YouWantToExclude" \
                  :
;
do
  sudo /usr/libexec/PlistBuddy -c "Add :Exclusions:0 string $d" /private/var/db/Spotlight-V100/LocalVolumes/smb%3A%2F%2FDRIVE@localhost%3A$PORT%2FGoogle%2520Drive/VolumeConfiguration.plist
done

sudo /usr/libexec/PlistBuddy -c "Print :Exclusions" /private/var/db/Spotlight-V100/LocalVolumes/smb%3A%2F%2FDRIVE@localhost%3A$PORT%2FGoogle%2520Drive/VolumeConfiguration.plist

echo -e '\033[37;44m'"\033[1m"---- enable ----"\033[0m";

string=$(mdutil -s /Volumes/Google\ Drive | tail -1)
if [[ $string == *"enabled"* ]]; then
  echo already enabled
else
  mdutil -i on /Volumes/Google\ Drive
fi

mdutil -s /Volumes/Google*
Using Third-Party Tools
There exist quite a few tools that could mimic Drive’s indexing functionality by actually creating placeholder files of the same names as the real file names and hence letting the indexing function work on your PC. However, using any of these tools would require you to give them access to your Drive files, which could prove to be a major privacy risk.
Concluding Remarks
So with this, we round off the guide on how you could fix the issue of Google Drive Local Search Indexing Not Working in Stream Mode. We have listed five different workarounds for the same. Though none of them would rectify this problem, they might help you in mitigating this issue up to an extent.
The only way of actually fixing this issue is when Google decides to reintroduce this functionality back into its app, chances of which are bleak as of now. As and when (or rather if) that happens, we will update this guide accordingly. In the meantime, if you know of any workarounds, do let us know in the comments below. Likewise, all your queries are welcomed in the comments section.


