In this guide, we will show you how to fix the issue of the device not booting up after flashing a GSI ROM. Whenever a tech enthusiast steps into custom development, then flashing a customized firmware is usually at the top of the priority queue. And with OnePlus switching over to ColorOS and ditching the OxygenOS in the process, we might now see quite a few users from this OEM as well in this domain.
Talking about these custom ROMs, it is solely in the hands of the developers to release them, taking various factors into consideration. However, there are still some popular devices out there that are left out from this, mainly because of a lack of working custom recovery, kernel source code not being readily available, or because it failed to get the attention of the devs. In all these scenarios, a Generic System Image comes in handy.
The only prerequisite that your device needs to checkmark is that it should be Project Treble compatible (which most of today’s devices are). If that’s well and good, then you will be able to flash the desired GSI Image onto your device and enjoy all the goodies of a custom ROM. Moreover, flashing these system images doesn’t even require you to have a custom recovery, you could directly flash them via Fastboot Commands.
However, in spite of all the goodies attached, there is one common issue that we usually come across after flashing a GSI- the device fails to boot up. It is either stuck in a bootloop or gets soft-bricked, with Fastboot being the only accessible mode. If you are also in the same boat, then this guide will show you the steps to fix the issue of the device not booting up after flashing a GSI ROM. So without any further ado, let’s get started.
Table of Contents
How to Fix: Device not booting after flashing GSI
The below instructions are listed under separate sections for ease of understanding. Make sure to follow in the exact same sequence as mentioned. Droidwin and its members wouldn’t be held responsible in case of a thermonuclear war, your alarm doesn’t wake you up, or if anything happens to your device and data by performing the below steps.
STEP 1: Install Android SDK

First and foremost, you will have to install the Android SDK Platform Tools on your PC. This is the official ADB and Fastboot binary provided by Google and is the only recommended one. So download it and then extract it to any convenient location on your PC. Doing so will give you the platform-tools folder, which will be used throughout this guide.
STEP 2: Download and Extract Stock Firmware
Next up, download the stock firmware for your device and extract it to any convenient location on your PC. Once the extraction is complete, transfer the below files to the platform-tools folder.
- boot.img [compulsory]
- vbmeta.img [compulsory]
- dtbo.img [if present]
- vendor_boot.img [if present]
- vbmeta_system.img [if present]
- vbmeta_vendor.img [if present]
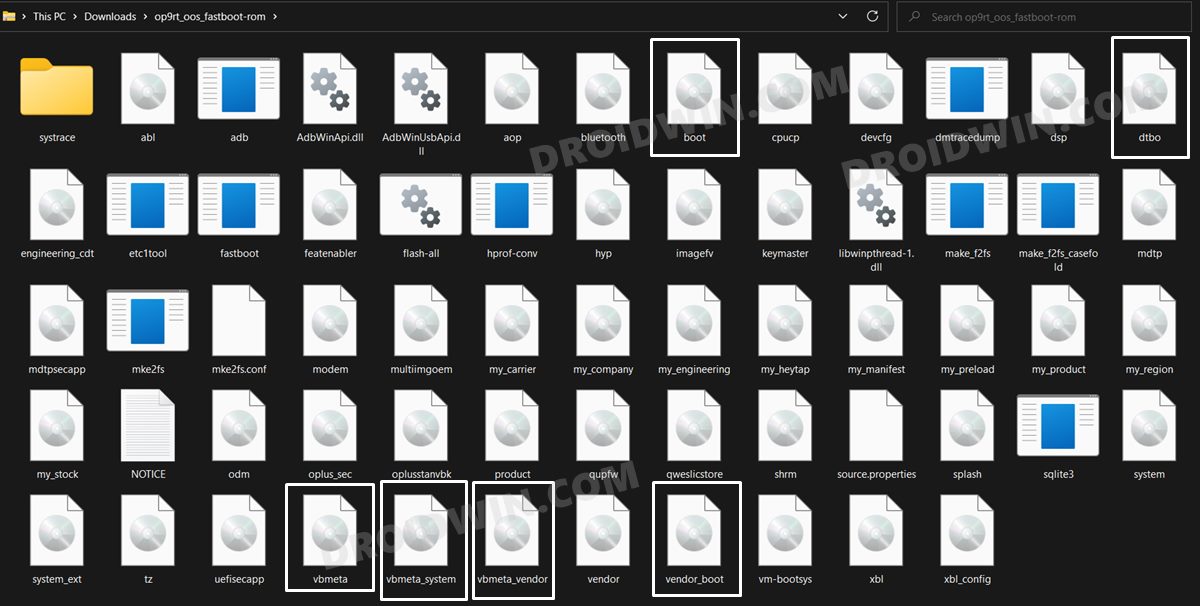
Do note that not every device has the dtbo.img, vendor_boot.img, vbmeta_system.img, and vbmeta_vendor.img, that is completely fine. However, your stock firmware should definitely have the boot.img and vbmeta.img files.
STEP 3: Boot Bricked Device to Fastboot Mode
In most cases, a soft-bricked or boot looped device might already be in the Fastboot Mode. However, if you are stuck in a bootloop, then long-press the Power key to turn it off. Then press and hold the Power and Volume Down keys (or Power and Volume Up in some devices) together to boot your device to Fastboot Mode.

However, if you are unable to power off the device, then let its battery drain out. Once that happens, connect it to the charger. Then as soon as it is about to boot up, use the Power and Volume Up/Down keys and it will straightaway boot to Fastboot Mode.
STEP 4: Flash boot [dtbo, vendor]
- Head over to the platform-tools folder, type in CMD in its address bar, and hit Enter. This will launch the CMD window.

- Now execute the below command to flash the boot.img file to both the slots [in case of any error, check FAQ 1 at the end of this guide].
fastboot flash boot_a boot.img
fastboot flash boot_b boot.img
- If your stock firmware has dtbo.img and vendor_boot.img as well, then flash them onto your device as well:
fastboot flash dtbo_a dtbo.img
fastboot flash dtbo_b dtbo.img
fastboot flash vendor_boot_a vendor_boot.img
fastboot flash vendor_boot_b vendor_boot.img

STEP 5: Disable Verity Checks
You will now have to disable the verification checks on your device as well. And that could be achieved by flashing the vbmeta (and vbmeta_system and vbmeta_vendor) files. So proceed with the below instructions to start the process [in case of any error, check out FAQ 1 at the end of this guide].
- To begin with, flash the vbmeta file to both the slots using the below command:
fastboot --disable-verity --disable-verification flash vbmeta_a vbmeta.img
fastboot --disable-verity --disable-verification flash vbmeta_b vbmeta.img
- Then if your device comes with a vbmeta_system file, then flash it across both the slots using the following commands:
fastboot --disable-verity --disable-verification flash vbmeta_system_a vbmeta_system.img
fastboot --disable-verity --disable-verification flash vbmeta_system_b vbmeta_system.img
- Likewise, if your firmware also has the vbmeta_vendor file, then flash it across both the slots using the below commands:
fastboot flash --disable-verity --disable-verification vbmeta_vendor_a vbmeta_vendor.img
fastboot flash --disable-verity --disable-verification vbmeta_vendor_b vbmeta_vendor.img
- That’s it. You may now reboot the device to the OS via the below command [check FAQ 2 in case of any issues]:
fastboot reboot
So these were the steps to fix the issue of the device not booting up after flashing a GSI ROM. If you have any queries concerning the aforementioned steps, do let us know in the comments. We will get back to you with a solution at the earliest.
FAQ 1: Fix Fastboot Flash Commands Gives Out Error
If the fastboot flashing commands are giving out errors, then rather than flashing the files to both the slots, you should use the generic flashing commands.
- So instead of using the below two commands:
fastboot flash boot_a boot.img
fastboot flash boot_b boot.img
- You should execute the following single command:
fastboot flash boot boot.img
- Do so for all the other files and then check out the results.
FAQ 2: Fix Fastboot Reboot Command Not Working
If your device is still stuck in a bootloop even after flashing all the files, then you might have to reflash the GSI image.
- For that, rename the GSI ROM to system.img and then transfer it to the platform-tools folder.
- After that, execute the below command to flash the GSI ROM:
fastboot flash system system.img
- Then try rebooting to the OS vias the below command:
fastboot reboot
- If you are still stuck in a bootloop, then you will no choice but to factory reset your device.
- So execute the below command to do so
fastboot -w
- You should have no issues in booting the GSI ROM now.
On that note, we round off this tutorial on how you could fix the issue of the device not booting up after flashing a GSI ROM. All your queries are welcomed in the comments section below.


hakan
Hello, my phone is Redmi Note 12 4G tapas model. The device does not accept GSI installation in any way and does not turn on fastbootd mode after disabling vbmeta. Please help.