In this guide, we will show you the steps to extract the boot.img file directly from your device, without even the need to download the firmware. In order to extract the full potentiality of their device, the first step calls for unlocking the device’s bootloader. Once you do so, you stand in a position to try out a plethora of mods and tweaks. But most of these customizations require you to get administrative privileges. In other words, your device needs to be rooted via Magisk.
Now there are two different methods through which you could carry out the said task. The first one is by directly flashing the Magisk App via TWRP. Then the second method involves extracting the boot.img file from the stock firmware, patching it via Magisk and flashing it via Fastboot. However, there are two major issues with this method. First off, it requires you to download the entire firmware, which not only exhausts your data but also leads to unnecessary time wastage.
Then the second and more concerning issue is the fact that you need to get hold of the exact same firmware version that is currently installed on your device. If you end up flashing an incorrect build number’s boot.img then it would straightaway lead to a boot looped or bricked device. Hence as you might have noticed, both these issue arises from the firmware, one way or the other. But what if we take the stock firmware out of this picture? Well, as strange as it may sound, this is very much possible.
Rather than downloading the firmware file, we would directly extract the boot.img file from the firmware that is already installed on your device. This way, you could be absolutely sure that the stock boot.img file is of the same version that is currently installed on your device. So now that you are aware of the benefits of this method, let’s start off with the instructions to extract the boot.img file directly from your device without downloading the firmware.
Table of Contents
Extract Boot.img Directly from Device via TWRP
The below instructions are listed under separate sections for ease of understanding. Make sure to follow in the exact same sequence as mentioned. Droidwin and its members wouldn’t be held responsible in case of a thermonuclear war, your alarm doesn’t wake you up, or if anything happens to your device and data by performing the below steps.
Heads Up: This is the best method to get this job done as it will give you the boot.img depending on your current device status. If your device is non-rooted, then it’ll give you a stock boot.img. On the other hand, if your device is rooted, then it will give you the patched boot.img!
Install Android SDK
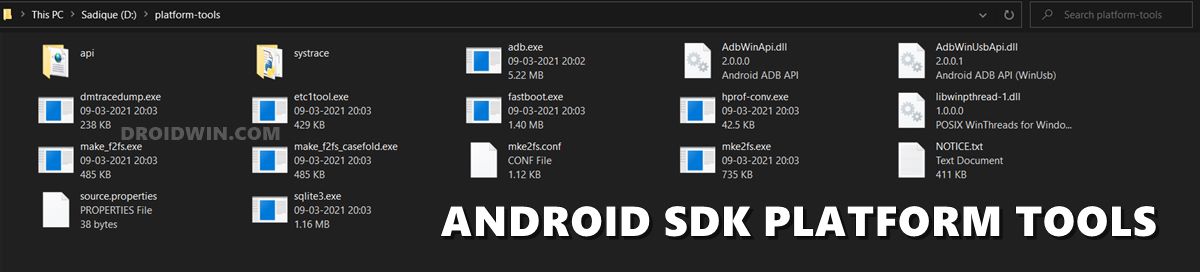
First and foremost, you will have to install the Android SDK Platform Tools on your PC. This is the official ADB and Fastboot binary provided by Google and is the only recommended one. So download it and then extract it to any convenient location on your PC. Doing so will give you the platform tools folder, which will be used throughout this guide.
Enable USB Debugging
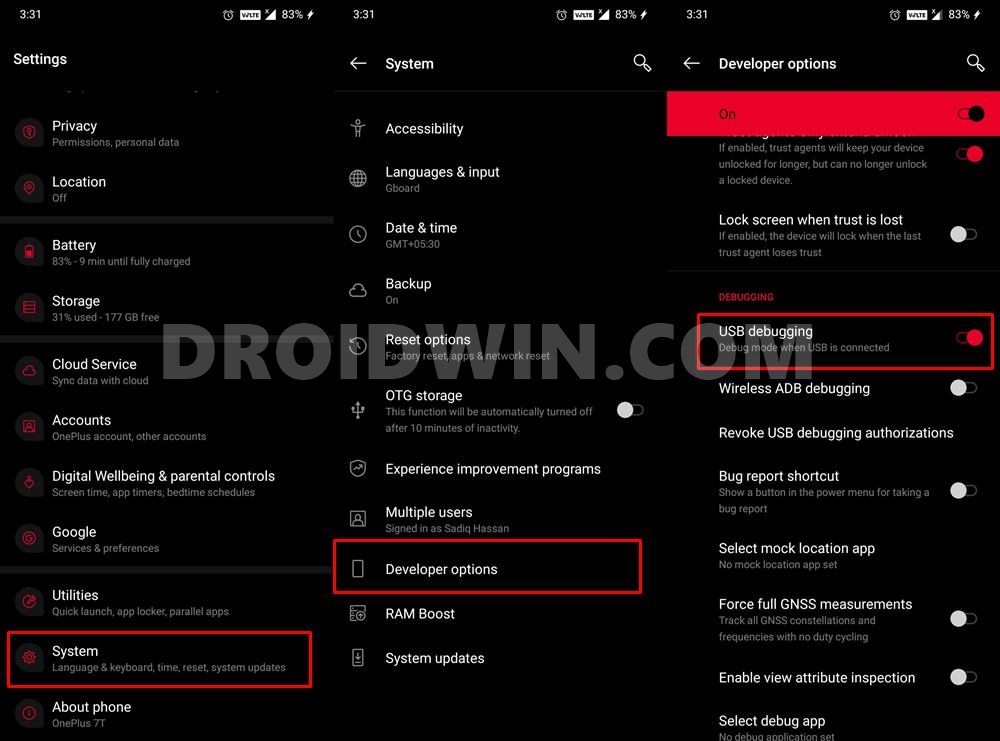
Next up, you will have to enable USB Debugging on your device. It will make your device recognizable by the PC in ADB mode. So head over to Settings > About Phone > Tap on Build Number 7 times > Go back to Settings > System > Advanced > Developer Options > Enable USB Debugging and OEM Unlocking.
Install TWRP Recovery
For this process, you would need to have the TWRP Recovery installed. If that is not the case, then please refer to our comprehensive tutorial on How to Install TWRP Recovery on Android. The guide also lists out the instructions to temporarily boot the device to TWRP. You may try that out as well if you are just looking to install TWRP for one-time usage.
Boot Device to TWRP Recovery
- Connect your device to the PC via USB cable. Make sure USB Debugging is enabled.
- Then head over to the platform-tools folder, type in CMD in the address bar, and hit Enter. This will launch the Command Prompt.

- Type in the following command in the CMD window to boot your device to TWRP Recovery
adb reboot recovery

Extract Boot.img via TWRP
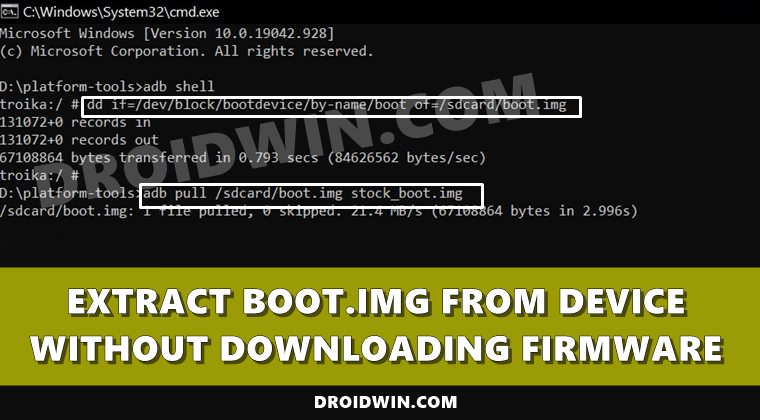
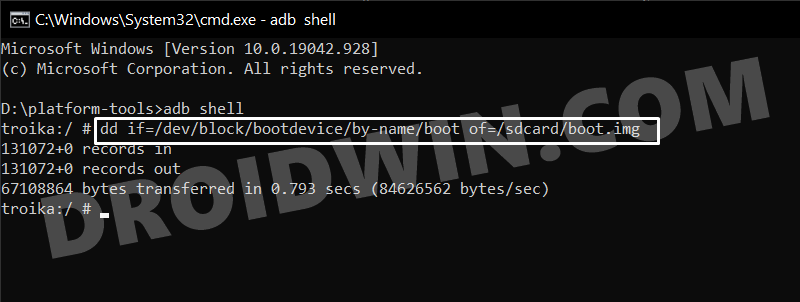
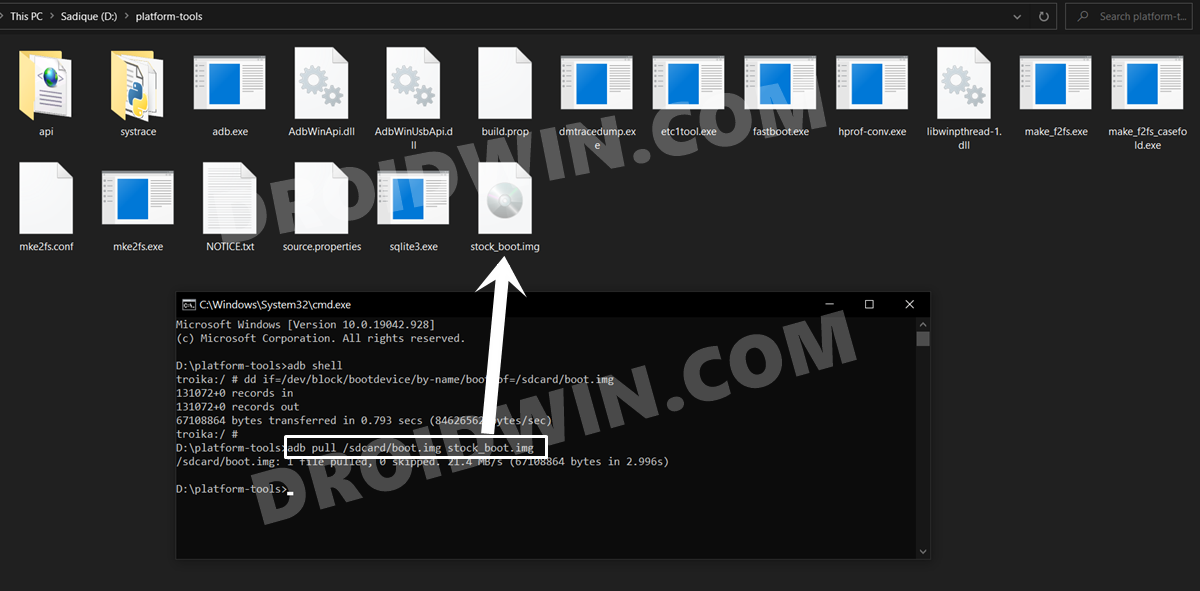
- With your device booted to TWRP and connected to PC, type in the below command in the CMD window that is opened inside the platform-tools folder:
adb shell
dd if=/dev/block/bootdevice/by-name/boot of=/sdcard/boot.img
- As soon as you execute the above command, your device will extract the stock boot.img from the currently installed firmware. It will then place this boot.img file in the Internal Storage (not inside any folder).
- While it is optional, but I highly recommend that you take a backup of this file onto your PC as well. For that, use the following command:
adb pull /sdcard/boot.img stock_boot.img
- As soon as you do so, a copy of boot.img will be placed inside the platform-tools folder. it will be named stock_boot.img.
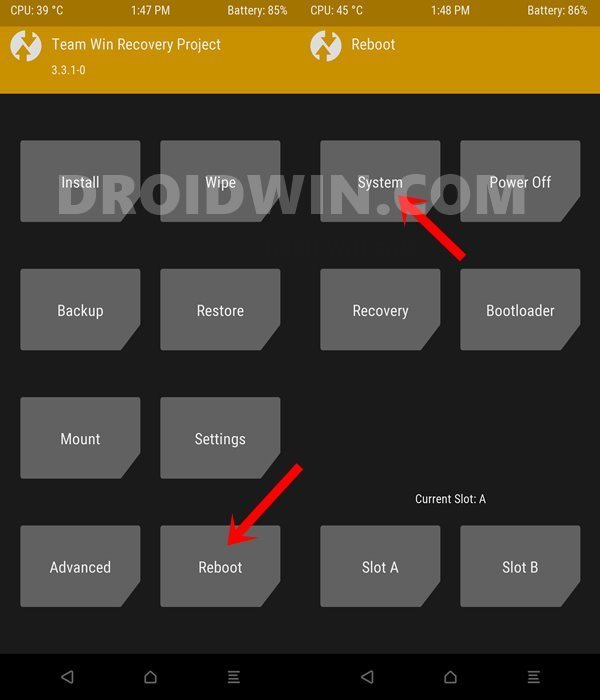
- Anyways, now that the process is complete, you may reboot the device to the OS. For that, go to Reboot and select System.
- Once your device boots up, install the Magisk App and patch this boot.img file via it. Doing so shall give you the magisk_patched.img file, which you could then flash via Fastboot Commands and hence root your device!
So this was all from this guide on how you could extract the boot.img file directly from your device without downloading the firmware. If you have any queries concerning the aforementioned steps, do let us know in the comments. We will get back to you with a solution at the earliest.
Extract Boot.img Directly from Device via Root
You could also extract the boot.img file if your device is rooted via Magisk, however, these methods will only give you the patched boot.img. But having root as a prerequisite might sound as counterintuitive as we are looking for the stock boot.img to root the device in the first place. Well, that’s true up to an extent and hence this method is usually preferred if you have done a factory reset and want to re-root your device, then you could directly use this patched boot.img and quickly obtain root.
Extract Ptched Boot.img via DD Command
- Enable USB Debugging and connect your device to your PC via a USB cable.
- After that, download and extract Android SDK Platform Tools on your PC.
- Now open Command Prompt inside platform tools and type in the below command:
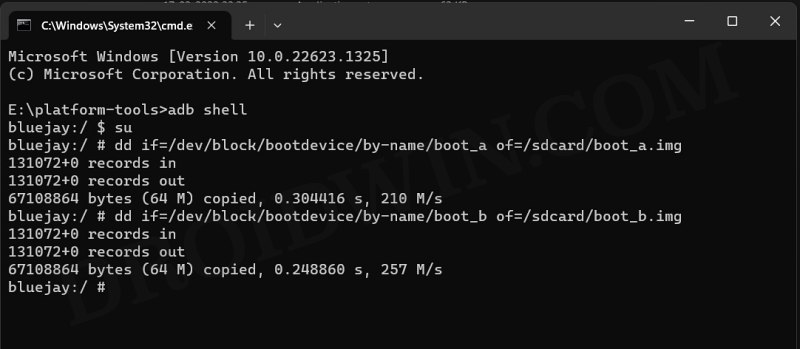
adb shell
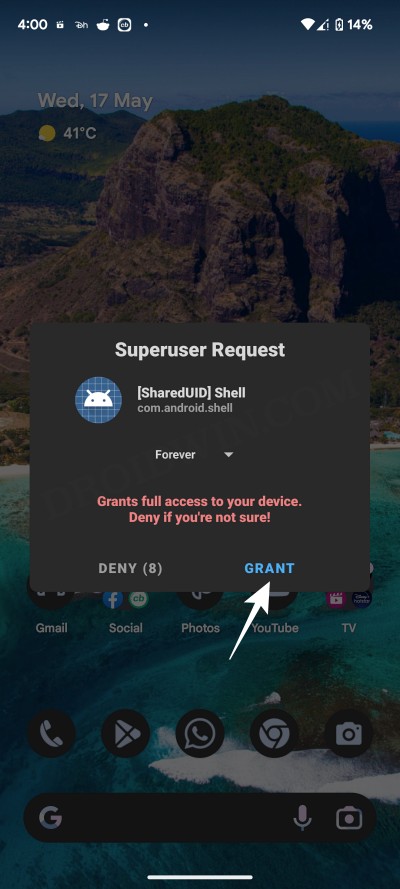
- You might get a prompt on your device, tap OK. Now type in the below command:
su
- You’ll get a Magisk prompt, tap OK. Finally, execute the below two commands:
dd if=/dev/block/bootdevice/by-name/boot_a of=/sdcard/boot_a.img
dd if=/dev/block/bootdevice/by-name/boot_b of=/sdcard/boot_b.img
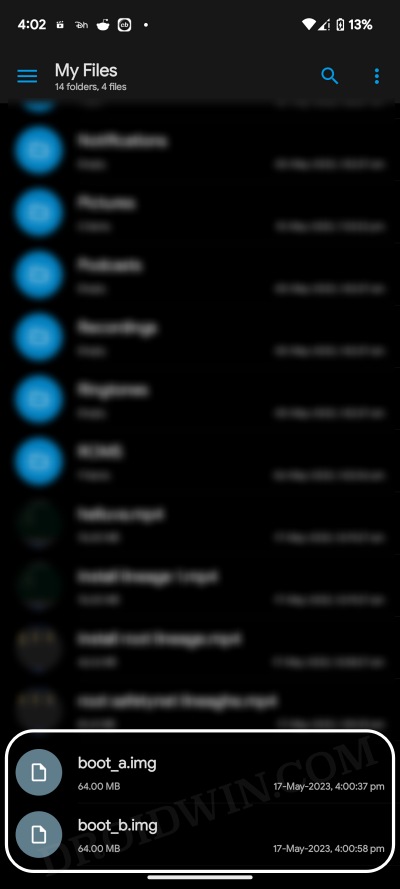
- The boot_a.img and boot_b.img will now be placed in the platform-tools folder.
Extract “Patched” Boot.img via Termux
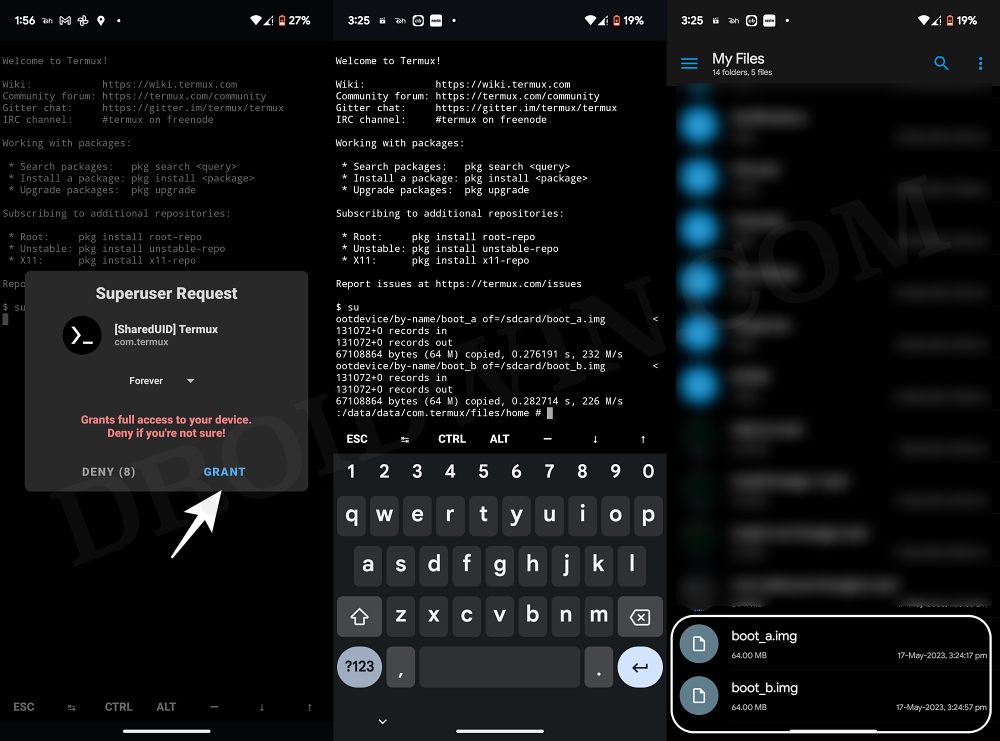
- Download and install Termux from Play Store. Then launch it, type in su, and hit Enter.
- You’ll get a Magisk prompt, tap OK/Grant. Now type in the below two commands:
dd if=/dev/block/bootdevice/by-name/boot_a of=/sdcard/boot_a.img
dd if=/dev/block/bootdevice/by-name/boot_b of=/sdcard/boot_b.img
- The backup of patched boot_a.img and boot_b.img will be created on your device.
- You could now easily access them from Internal Storage and transfer it to the desired location.
Extract Stock Boot.img via Magisk? No please!
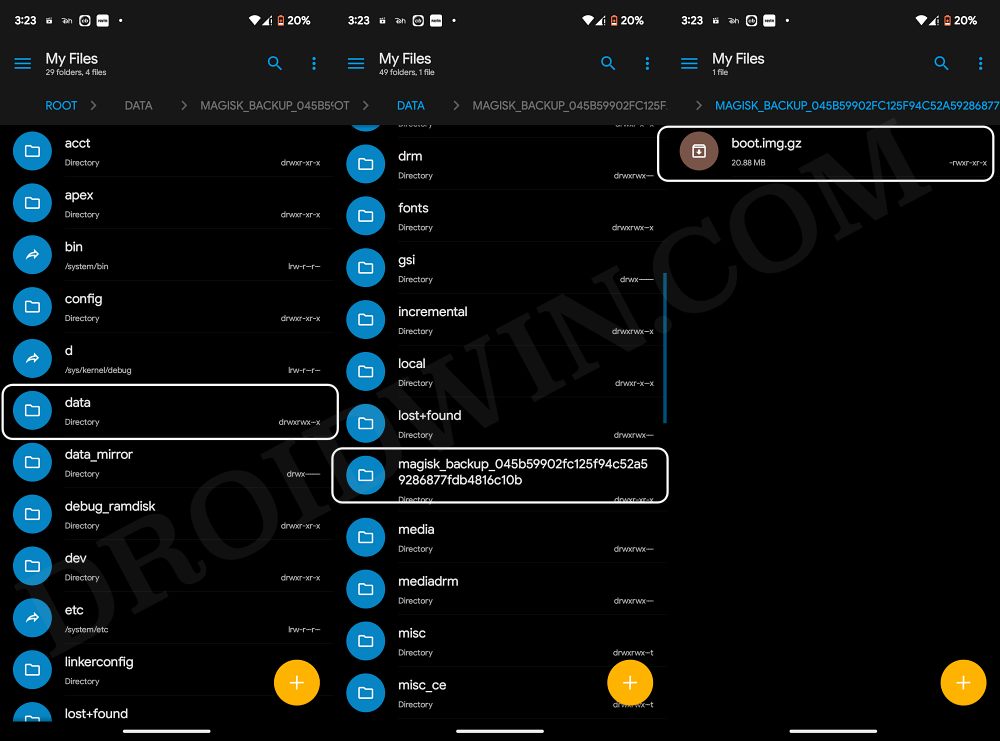
Even though Magisk creates a backup of stock boot.img, but it compresses it in its own format and only it could use this format. So while you could flash its backed-up boot.img.gz, but your device will end up in a bootloop. So it’s best to skip this method.
- Download and install a root-supported File Manager.
- Then launch it, go to the menu, and select Root directory.
- You’ll get a Magisk prompt, tap OK. Then go to /data.
- You should see the magisk_backup_<random> folder.
- Go there and the stock boot.img will be present in that folder.
- You could transfer it to the desired location via the dd command.
Extract Boot.img via DSU Sideloader
Extract Boot.img Directly from Device via a Script File
If you don’t wish to manually execute the commands in the CMD inside that we have mentioned above, then there’s an alternate way out. XDA Member KyoshiDev has created a script file that does exactly the same thing. You only need to launch the file and the script will do the rest of the work.
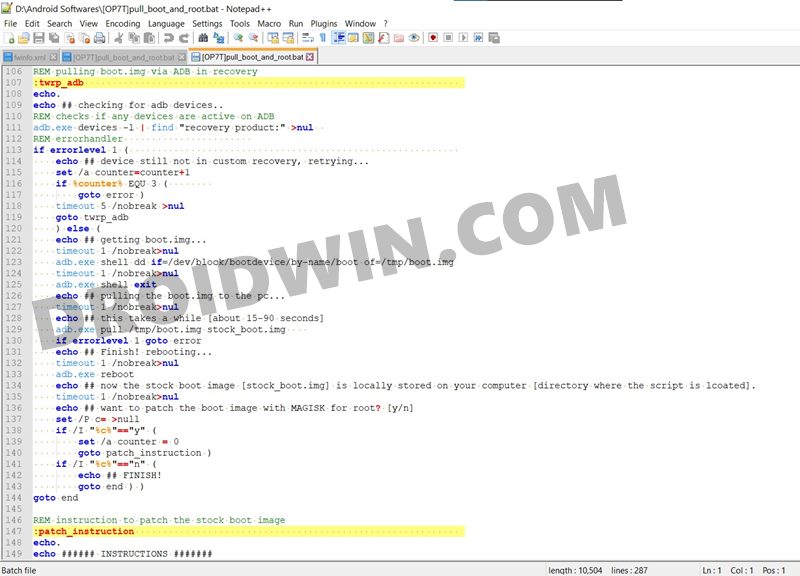
If you have any concerns regarding this file, then you may access its code over at GitHub and verify it yourself. Or even edit the Batch file via an advanced text editor and re-verify the contents of that file (see above image). As far as the prerequisite are concerned, they are exactly the same as before: Android SDK Platform Tools, Unlocked Bootloader, and TWRP Recovery installed on your device.
- Download the Script from GitHub: OP7T-boot-patch-tool
Once you have downloaded it, extract it inside the platform-tools folder, boot your device to Fastboot, connect it to PC via USB, and finally launch the script file.
Conclusion: Do we Really Need this Method?
There is definitely a counter-argument with this process. The biggest of which is the fact that since this process requires TWRP, wouldn’t it be better to directly flash the Magisk ZIP via TWRP instead of carrying out the aforementioned steps? Well, this is indeed a genuine doubt.
And there is no better way to answer this question than by sharing a real-life example of the same. So recently there were some issues with the boot partition which resulted in a boot looped device. The fix was fairly simple- to flash the stock boot.img file. And to get hold of this file, I no longer needed to download the entire firmware, rather the backup that I had made came in useful.
Well, this is just one of the many perks of this method, there could be countless others. Do share your opinions with us in the comments about what you think of this guide to extract the boot.img file directly from your device without downloading the firmware.


ganesh
Hi SADIQUE HASSAN,
Could you pls me, How to download android mobile original image (not jpg image) through using Linux.
andy01q
Thank you very much.
On my device, which is the not so exotic Redmo Note 8T TWRP does not run stable, even though countless devs have told me it does. And neither does Orangefox, although many devs have told me that Orangefox works better on my device than TWRP does. Well, it is nicer, has more features and is more responsive and less laggy, but it runs even less stable.
The script by Kyoshidev… is pretty. You told me to boot my device into fastboot first, which seems like a reasonable thing, but the script needs to reboot my phone into fastboot by itself or else it will just crash.
Next it asks for twrp.img I don’t have that ready (for a good reason), so let’s first reboot my phone into the ROM so that the script can reboot it back into fastboot, because now I need to start over. At this point I’m gonna stop and just say that I’d rather not have used the script.
Ted
How did you get “dd” in CMD/PS/Windows?
Deadman
you have to install fastboot and fastboot driver first and you can run those command
Lis Riba
You say “The (linked) guide also lists out the instructions to temporarily boot the device to TWRP”
How does one do that if I only want TWRP for this purpose?
Sadique Hassan
Hi Lis, here’s what you need to do in short: transfer twrp.img to platform-tools folder > open CMD inside this folder > use the fastboot boot twrp.img command to temporarily oot your device to TWRP.