From this guide, you could download and install the MediaTek Fastboot Drivers to establish a successful Fastboot connection. Upon installing the MTK VCOM USB Drivers, your PC would be able to recognize the connected device. This would then allow you to carry out tasks such as MTP, PTP, USB Tethering, among others.
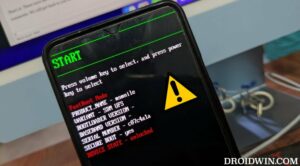
However, these drivers might not be enough if you are looking to carry out advanced functionalities. For tech enthusiasts, Fastboot is usually their go-to mode. Right from unlocking the bootloader, to flashing a custom recovery or even rooting their device via the Magisk patched boot.img, there’s a lot to try out. However, there have been a few instances when the PC isn’t able to identify the connected device, even if the USB Drivers are installed.
This happens when the appropriate Bootloader drivers aren’t installed. As a result, you wouldn’t be able to execute any Fastboot Command. Well, if you are currently going through this issue, then this guide shall help you to download and install the MediaTek Fastboot Drivers for the Fastboot connection. Follow along.
- How to Install TWRP on MediaTek using SP Flash Tool
- Bypass MediaTek SP Flash Tool SLA DAA Authentication
- How to Root any MediaTek Device Using SP Flash Tool
- How to Unbrick any MediaTek Phone using SP Flash Tool
Table of Contents
Download MediaTek Fastboot (Bootloader) Drivers
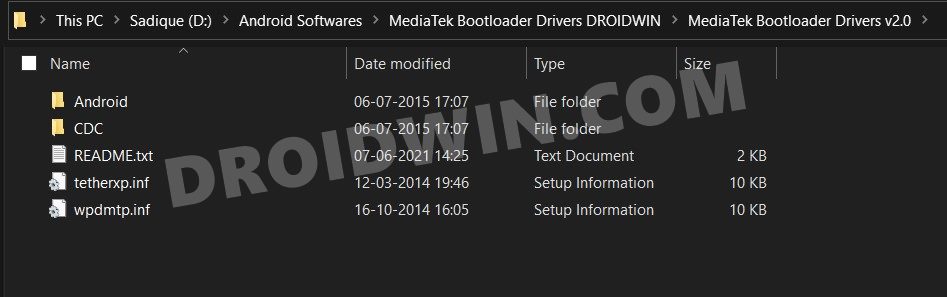
Before moving ahead with the instructions, make sure to grab the driver file from the below link:
- Download: MediaTek Bootloader Interface Drivers
How to Install MediaTek Fastboot Drivers
- To begin with, extract the downloaded driver file to any convenient location on your PC.

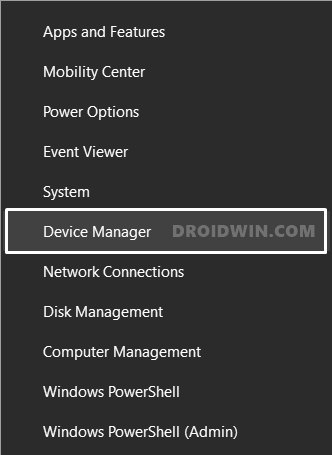
- Then right-click on the Windows icon present on the Taskbar and select Device Manager from the menu.
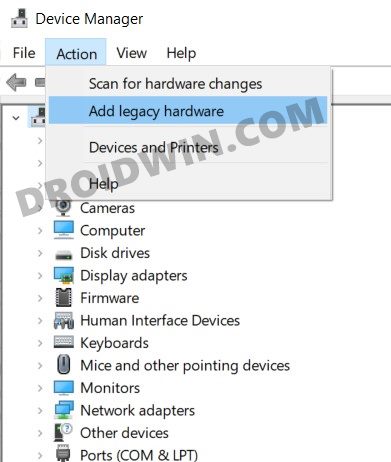
- Click on the Action button situated at the top menu bar and select Add Legacy Hardware.
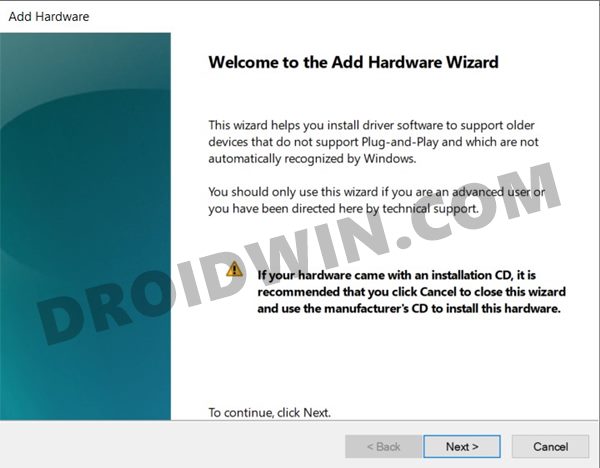
- Click Next on the welcome screen.
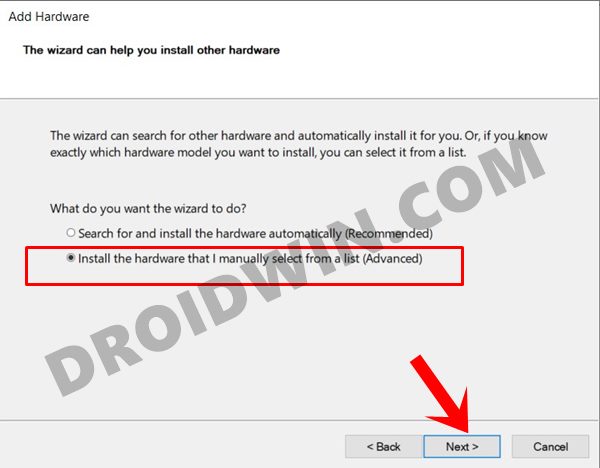
- Then select “Install the hardware that I manually select from a list”.
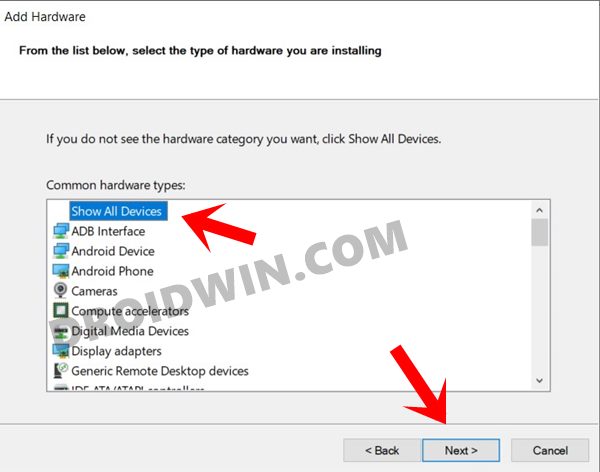
- Then select the Show All Devices option from the list and click Next.
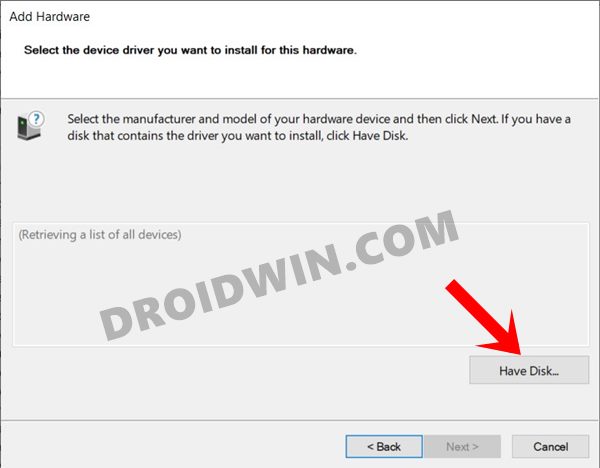
- After that, click on the Have Disk button.
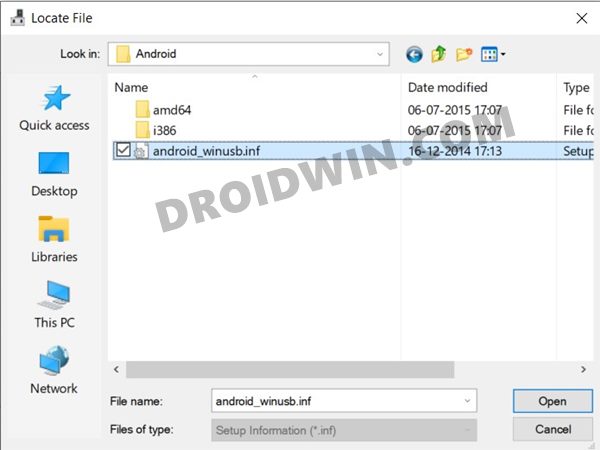
- Navigate to the extracted drivers folder, select the android_winusb.inf file and click OK.
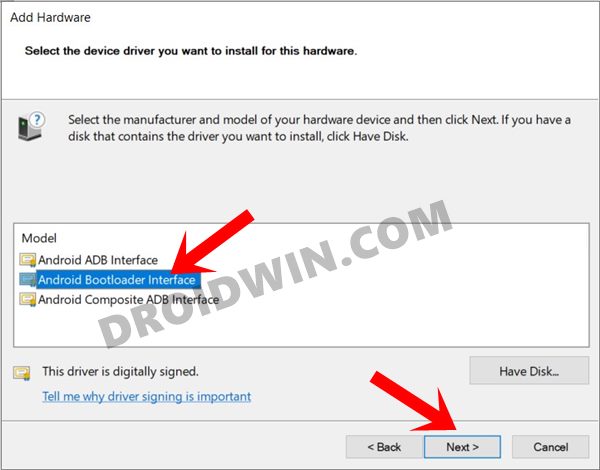
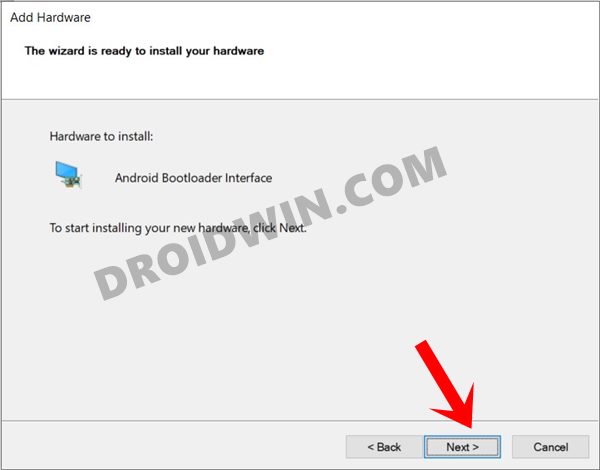
- Select the Android Bootloader Interface drivers from the list and hit Next.
- Finally, click Next and the installation process will now start. Once done, click on the Finish button.
- That’s it. It is now recommended that you restart your PC once as well.
So with this, you have successfully installed the MediaTek Fastboot Drivers. You may now check the Fastboot Connection by referring to our guide on How to Boot any Android Device to Fastboot Mode. You may also refer to the below shorter instructions:
How to Boot MediaTek Device to Fastboot Mode
- First off, download and install the Android SDK Platform-Tools folder on your PC.
- Then enable USB Debugging on your device and connect it to the PC via USB cable.
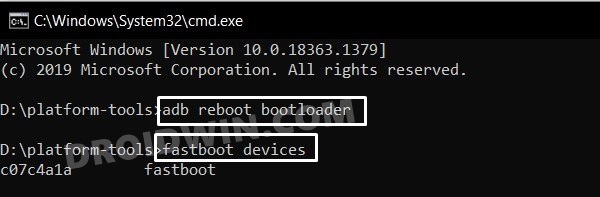
- Head over to the platform-tools folder, type in CMD in the address bar, and hit Enter.
- This shall launch the Command Prompt. Type in the below command to boot your device to Fastboot
- Finally, verify the Fastboot Connection by executing the below command:
fastboot devices
- If you get an alphanumeric code, then that’s it, the connection stands successful.

So with this, we round off this tutorial on how to download and install the MediaTek Fastboot Drivers. If you have any queries, do let us know in the comments section. We will get back to you with a solution at the earliest.