Google Camera Port for the recently released Redmi Note 7/Note 7 Pro is now available. Download and install it from the below guide.
Let’s face it. If there is any OEM which is capable of stuffing all the major features in a device at an extremely low price, it is Xiaomi (and Redmi too, now that it got separated). It seems to have carried forward this lineage by launching a new iteration in the Note series. With the launch of Redmi Note 7 and its Pro variant, it raised the bar to a completely new level altogether.
Some noticeable features include an Octa-Core Processor, Snapdragon 675 chipset, 6 GB of RAM, 4000mAh battery, 128 GB of storage and running on a modified version of Android 9. It seems probably there is nothing more you could ask for- at least at this price range.
Although it sports an impressive 48MP camera and an equally good 13MP HDR front camera, yet there is something more to be desired. This where we take the help of Google Camera Port. Read on below to know more.
Table of Contents
Google Camera Port for Redmi Note 7/Note 7 Pro
Google Camera is basically a stock camera app present in Google Nexus and Pixel devices. Nowadays it has become among the most sought after mods in the rooting communities. This is due to the fact that it provides tons of new features that completely bring a fresh new look to your photos. Some of the most amazing features include:
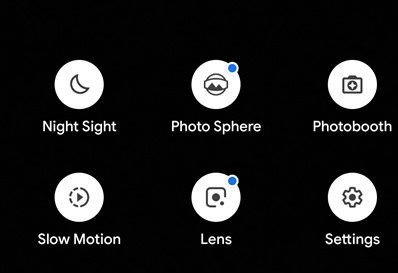
- HDR+
- HDR+ Enhanced
- Portrait Mode
- Motion Photos
- Top Shot
- Photo Booth
- Super Res Zoom
- Night Sight
If you want detailed instructions on each of these features, read this guide. Next, download the GCam from below and then head over to the instruction set that follows.
Download GCam for Redmi Note 7/Note 7 Pro
Three versions of Google Camera for Redmi Note 7 Pro and a version of Redmi Note 7/7S have been provided below. Both of them are based on the latest Google Camera v6.2.030. Although there are some issues, especially with the saturation level, yet I have provided the workaround for them. Everything should work fine after trying out the said tweaks.
Google Camera for Redmi Devices:
- Redmi Note 7 and Redmi Note 7S: MGC_6.2.030_RN7_V1a_FINAL.apk
- Redmi Note 7 Pro: MGC_6_1_021_xcam6_beta5.apk | GC_RN7P_6.2.030_V1FINAL.apk | MGC_6.2.030_DCIP3Version_Bulkin043_V8.2.apk
[Looking for other devices’ Google Camera Port? Head over to this guide: Download Google Camera Port for various Android Devices]
How to Install GCam on Redmi Note 7/Note 7 Pro
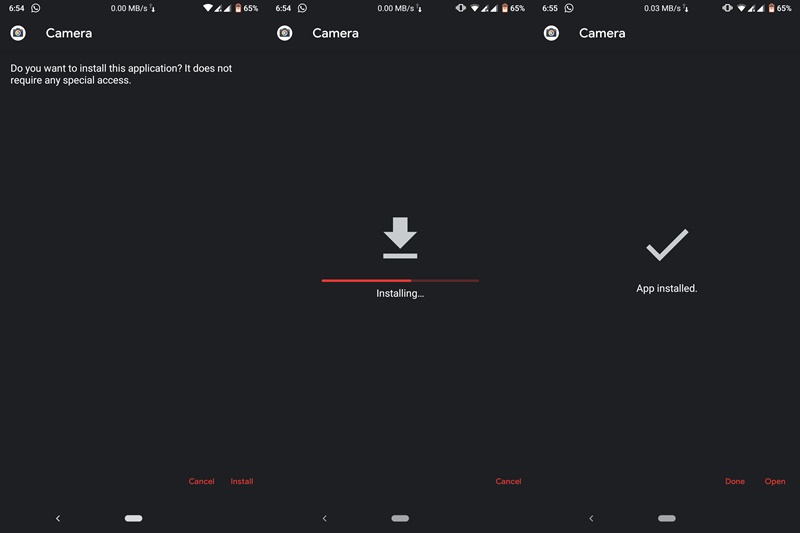
- Download the GCAm for your Redmi device.
- Navigate to the downloaded Gcam file.
- Tap on the file and choose ‘Install’.
- Wait for the process to finish. It will take quite a few seconds.
That’s it. Google Camera has been successfully installed on your Redmi Note 7/Note 7 Pro. After installing it, open it and grant all four permissions that it asks for. But don’t yet start taking pictures with it. First, you need to tweak your camera a little. Follow the instructions given in the below section.
Issues, Workaround, and Tweaks
As mentioned before, there might be some issues with Google Camera Ports for Redmi Note 7/Note 7 Pro. Therefore it is extremely important to first correct them. Given below are some of the bugs that you might face and the ways to correct them.
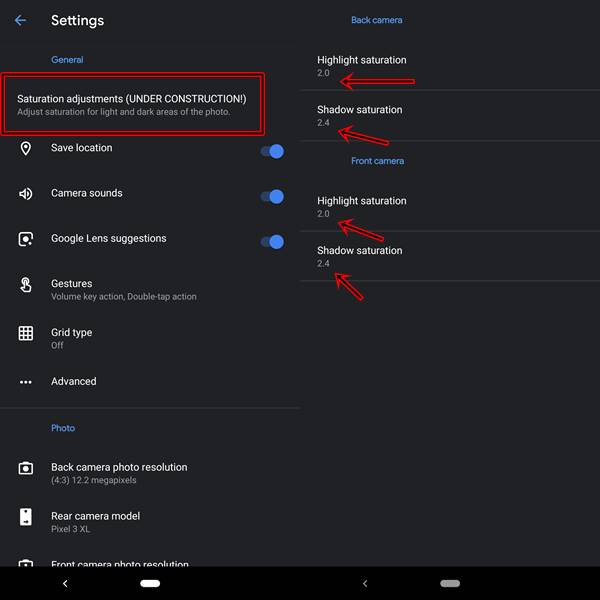
ISSUE 1: If you notice that the “saturation level” is slightly blown out of proportions, then follow the below steps:
- Open the Google Camera app.
- Go to ‘More‘ > ‘Settings‘.
- Depending on your camera, the option to adjust the saturation level varies.
- Either it may be the first option under ‘Settings‘- “Saturation adjustments (UNDER CONSTRUCTIONS) “. See the screenshot below.

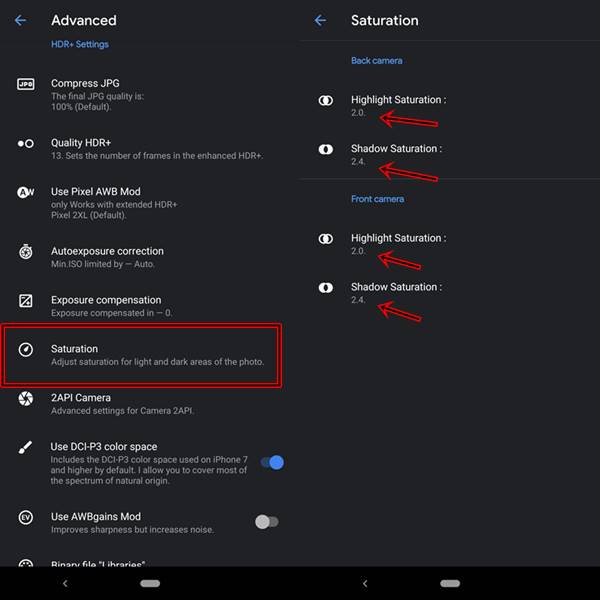
- Or, go to “Advanced” > “Saturation”. Have a look at the below-attached screenshots.
- Either it may be the first option under ‘Settings‘- “Saturation adjustments (UNDER CONSTRUCTIONS) “. See the screenshot below.
- Next, under the “Back Camera” and “Front Camera” options, change the “Highlight Saturation” value to “2.0” and “Shadow Saturation” value to “2.4”. As shown in the above images.=
ISSUE 2: If the front camera isn’t clicking pictures as expected or facing quite a lot of FC (frequent crashes), try the below tip:
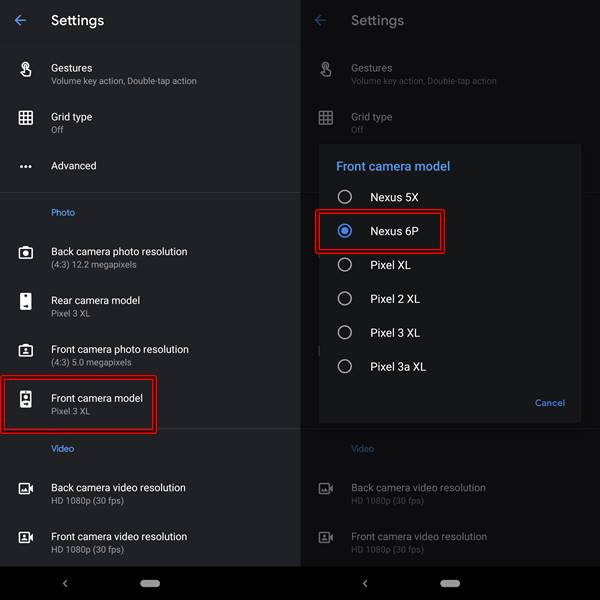
- Go to the ‘Settings’ option of your Camera.
- Head over to the ‘Photo’ section.
- Change the ‘Front Camera model’ to Nexus 6P. That’s it.
Final Thoughts
So this was a detailed guide on how to download and install the Google Camera Port on the Redmi Note 7/Note 7 Pro. This GCam Port will also work on Mi 9T and Mi 9T Pro as well. Do share your experience regarding the picture quality. Do you find any considerable difference in the photo clicked by the GCam and those by the stock camera? Moreover, there are tons of additional features present under the “Settings” menu. Go try them all. Happy Installing!


