In this guide, we will show you the steps to downgrade Samsung devices from One UI 4.0 (Android 12) to One UI 3.1 (Android 11) via Odin. The fourth iteration of Samsung’s customized OS build has bought in quite a few noteworthy features. These include the likes of a new widget selection menu, Privacy Dashboard, improvements to the camera app design, and as well as the new Material You UI theming engine. Owing to such a plethora of goodies at stake, many users have already jumped the ship over to the new OS build.
However, at the time of writing, One UI 4.0 is still in the beta stage, so a few bugs and issues are along the expected lines. Apart from that. some apps are also facing compatibility issues. So if these problems are proving to be a tough nut to crack, then your best course of action is to roll back to the earlier OS build. In this regard, if you have installed the One UI 4.0 via the Samsung Member’s App, then the downgrade is quite easy to carry out.
All you need to do is remove yourself as a beta tester via that app and then perform the downgrade via the Smart Switch Desktop app. However, if you have performed the upgrade via the ADB Sideload or Apply Update from the SD Card method, then you wouldn’t be able to downgrade via the Member and Smart Switch App. Rather you will have to take the help of Odin. And in this guide, we will help you with just that. Given here are the detailed instruction steps to downgrade Samsung devices from One UI 4.0 to One UI 3.1 via Odin. Follow along.
Table of Contents
How to Downgrade Samsung One UI 4.0 to One UI 3.1 via Odin
Before starting off with the steps, make sure to take a backup of all the data on your device. This is because downgrading will result in a factory reset. Droidwin and its members wouldn’t be held responsible in case of a thermonuclear war, your alarm doesn’t wake you up, or if anything happens to your device and data by performing the below steps to downgrade Samsung from Android 12 to Android 11.
Check Bootloader Version Number Before Downgrading Samsung
Before you downgrade your Samsung device, you should first check if your device is currently compatible with this rollback. For that, go to Settings > About Phone and check out the Baseband/Build version. The fifth digit from the right is the Bootloader version for your Samsung device. So if the Version number is S918BXXS3AWF7, then the Bootloader Version is 3. As a result of this, you cannot roll back to an OS version with a lower Bootloader version.
The only way you can roll back is if the firmware has the same bootloader version. So if Android 12 is on U3 or S3 and Android 11 is on U3 or S3, then you can go downgrade to Android 11. However, if Android 11 is U3 or S3 and Android 12 is U4 or S4, then you cannot downgrade your Samsung device.
STEP 1: Download Samsung USB Drivers
In most instances, as soon as you connect your device to a PC via USB cable, the associated USB drivers are automatically installed. However, if that isn’t the case with you, then you may manually install the drivers as well. To do so, get hold of the official USB Drivers from the below link and launch the setup file. Then proceed with the on-screen instructions to install onto your PC.
Download: Samsung USB Drivers
STEP 2: Download Odin
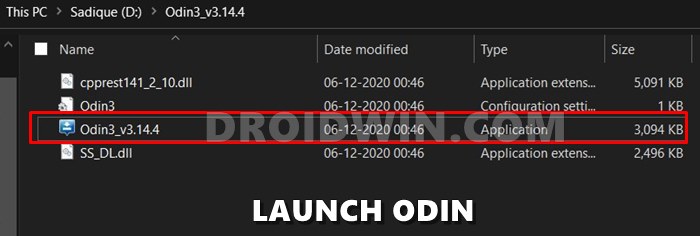
Next up, download the Odin Tool. This will be needed to flash the Android 11 OneUI 3.1 firmware onto your Samsung device in order to downgrade it. So grab it from the below link and then extract it to any convenient location on your PC.
Download: Odin3-v3.14.4.zip
STEP 3: Download One UI 3.1 Downgrade Firmware
You will now have to download the Samsung One UI 3.1 downgrade firmware. In this regard, you should use the Frija Tool. However, this tool will only come in useful till One UI 4.0 is in the beta stage. As soon as it reaches the stable build for your device, then you would have to instead use the SamMobile website or the Update site.
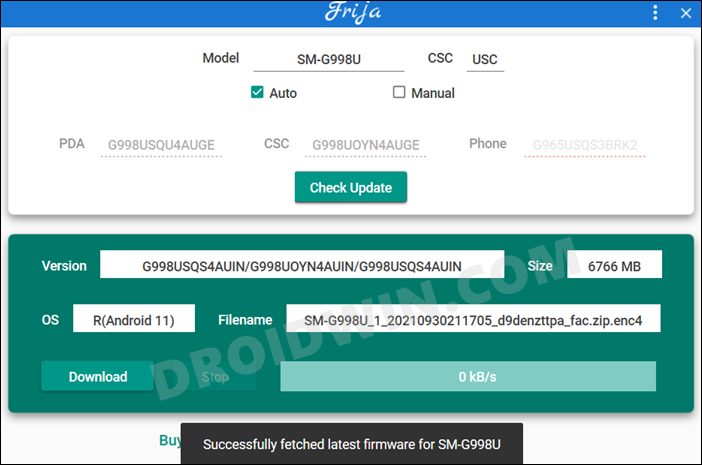
This is because Frija only uploads the latest stable build. Till Android 12 is in the beta state, Frija will keep on uploading the Android 11 firmware. But as soon as Android 12 for your device gets live, Frija will also start uploading the Android 12 build. So in such a situation, you will have to refer to the SamMoble or Update websites.
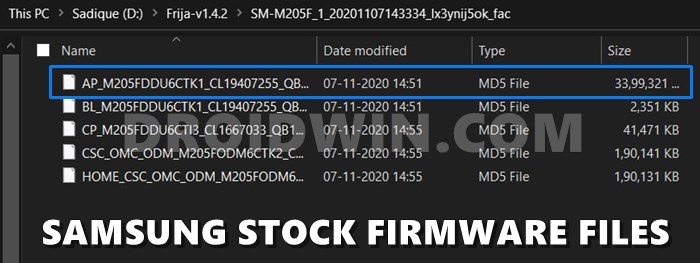
STEP 4: Extract Samsung OneUI 3.1 Firmware
Once you have downloaded the firmware, extract it to any convenient location on your PC. Doing so shall give you the AP, BL, CP, and CSC files, which we will be using to downgrade your Samsung device from One UI 4.0 (Android 12) to One UI 3.1 (Android 11).
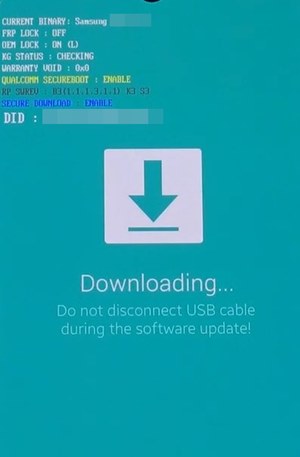
STEP 5: Boot your Samsung Device to Download Mode
You will now have to boot your Samsung device to Download Mode. This is because Odin would only be able to recognize and hence interact with your device in Download Mode. So to boot your device to this mode, you may refer to our detailed guide: How to Boot any Samsung Device to Download Mode. Or refer to the shorter instructions:
- To begin with, power off your device.
- Then press and hold the Volume Down + Bixby + Power buttons (or Volume Down + Home + Power on older devices) for around 5 seconds.
- Once you see the Warning screen, just press the Volume Up key to boot your Samsung device to Download Mode.
STEP 6: Install One UI 3.1 Downgrade Firmware via Odin
- To begin with, connect your device to the PC via USB cable. Make sure it is booted to Download Mode.
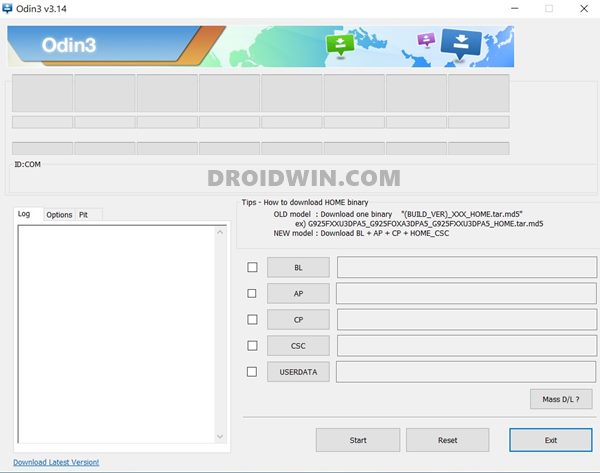
- Then head over to the folder where you had extracted Odin and double click on the Odin3_v3.14.4.exe file to launch the Odin Tool.

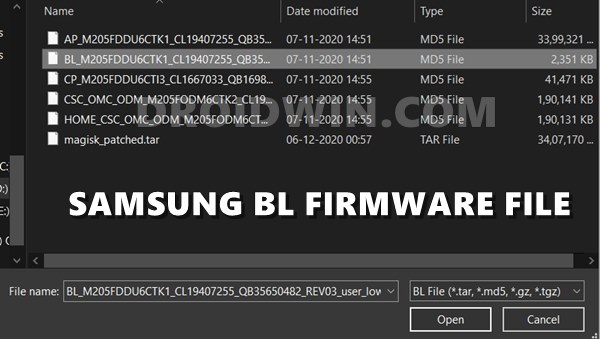
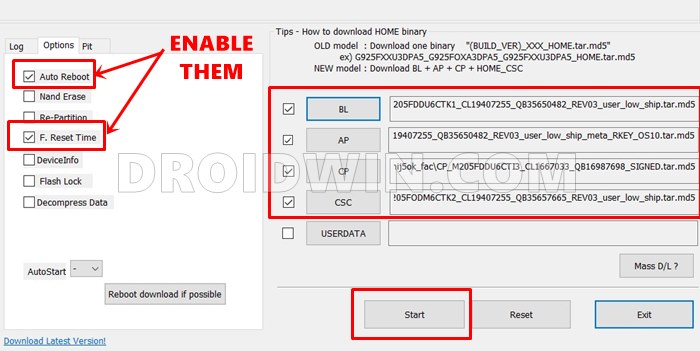
- You should now see the ID:COM port of the tool being highlighted. This signifies that the tool is able to recognize your device and the connection stands successful. So you may now proceed ahead to load the BL, AP, CP, and CSC files to Odin.
- First off, click on the BL button, navigate to the extracted firmware file and select the BL file from there.
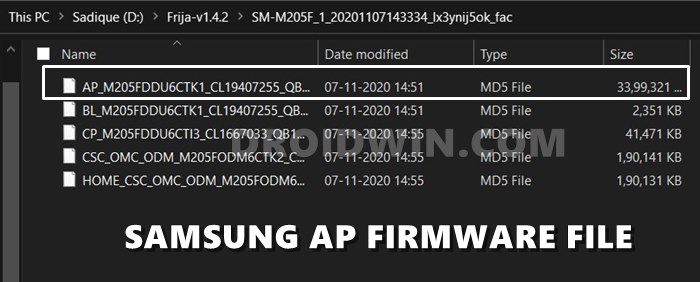
- Then click on AP and upload the AP firmware file. This might take some time.
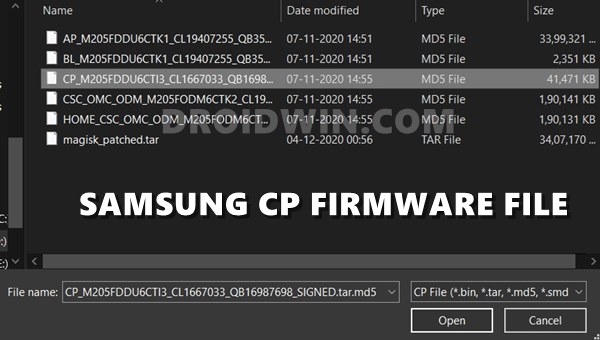
- After this, click CP and load the CP firmware file.
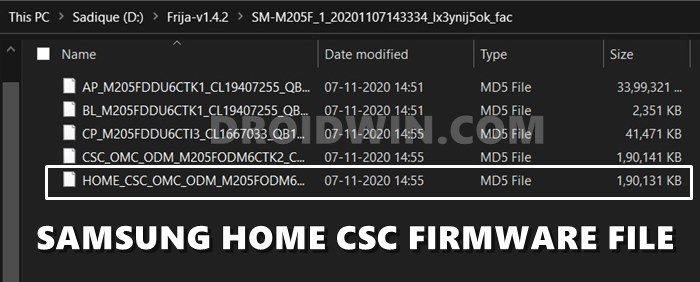
- Finally, click CSC and upload the Home_CSC file (make sure it’s the Home_CSC file and not the normal CSC).
- Once you have loaded all four files, go to the ‘Options’ section of Odin and check Auto Reboot and F.Reset Time (see below image).
- Finally, hit the Start button and wait for the process to complete.
- As soon as the installation is done, you should get the PASS message and your device will boot to the OS. You may now disconnect it from your PC and close the tool.


That’s it. These were the steps to downgrade any Samsung device from Android 12 to Android 11, i.e from OneUI 4.0 to OneUI 3.1. Once your device boots up, you will have to set it up from scratch as it has undergone a reset. With that said, we round off this guide. If you have any queries concerning the aforementioned steps, do let us know in the comments. We will get back to you with a solution at the earliest.
- Manually Install One UI 4.0 Beta Android 12 on Samsung
- OTA Download Link for Samsung One UI 4.0 Android 12 Beta
- How to Change CSC Codes in Samsung Devices
- Unbrick Samsung | Flash Stock Firmware via Odin
- How to Fix Samsung Bootloop due to Prenormal KG/RMM state
- Extract PIT File from Samsung Firmware: Unbrick Guide
- How to Nand Erase and Re-Partition Samsung via Odin


koutama513
please help me to root my phone samsung m21 android 12 one ui 4.1
here is my e-mail: [email protected]
koutama513
how to root samsung m21 android 12 one ui 4.1
rıdvan
Samsung note One plus UI 4.1 android 12 sürümü alt versiyonlara çekmek mümükünmü boot.img hatası veriyor şu an odinde
Mathew
Hello,
How can you downgrade from Android 12 UI 4.1 to 11 UI 3.1
Cavidan
hello I do the same sequence on Samsung s10 but it doesn’t load.
Jesey
hi., is it okay to downgrade Galaxy A72 Android 12 to Android 11? my A72 lost signal after i update the OS to Android 12/.
Abdul Rehman Mahar
Sir, my mobile has android 12 installed, uninstall it and restore it 🔙 how to install android 11 please help me
fred
will it erase all phone data ?
Sadique Hassan
Yes Fred, it will wipe off all the data from your device