In this guide, we will show you the steps to downgrade your Pixel device using the Android Flash Tool. Pixel devices are usually the first in line when it comes to receiving software updates. However, there could be a few instances when you wish to manually install the firmware onto your device. In this regard, the most common scenario is when you are planning to roll back to an earlier software build.
But why would one prefer to downgrade to an older OS version or security patch? Well, there could be quite a few reasons for the same. To begin with, a monthly security patch update sometimes brings in a few uninvited risks and bugs. When that happens, you could either wait for the next OTA update for the fix or straightaway flash an older build that didn’t have that issue.
Along the same lines, users also prefer to downgrade from one major OS upgrade to another. For example, tech enthusiasts usually try out the beta or developer’s preview builds of the latest OS release. Once they are done using it, they then prefer to roll back to the earlier stable OS version.
All in all, there are quite a few reasons why you would want to perform a downgrade. Along the same lines, there exist numerous methods for this downgrade, so why settle to downgrade your Pixel device via Android Flash Tool? Well, there are numerous reasons for the same. Let’s check them out (as well as the downsides of this tool).
Table of Contents
Perks and Downsides of Android Flash Tool
One of the most common methods for manually flashing the stock firmware is via the fastboot commands. However, that approach usually proves to be a little bit technical and complicated for the general users. On the other hand, the Android Flash Tool has completely streamlined this process. With a handy user interface, this is a web-based tool that only requires a few clicks to flash the firmware. So the perks for this tool are there for everyone to see.
However, it has a few downsides as well. To begin with, it requires you to enable USB Debugging. Hence this straightaway means that a boot-looped or bricked device is incompatible with this method. Furthermore, you also need to have an uninterrupted network throughout the flashing process. With this, you would have got a decent idea regarding the benefits and caveats. Let’s now check out the steps to downgrade your Pixel device using the Android Flash Tool.
How to Downgrade Pixel Devices via Android Flash Tool
![]()
The below instructions are listed under separate sections for ease of understanding. Make sure to follow in the exact same sequence as mentioned. Droidwin and its members wouldn’t be held responsible in case of a thermonuclear war, your alarm doesn’t wake you up, or if anything happens to your device and data by performing the below steps.
Bypass Anti Rollback on Pixel 6A/6/Pro
Google has introduced the Anti Rollback Protection for the Pixel 6 series devices. So if you want to perform a downgrade from Android 13 to Android 12, you will first have to bypass this Anti Rollback mechanism, the instructions for which are given here- How to Bypass Anti Rollback Mechanism in Pixel 6A/6/6 Pro. [Just to re-iterate, this is only needed for the Pixel 6 series, the Pixel 5 and 4 series are unaffected by this. Moreover, it is only required for Android 13 to Android 12 downgrade, versions before it doesn’t need to bypass this rollback].
![]()
Install Android SDK

First and foremost, you will have to install the Android SDK Platform Tools on your PC. This is the official ADB and Fastboot binary provided by Google and is the only recommended one. So download it and then extract it to any convenient location on your PC. Doing so will give you the platform-tools folder, which will be used throughout this guide to downgrade Pixel devices via Android Flash Tool.
Install Google USB Drivers
You will also have to install the Google USB drivers so that your Pixel device is recognizable by your PC. So refer to our guide to Install Google’s Android Bootloader Interface Drivers.
Enable USB Debugging and OEM Unlocking
Next up, enable USB Debugging and OEM Unlocking on your device. The former will make your device recognizable by the PC in ADB mode. This will then allow you to boot your device to Fastboot Mode. On the other hand, OEM Unlocking is required to carry out the bootloader unlocking process.
![]()
So head over to Settings > About Phone > Tap on Build Number 7 times > Go back to Settings > System > Advanced > Developer Options > Enable USB Debugging and OEM Unlocking.
Authorize USB Debugging
- Connect your device to the PC via USB cable. Make sure USB Debugging is enabled.
- Then head over to the platform-tools folder, type in CMD in the address bar, and hit Enter. This will launch the Command Prompt.
- Type in the following command in the CMD window to authorize the ADB Connection:
adb devices

- If you get the device ID along with the “device” keyword, then the connection has already been authorized.
- However, if you get the unauthorized keyword, then check your device.

- You would have got a prompt, tap on Allow and the connection will be authorized.
Unlock Bootloader
You will also have to unlock the device’s bootloader. Doing so will wipe off all the data from your device and could nullify its warranty as well. So if that’s well and good, then please refer to our guide on How to Unlock Bootloader Of Google Pixel Devices. Once that is done, you may move over to the next step of our guide to downgrade Pixel devices via Android Flash Tool.
![]()
Flash Pixel Downgrade Firmware via Android Flash Tool
- To begin with, connect your device to the PC via USB cable.
- Then head over to the official Pixel firmware page. Here are the direct links for the same:
Pixel 8 Pro
Pixel 8
Pixel Fold
Pixel Tablet
Pixel 7A
Pixel 7 Pro
Pixel 7
Pixel 6 Pro
Pixel 6
Pixel 6A
Pixel 5
Pixel 4a (5G)
Pixel 4a
Pixel 4 XL
Pixel 4
Pixel 3a XL
Pixel 3a
Pixel 3 XL
Pixel 3
Pixel 2XL
Pixel 2
Pixel XL
Pixel
- Under your device section, scroll to the firmware date that you need to install. You can get hold of the date under the Version section.

- Once you have decided on the firmware that you need to flash, click on the Flash button next to it.
- You shall now be taken to the Android Flash Tool page, with your chosen firmware already loaded.
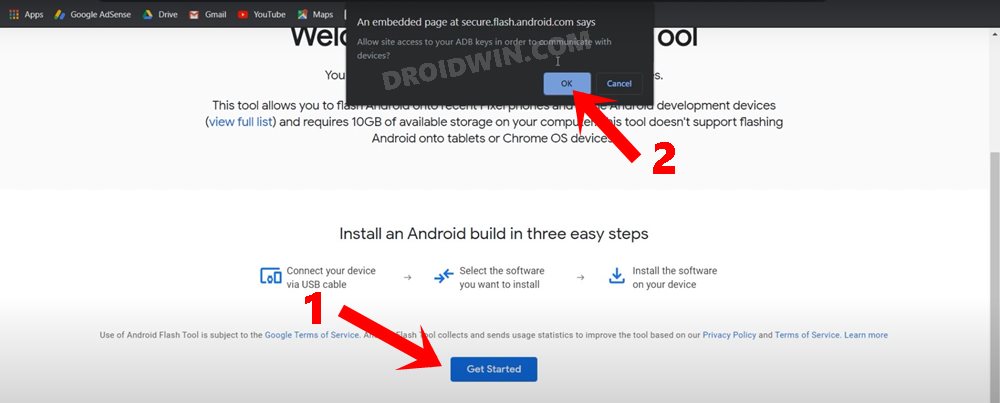
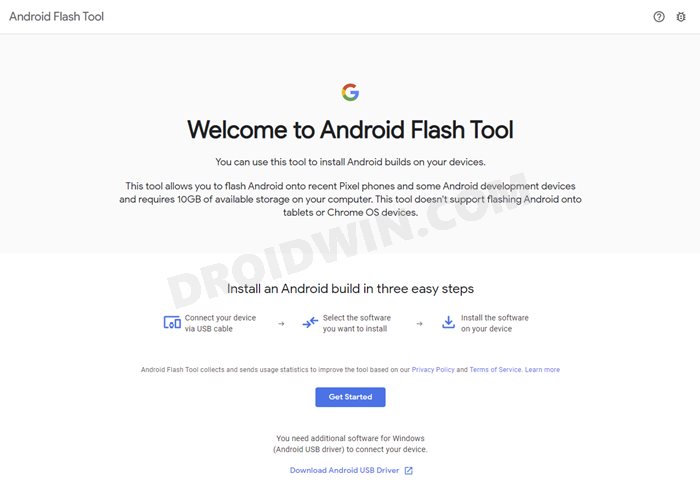
- Click on the Get Started button situated at the bottom. Doing so shall bring up a pop-up stating “Allow site access to your ADB keys in order to communicate with devices.” Click OK.

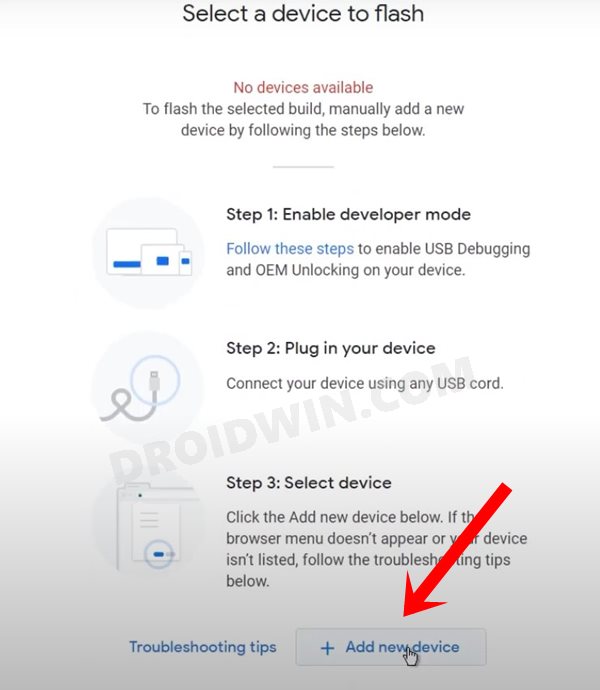
- After that, click on the Add New device button situated at the bottom right.

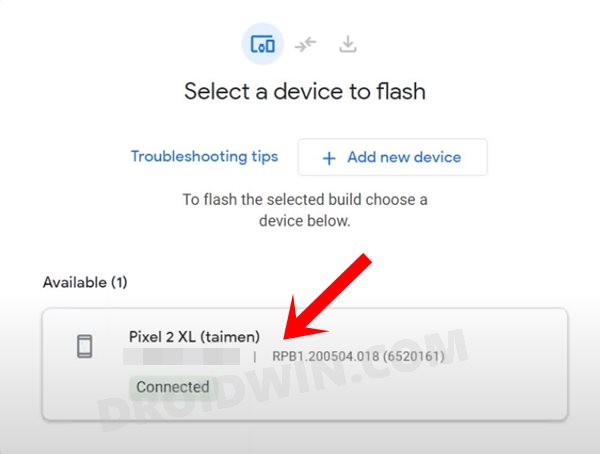
- Your device will now be visible under the Available section, click on it.

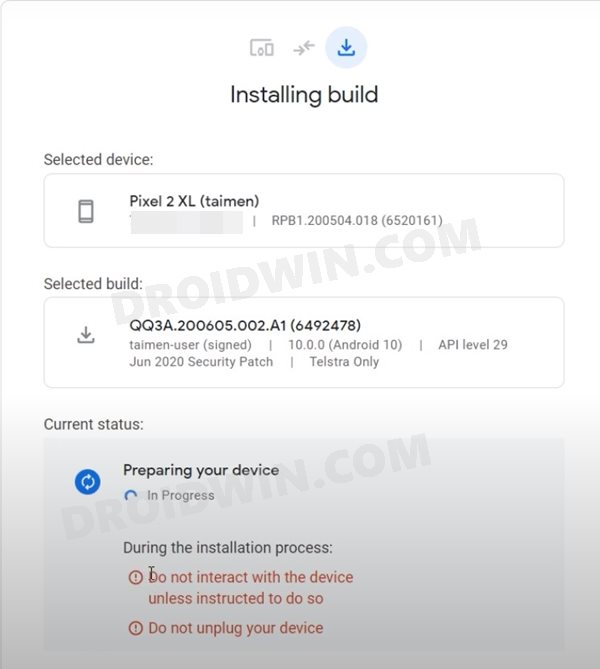
- It will show you the firmware build that you had earlier selected. If you still wish to make any change then click on the Edit button and select the desired firmware. However, if everything is well and good, then hit the Install button.

- Then click on the I Accept button in the License Agreement dialog box.

- The installation will now start and could take a few minutes.

- Once done, you shall get the Software successfully updated message (even though it was downgraded, but this is a generic statement that you would get after every success flash, whether a downgrade or upgrade).

- You may now remove your device from the PC and close the tool as well. Your device should now automatically reboot to the OS as well. If that doesn’t happen, then you may manually do the same via the Power key.
So with this, we round off the guide on how you could downgrade your Pixel device using the Android Flash Tool. If you have any queries concerning the aforementioned steps, do let us know in the comments. We will get back to you with a solution at the earliest.
