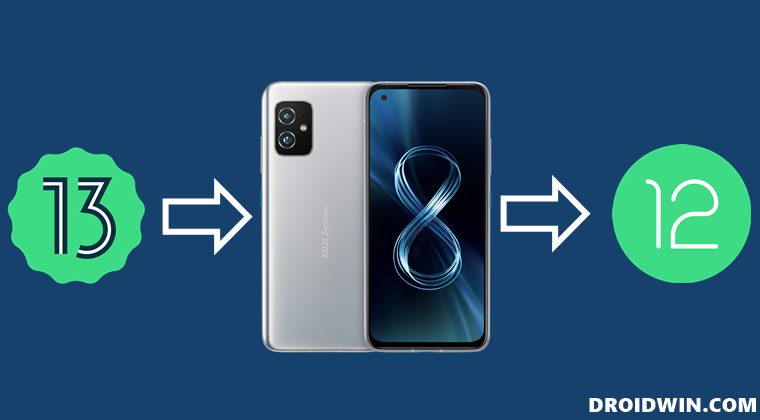
In this guide, we will show you the steps to downgrade your Asus ZenFone 8 from Android 13 to Android 12. The thirteenth iteration of the OS build has already made its way to a handful of devices and various OEMs have already jumped onto that bandwagon. If we talk about Asus, then its most popular offering in the form of Zenfone 8 has been blessed with this latest OS build.
So a plentitude of new and intriguing features are on the way. However, as of now, the update is still in the beta phase and is mostly intended for developers to test out their apps and API level changes. With that said, many tech enthusiasts who are always on the lookout for trying out the latest features have also given this update a try, but are facing quite a few issues.
These include the likes of performance instability, Fingerprint Authentication, and Face Unlock not working, and apps not working along the expected lines have made it quite difficult for them to use this software as their daily driver. if you are also in the same boat, then your best bet will be to downgrade your Asus ZenFone 8 from the buggy Android 13 to the stable Android 12 build. And in this guide, we will show you how to do just that. Follow along.
Table of Contents
How to Downgrade Asus ZenFone 8 from Android 13 to Android 12
The below process will wipe off all the data from your device, so take a complete device backup beforehand. Droidwin and its members wouldn’t be held responsible in case of a thermonuclear war, your alarm doesn’t wake you up, or if anything happens to your device and data by performing the below steps.
Download Zenfone 8 Android 13 to Android 12 Downgrade Firmware
First off, get hold of the downgrade firmware for your device from the below link:
WW-ZS590KS-31.1010.0410.61-MR0-2204-user-20220422.zip
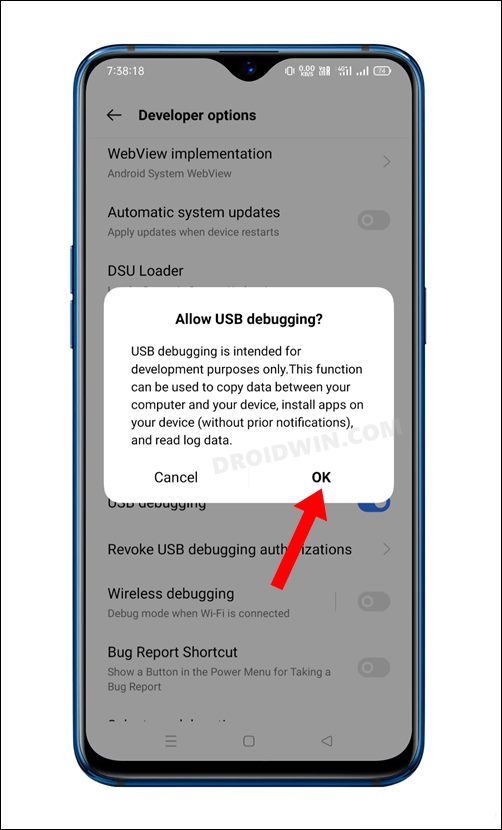
Enable USB Debugging
Next up, enable USB Debugging on your device so as to make it recognizable by the PC in ADB mode. This will then allow you to boot your device to Fastboot Mode. So head over to Settings > About Phone > Tap on Build Number 7 times > Go back to Settings > System > Developer Options > Enable USB Debugging.
Boot Asus ZenFone 8 to Fastboot Mode
- Connect your device to the PC via USB cable. Make sure USB Debugging is enabled.
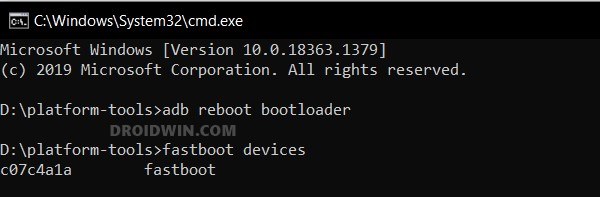
- Then head over to the platform-tools folder, type in CMD in the address bar, and hit Enter. This will launch the Command Prompt.

- After that, type in the following command in the CMD window to boot your device to Fastboot Mode
adb reboot bootloader

- To verify the Fastboot connection, type in the below command and you should get back the device ID.
fastboot devices

Install Android 13 on Asus ZenFone 8
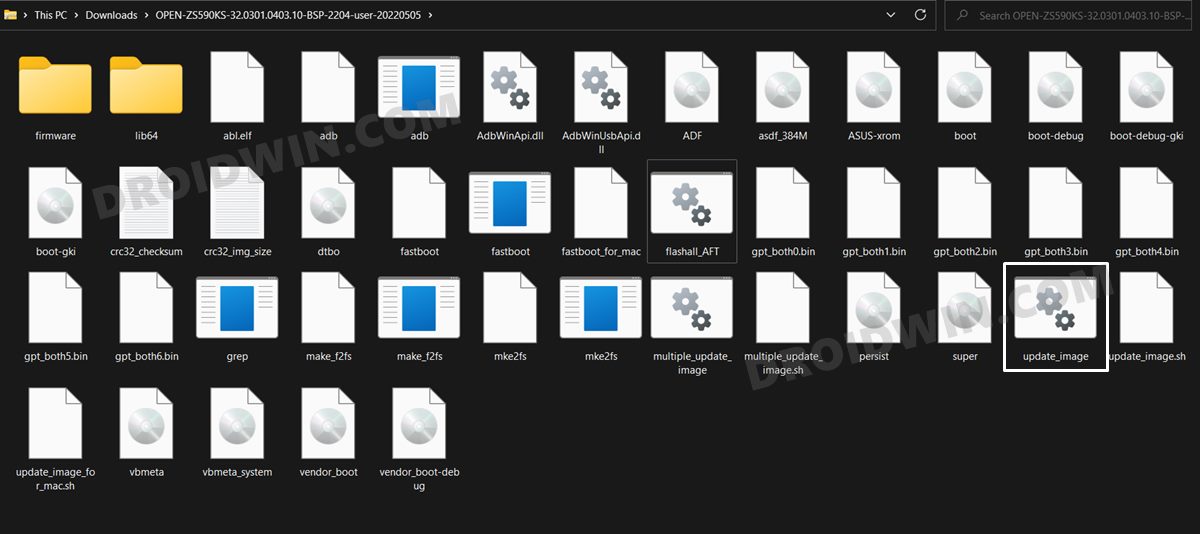
- Extract the Android 13 firmware to any convenient location on your PC.
- Then double click on the update_image.bat file and the flashing will start.
- Once done, you will get the Download Complete message in the CMD.
- Hit Enter and your device will now boot to Android 12.
That’s it. These were the steps to downgrade your Asus ZenFone 8 from Android 13 to Android 12. We will continuously update this guide as and when a new ‘downgrade build’ gets live. In the meantime, if you have any queries concerning the aforementioned steps, do let us know in the comments. We will get back to you with a solution at the earliest.


Khayelihle
Hi maybe a video tutorial will be great. I have tried the steps but it doesn’t work at all. I end up having 2 windows command center
Sahib Virdee
how long does this take?