In this guide, we will show you the steps to create a new local account on your Windows 11 PC. There could be quite a few reasons why you would need to create an additional account on your PC. For example, at the time of writing, the latest iteration of the OS is still in the development stages. As a result, a few bugs and issues are imminent.
So I, along with many other users, have installed this testing build on a backup PC. So there aren’t any intentions as such to sync all the data from this Insider Preview build over to our primary account. Rather, a much safer approach will be to create a local account and carry out all the tasks using it.
Then when we are done using it, we may easily remove that second account from that PC, without affecting any of the data of our primary account. Well, this is just one of the many reasons why you would want to create a new local account on your Windows 11 PC, there could be countless others. So without any further ado, let’s get started with the instructions.
- 10 Methods to Open Command Prompt (CMD) in Windows 11
- How to Replace PowerShell with Command Prompt in Windows 11
- How to Find My Windows 11 Product Key or License Key
Table of Contents
How to Create a New Local Account in Windows 11
There exist two different methods through which you could carry out the said task– via the Settings menu and using Command Prompt. We have listed both these methods below, you may try out the one that is in sync with your requirement.

Create a New Local Account in Windows 11 via Settings Menu
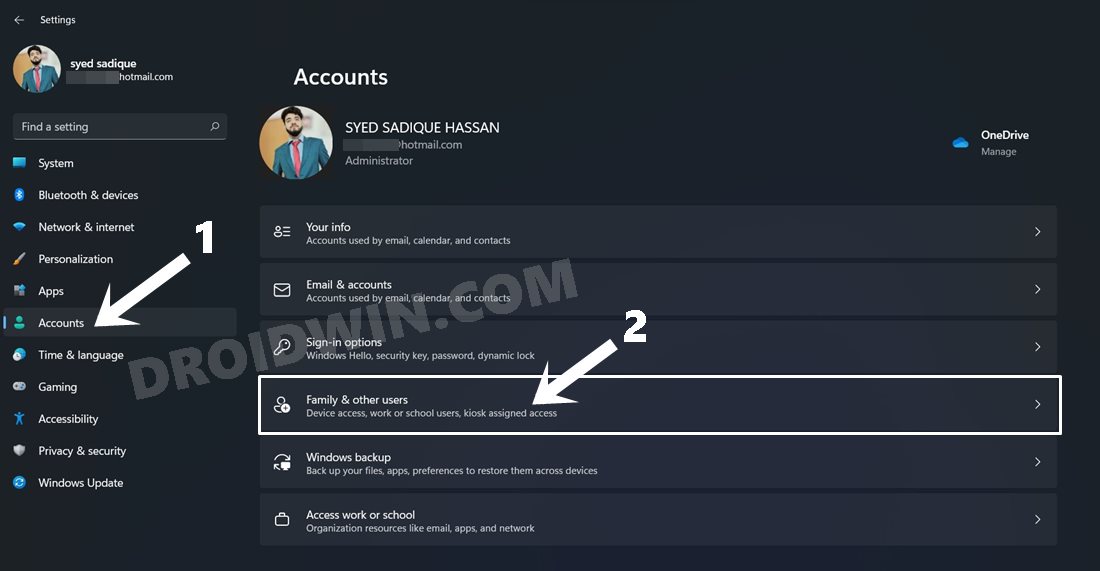
- To begin with, use the Windows+I shortcut keys to bring the Settings menu.
- Then select Accounts from the left menu bar and go to the Family & other users section.

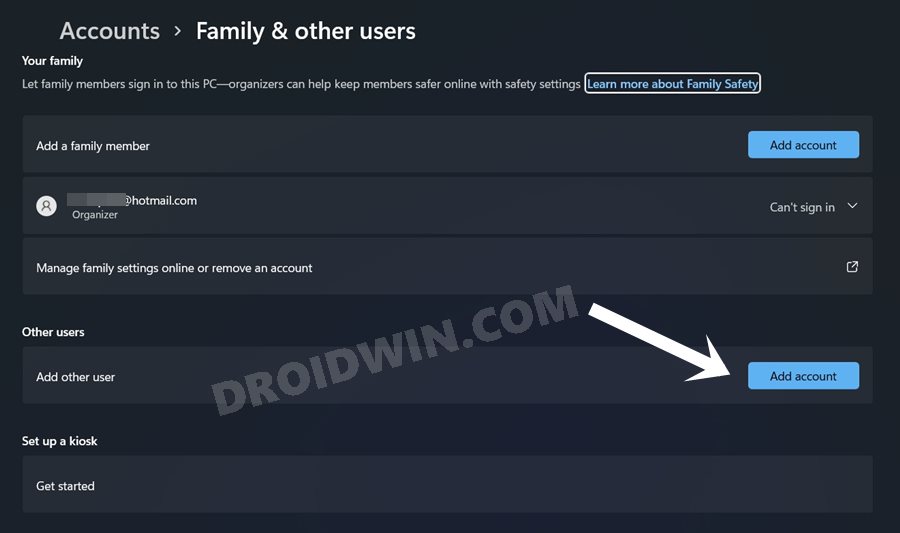
- Go to the Other user section and click on the Add Account button next to Add other user.
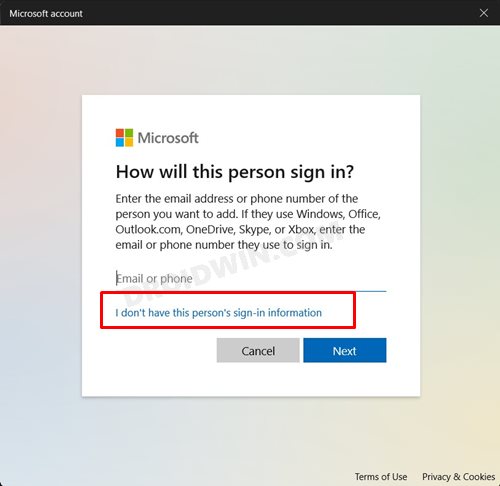
- Microsoft account sign-in dialog box will now open. If you have the account credentials, type them in.
- Otherwise, if you don’t wish to associate your Microsoft Account to your PC, then click on the I don’t have this person’s sign-in information message. Let’s go ahead with this approach as of now.
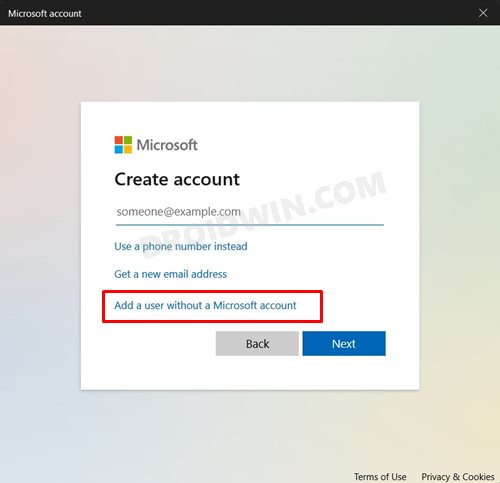
- So click on it and then click on Add a user without a Microsoft account.
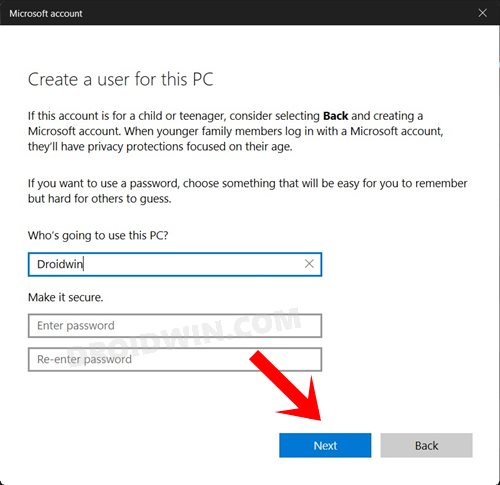
- Now type in the desired username and password. If this is your own PC and you wish to save yourself from the hassle of typing in your password every time when you log in, you may consider leaving this field blank (though it is a less secure option).
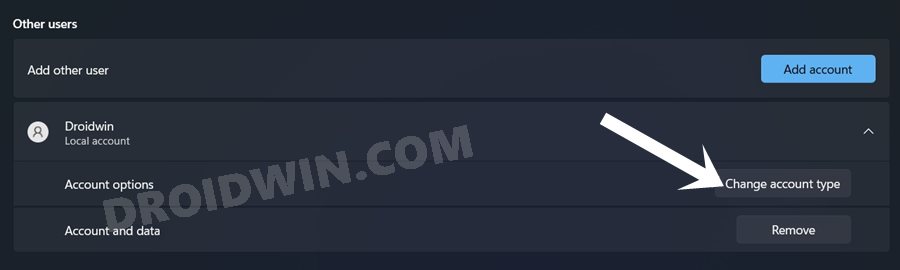
- Hit Next and the local account in Windows 11 will now be created. However, it is a Standard account. If you wish to make it an Admin account, then click on your account name under the Other user section.
- Now, click on the Change account type button next to Account options.
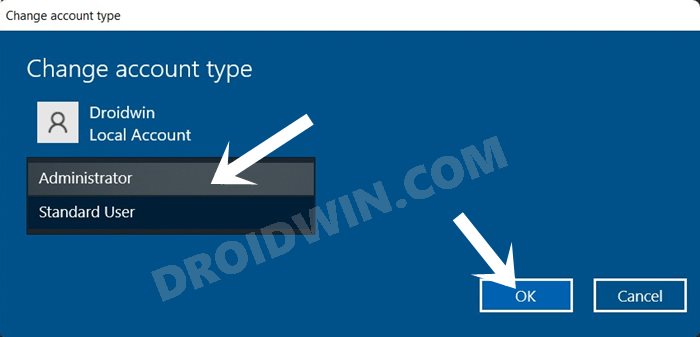
- Then click on Standard User, select Administrator from the drop-down menu, and click OK. The newly created account will be transformed into an admin account.
Create a New Local Account in Windows 11 via Command Prompt (CMD)
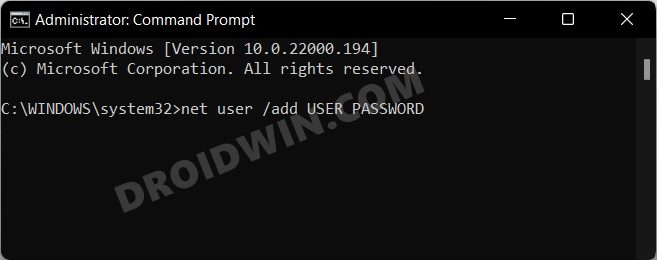
- To begin with, head over to the Start Menu, search CMD, and launch it as an administrator.
- Then copy-paste the below command in this CMD window. Make sure to replace the USER and PASSWORD keyword accordingly.
net user /add USER PASSWORD
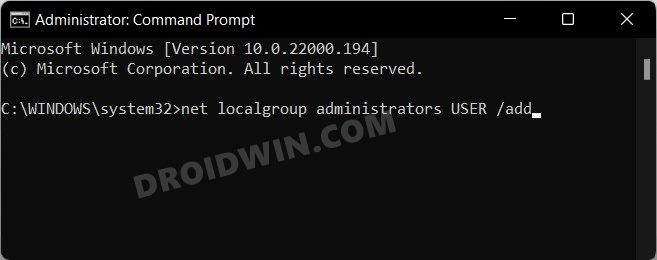
- Next up, execute the below command in the CMD window. As before, replace the USER keyword with the one that you have set.
net localgroup administrators USER /add
- Now restart your PC and you should see the new local account in the account selection screen. Just select it and you will be logged into it!
That’s it. These were the two different methods to create a new local account on your Windows 11 PC. If you have any queries concerning the aforementioned steps, do let us know in the comments section below. We will get back to you with a solution at the earliest.


