In this guide, we will show you the steps to create and restore a System Restore Point in Windows 11. At the time of writing, the latest iteration of the OS is in a Developer Preview phase, with an option to jump over to the Beta build. While both these builds offer you cutting-edge and new features before everyone else, it comes at a cost. You will have to sacrifice on the performance front and deal with quite a few issues from time to time.
Well, even if you directly opt for the stable build, you aren’t guaranteed an error-free environment. There’s always a risk of things going south. When that happens, one option is to perform a reset and install a fresh copy of Windows. But that is easier said than done. This is because you would then have to bid adieu to GBs of data, which is no easy task. This is why it is always recommended to have a system restore.
By default, this functionality is turned off, mainly because it tends to eat up a large chunk of the storage space. However, there shouldn’t be any second thought involved when it comes to creating a restore point as the positives associated with it more than outweighs the sole negativity involved. So keeping all these points in mind, let’s make you aware of the steps to create and restore a System Restore Point in Windows 11.
Table of Contents
How to Create a System Restore Point in Windows 11
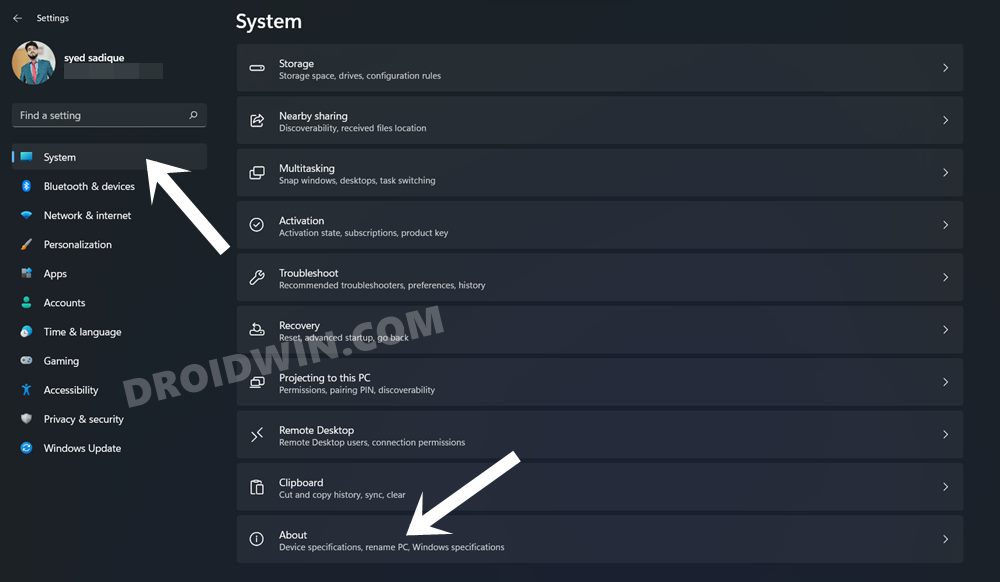
- To begin with, open the Settings page via the Windows+I shortcut keys.
- Then go to the System tab from the left menu bar, scroll all the way to the bottom and click on About.

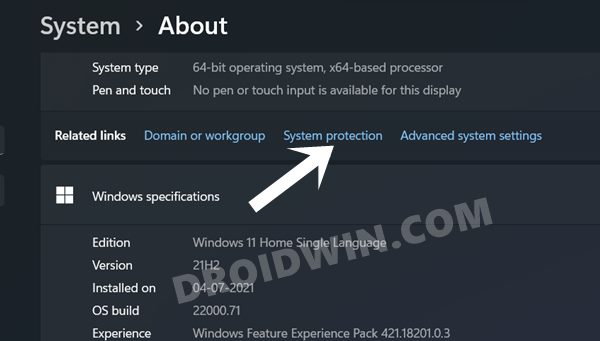
- After that, click on the System Protection option present on the Related Links tab.
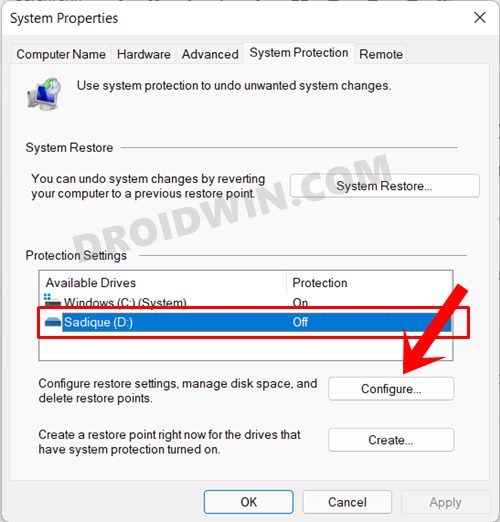
- This shall launch the System Properties dialog box.
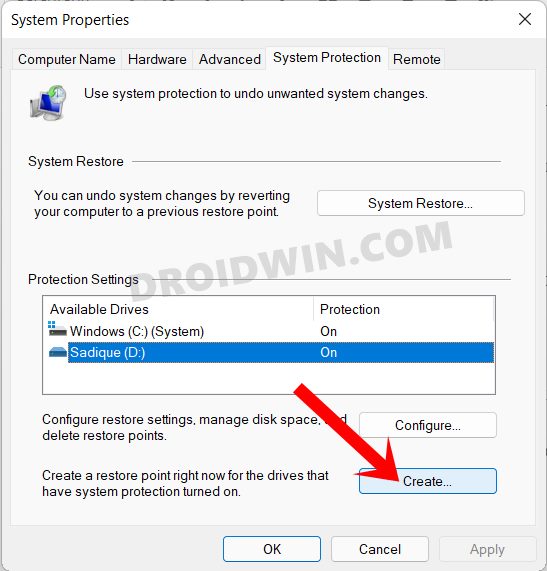
- Select the Drive for which you need to create a restore point and then hit the Configure button.
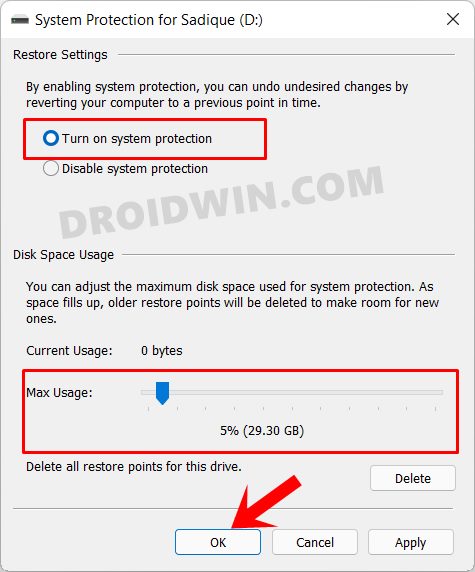
- Now enable the Turn On System Protection option.
- Likewise, drag the toggle and allocate the maximum GB that you want for that restore point.
- Once done, click OK. Now select the Drive whose system protection you have just turned on and then click on Create.
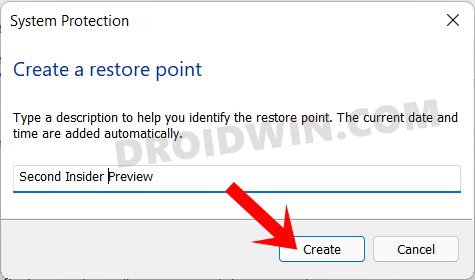
- Finally, give this backup an appropriate description (date and time will be automatically added) and hit the Create button.
- The backup creation will now start and could take a few minutes depending on the size of your drive. Once the process is completed, you shall be notified of the same.
So this is how you could create a System Restore Point on your Windows 11 PC, let’s now check out the steps to restore it.
How to Restore a System Restore Point in Windows 11

Now there are two different methods through which you could restore your system backup. The first route is via the Windows Settings page and is the preferred route if your PC is working well and good. However, if your PC is unable to boot to the OS, then you wouldn’t be able to access the Settings menu.
So in those cases, using the Windows Recovery Environment is the sole way out. Both these cases have been discussed below, you may refer to the one that meets your requirements.
Via Windows 11 Settings Page
- Start off by bringing up the System Properties dialog box as before [Settings > System > About > System Protection].
- Then click on the System Restore button.
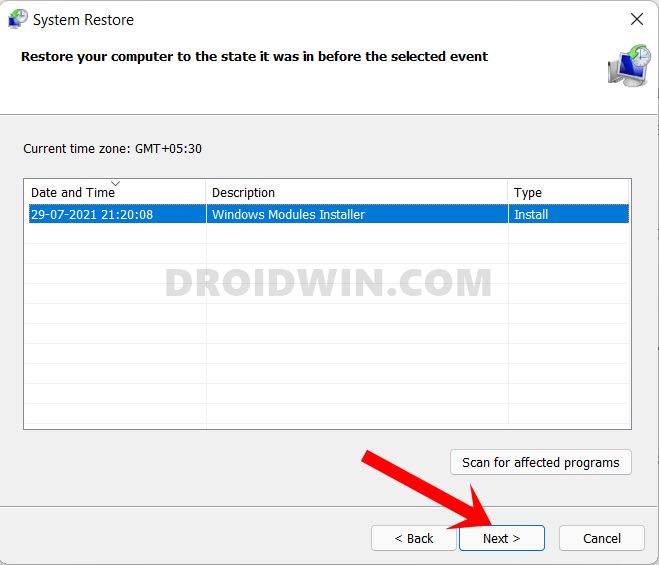
- Windows will now bring up the backup under the Recommended Restore section. This is the backup that it finds most suitable according to your PC’s current condition.
- If you are satisfied with it, enable the Recommended Restore option and hit Next.
- However, if you wish to select any other custom backup, then select Chose a Different Restore point and click Next.
- Now select the desired custom restore point and hit Next.
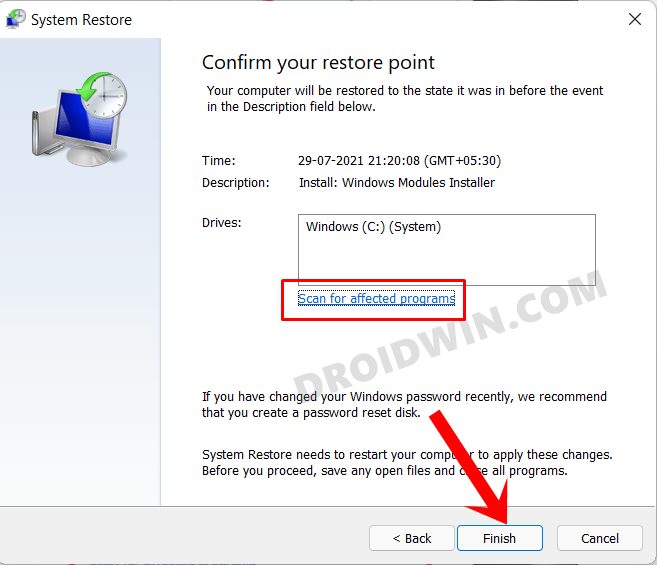
- Windows will now bring up the finalized screen showing all your selections. You may click on the Scan for Affected program option and get a list of all the programs that would be uninstalled/re-installed after this restore.
- If everything is as per your requirement, hit the Finish button and wait for the restore to complete. Once done, your PC will automatically boot to that system restore.


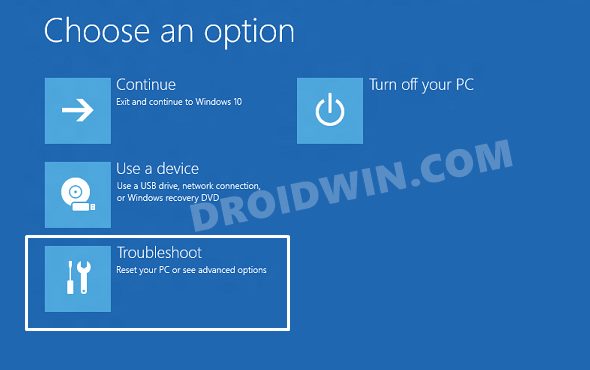
Via Windows 11 Recovery Environment
- First off, completely power off your PC/laptop. Then press the Power On button once and then keep on pressing the Esc key (HP) or F9/F12 key (Asus), or search online for your manufacturer.
- Your PC should now boot to the Windows Recovery Environment. Go to its Troubleshoot menu.
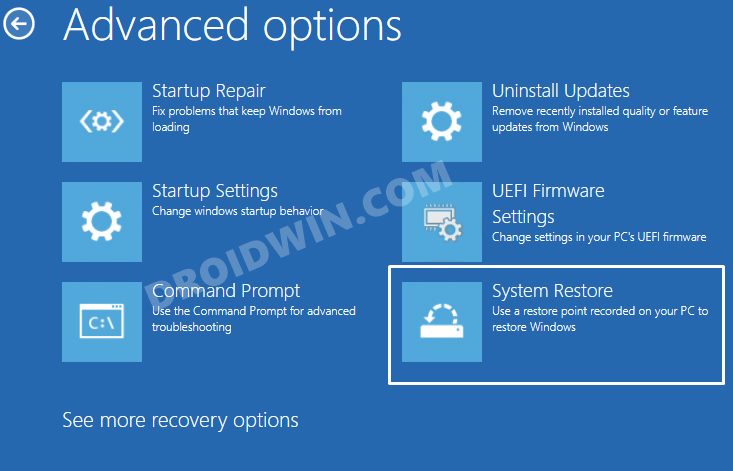
- After that, select Advanced Options > System Restore.
- The System Restore menu will now open. Click on the Next button.
- Now select the desired restore point and hit Next.
- As before, you may click on the Scan for Affected program option to get a list of all the programs that would be uninstalled/re-installed after the restore.
- Once everything is done, hit Finish. The restore process will now start and could take a few minutes.
- Once done, your PC shall notify you of the same. You may now boot it to the OS without any issues
So with this, we conclude the guide on how you could create and restore a System Restore Point in Windows 11. In this regard, we have shared two different methods for restoration. If you still have any queries, do let us know in the comments section below. We will get back to you with a solution at the earliest.


