In this guide, we will show you the steps to copy, move, rename, or delete files and folders right from the TWRP Recovery itself. Android ecosystem beholds a plethora of customization opportunities for the end users. Well, we aren’t just talking about the icon packs, themes, and launchers. Once you unlock the device’s bootloader and step into the custom development, the possibilities stand endless. There is just one prerequisite that your device needs to qualify- an unlocked bootloader. Once you do so, it then allows you to carry out a plethora of tweaks.
To begin with, you could install custom ROMs, flash mods, ZIPs, and IMGs and even root your device via Magisk. And for near about each of these tasks, you would require a custom recovery. But doesn’t our device already have a stock recovery? Well, it does have, but they are incapable (or rather not designed to work in an unlocked and rooted environment). This is where a custom recovery like TWRP comes into the picture. Apart from the above-mentioned tasks, there are a plentitude of other noteworthy features.
These include creating and restoring Nandroid backup, mounting external devices, fixing Recovery bootloop, and tons of other advanced functionality. However, there is another pretty useful feature of this recovery that doesn’t the limelight it deserves. We are talking about the ability to copy, move, rename, or delete files and folders right from the TWRP Recovery. In this guide, we will show you how to do just that. But first, let’s check out the need or rather under what circumstances will you require to carry out this task.
- How to Fix TWRP 0MB Internal Memory Issue
- How to Fix TWRP Error 70 [With Screenshots]
- Fix TWRP Error 7 (While Flashing Custom ROM via TWRP)
- How to Fix TWRP Error 20 GApps after flashing LineageOS
Table of Contents
The Need to Copy, Move, Rename, Delete Files and Folders via TWRP Recovery
Well, there is a pretty genuine question that might come to your mind. “Why do we need to carry out this task? Couldn’t we just do the same right from the PC itself, then transfer the file to our device and finally boot it to TWRP to carry out the indeed tweak”. The answer is in the affirmative and most of you would be following the exact same sequence. However, we all know that generally, things don’t go as planned in custom development.
For example, in some instances, a particular file is required to be placed inside the root directory (move feature will come in handy). Or you might have to execute the ADB and Fastboot Command to flash a file but the name of the file is way too long (usage of Rename feature). Likewise, I usually have around two-three copies of all the major mods such as Magisk ZIP, custom kernels, TWRP IMG files, and the likes. This leads to an issue of identifying the correct build.
As and when that happens, I straightaway make use of the copy, move, rename, or delete files and folders functionality of TWRP. These are just some of the reasons as to when and why you might use this feature. There could be a plentitude of reasons for the same. With that said, I thought of penning this trick down in the form of a guide to help out all the other users across the web. So without further ado, let’s start off with the guide.
- Disable DM-Verity or Android Verified Boot without TWRP
- Root Android 11 via Magisk Patched boot.img (without TWRP)
- How to Update Magisk ZIP and Magisk Manager (without TWRP)
- Fix Magisk Module Bootloop without TWRP Recovery
How to Copy, Move, Rename, and Delete Files and Folders via TWRP Recovery
We have listed out the complete instruction set in separate sections for ease of understanding. Follow along in the exact sequence as mentioned.
STEP 1: Install TWRP Recovery
Well, it goes without saying that the TWRP Recovery needs to be installed on your device. If that is not the case, then install it right away using the below-given articles:
- Install TWRP Recovery on any Android Device
- TWRP: fastboot flash vs fastboot boot: Which command to use
- Download TWRP for All Samsung Devices (ODIN Installation Steps Included)
- How to Update TWRP Recovery on any Android Device
If you don’t wish to go through these articles, then here are the instructions in short. For A/B devices, use fastboot boot twrp.img to boot to TWRP and then flash the TWRP ZIP. On the other hand, for the A-only devices, use the fastboot flash recovery twrp.img command.
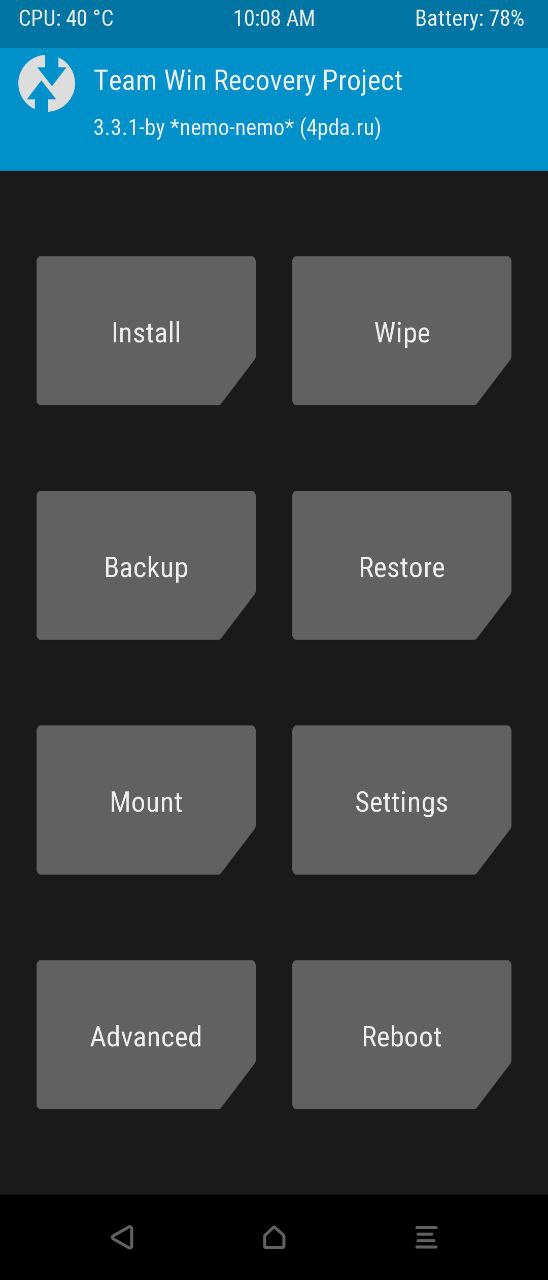
STEP 2: Boot Device to TWRP Rec0very
Next up, its time to boot your Android device to TWRP. For that, you may refer to our comprehensive tutorial: How to Boot into Recovery (TWRP/Stock). Wish to save a click, then here’s the shorter version: Use the adb reboot recovery command to boot to TWRP (after enabling USB Debugging on your device).
STEP 3A: Copy, Move, Rename, Delete Files via TWRP Recovery
Now that your device is booted to TWRP, you could start off with the steps to copy, move, rename or delete files via TWRP Recovery. Follow along for the instructions:
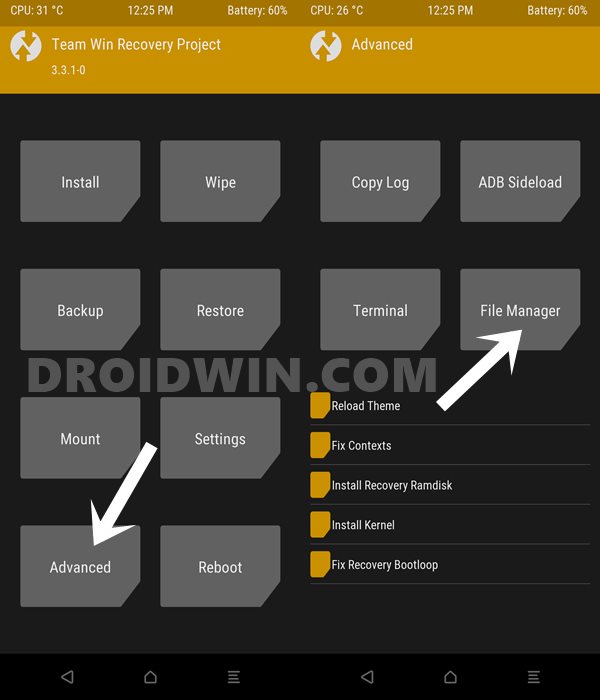
- From TWRP home screen, go to Advanced. Then tap on the File Manager option.

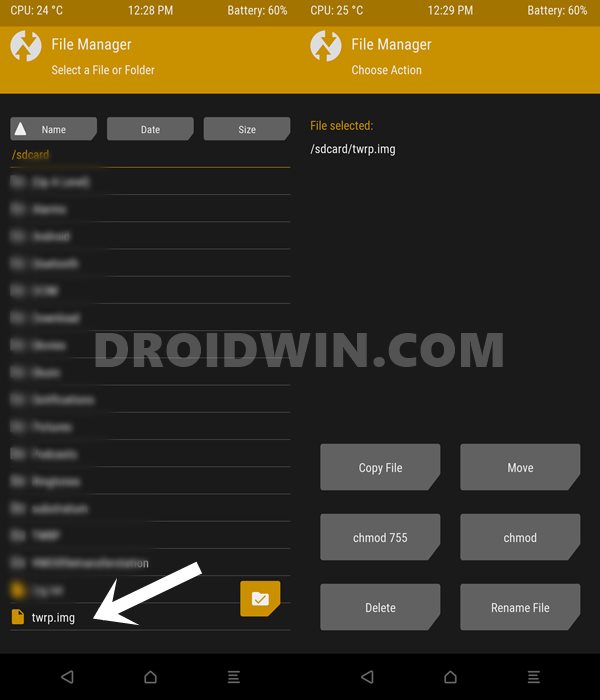
- Navigate to the desired file on which you need to take an action and select it.
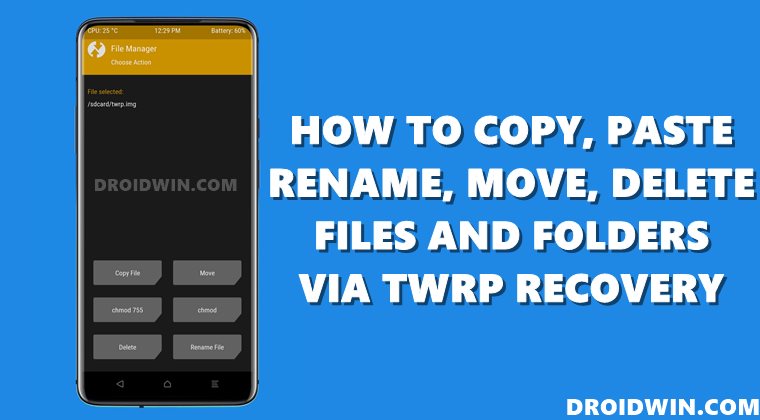
- As soon as you tap on it, you will get the following options: Copy File, Move, Delete, Rename File among others.
- Let’s first check out the steps to copy/paste a file, and then the steps to move, delete and rneame files will be given.
How to Copy a File using TWRP Recovery
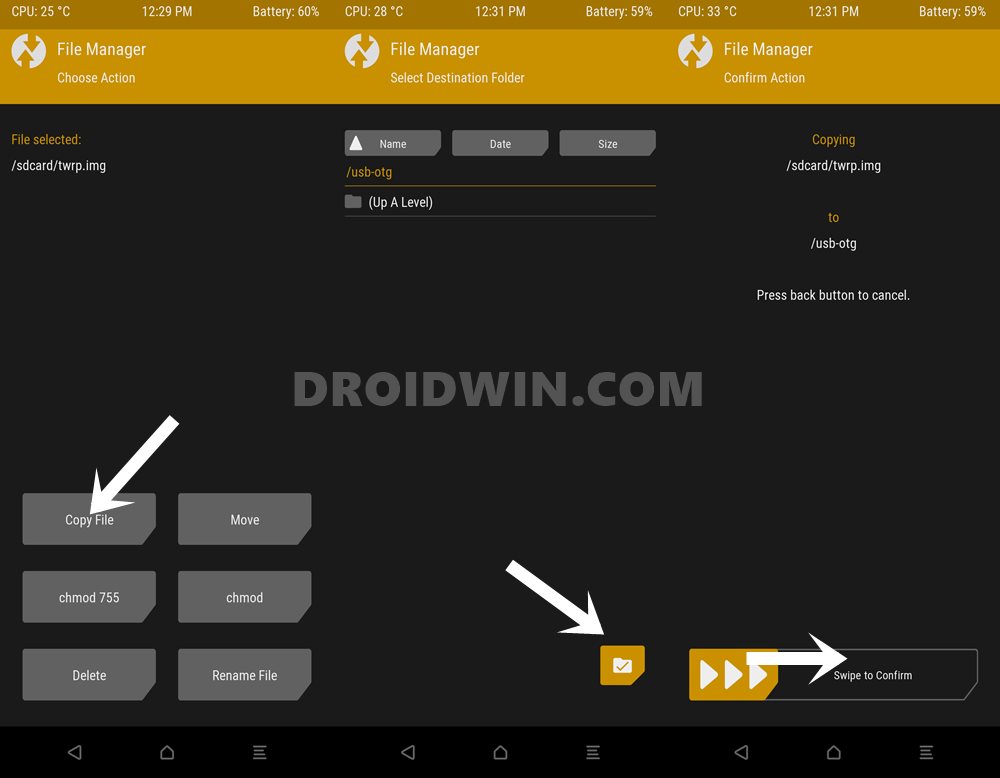
- Once you have selected the file (from the Advanced > File Manager), tap on the Copy File button.
- Now browse the desired location and hit the BLue tick mark situraed at the bottom right.
- Finally, perform a right swipe to confirm the copy-paste operation.
- As soon as it is done, you should get the File Operation Complete message,
How to Move a File using TWRP Recovery

- First off, select the desired file as mentioned above (via Advanced > File Manager) and tap on the Move option.
- Navigate to the location where this file needs to be moved and then tap on the blue tick mark situated at the bottom right.
- Finally, perform a right swipe to confirm the move operation.
- Once done, you should get the File Operation Complete message,
How to Rename a File using TWRP Recovery
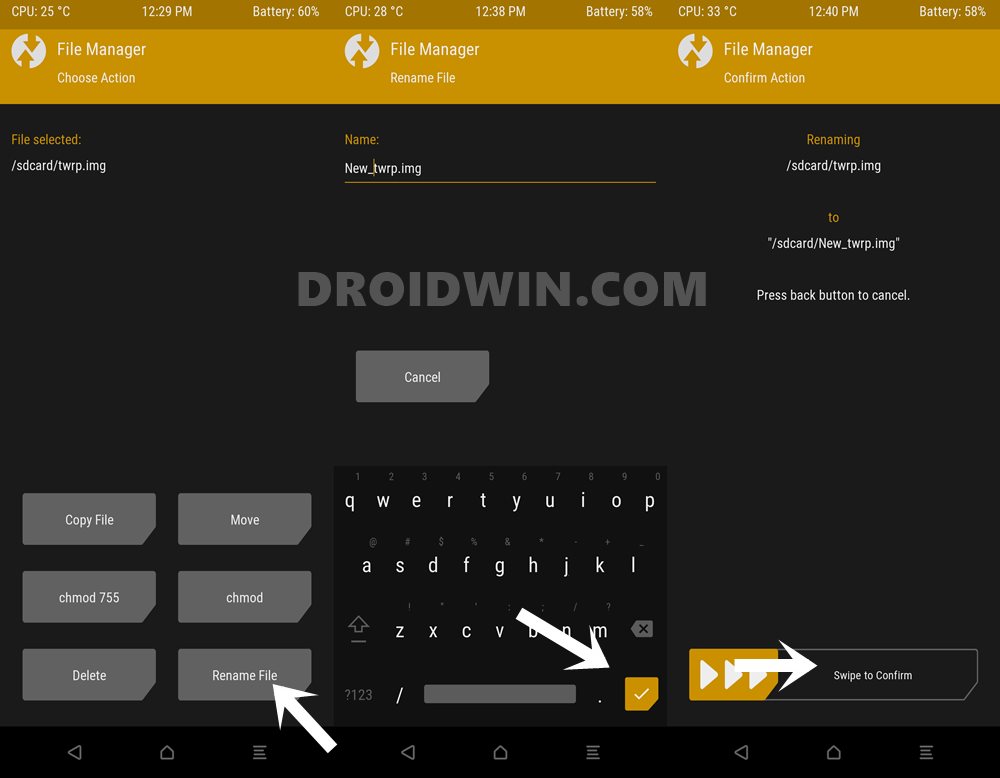
- To rename any file, select it from the Advanced > File Manager option and select the Rename File option.
- Now type in the desired name [see Note below] and then tap on the blue check mark situated at the bottom right.
- Finally, perform a right swipe to comfirm the rename.
NOTE: Do keep in mind not to include spaces between two words. This might lead to a few issues while flashing that file. Rather you should make use of the underscore character. For example, rather than New twrp, give it the name New_twrp.
How to Delete a File using TWRP Recovery
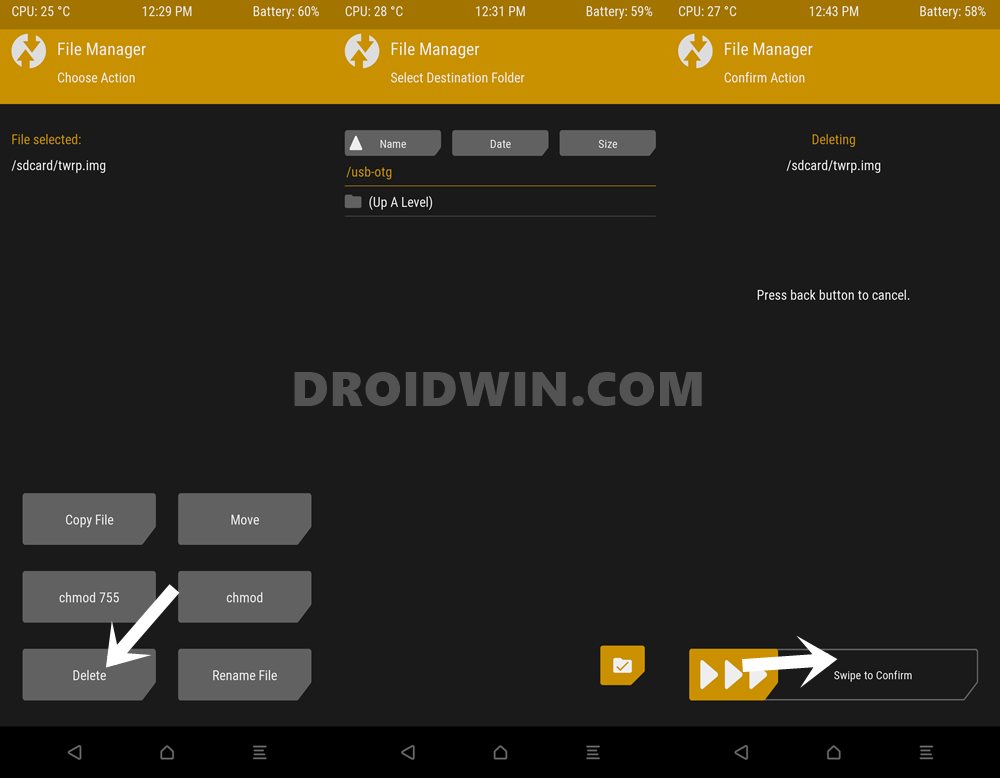
- If a file is no longer needed, then its probably time to remove it from your deivce.
- To do so, start off by selecting the desired file from Advanced > File Manager.
- After that, select the Delete option.
- Finally, perform a right swipe to delete this file for good.
That’s it. These were the steps to Copy, Paste, Move, Rename and Delete Files via TWRP. Let’s now check out how each of these operations could be performed on the folders.
- How to fix ADB Device not found [List of Devices Attached is blank]
- Detailed Steps to Fix adb is not recognized Error
- How to Fix Unauthorized Device with ADB Commands [3 methods]
- How to Fix Android Device stuck in Fastboot Mode
STEP 3B: Copy, Move, Rename, Delete Folders via TWRP Recovery
Well, not only the files, but you could also carry out the above mentioned steps on an entire folder as well. The steps are nearbaout identical to the one that you have just used for the files section. Here’s what needs to be done to Copy, Paste, Move, Rename and Delete Folders via TWRP:
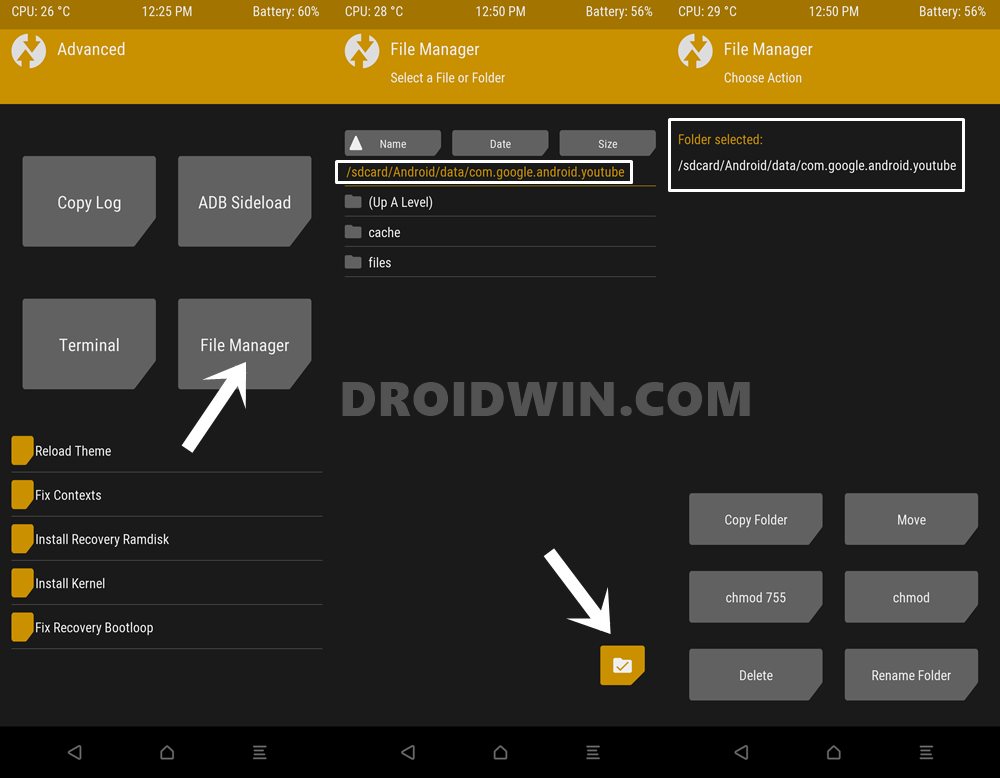
- From the TWRP Home screen, go to Advanced > File Manager.
- Now navigate to the desired folder of your choice and go inside that folder.
- Then tap on the Blue tick mark icon situated at the bottom right to select that folder.
- Once you have selected the folder, you will get the following options: Copy Folder, Move, Delete, Rename Folder, among others. Let’s check out how to perform, each of these tasks.
How to Copy a Folder via TWRP
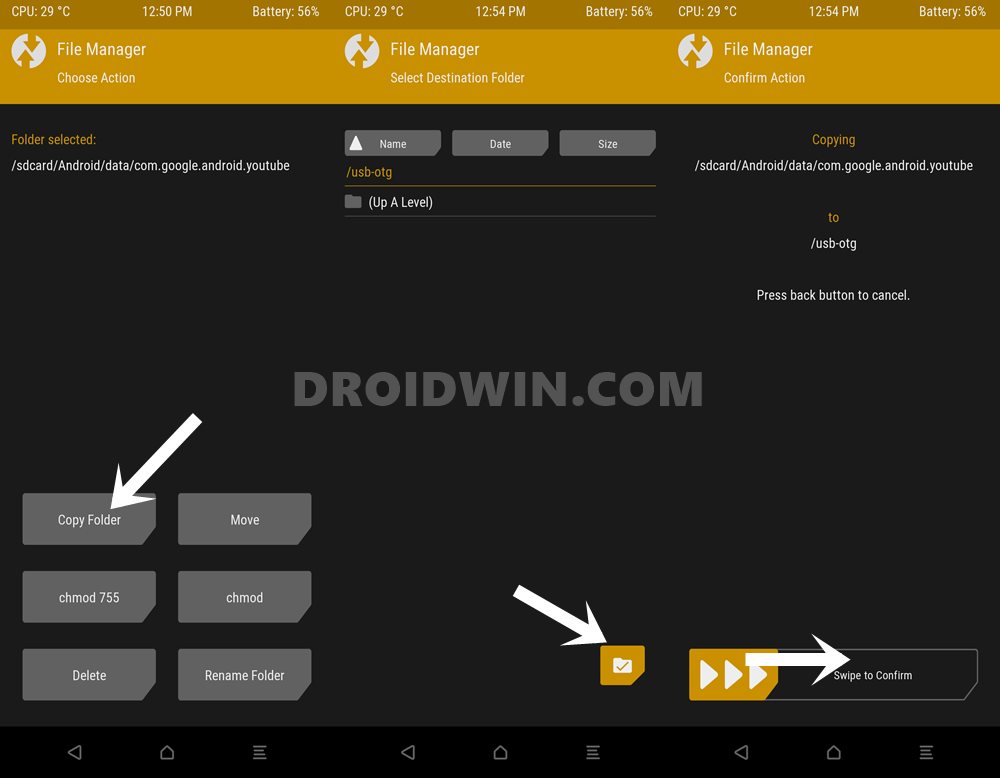
- If you wish to copy/paste a particular folder, then start off by selecting that folder as mentioned above.
- Then navigate to the desired destination folder and tap on the blue check mark to finalize the location.
- Finally,perform a right swipe to confirm the paste.
How to Move a Folder via TWRP Recovery

- Select the desired folder via Advanced > File Manager.
- Then tap on the Move option. Go to the desired location and hit the blue check mark situated at the bottom right.
- Finally, perform a right swipe to move the selected folder to that location.
How to Rename a Folder using TWRP
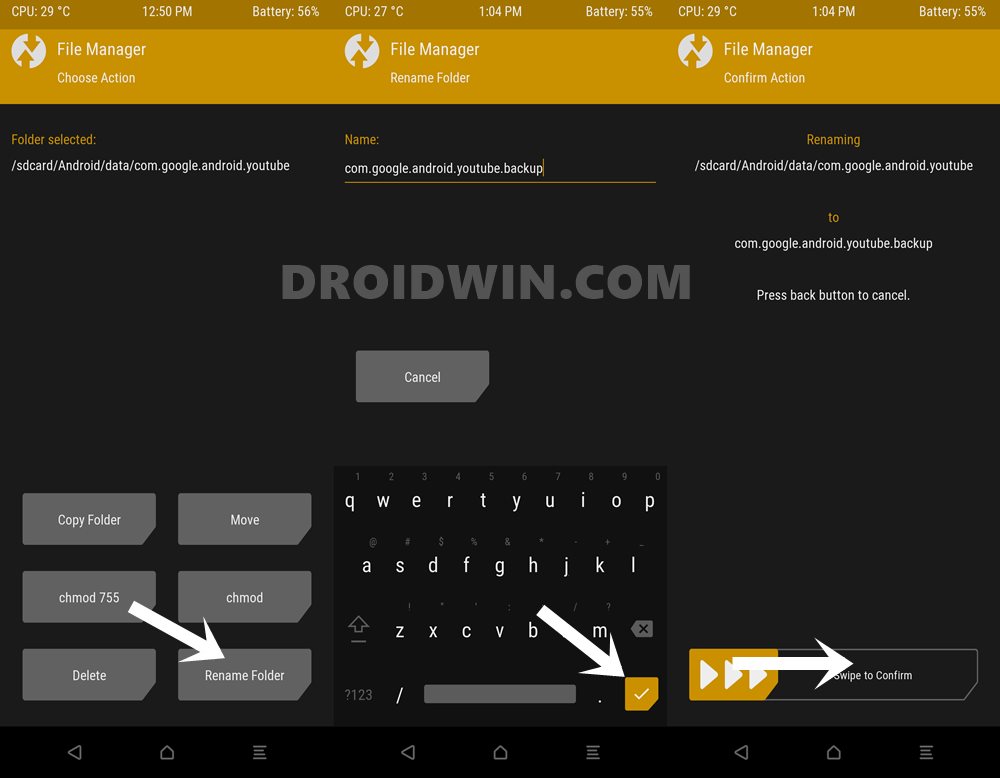
- To begin with, select the desired folder via Advanced > File Manager.
- Then select the Rename folder option (no points in guessing this!).
- Type in the desired name (see Note below) and hit the blue tick to confirm.
- Finally, perform a right swipe to confirm the rename.
NOTE: As opposed to files, you may use spaces between two words, however, it is still recommended not to do so. Rahtrer make use of the underscore or the period (full stop) such as com.google.android.youtube.
How to Delete any Folder via TWRP Recovery
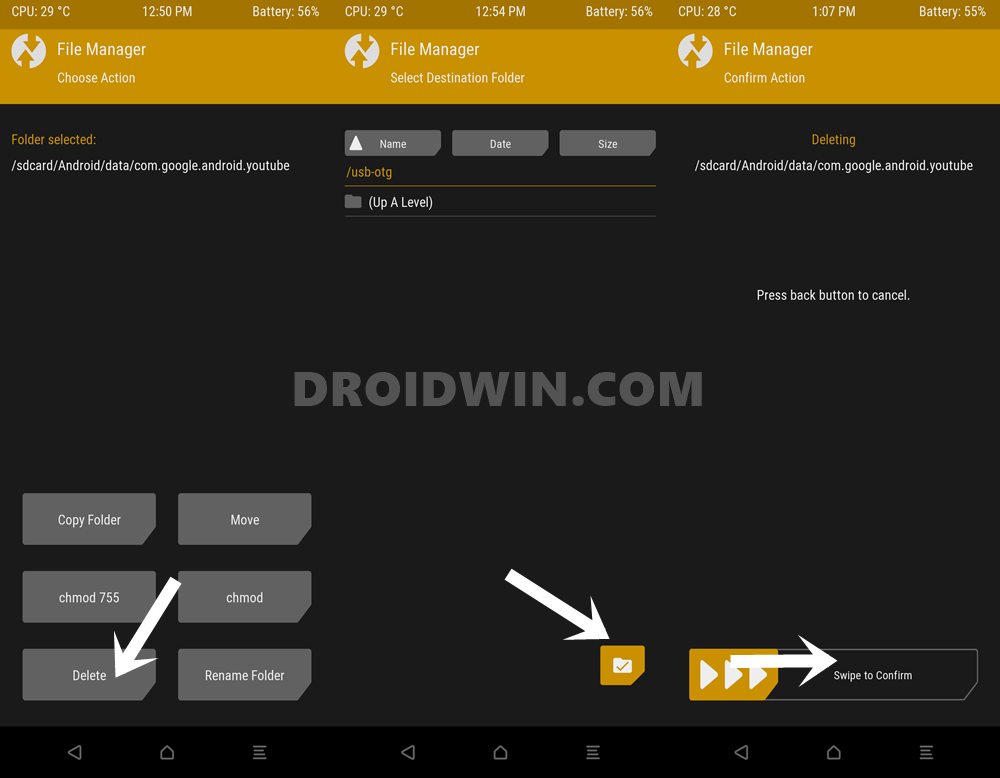
- To remove any folder from your device, select it from Advanced > File Manager.
- Then hit the Delete button
- Finally, perform a right swipe to confirm the deletion.
That’s it. These were the steps to Copy, Paste, Move, Rename and Delete Files and Folders via TWRP. if you have any queries, do let us know in the comments, Likewsie, if you have any other questions concerning the TWRP Recovery, drop them in the comments section below. We will get back to you with a solution at the earliest.


