In this guide, we will show you various methods to fix the issue of the Command ~ Tilde shortcut not working in Ventura. The thirteenth iteration of the OS has just been released by the Cupertino giant and with that, there is a slew of intriguing features that you are about to welcome. These include the introduction of Stage Manager, Weather App, and Continuity Camera; changes to Spotlight search and System Preferences; and the ability to unsend messages and emails.
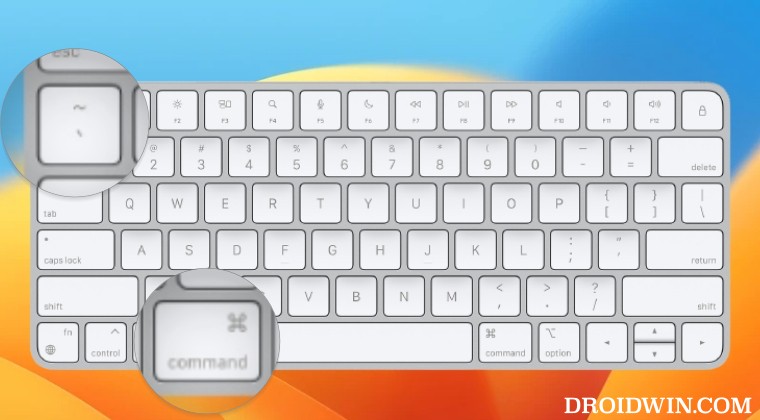
On the flip upside though, a few bugs have managed to creep in as well. One among them is the inability of the Command ~ Tilde shortcut to work along the expected lines in macOS Ventura. For the unaware, this is quite a handy shortcut that allows you to switch between two or more active windows of the same application [or to move backward in the app switcher, but let’s keep our focus on the former one for this guide!].
However, numerous users have voiced their concern that the Command ~ Tilde shortcut is performing rather abruptly in apps like Finder and Apple Mail after updating their OS to Ventura. if you also echo the same concerns, then this guide will make you aware of numerous workarounds to rectify this issue. Follow along.
Table of Contents
Fix Command ~ Tilde shortcut not working in Ventura
It is recommended that you try out each of the below-mentioned workarounds and then see which one spells out success for you. So with that in mind, let’s get started.
Fix 1: Toggle Move Focus to Next Window
First and foremost, you should consider disabling and then re-enabling this feature. This will refresh its underlying settings and could well rectify the issue that we are currently dealing with. So refer to the below steps to give it a try and then check out the results.
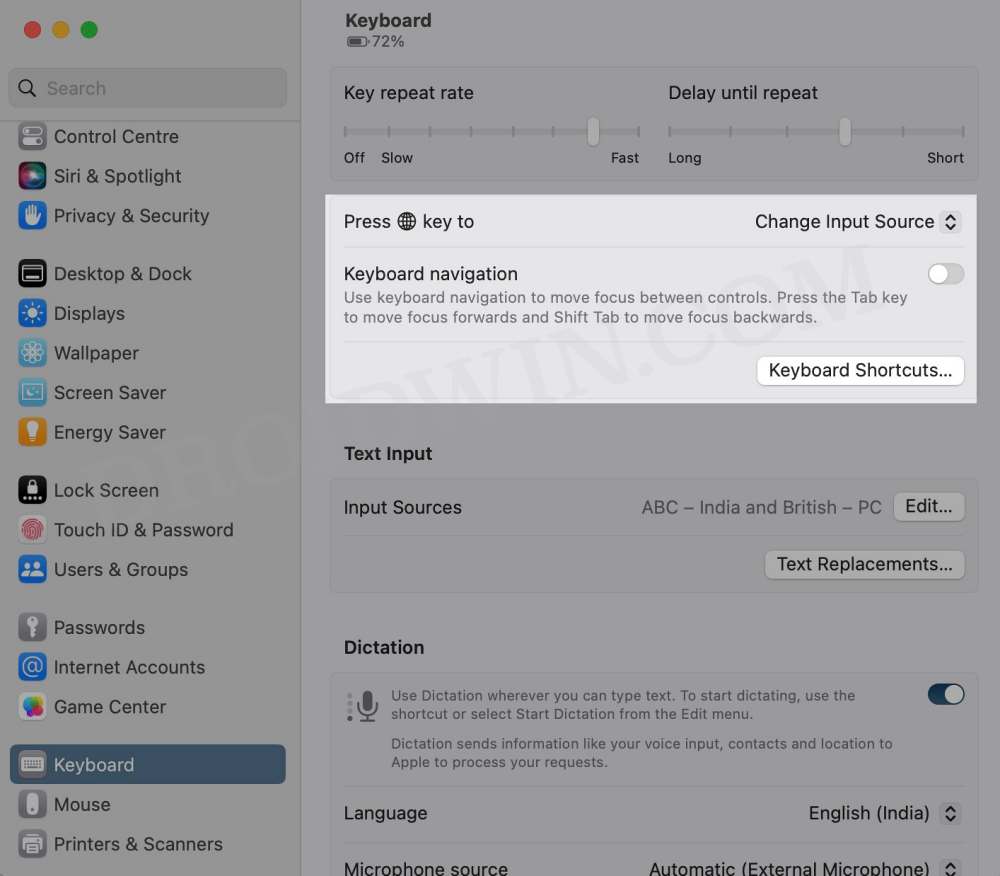
- Open System Preferences and select Keyboard from the left-hand side.
- Then go to the right-hand side and click on the Keyboard Shortcut button.

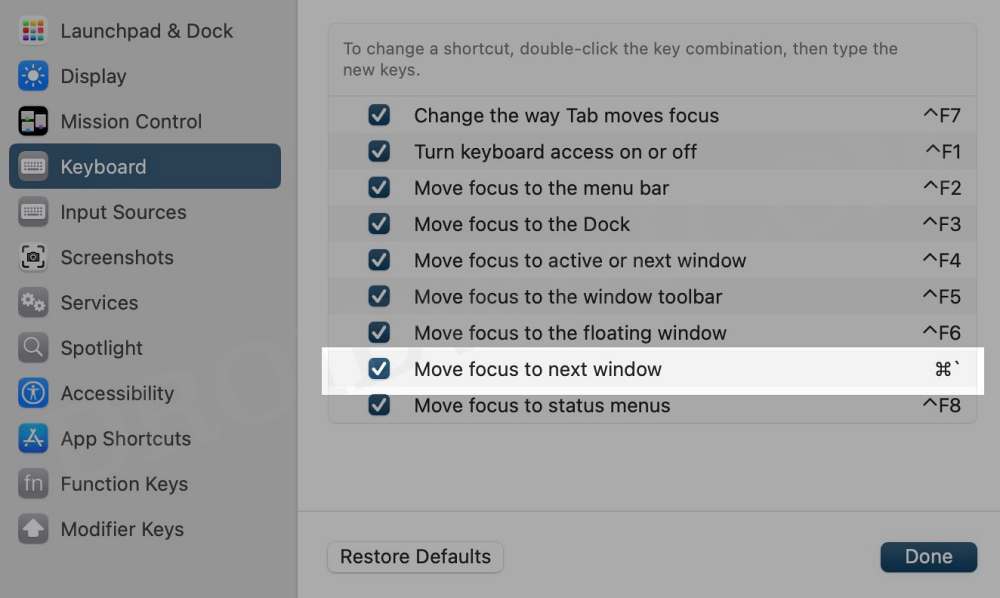
- Now select Keyboard from the left-hand side, uncheck Move Focus to Next Window, and hit Done.
- Then again select Keyboard, re-check Move Focus to Next Window, and click Done.
- Check if the Command ~ Tilde shortcut is now working in Ventura or not.
FIX 2: Change Keyboard Type
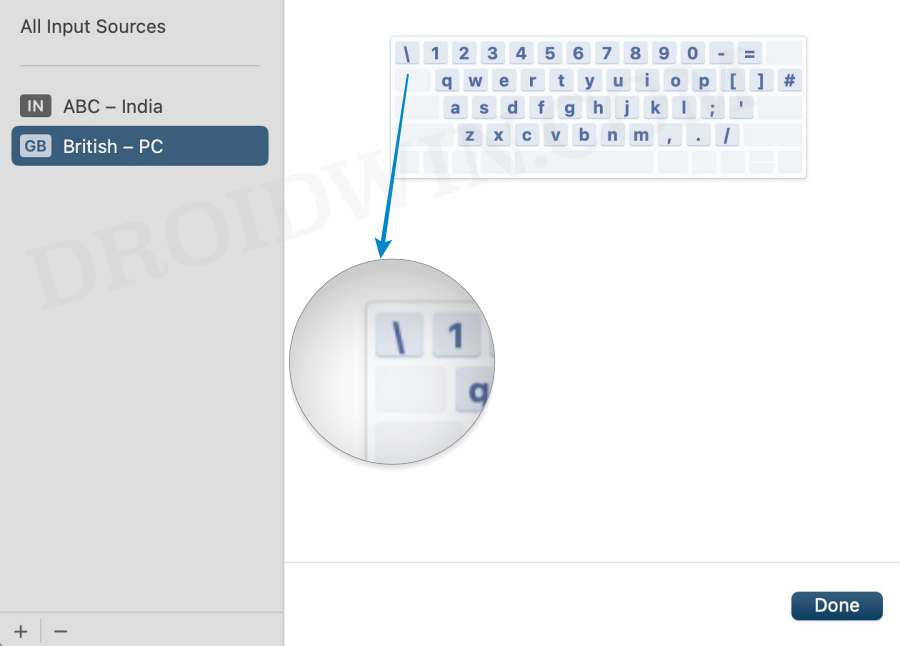
Some input sources have the forward slash in place of the tilde symbol [see second image below]. So if you have currently set your keyboard type to any one of these, then it’s time to make a change. here’s how it could be done:
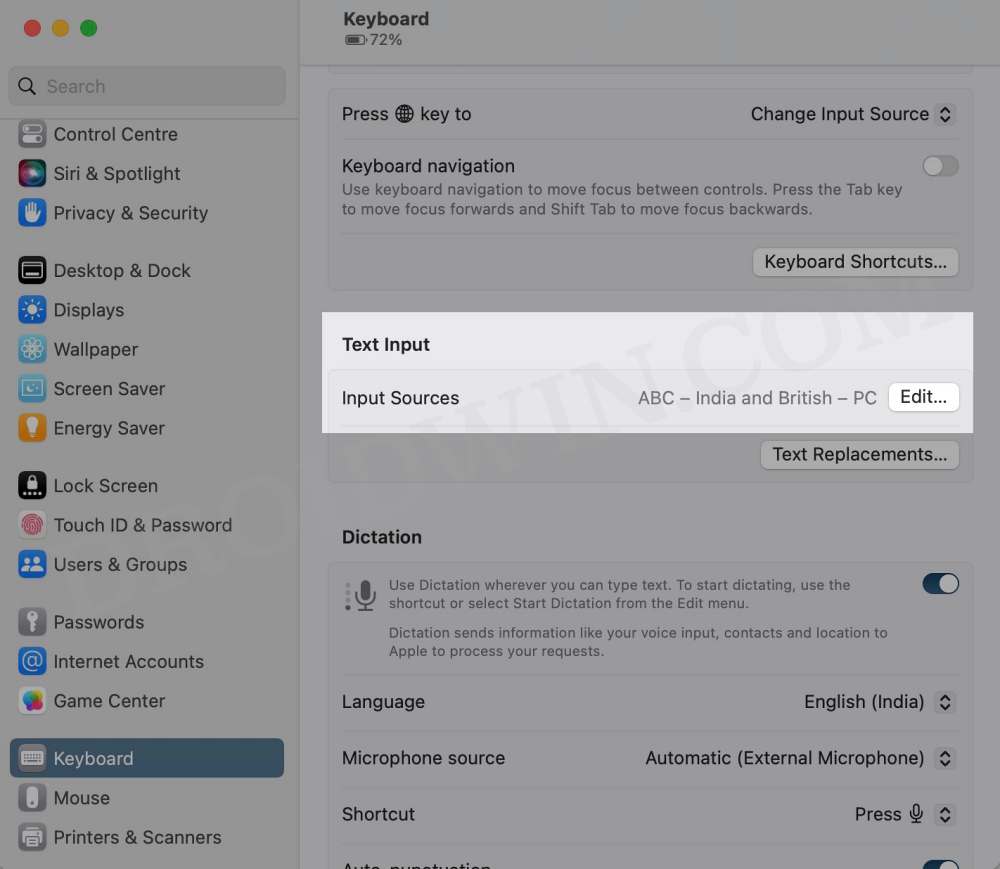
- Open System Preferences and select Keyboard from the left-hand side.
- Then click on Edit next to Input Source.
- Now select that keyboard style that has a tilde at the top left and hit Done.
- Check if it fixes the Command ~ Tilde shortcut is not working issue in Ventura.
FIX 3: For Chrome
It has been noticed that this shortcut doesn’t seem to work in different Chrome windows if any one of them is maximized to full screen. So take the mouse cursor to the top left and drag it to reduce the Chrome window size. Then retry using the Command ~ Tilde shortcut on your macOS Ventura and check out the results.
FIX 4: Reset Keyboard Shortcuts to Default
If none of the aforementioned tweaks spelled out success, then your last course of action should be to reset all the keyboard shortcuts to their factory default state and then check out the results. Here’s how it could be done:
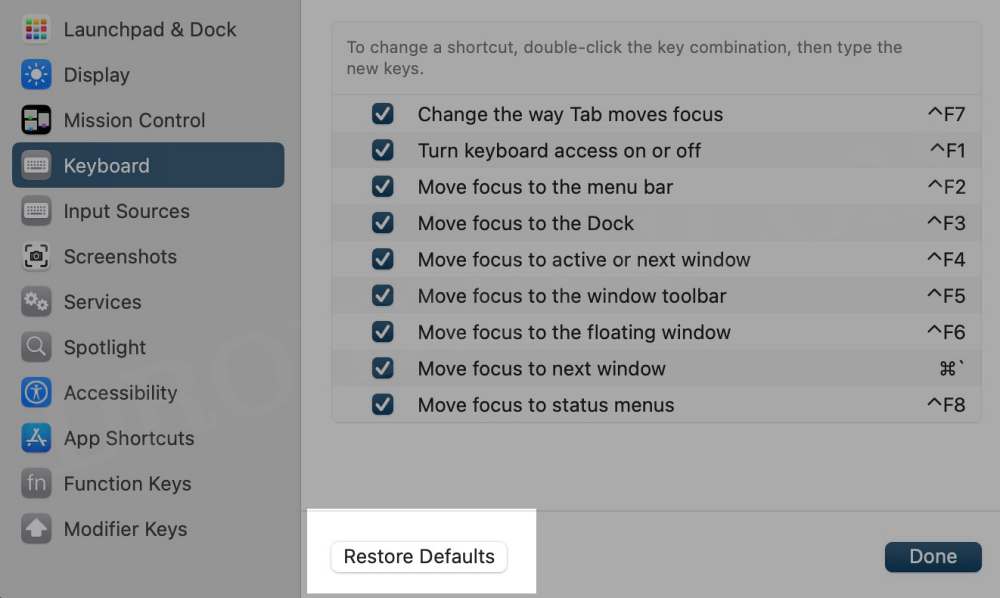
- Open System Preferences and select Keyboard from the left-hand side.
- Then go to the right-hand side and click on the Keyboard Shortcut button.
- Now select Keyboard from the left-hand side and click on Restore Defaults.
That’s it. These were the four different methods that shall help you fix the issue of the Command ~ Tilde shortcut not working in Ventura. If you have any queries concerning the aforementioned steps, do let us know in the comments. We will get back to you with a solution at the earliest.


db
None of these solutions worked for me.
But, what did work for me finally was the following:
Turning off Speak Selection under Spoken Content in Accessibility Setting.
Brian
I just went through all four of these steps. None of them worked initially. But then I QUIT Mac Mail and restarted it and now it’s working. Thank you so much for the help on this.