In this guide, we will show you the steps to change the DNS address on your Android device. By default, the system is automatically assigned the Domain Name Server provided by the Internet Service Provider. In slightly more technical terms, the Dynamic Host Configuration Protocol (DHCP) automatically configures the OS to use the IP addresses of your ISP’s domain name servers.
However, in some instances, you might need to slightly divert from this route and take the road less traveled. In other words, there could be a few cases wherein you might want to opt-in for Google’s trustworthy DNS, Cloudflare’s encrypted and secure DNS, Quad9 for blocking malicious domains, or CleanBrowsing for blocking adult contents.
The rules that will be implemented upon selecting the DNS will be applied across all the apps installed on your device. As a result, you wouldn’t need to manually create standalone rules for individual browser apps. So owing to all these benefits involved, it’s no hidden secret why users are looking to change the DNS address on their Android device. If you are also in the same boat, then this guide will help you out. Follow along.
Table of Contents
How to Change DNS Address on Android
While changing the DNS on Windows requires the numerical IP Address [such as 8.8.8.8 and 8.8.4.4 for Google], in Android, things are a little bit different. Rather than the numerical values, here you are required to provide the hostname of the DNS provider. In this regard, this guide will focus on four of the most popular third-party DNS addresses.
These include Google, Cloudflare, Quad9. and CleanBrowsing. We have already listed the best use case scenario for each of these DNS above. Let’s now make you aware of their host provider names that you could use to change the DNS address on your Android device.
Google DNS Hostname
dns.google
Cloudflare DNS Hostname
1dot1dot1dot1.cloudflare-dns.com
Quad9 DNS Hostname
dns.quad9.net
CleanBrowsing DNS Hostname
adult-filter-dns.cleanbrowsing.org
family-filter-dns.cleanbrowsing.org
Instruction Steps
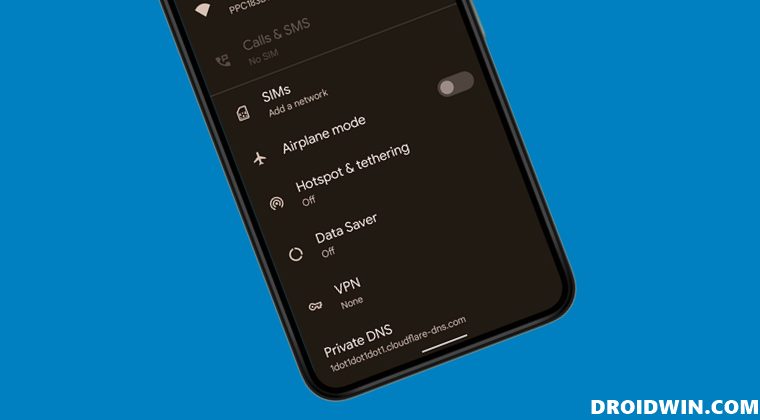
- To begin with, head over to the Settings menu on your device
- Then go to Network and Internet and select Private DNS.
- After that, choose Private DNS Provider Hostname.

- Now type in the desired hostname [from the below section] and hit Save.
- For example, if you wish to use Cloudflare’s DNS, then type in the following value
1dot1dot1dot1.cloudflare-dns.com

Change DNS Address on Android using Apps
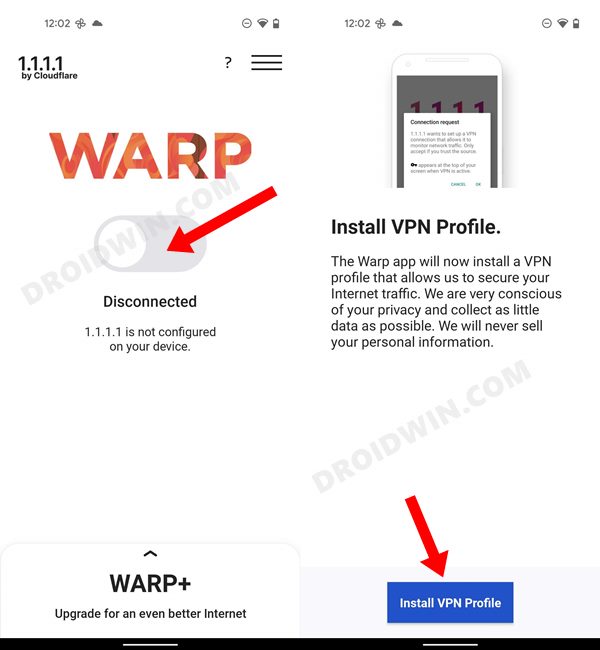
Some DNS providers also have their standalone apps that would do all the aforementioned work on your behalf. Here’s how to make full use of the same, taking the Cloudflare app as an example.
- Download and install the Cloudflare app from Play Store.
- Then launch the app and go through the welcome screen.
- After that, enable the toggle next to Warp and tap on Install VPN Profile.
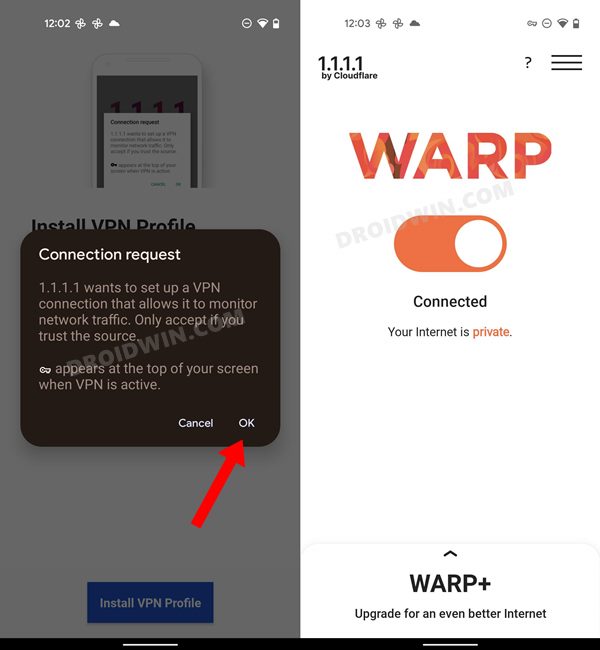
- You will now get a connection request prompt, tap OK.
- That’s it. You will now get the Connected message.
So these were the steps to change the DNS address on your Android device. We have listed both the automated and manual methods to get the job done. If you have any queries concerning the aforementioned steps, do let us know in the comments. We will get back to you with a solution at the earliest.


