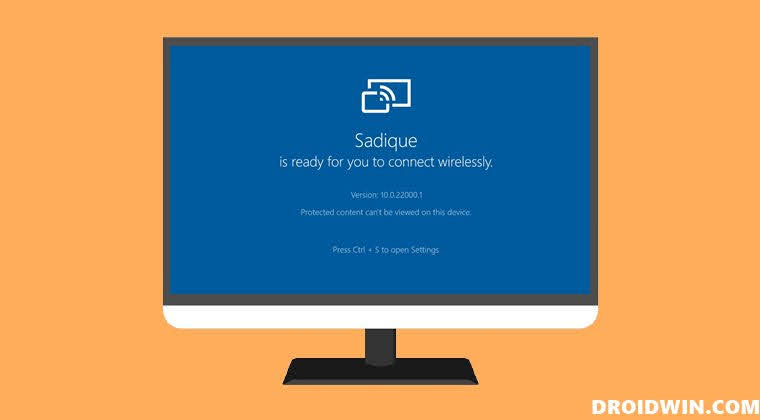
In this guide, we will show you various methods to fix the issue of being unable to install Wireless Display in Windows 11. Most Windows PC comes with built-in support for Micracast. This is a technology that allows you to wirelessly connect screens to your computer. So if you want apps and content from another device to show on your PC screen, then this is probably the best route forward.
To carry out this task, you only need to install the wireless display utility on your Windows 11 PC and get going. However, many users have voiced their concern that they are unable to cast other device screens over to their PC. This is because the wireless display software isn’t being installed on their PC, instead giving out the Installed Failed message. If you are also in the same boat, then this guide shall help you out. Follow along for the fixes.
Table of Contents
How to Install Wireless Display in Windows 11
Every fixes listed below would advise you to install the Wireless Display once the workaround has been completed. So we thought it would be better to make you aware of the steps to do so right at the beginning itself.
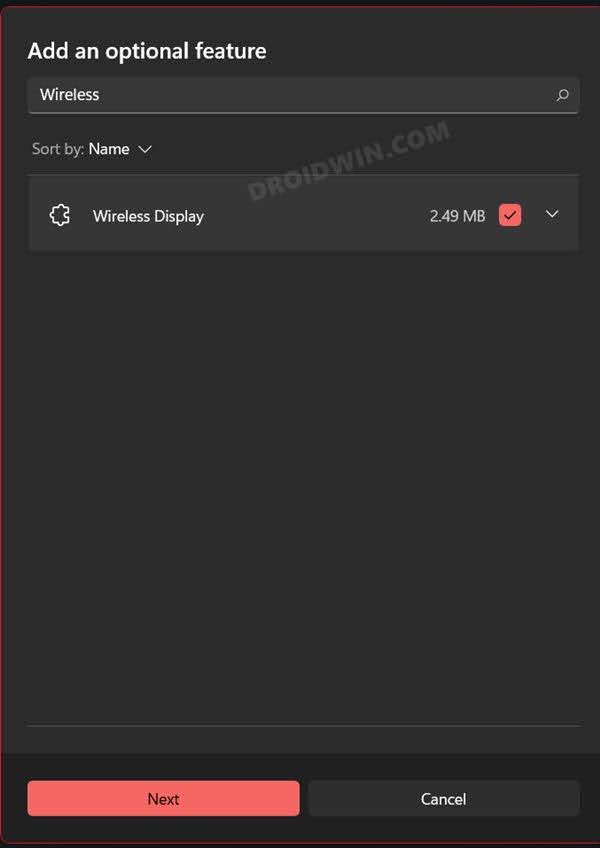
- Bring up the Settings menu via Windows+I and go to Apps > Optional Features.
- Then click on View Features next to Add an optional feature.
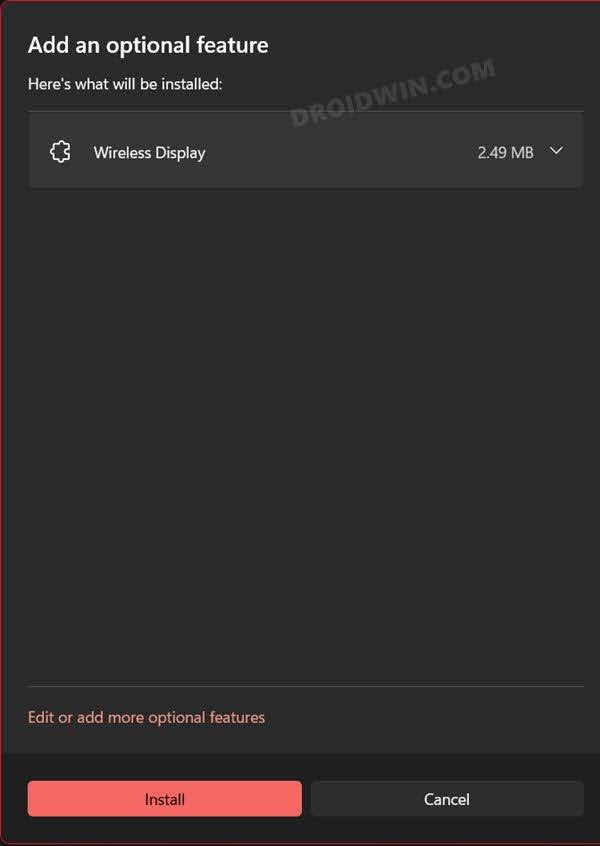
- Now search Wireless Display, select it and click Next.

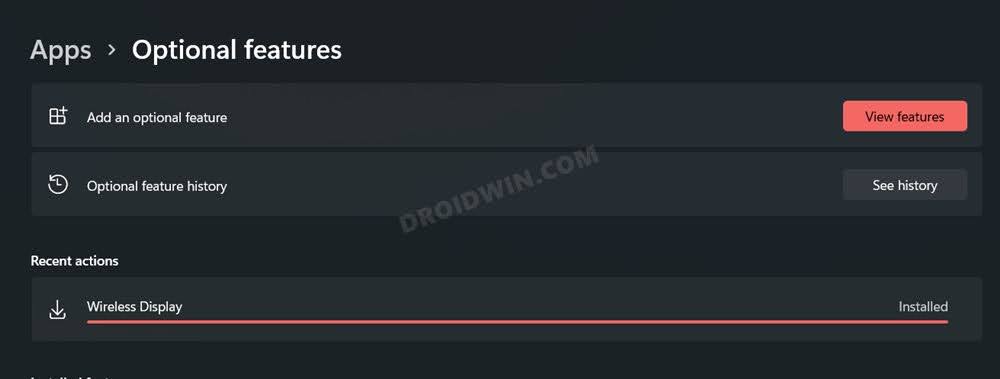
- Finally, click install and wait for the process to complete.
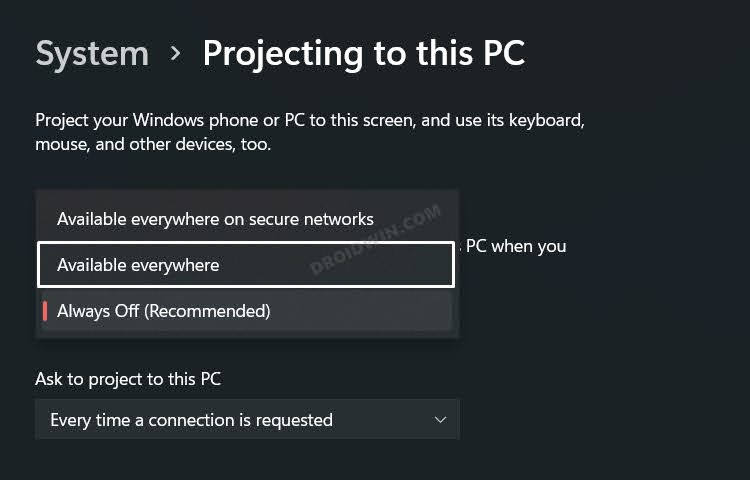
- Once done, open Projection settings from the Start menu.
- Then click on the drop-down next to Projection settings and select Available everywhere.
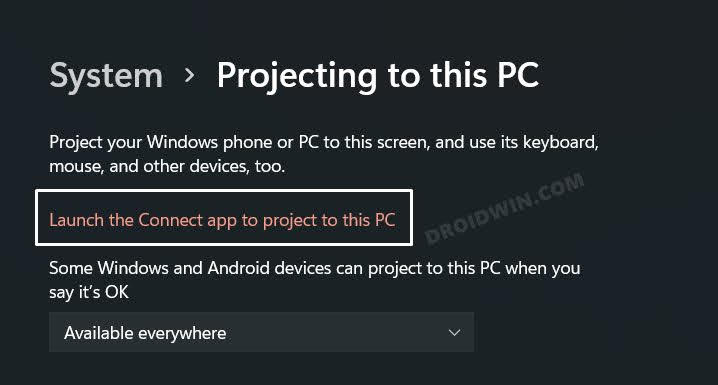
- After that, click on the ‘Launch the Connect app to project to this PC’ option. That’s it.
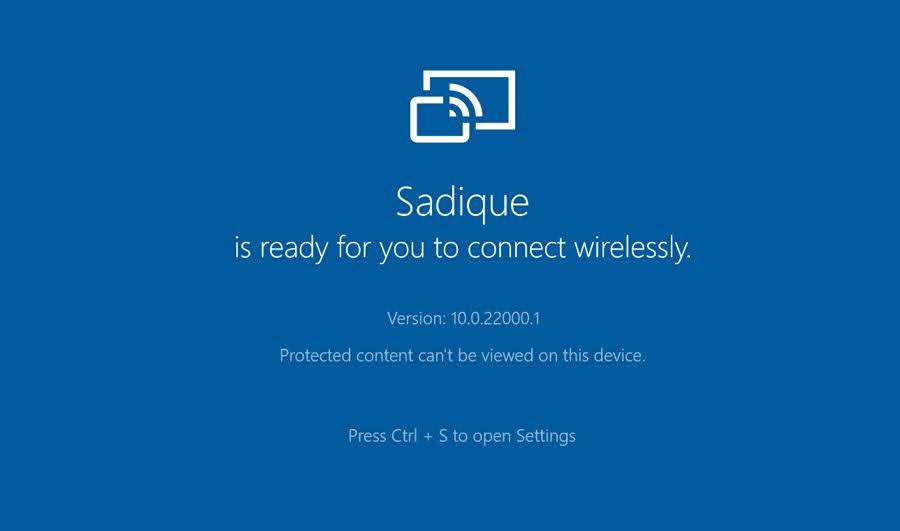
- Your PC is now ready for the task. Just make sure that the other device is also on the same network.
Fix Cannot Install Wireless Display in Windows 11
It is recommended that you try out each of the below-mentioned workarounds and then see which one spells out success for you. So with that in mind, let’s get started.
FIX 1: Try Network Tweaks
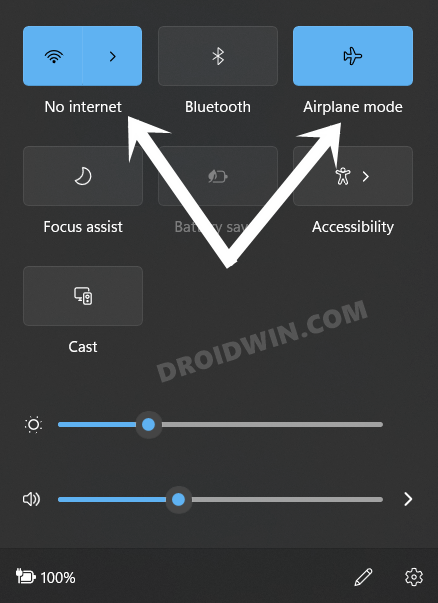
- First and foremost, you should double-check that the internet is up and running without any interruptions.
- Likewise, we will also recommend you restart the router and disable/re-enable the WiFi on your PC.
- To take it a step further and enable and disable the Airplane Mode from the Action Center.
- Once all these network tweaks have been carried out, retry installing Wireless Display in Windows 11 and check out the results.
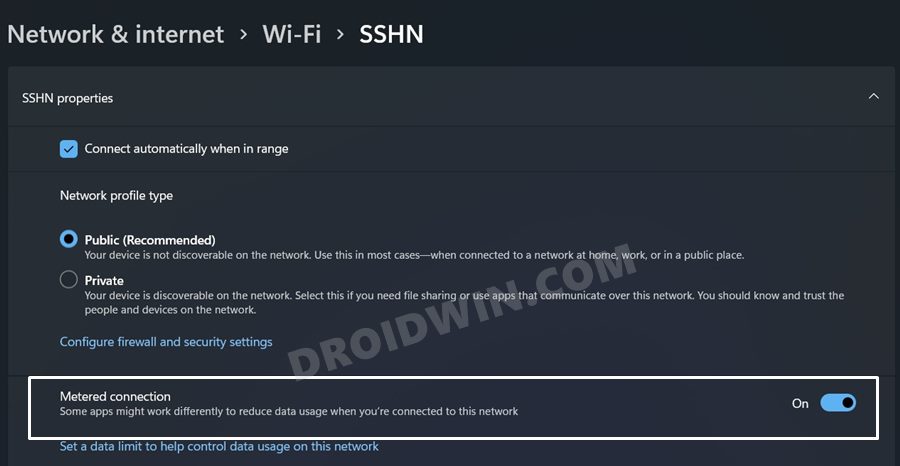
FIX 2: Disable Metered Connection
A metered connection is a type of restricted connection wherein a cap is put on the maximum bandwidth that you could exhaust. So if you have reached that limit, then it would prevent you from downloading content, which also includes the Wireless Display. So we would recommend disabling this feature and then retrying the downloading. Here’s how:
- Bring up the Settings menu via Windows+I shortcut keys.
- Then go to Network and Internet > WiFi Manage known networks.
- Now select your network from the list and turn off the toggle next to Metered Connection.
- Check if you are now able to install Wireless Display in Windows 11 or not.
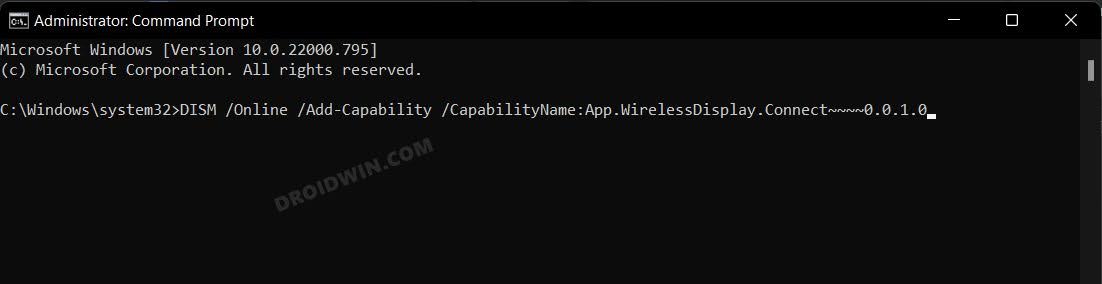
FIX 3: Install Wireless Display via CMD/PowerShell
If you are unable to install the wireless display via the conventional route of the Settings menu, then you could also get this job done via CMD or PowerShell window. Here’s how-
- Launch CMD or Powershell as an administrator and type in the below command:
DISM /Online /Add-Capability /CapabilityName:App.WirelessDisplay.Connect~~~~0.0.1.0
- The downloading will now start. Once done, check if the issue has been resolved or not.
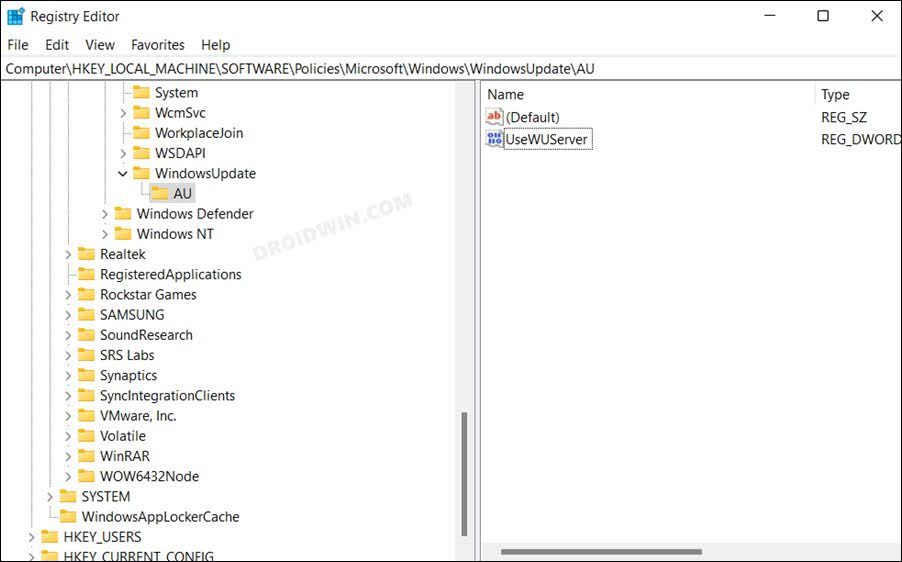
FIX 4: Using Registry Editor Tweak
In some instances, the WindowsUdpate server might also prevent you from installing the Wireless Display on your Windows 11 PC. So you will have to tweak its value via the Registry Editor and then test out the results.
- Launch Registry Editor from the Start menu and head over to the below location
HKEY_LOCAL_MACHINE\SOFTWARE\Policies\Microsoft\Windows\WindowsUpdate\AU
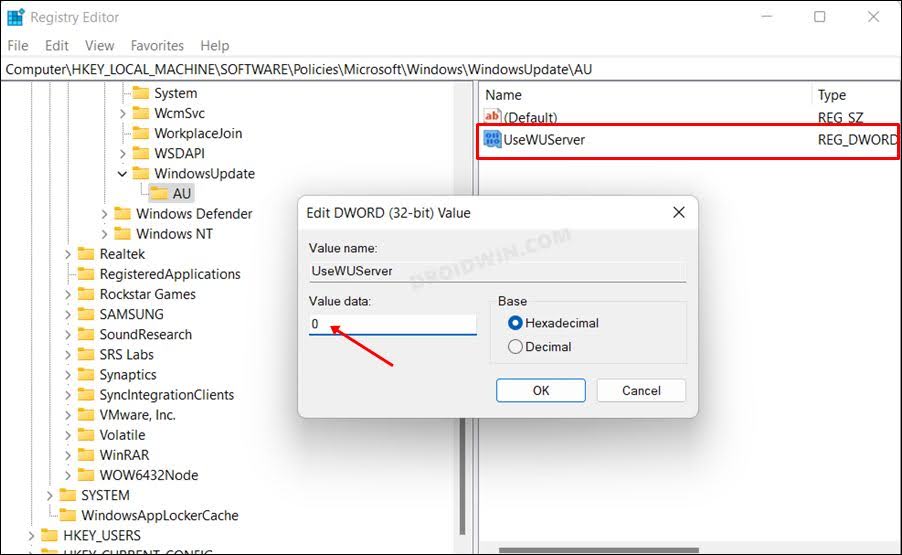
- Then go to the right-hand side and open the UseWUServer file.
- Now change its Value Data to 0 and hit OK to save it.
- That’s it. This should have rectified the underlying issue.
That’s it. These were the four different methods that shall help you fix the issue of being unable to install Wireless Display in Windows 11. If you have any queries concerning the aforementioned steps, do let us know in the comments. We will get back to you with a solution at the earliest.


