In this guide, we will show you the steps to block an app from accessing the internet on your Windows 11 PC. Recently a developer rolled out a buggy update that ended up breaking the app’s online functionality, though it was still working in the offline mode. However, there was no way of forcing the app to work only in the offline ecosystem, resulting in the user’s inability to use the app altogether. Granted, one way of dealing with it is to turn off the WiFi on your PC.
However, that is not the most viable approach to get this job done as there would be quite a few other apps and services installed on your PC that would need to interact with the internet, either in the foreground or background. So what else could be done? Well, you could specifically block just that particular app from accessing the internet on your Windows 11 PC. And in this guide, we will show you how to do just that. Follow along.
Table of Contents
How to Block an App from accessing the Internet in Windows 11

- Head over to Settings > Network & internet > Advanced network settings.
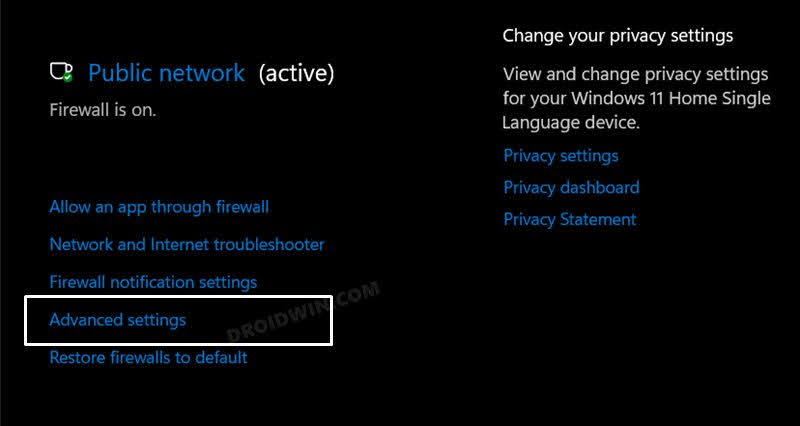
- Then select Windows Firewall and click on Advanced settings.

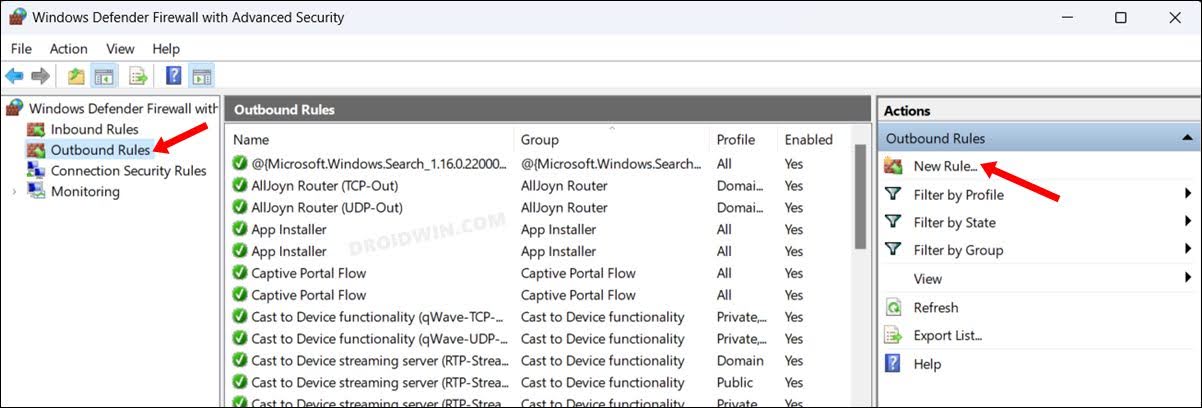
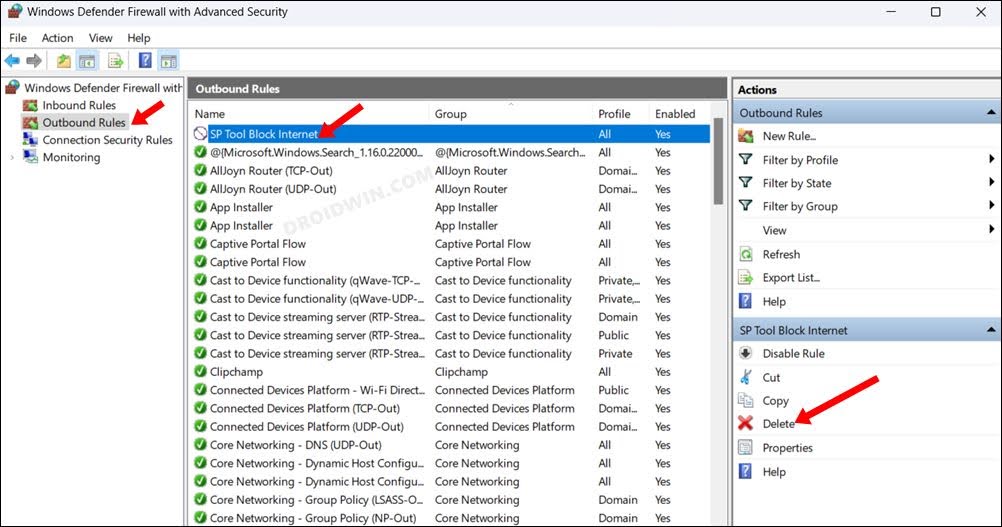
- Now select Outbound Rules from the left-hand side.
- Then click on New Rule from the right-hand side.
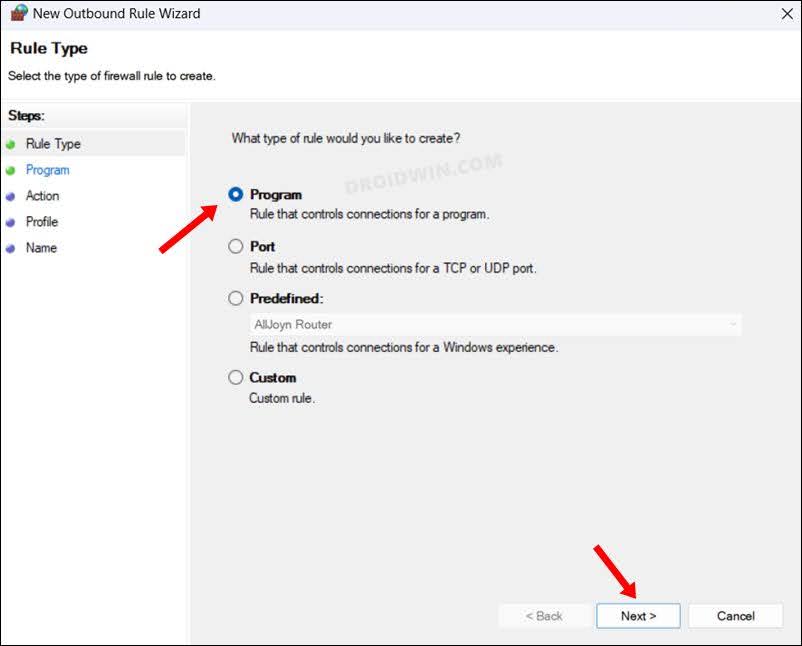
- After that, select Program and click Next.
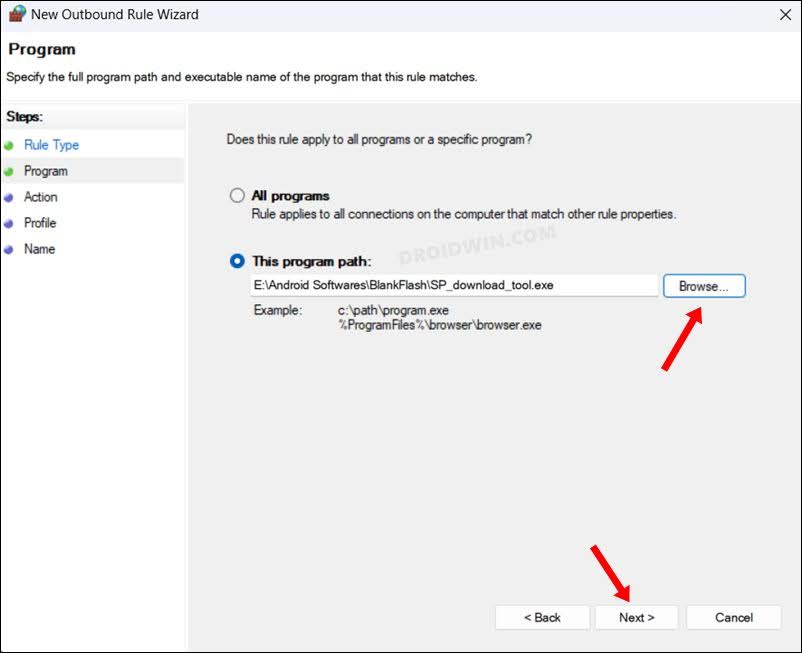
- Now browse to the directory where the desired app’s EXE file is present, select it, and click Next.
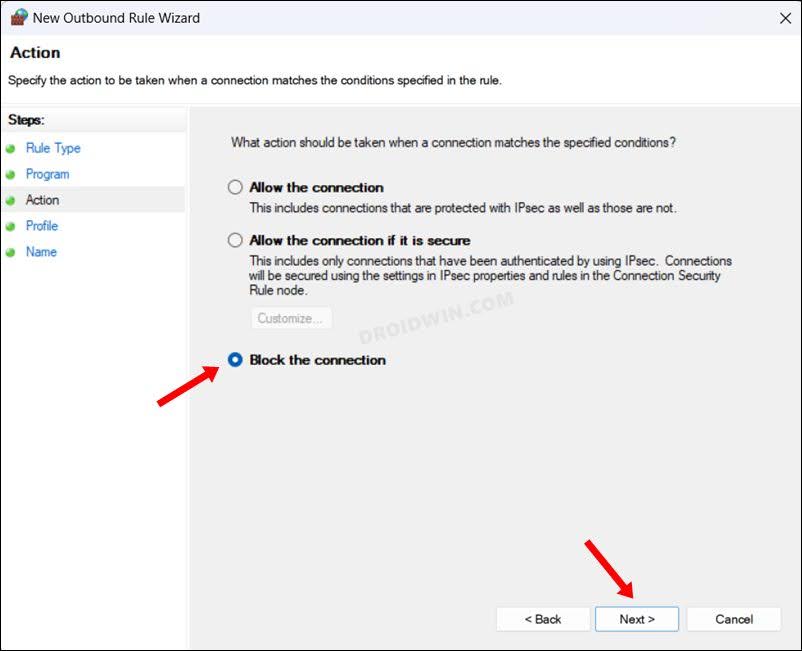
- After that, select Block the Connection and click Next.
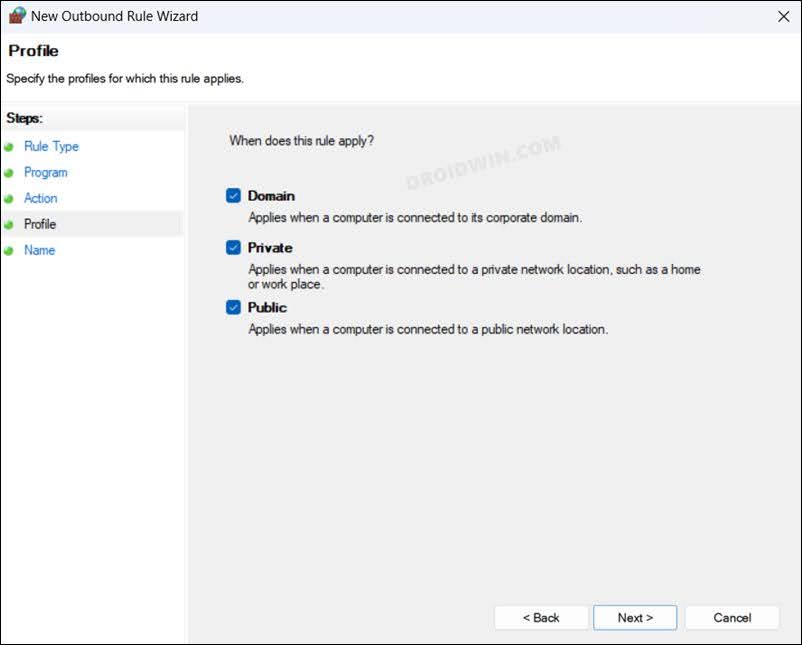
- Now checkmark Domain, Private, and Public, and hit Next.
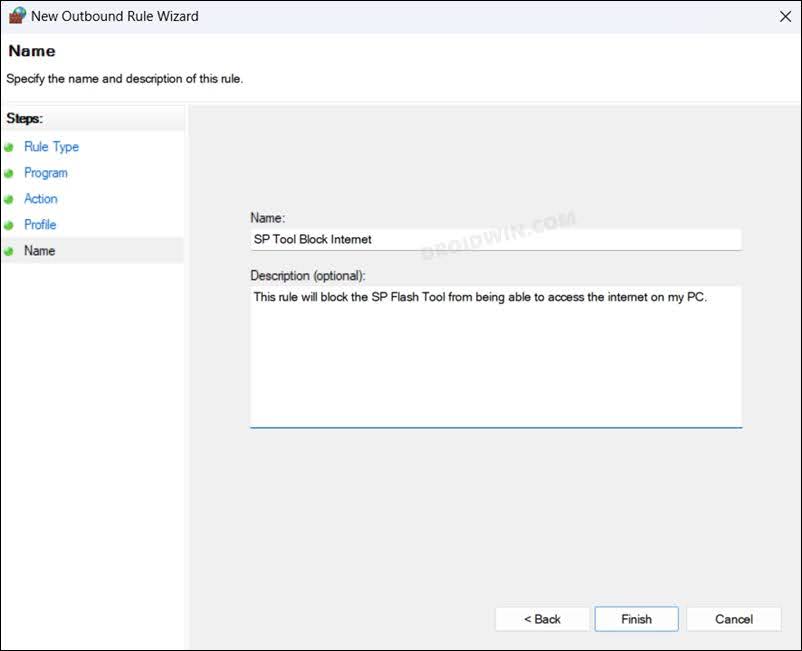
- Finally, give it a name of your choice and an optional description, and click Finish.
- That’s it. You have successfully blocked an app from accessing the internet in Windows 11.
How to Unblock an App from accessing the Internet in Windows 11
if you wish to remove the network restriction and want the app to gain access to the network, then you could either disable the rule or delete it altogether. If you disable this rule, and you ever wish to reblock the app from accessing the internet, then you could easily re-enable it as and when needed in just a few clicks.
However, if you end up deleting this rule, and if you wish to reblock the app from network access, then your only course of action would be to re-create that rule from scratch [as explained in the above section]. Anyways, we have listed both these methods, you may refer to the one that is in sync with your requirement.
Disable Rule
- Head over to Settings > Network & internet > Advanced network settings
- Then select Windows Firewall and click on Advanced settings.
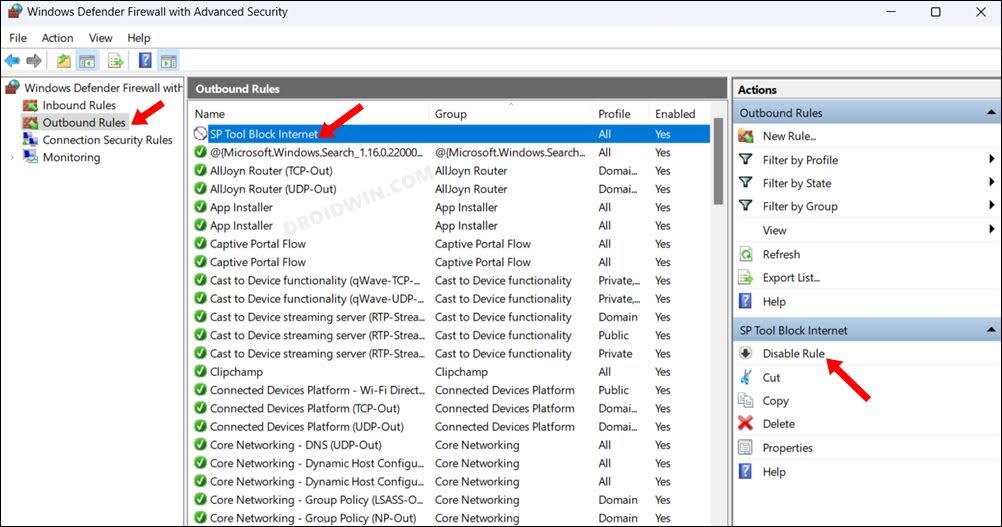
- After that, select Outbound Rules from the left-hand side.
- Now select the rule from the list and select Disable Rule. That’s it.
Delete Rule
- Head over to Settings > Network & internet > Advanced network settings
- Then select Windows Firewall and click on Advanced settings.
- After that, select Outbound Rules from the left-hand side.
- Now select the rule from the list and select Delete Rule > YES in the prompt.
That’s it. These were the steps to block an app from accessing the internet on your Windows 11 PC. Likewise, we have also listed the steps to revert this change- by disabling and deleting the Firewall rules. If you have any queries concerning the aforementioned steps, do let us know in the comments. We will get back to you with a solution at the earliest.


