In this guide, we will show you the steps to back up your app data via Swift Backup and then restore it after performing a factory reset. In the general use case scenario, backing up the data over to Google One and then restoring it should be more than sufficient. However, there are two major drawbacks with that backup mode- it doesn’t backup the app data and you have no choice but to upload the backup over to Google Drive.
As far as the first instance is concerned, Google will only keep track of all the apps installed on your device The next time you restore the data, it will simply reinstall those apps from Play Store. While you will get back the app but you wouldn’t get its data back [forgot about your level 1000 progress in Candy Crash, you’ll have to restart from Level 1!].
In this regard, earlier we used to have Titanium Backup, which was able to backup and restore each and individual bit of data. Moroever, you could store the data locally as well, there was no need to upload it over to the Google Clouds. Many years later and we are still yet to have a worthy competitor for it, however slowly but surely we are moving in that direction.
In the current state, using the Swift Backup with Shizuku are our best bet which would allow you to back up your app data and then restore it after performing a factory reset. But before proceeding ahead, let’s make you acquainted with some important stuff.
Table of Contents
Does Swift Backup Require Root?
Swift Installer works across both rooted and non-rooted devices. If your device is non-rooted, then Swift Installer will be able to back up APK, Ext. data, Expansion, and Media, but it wouldn’t be able to back up the app data [data partition cannot be accessed by any app unless it is given admin-level privileges aka your device is rooted]. On the other hand, in a rooted device, you could backup the app data as well, apart from that APK, Ext. data, Expansion, and Media.
So is there any benefit of using Swift Backup on a non-rooted device? Well, if you are looking to have a local copy of the app backup instead of uploading it over to the cloud, then this is your best and most probably the only bet. With that said let’s make you aware of the steps to back up your app data via Swift Installer and then restore it after performing a factory reset.
How to Backup App & Its Data via Swift Backup
- Non-rooted users should install and set up Shizuku on their devices.
- Now download and install Swift Backup on your device.
- Now launch it and either sign in via Google or skip it.
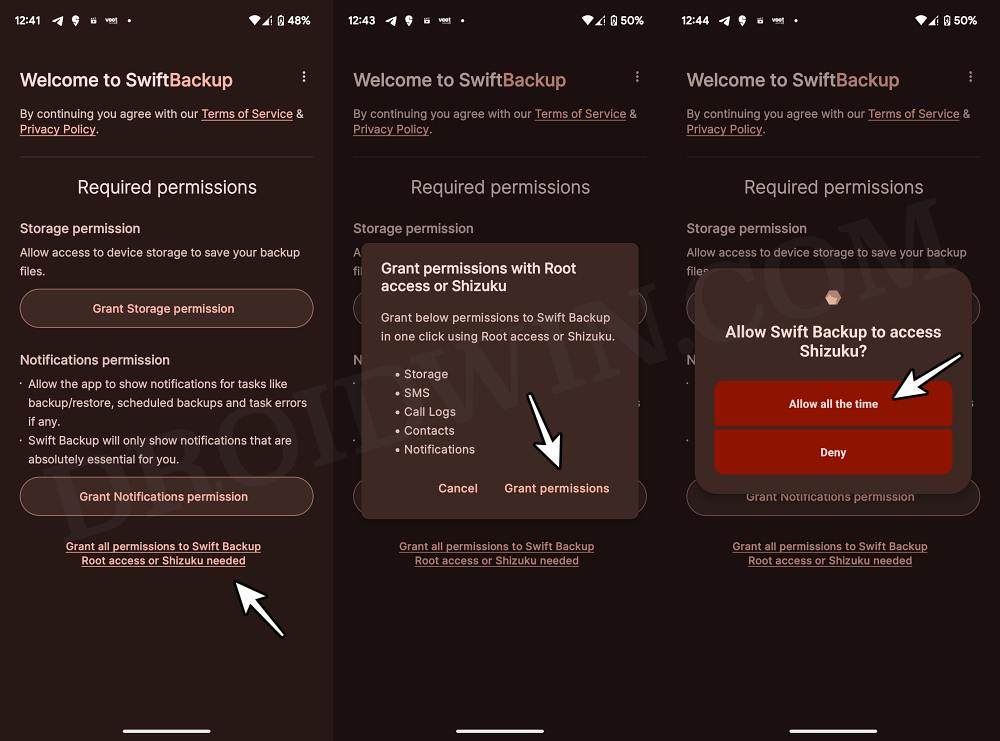
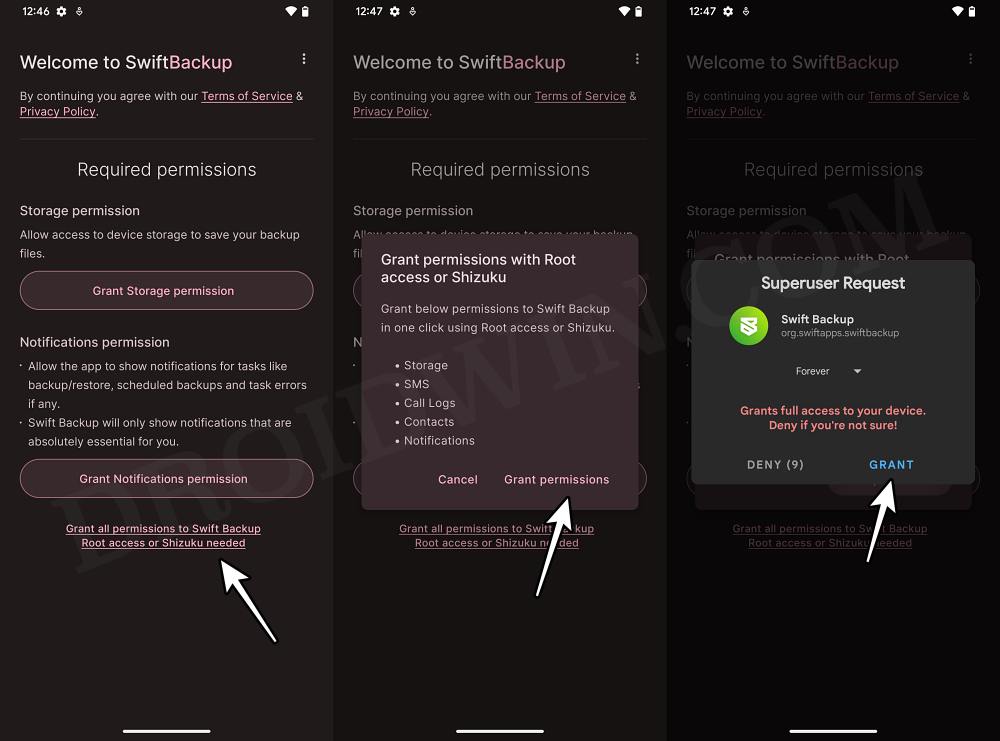
- Then tap on Grant All Permissions > Grant Permissions.

- Non-Rooted users will get a Shizuku prompt, tap on Allow all the time.
- On the other hand, rooted users will get a Magisk request, tap on Grant.
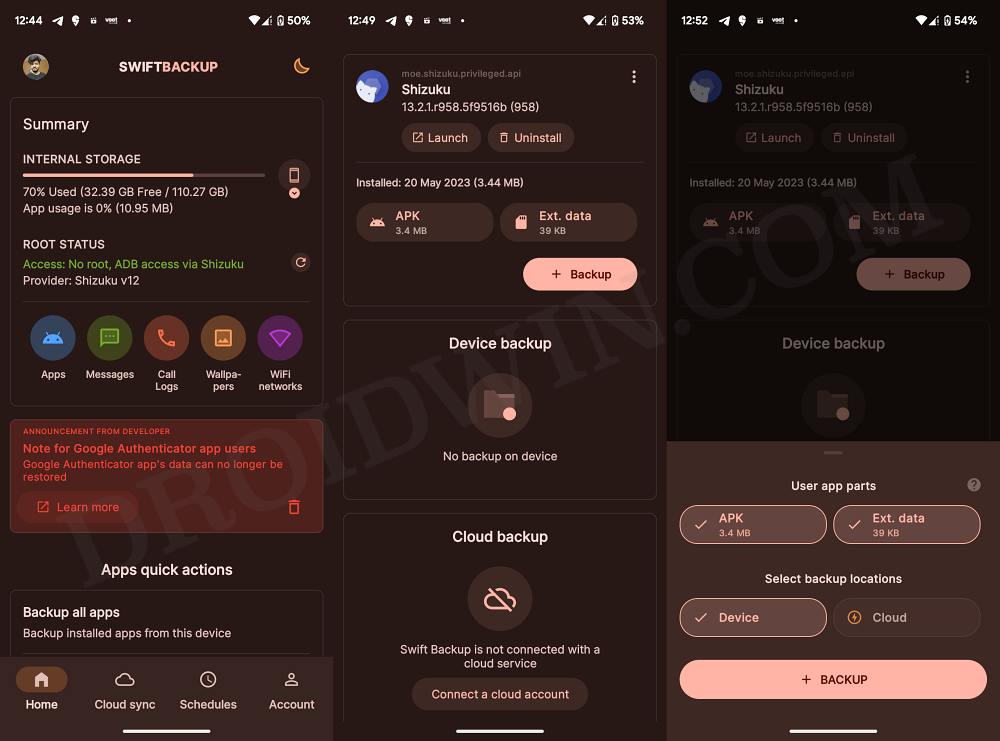
- You may now carry out the desired backup [apps, SMS, calls, WiFi, etc].
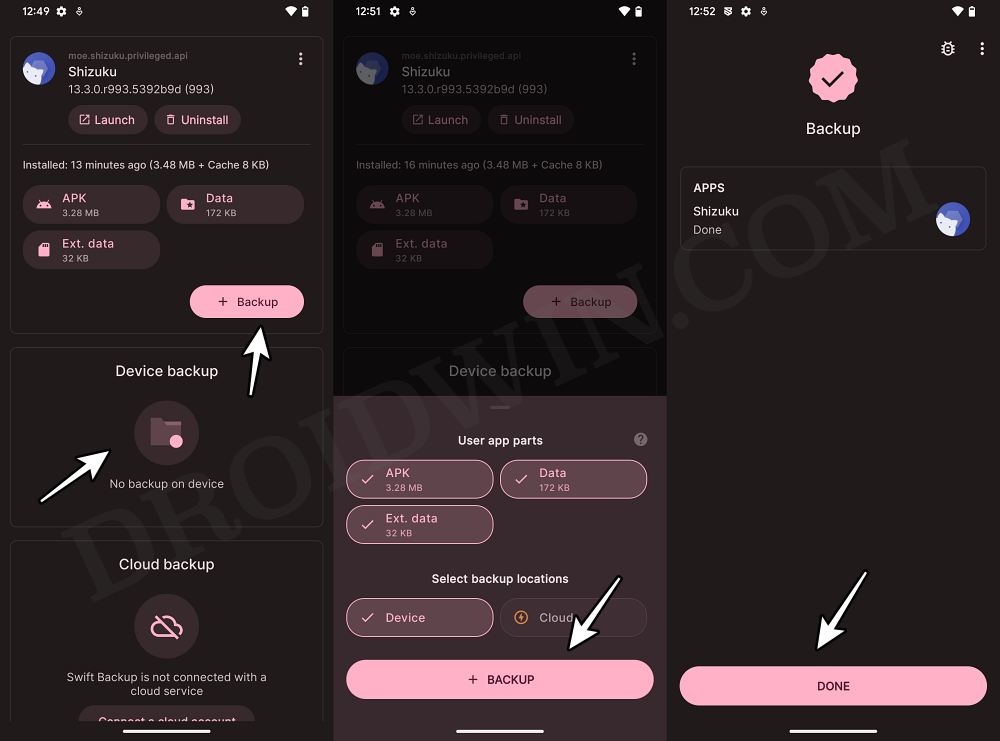
- For the sake of reference, let’s back up the Shizuku app, so select it.
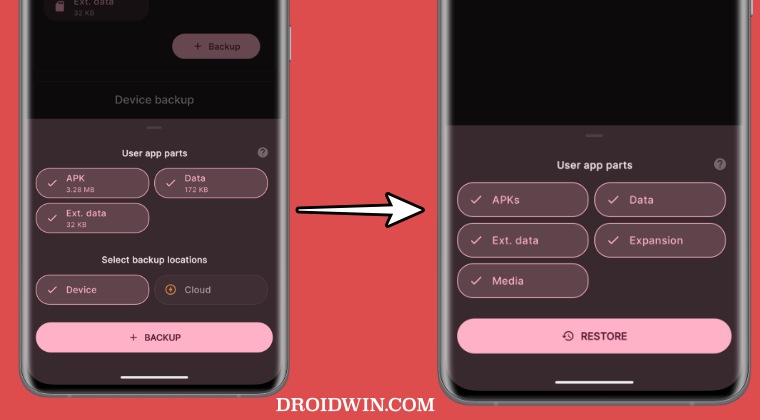
- Above is a screenshot from a non-rooted device, which will allow you to back up APK and Ext Data.
- Below is a rooted device that allows you to additionally back up the app’s Data as well.
- So tap on backup and then choose the backup location [local/on device or clouds]. That’s it.
How to Restore App Data via Swift Backup
As already discussed before, you will only be able to restore the app data if your device is rooted. For non-rooted devices, only the app will be installed from the store. So with that in mind, let’s show you the steps to restore the app and its data in both scenarios.
- Non-Rooted users should first set up Shizuku on their devices.
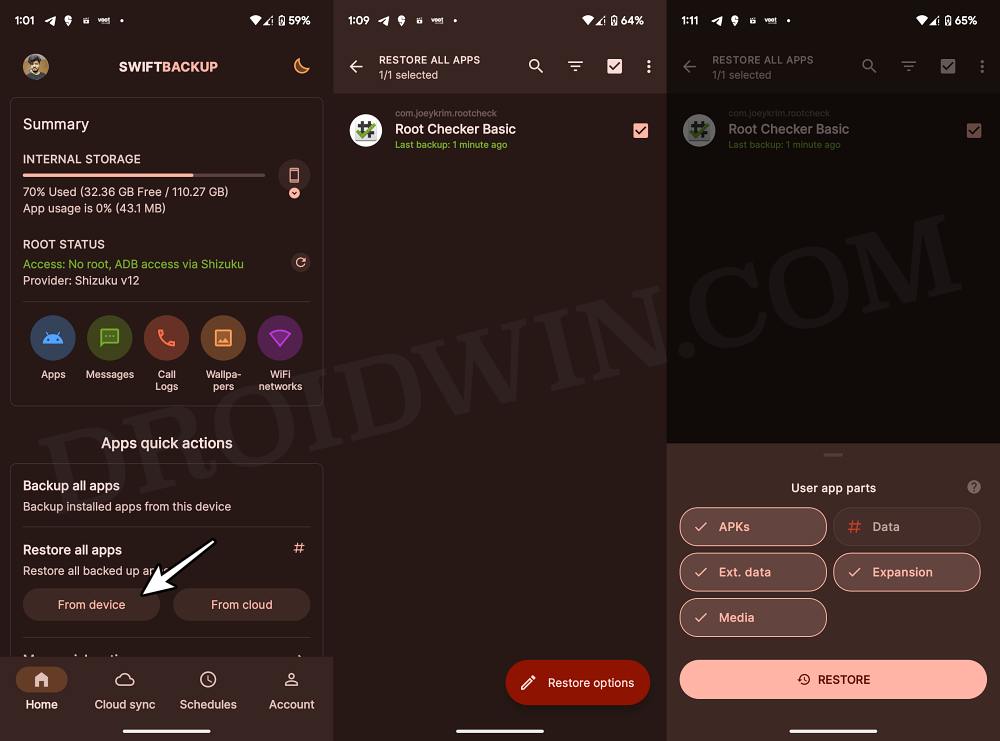
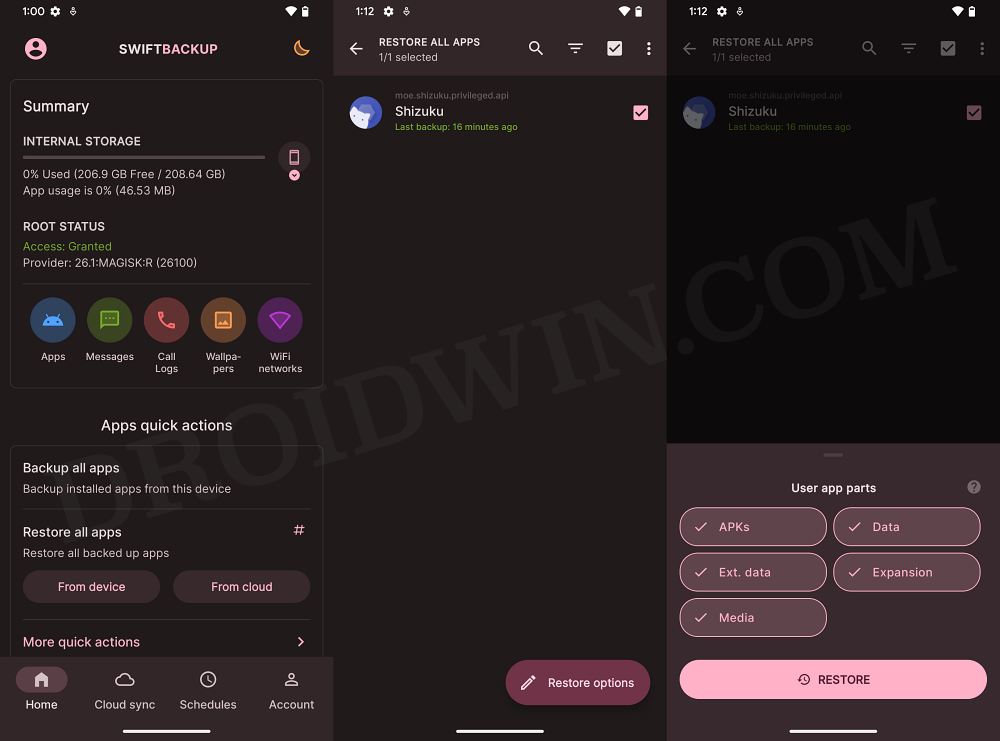
- Now launch Swift Backup and go to Apps Quick Actions.
- Then tap on Restore all apps and choose From Device or Clouds.
- Now select the desired app to be restored and tap on Restore Options.
- A non-rooted device could restore the APKs, Ext Data, Expansion, and Media.
- On the other hand, a rooted device could also select the Data to be restored.
- Once you have made the desired selections, tap on Restore. That’s it.
These were the steps to back up your app data via Swift Backup and then restore it after performing a factory reset. If you have any queries concerning the aforementioned steps, do let us know in the comments. We will get back to you with a solution at the earliest.


