In this guide, we will show you the steps to allow Edge through the Windows 11 Firewall by adding it to the exception list. There’s no dearth of antivirus and firewall apps for the Windows platform. However, inspite of that, it’s the offering from the Redmond giant that more often than is sufficient enough to meet the prerequisites. Up to three different layers of the security scan, blocking harmful traffics, and preventing malicious executables from carrying out their functionality, it takes care of all these concerns.
However, in some instances, it might prove to be a tad over-protective in nature and could even end up blocking traffic that is coming from legitimate sources. This phenomenon has been noticed mostly with browser apps. Various users have voiced their concern that they are unable to access certain websites or download a particular file because Defender or Firewall thinks it to be risky.
Though in reality users have double verified the source and have confirmed that it is coming from a trusted source. So if you also get stuck in such a predicament, then the best bet will be to allow Edge through the Windows 11 Firewall by adding it to the exception list. And in this guide, we will show you how to do just that. Follow along.
Table of Contents
Allow Edge Through Firewall in Windows 11: Add it to Exception List
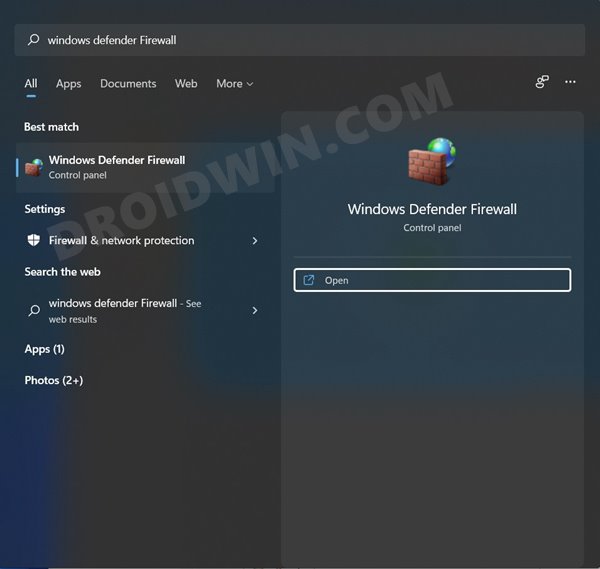
- Head over to the Start Menu, search Windows Defender Firewall, and open it.

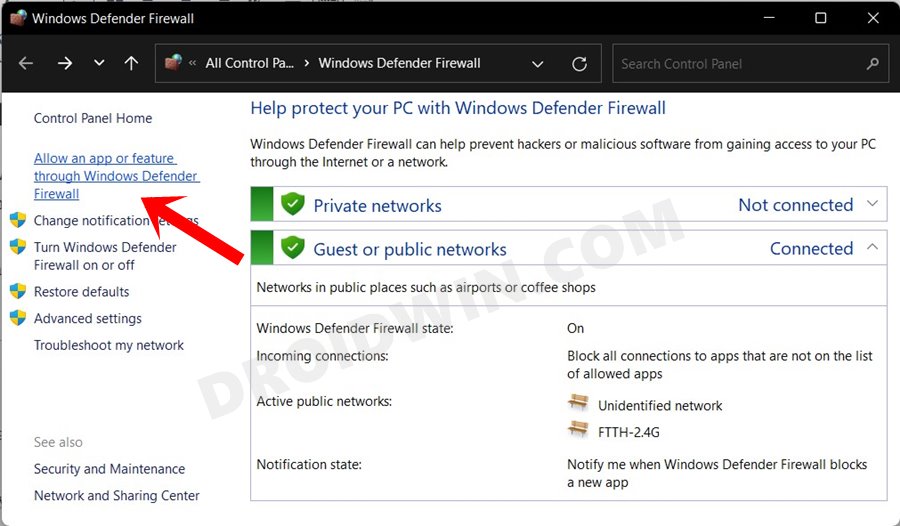
- Then click on ‘Allow an app or feature through Windows Defender Firewall’ from the left menu bar.

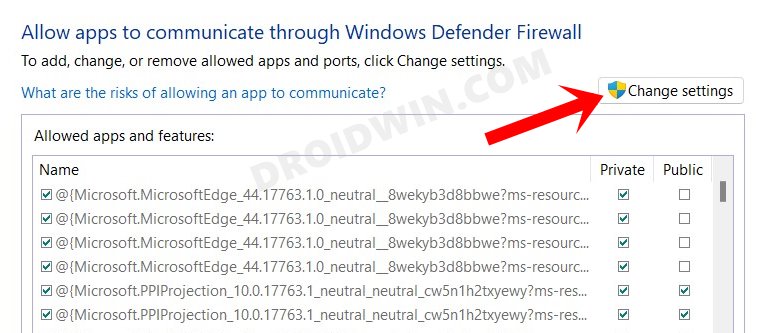
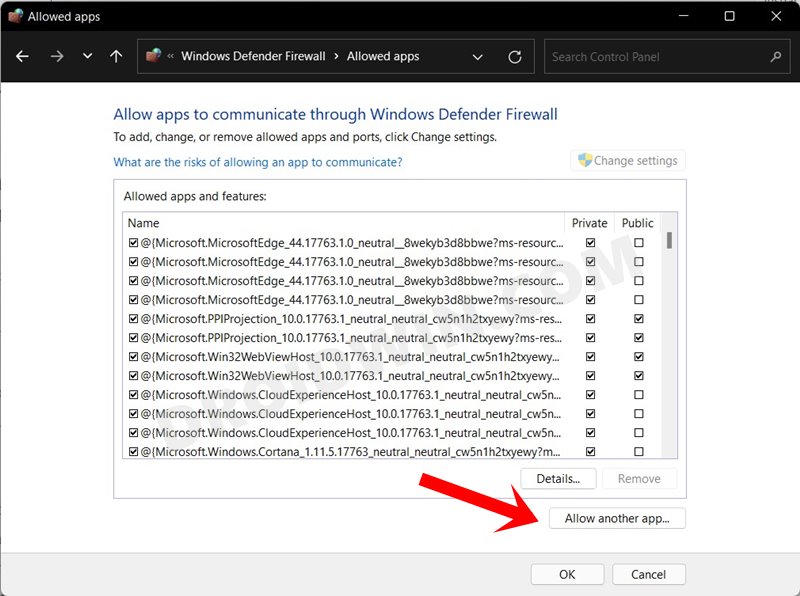
- After that, click on the Change Settings button situated at the top right.

- Then click on the Allow Another App button situated at the bottom right.

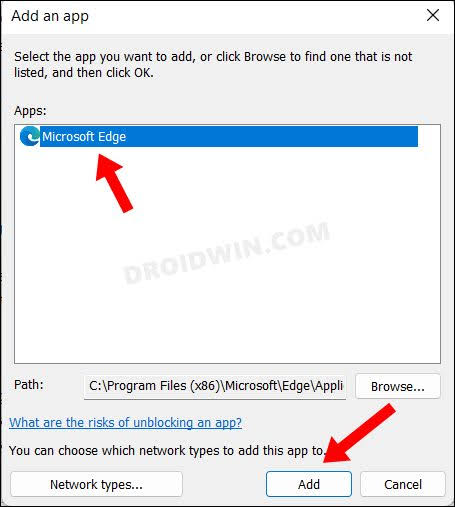
- Now click on the Browse button, navigate to that Edge EXE file and select it.

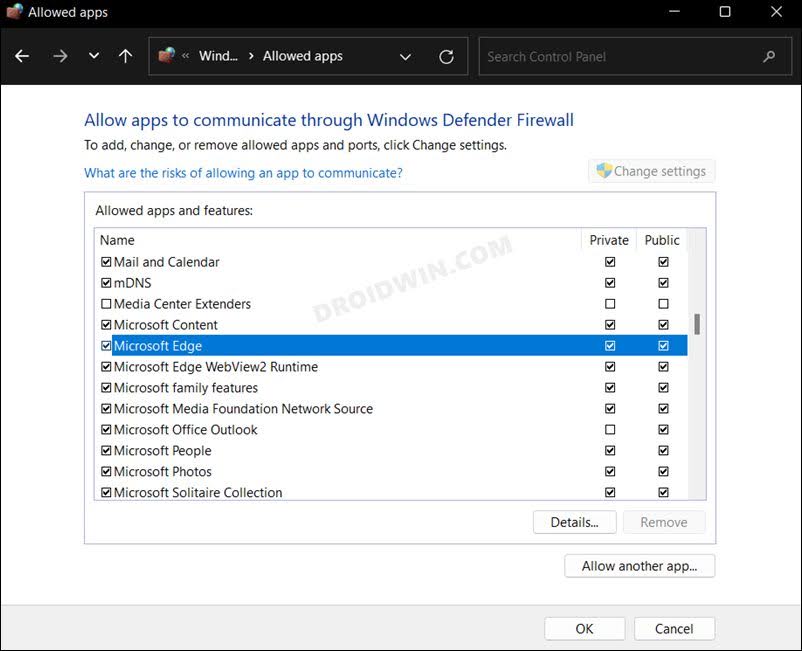
- Then click on the Add button and Edge will now be added to the Firewall’s exclusion list. You may now customize it according to your need by check-marking the required Public/Private Network box.

- Finally, click OK to save the changes and your task stands complete.
Allow Edge Through Defender in Windows 11

If allowing Edge through the Windows 11 Firewall and adding it to the exception list didn’t spell out success for you, then you will have to add it to the Windows Defender exception list as well. Here’s how it could be done:
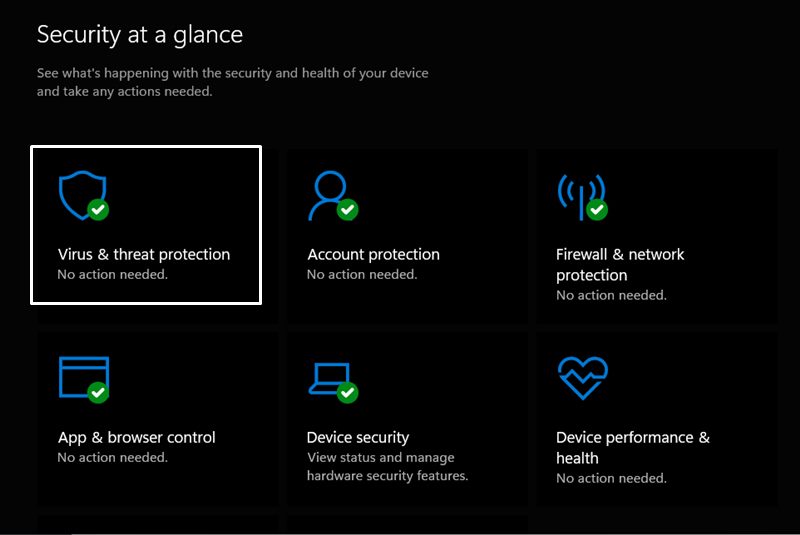
- Open Windows Security from the Start Menu and go to Virus and Threat Protection.

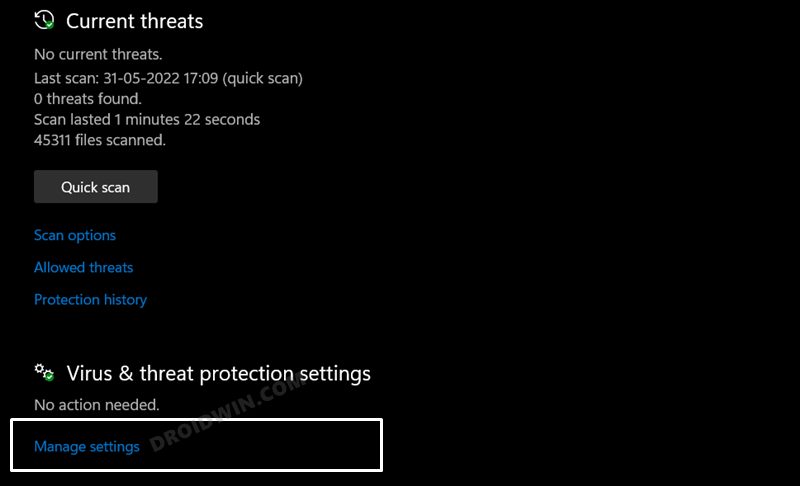
- After that, scroll to Virus and Threat Protection settings and click on Manage Settings.

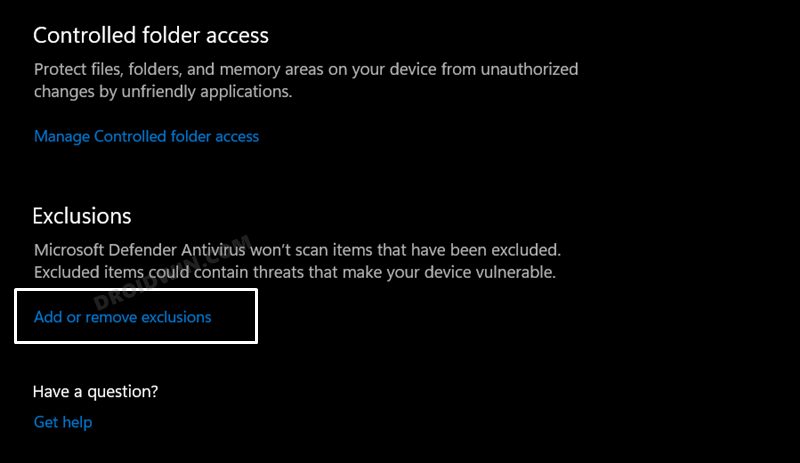
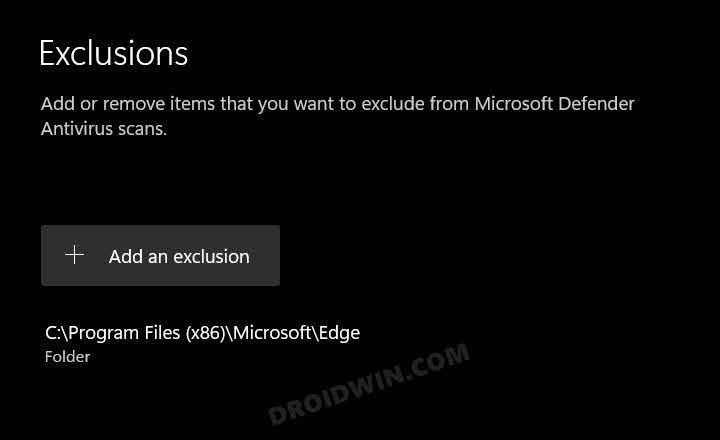
- Now scroll to the Exclusions section and click on Add or remove exclusions.

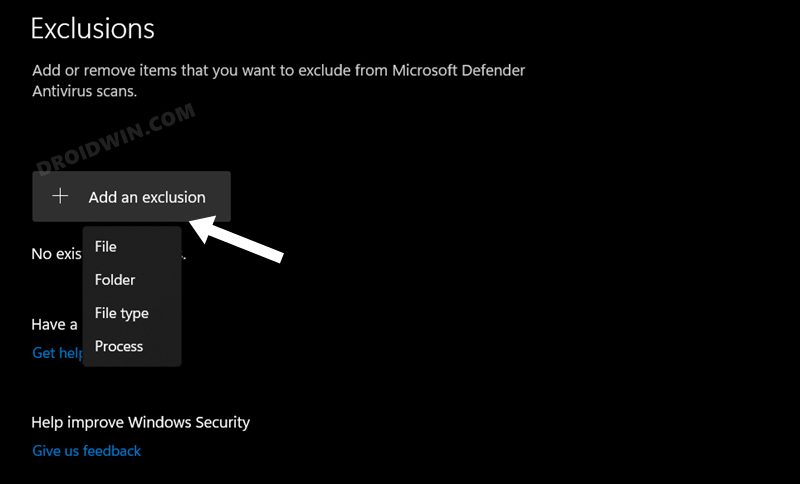
- Then click on Add an exclusion and select Folder from the list.

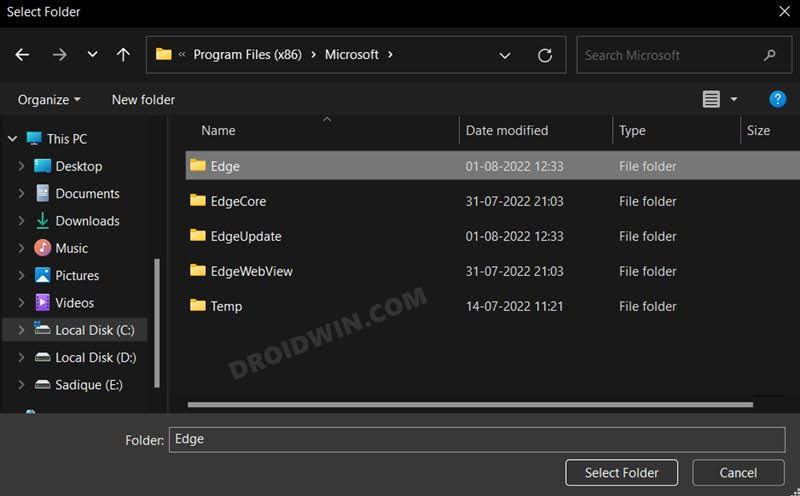
- Now navigate to the Edge installation directory and select the entire folder.

- That’s it. Edge is now added to the Windows Defender whitelist.

So these were the steps to allow Edge through the Windows 11 Firewall by adding it to the exception list. If you have any queries concerning the aforementioned steps, do let us know in the comments. We will get back to you with a solution at the earliest.
How to Remove Edge from Defender/Firewall Exception List in Windows 11
If you wish to revert the process and remove Edge from Firewall as well as Defender’s exclusion list, then here’s what you need to do:
Remove Edge from Firewall Exclusion
Launch Firewall and click on click on ‘Allow an app or feature through Windows Defender Firewall’ > Change Settings > uncheck Edge if you wish to temporarily remove it. On the other hand, for permanent removal, select Edge and click on Remove > Yes in the confirmation dialog box.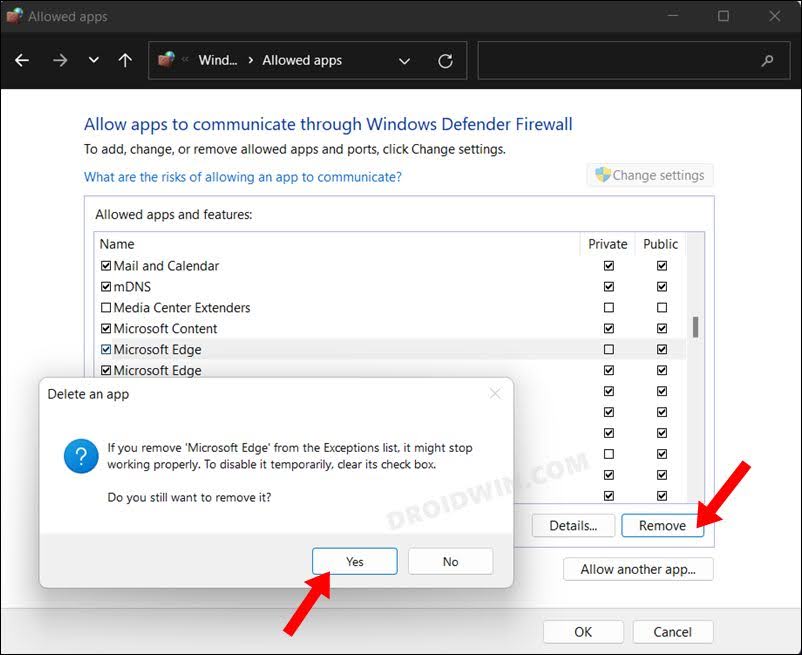
Remove Edge from Defender Exclusion
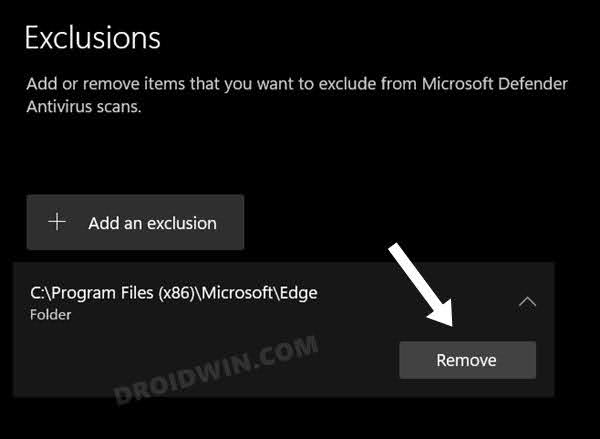
Open Windows Security > Virus and Threat Protection > Virus and Threat Protection settings > Manage Settings > Add or remove exclusions > Select Edge and click on Remove.