In this guide, we will show you the steps to allow Chrome through the Windows 11 Firewall by adding it to the exception list. There are a slew of third-party antivirus and firewall apps that you could choose from. However, in most cases, the built-in app would be enough to checkmark most of your security needs. This offering from Microsoft comes with a plethora of nifty scan features and is able to deal with malicious files, applications, and incoming traffic with ease.
On the flip side though, there have been a few instances wherein the Firewall tends to act overprotective and ends up blocking the data exchange process even if it is happening from a trustworthy source. one perfect example of the same is the inability to access a certain website or download a specific file from the web. To deal with it, you could take two different approaches- either temporarily disable the firewall on your system or add the browser to the whitelist.
In this regard, the second approach is a more secure one as it will still monitor harmful traffic from all the other sources, except for the web browser. So on that note, let’s make you aware of the steps to allow Chrome through the Windows 11 Firewall by adding it to the exception list.
Table of Contents
Allow Chrome Through Firewall in Windows 11: Add it to Exception List
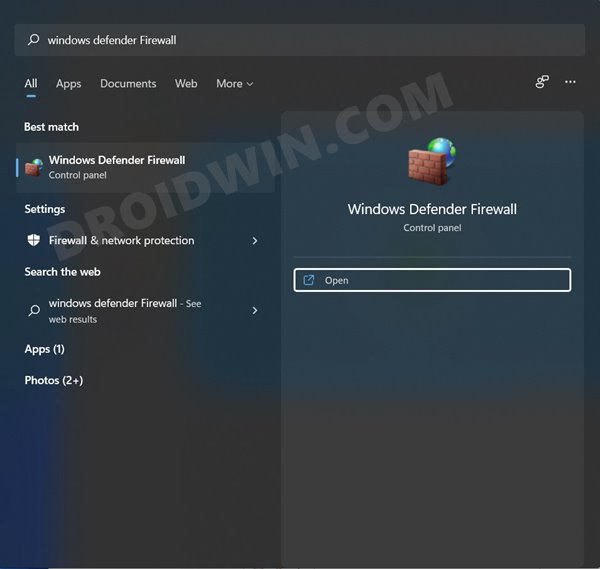
- Head over to the Start Menu, search Windows Defender Firewall, and open it.

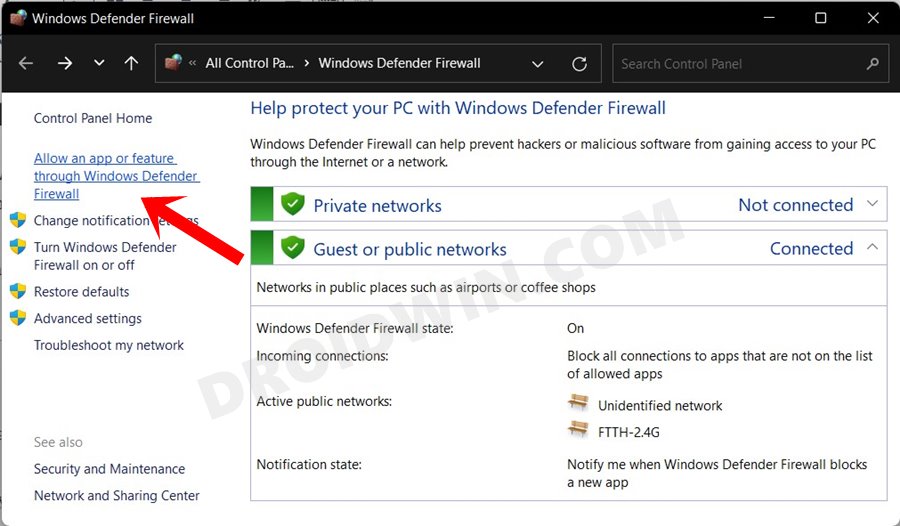
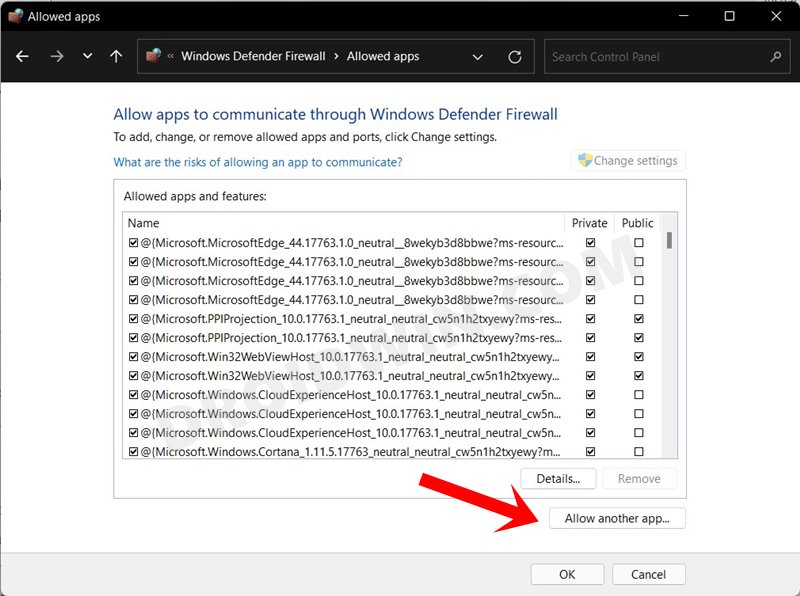
- Then click on ‘Allow an app or feature through Windows Defender Firewall’ from the left menu bar.

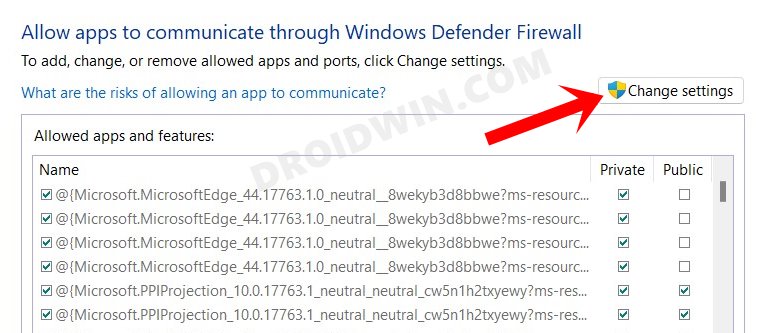
- After that, click on the Change Settings button situated at the top right.

- Then click on the Allow Another App button situated at the bottom right.

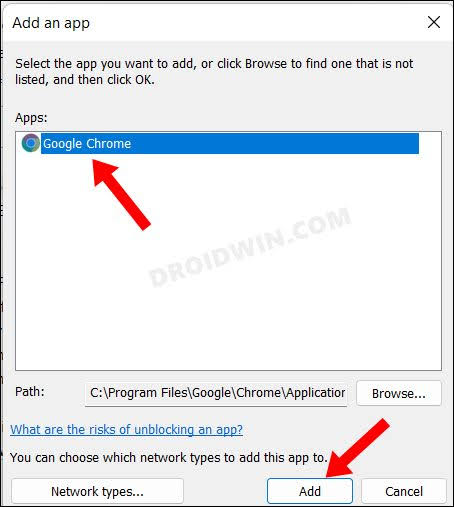
- Now click on the Browse button, navigate to that Chrome’s EXE file and select it.

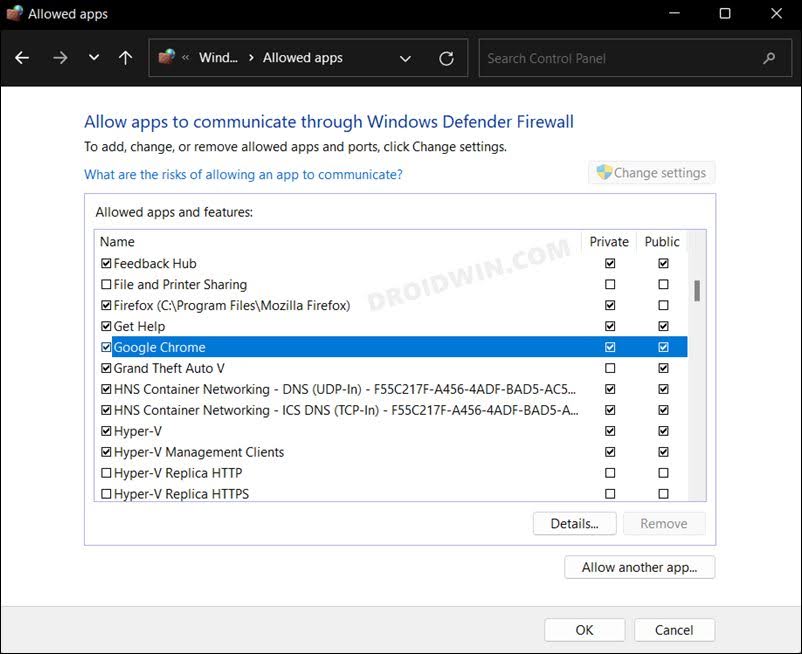
- Then click on the Add button and Chrome will now be added to the Firewall’s exclusion list. You may now customize it according to your need by check-marking the required Public/Private Network box.

- Finally, click OK to save the changes and your task stands complete.
Allow Chrome Through Defender in Windows 11

If allowing Chrome through the Windows 11 Firewall and adding it to the exception list didn’t spell out success for you, then you will have to add it to the Windows Defender exception list as well. Here’s how it could be done:
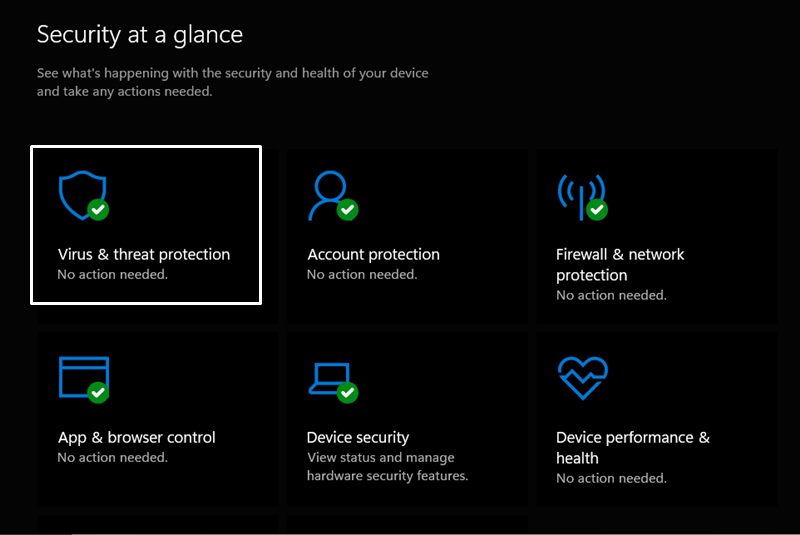
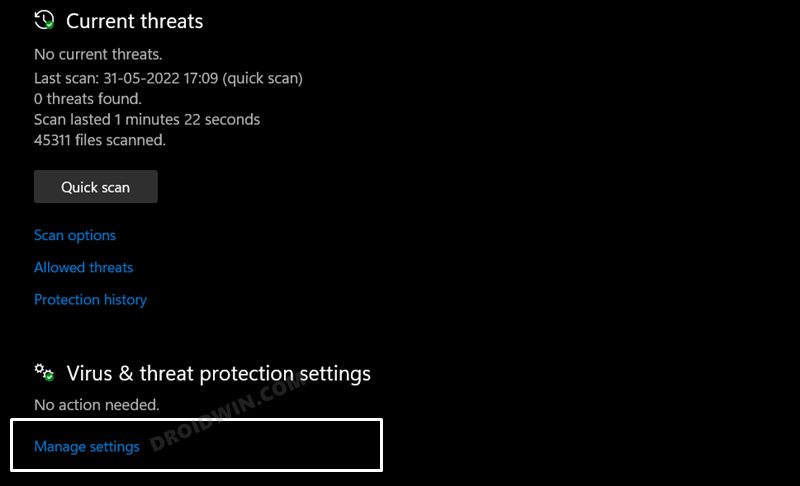
- Open Windows Security from the Start Menu and go to Virus and Threat Protection.

- After that, scroll to Virus and Threat Protection settings and click on Manage Settings.

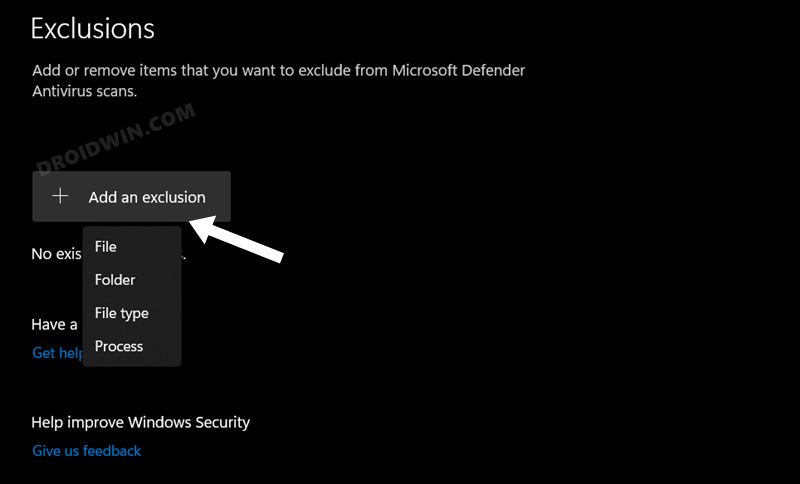
- Now scroll to the Exclusions section and click on Add or remove exclusions.

- Then click on Add an exclusion and select Folder from the list.
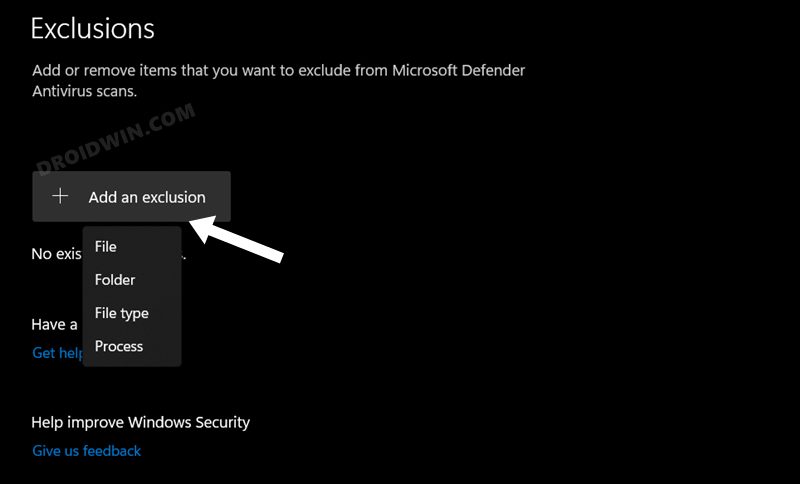
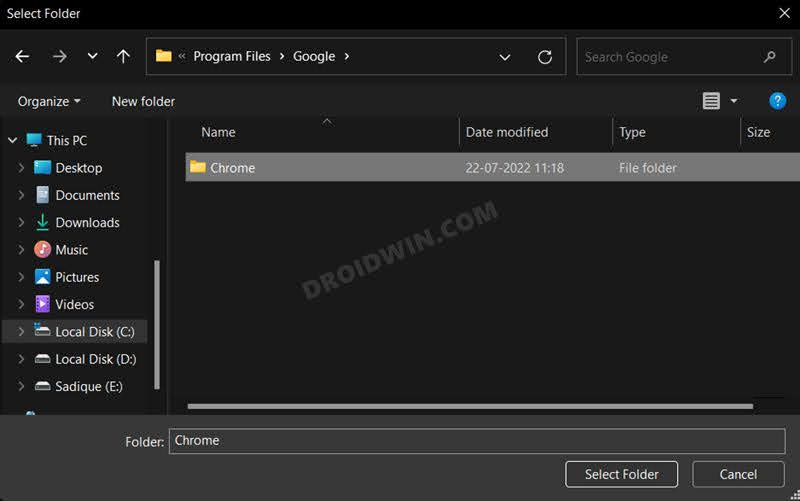
- Now navigate to the Chrome installation directory and select the entire folder.

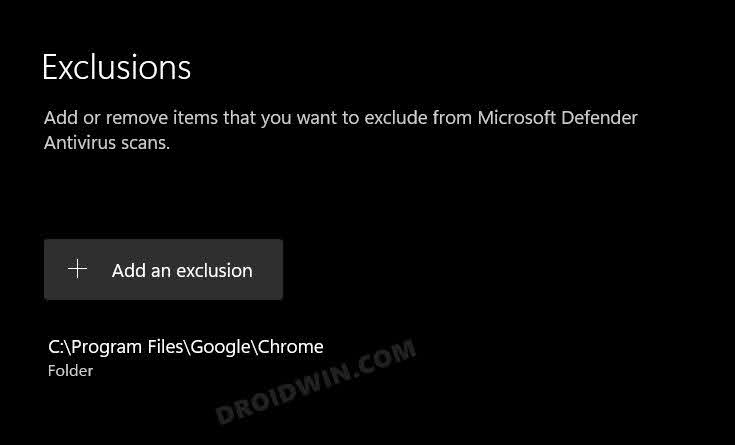
- That’s it. Chrome is now added to the Windows Defender whitelist.

So these were the steps to allow Chrome through the Windows 11 Firewall by adding it to the exception list. If you have any queries concerning the aforementioned steps, do let us know in the comments. We will get back to you with a solution at the earliest.
How to Remove Chrome from Defender/Firewall Exception List in Windows 11
If you wish to revert the process and remove Chrome from Firewall as well as Defender’s exclusion list, then here’s what you need to do:
Remove Chrome from Firewall Exclusion
Launch Firewall and click on click on ‘Allow an app or feature through Windows Defender Firewall’ > Change Settings > uncheck Chrome if you wish to temporarily remove it. On the other hand, for permanent removal, select Chrome and click on Remove > Yes in the confirmation dialog box.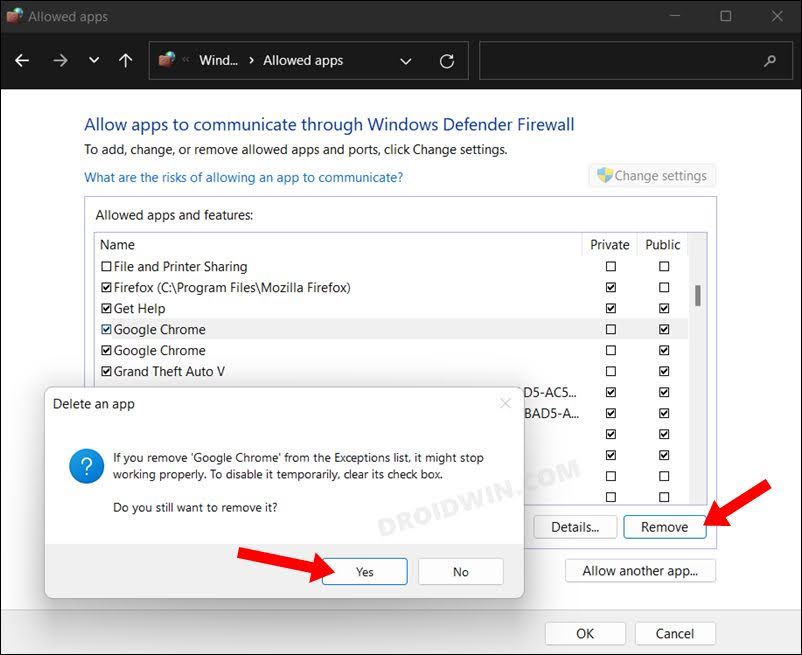
Remove Chrome from Defender Exclusion
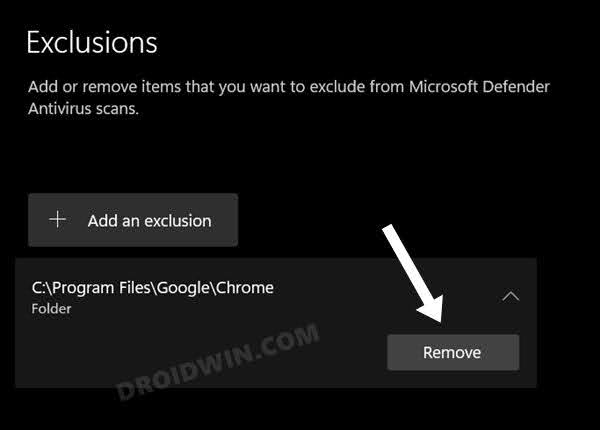
Open Windows Security > Virus and Threat Protection > Virus and Threat Protection settings > Manage Settings > Add or remove exclusions > Select Chrome and click on Remove.