In this guide, we will show you various methods to fix the issue of Adobe Premiere Pro Export File not working. This timeline-based non-linear video editing software from Adobe is without a shadow of a doubt the best in this domain. However, in spite of the truckload of features that it beholds, it isn’t free from its fair share of issues either. Numerous users have voiced their concern that the Export File option is not working along the expected lines in Adobe Premier Pro.
Whenever they try to export a file, they are instead greeted by the “File importer detected an inconsistency in the file structure of %filename.mp4%. Reading and writing this file’s metadata (XMP) has been disabled” error. Apart from that, some have also reported that the file name tends to get truncated when trying to export a file. If you are also getting bugged by these issues, then this guide will help you out. Follow along for the fixes.
Table of Contents
Fix Adobe Premiere Pro Export File not working

It is recommended that you try out each of the below-mentioned workarounds and then see which one spells out success for you. So with that in mind, let’s get started.
FIX 1: Disable Hardware-Accelerated Encoding
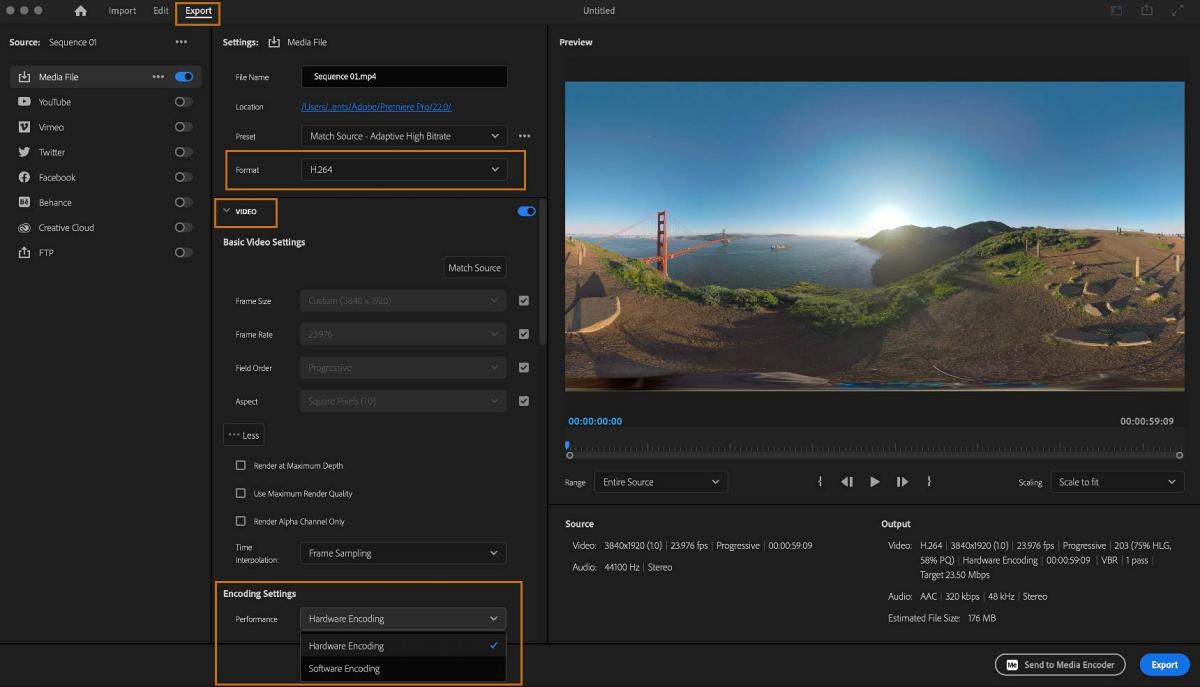
Your first course of action should be to disable the “Hardware-Accelerated Encoding” [especially if you dealing with H.264 exports] using the below-listed steps and then check out the results.
- Launch Adobe Premiere Pro and go to the Export tab.
- Then select H.264/HEVC from the Format menu.

Credits: Adobe - Now go to Performance and select Software Encoding.
- Check if it fixes the Adobe Premiere Pro Export File issue.
FIX 2: Verify Export Location
Next up, make sure that the export directory uses only single-byte ASCII English characters. If it has accents, umlauts, or non-basic English characters, then you might have an issue or two in exporting that file or the file might end up truncated.
FIX 3: Downgrade Adobe Premiere Pro
If none of the above methods managed to spell out success, then your last course of action should be to downgrade the software to its earlier stable version [either v22.6 or v 23]. For that, you may refer to our detailed guide on How to Downgrade Adobe Creative Cloud Apps to an Earlier Version or check out the below shorter steps:
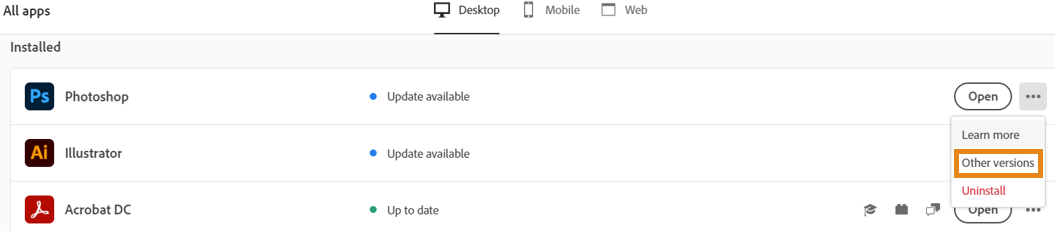
- Open the Creative Clouds app and scroll to the app that you wish to downgrade.
- Then click on the More (…) button next to that app.
- After that, select Other Versions from the drop-down menu.
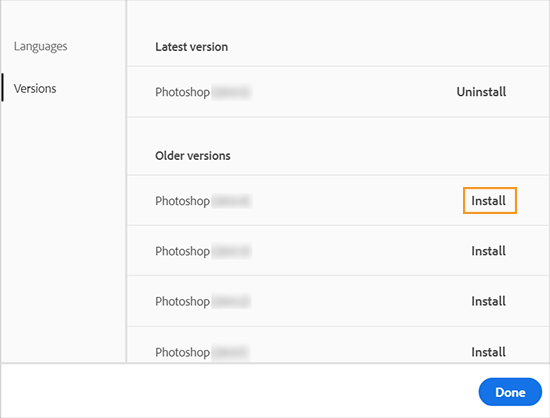
- Now click on the Install button next to the app version of your choice.
- The older build of that app will now be installed and it should rectify the underlying issue.

That’s it. These were the various methods that should help you fix the issue of Adobe Premiere Pro Export File not working. As far as the official stance on this matter is concerned, the developers are aware of this issue, but they haven’t given out any ETA for the rollout of a fix. As and when that happens, we will update this guide accordingly. In the meantime, the aforementioned workarounds are your best bet.


