In this guide, we will show you the steps to add the Turn off Display option in Windows 11 Context Menu. By default, your PC/laptop’s screen timeout is set to 5 minutes on battery and 15 minutes when plugged in. However, you could also change this time period as per the requirement. But what if you want to turn off the screen on your instructions instead of being automatically turned off when it reaches the stipulated time frame.
Well, you could easily do so as well. All that you need to do is add the Turn off Display option in Windows 11 Context Menu and then interact with that option from the right-click menu as and when required. Moreover, when your display goes to sleep, you could easily wake it up by moving the mouse, touching the trackpad, or pressing any key. So without any further ado, let’s put this nifty feature to the test right away.
How to Add Turn off Display option in Windows 11 Context Menu
- Right-click on an empty location on Desktop and select New > Text Document.
- Then paste the below commands in the file:
Windows Registry Editor Version 5.00

[HKEY_CLASSES_ROOT\DesktopBackground\Shell\TurnOffDisplay]
"Icon"="imageres.dll,-109"
"MUIVerb"="Turn off display"
"Position"="Bottom"
"SubCommands"=""

[HKEY_CLASSES_ROOT\DesktopBackground\Shell\TurnOffDisplay\shell]

[HKEY_CLASSES_ROOT\DesktopBackground\Shell\TurnOffDisplay\shell\01menu]
"Icon"="powercpl.dll,-513"
"MUIVerb"="Turn off display"

[HKEY_CLASSES_ROOT\DesktopBackground\Shell\TurnOffDisplay\shell\01menu\command]
@="cmd /c \"powershell.exe -Command \"(Add-Type '[DllImport(\\\"user32.dll\\\")]public static extern int SendMessage(int hWnd,int hMsg,int wParam,int lParam);' -Name a -Pas)::SendMessage(-1,0x0112,0xF170,2)\"\""

[HKEY_CLASSES_ROOT\DesktopBackground\Shell\TurnOffDisplay\shell\02menu]
"MUIVerb"="Lock computer and Turn off display"
"CommandFlags"=dword:00000020
"Icon"="imageres.dll,-59"

[HKEY_CLASSES_ROOT\DesktopBackground\Shell\TurnOffDisplay\shell\02menu\command]
@="cmd /c \"powershell.exe -Command \"(Add-Type '[DllImport(\\\"user32.dll\\\")]public static extern int SendMessage(int hWnd,int hMsg,int wParam,int lParam);' -Name a -Pas)::SendMessage(-1,0x0112,0xF170,2)\" & rundll32.exe user32.dll, LockWorkStation\""
- Once done, hit Ctrl+S and change Save as to All Files. Then name it tod.reg.
- Now launch the file and click Run > Yes in the confirmation prompt. That’s it.
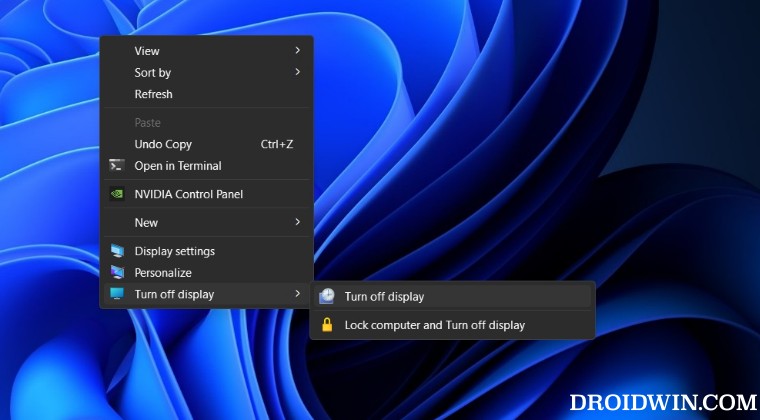
- Now right-click on your Desktop and you should see the Turn off Display option.
How to Remove Turn off Display option in Windows 11 Context Menu
- Right-click on an empty location on Desktop and select New > Text Document.
- Then paste the below commands in the file
Windows Registry Editor Version 5.00

[-HKEY_CLASSES_ROOT\DesktopBackground\Shell\TurnOffDisplay]
- Once done, hit Ctrl+S and change Save as to All Files. Then name it rtod.reg.
- Now launch the file and click Run > Yes in the confirmation prompt. That’s it.
- Now right-click on your Desktop and Turn off Display should be removed.
These were the steps to add the Turn off Display option in Windows 11 Context Menu. Likewise, we have also listed out the steps to remove it from the right-click menu. If you have any queries concerning the aforementioned steps, do let us know in the comments. We will get back to you with a solution at the earliest.


