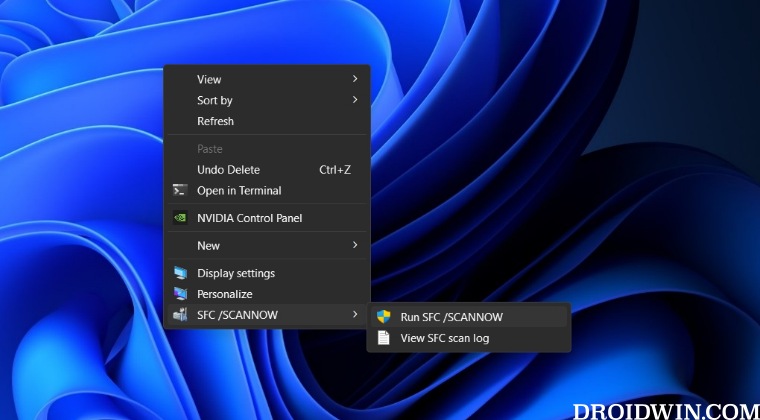
In this guide, we will show you the steps to add the sfc /scannow to Windows 11 Context Menu. System File Checker is a command-line utility tool that scans for corrupt Windows files and then replaces them with their working counterpart from the cached directory on your PC. More often than not, if you encounter a software issue, then one of the recommended fixes will be to try out SFC.
However, launching CMD as an administrator and manually typing in this command might be a tad lengthier approach. Fortunately, you could take a shorter route and add the sfc /scannow directly to the Windows 11 Context Menu. Thereby you will be able to invoke this tool with just a mouse click. So without further ado, let’s show you how this could be carried out.
How to Add sfc /scannow to Windows 11 Context Menu

- Right-click in an empty location on Desktop and select New > Text File.
- Now paste the below commands in the text file.
Windows Registry Editor Version 5.00

[HKEY_CLASSES_ROOT\DesktopBackground\Shell\SFC]
"Icon"="WmiPrvSE.exe"
"MUIVerb"="SFC /SCANNOW"
"Position"="Bottom"
"SubCommands"=""

[HKEY_CLASSES_ROOT\DesktopBackground\shell\SFC\shell\001menu]
"HasLUAShield"=""
"MUIVerb"="Run SFC /SCANNOW"

[HKEY_CLASSES_ROOT\DesktopBackground\shell\SFC\shell\001menu\command]
@="PowerShell -windowstyle hidden -command \"Start-Process cmd -ArgumentList '/s,/k, sfc /scannow' -Verb runAs\""

[HKEY_CLASSES_ROOT\DesktopBackground\shell\SFC\shell\002menu]
"MUIVerb"="View SFC scan log"
"Icon"="imageres.dll,-102"

[HKEY_CLASSES_ROOT\DesktopBackground\shell\SFC\shell\002menu\command]
@="PowerShell (sls [SR] $env:windir\\Logs\\CBS\\CBS.log -s).Line >\"$env:userprofile\\Desktop\\sfcdetails.txt\""
- Then hit Ctrl+S and change Save as to All Files.
- Name it sfc.reg and hit Save. Once done, launch it.
- Then click Run > Yes > OK in the prompt that appears.
- Now right-click the desired file > Show More Options.
- You should now see sfc /scannow in the context menu.
How to Remove It
- Right-click in an empty location on Desktop and select New > Text File.
- Now paste the below commands in the text file.
Windows Registry Editor Version 5.00

[-HKEY_CLASSES_ROOT\DesktopBackground\Shell\SFC]
- Then hit Ctrl+S and change Save as to All Files.
- Name it rsfc.reg and hit Save. Once done, launch it.
- Then click Run > Yes > OK in the prompt that appears.
- sfc /scannow is now removed from right-click menu.
That’s it. These were the steps to add the sfc /scannow option in Windows 11 Context Menu. Likewise, we have also listed the steps to remove this option. If you have any queries concerning the aforementioned steps, do let us know in the comments. We will get back to you with a solution at the earliest.


