In this guide, we will show you the steps to add face unlock to any stock/custom ROM on your Android device. It goes without saying that out of all the available authentication measures, Face Unlock is the go-to choice for many users. One major reason for the same is its ease of convenience though which you could unlock your device within seconds. However, in some instances, this functionality might not work along the expected lines or goes out for a toss.
While this is most noticeable in Custom ROMs but in recent times, even the official OTAs tend to break this feature. Well, if that ever happens again, then you no longer have to be dependent on the ROM developer or your OEM as you could easily add face unlock to your stock/custom ROM on your Android device right away. And in this guide, we will show you how to do just that. So without further ado, let’s get started.
How to Add Face Unlock to any Stock/Custom ROM on Android

The below instructions are listed under separate sections for ease of understanding. Make sure to follow the same sequence as mentioned. Droidwin and its members wouldn’t be held responsible in case of a thermonuclear war, your alarm doesn’t wake you up, or if anything happens to your device and data by performing the below steps.
Tested Devices
This module has been tested on OnePlus running OxygenOS, Xiaomi [Redmi, Mi, and Poco] on MIUI and Pixel devices. Moroever, it is confirmed working on Android 11, 12, and 13.
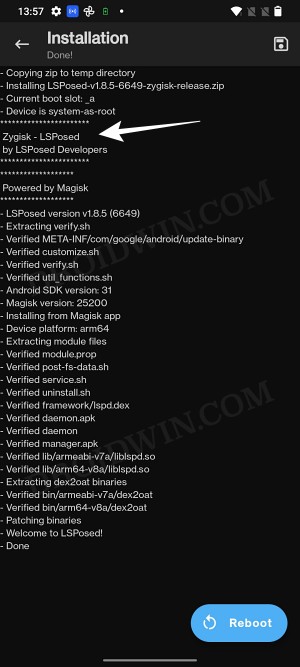
- To begin with, install the Xposed Framework/LSPosed on your device [NOTE: Install the Zygisk version].

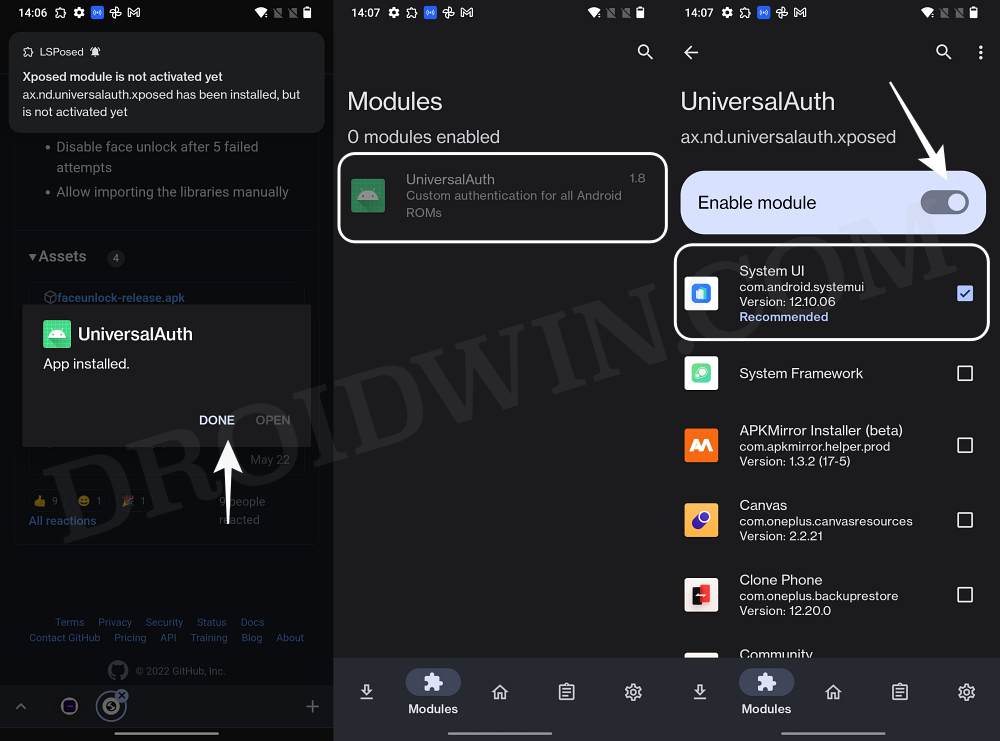
- Then download and install the universalauth-xposed-release.apk file from GitHub.
- After that, launch Xposed Framework, go to the Modules section, and select UniversalAuth.
- Now turn on the toggle next to Enable Module [make sure System UI is checked] and restart your device.
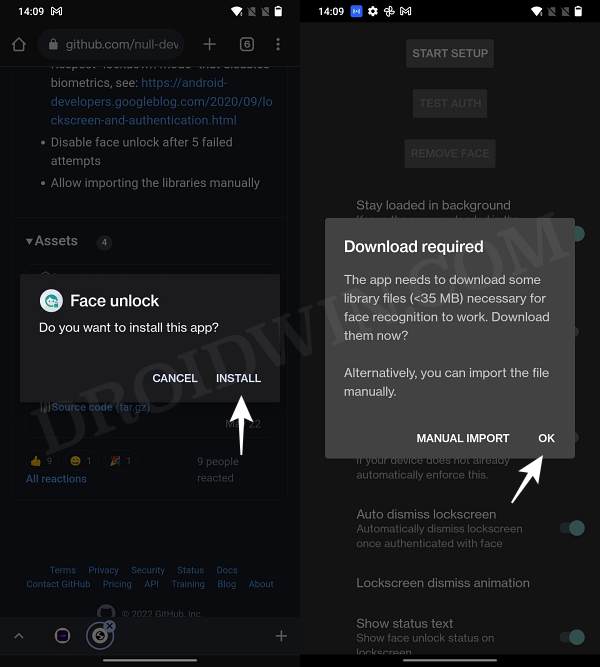
- After that, download and install the faceunlock-release.apk. Now launch it and hit OK in the Download Required prompt.
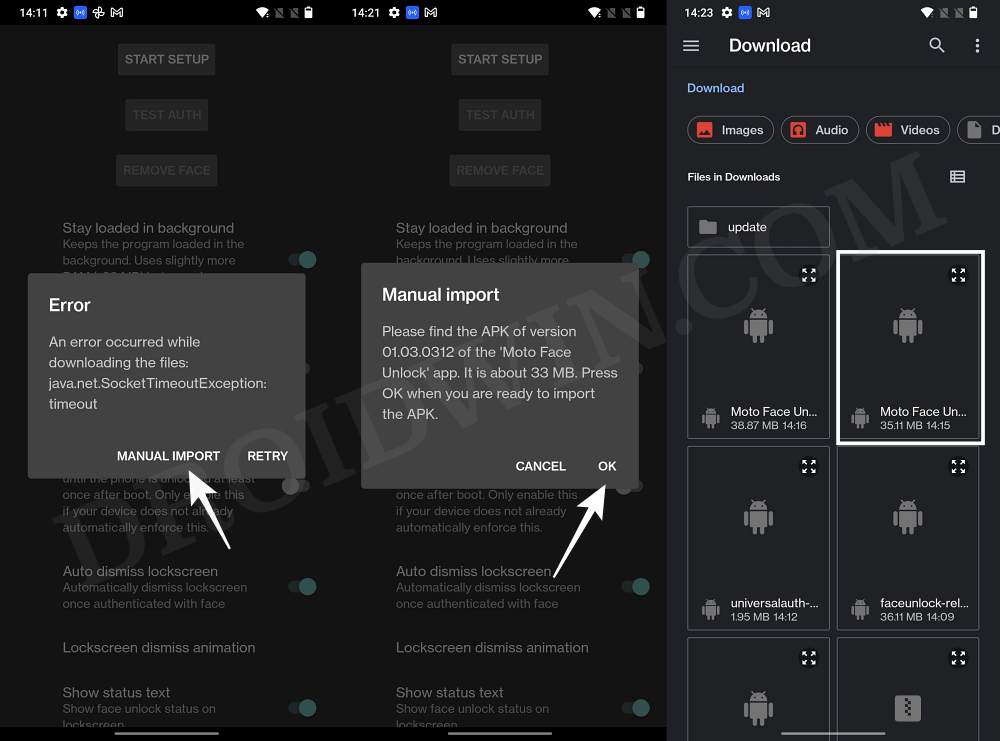
- If you get an error while downloading, then download this Face Unlock APK corresponding to the architecture [do not install it].
- Now tap on Manual Import and select that APK file. It will be imported. Once done, you will get a prompt, tap Allow.
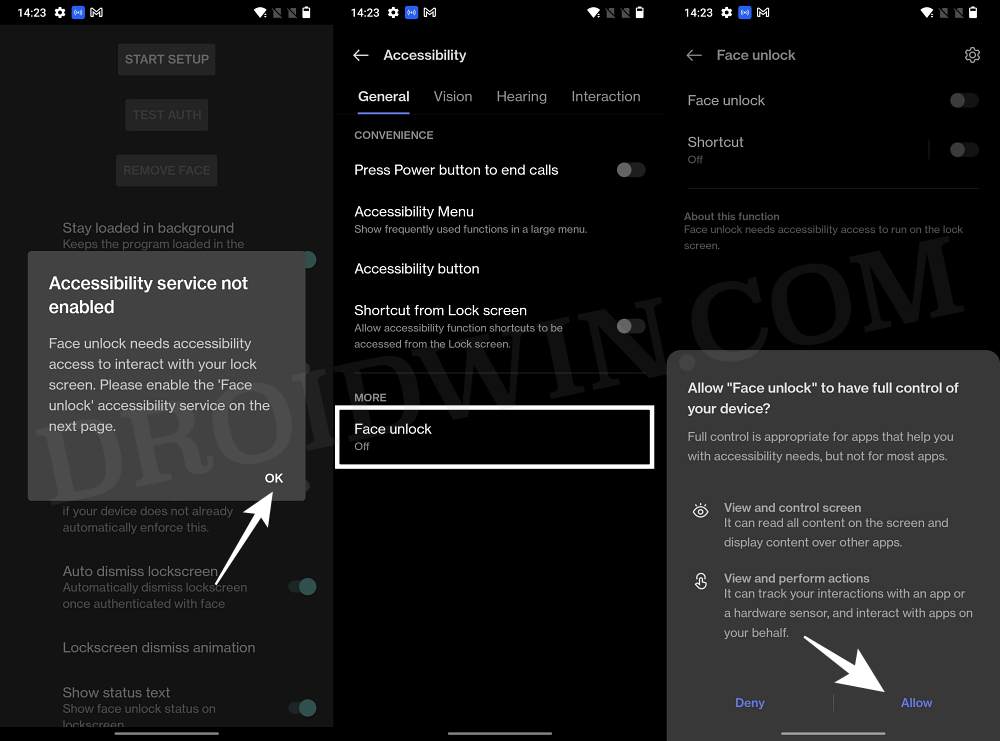
- After that, enable the Accessibility Service permission for Face Unlock.
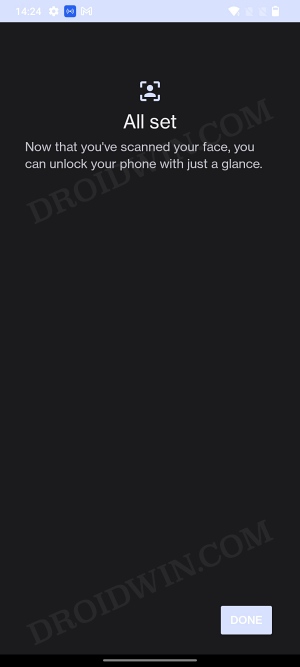
- Then go back to the app and tap on Start Setup. Now proceed with the on-screen instructions to add your face.
- Once done, you should get the All Set message and this signifies that the Face Unlock has been successfully added.

That’s it. These were the steps to add face unlock to any stock/custom ROM on your Android device. If you have any queries concerning the aforementioned steps, do let us know in the comments. We will get back to you with a solution at the earliest.


