In this guide, we will show you various methods to fix the issue of Android ADB Commands not working on PC. If you are planning to step into custom development, then your first course of action will be to establish a successful ADB connection between your device and PC. Once you do so, you will then be able to execute the required commands, such as the one required to boot your device to Recovery Mode, Fastboot Mode, or even EDL Mode.
For general users, they could use these commands to uninstall bloatware from their device via ADB Shell commands or boot to ADB Sideload mode and then install the OTA. All in all, there could be a plethora of reasons why you would want to boot to this mode. But doing so might prove to be a tough nut to crack for some. If you are among them, then fret not as this guide will help you out. Follow along for the various fixes.
Table of Contents
Fix ADB Commands not working on Android
There is no single universal fix as such rather we will recommend you checkmark all the prerequisites that we have listed below. If for some reason that isn’t possible then try to qualify as many requirements as possible.
FIX 1: Implement USB Tweaks
- First off, you should use the official USB cable that came with your device. If you don’t have it, then use the one that came shipped with any other device. Third-party cables might cause a few issues as some of them only support charging and File Transfer at the very max, they might not be able to support ADB and Fastboot Modes.

- Apart from that, you should consider using the USB 2.0 Port on your PC instead of the 3.0 Ports.
- Likewise, using a Windows PC with an Intel chipset [instead of AMD] is recommended.
FIX 2: Use Android SDK Platform Tools
There exists a plethora of ADB Tools present online, however, most of them have one or more binaries missing which will ultimately result in the ADB Commands not working on your PC. Therefore, it is always recommended that you use the official Android SDK Platform Tool provided by Google, which can be downloaded from here. [If the latest version of this tool isn’t working, then you could also use an older version, as explained here].

FIX 3: Add ADB to Path
While you could extract the platform tools to any directory of your choice, but you will at least have to notify the system of this path, which could be done as follows:
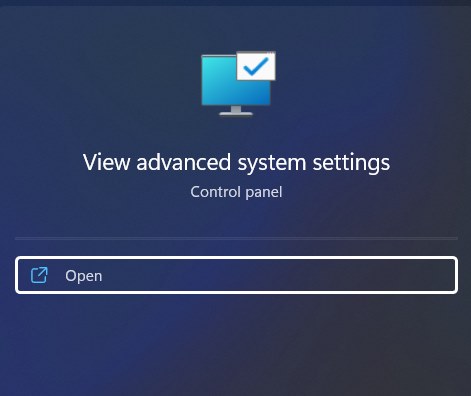
- To begin with, open View Advanced System Settings from the Start menu.

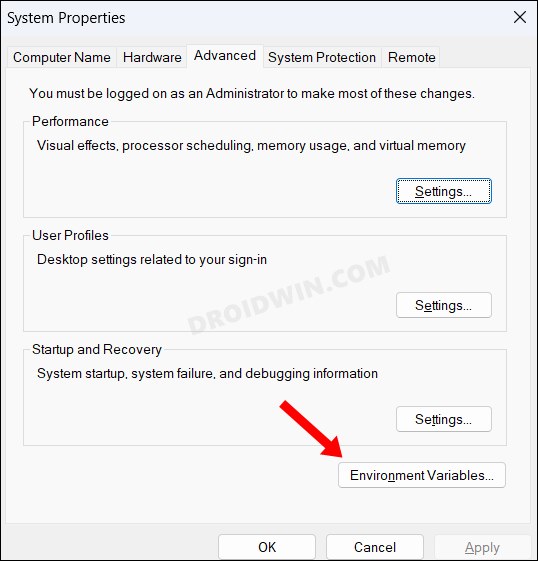
- Then go to the Advanced tab of System Properties and click on Environmental Variables.

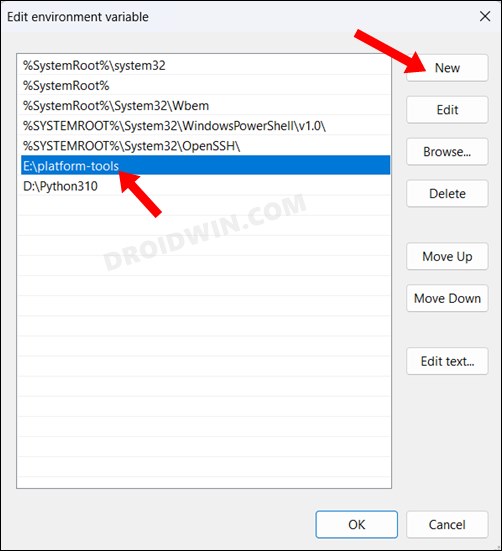
- Now select the Path field under System Variable and click New.
- Then type in the location where you have extracted Platform Tools and hit OK.

- Now check if the Android ADB Commands are working on your PC or not.
FIX 4: Use Command Prompt instead of PowerShell
We always recommended that you use the CMD instead of PowerShell because, in the case of the latter, you will have to add a period and a slash before every command, whereas, in the case of Command Prompt, you don’t need to prefix anything, simply execute the desired command in its raw form.
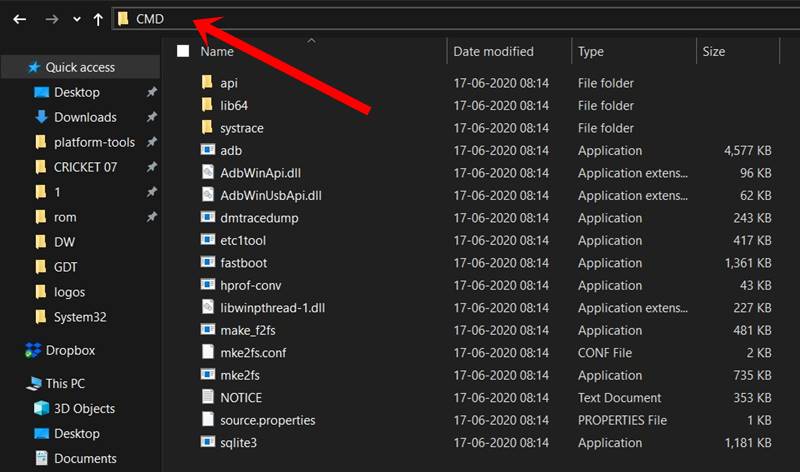
Moreover, you should launch the Command Prompt window inside the platform-tools folder itself rather than launching it from Start Menu and then using the cd command to change the directory to the platform-tools folder. To do so, simply head over to the platform-tools folder address bar, type in CMD, and hit Enter. Now execute the desired ABD Command and check if they are working on your PC or not.
FIX 5: Re-Enable USB Debugging
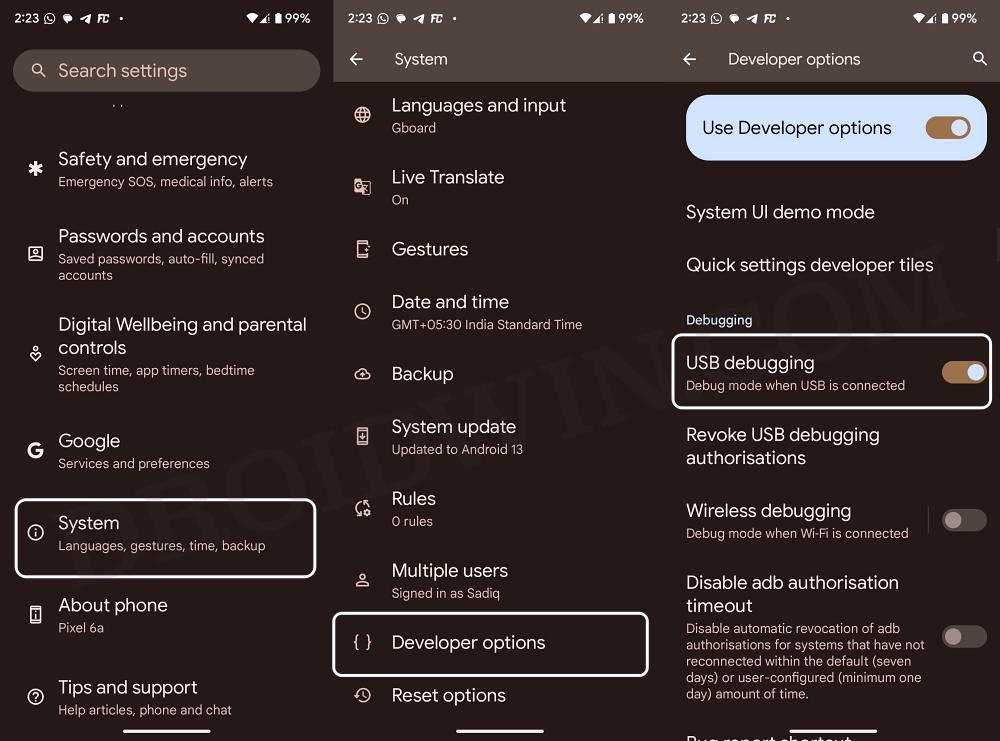
You should also try disabling and then re-enabling USB Debugging. This will refresh its underlying settings and could rectify the issue that we are currently dealing it. So refer to the below steps to give it a try right away [before starting, make sure to unplug your device from your PC].
- First off, go to Settings > System > Developer Options and disable the toggle next to it.
- Then head over to Settings > System > About Phone > Tap on Build Number 7 Times.
- This will enable Developer Options. So go to Settings > System > Developer Options.

- Now enable USB Debugging and then connect your device to your PC via a USB cable.
- Then launch CMD inside the platform-tools folder and execute the below command:
adb devices
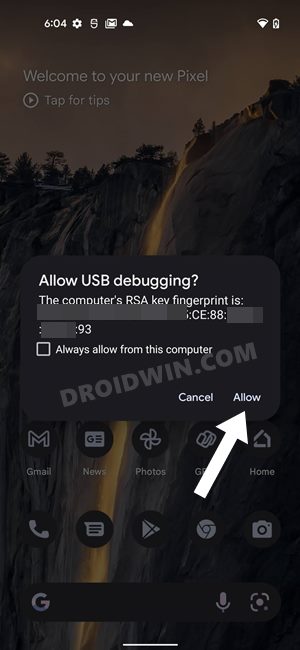
- You will get a prompt on your device, tap Allow and again execute the same command:
adb devices

- This time you should get the serial ID, signifying that your PC is able to identify your device.
FIX 6: Revoke USB Authorization
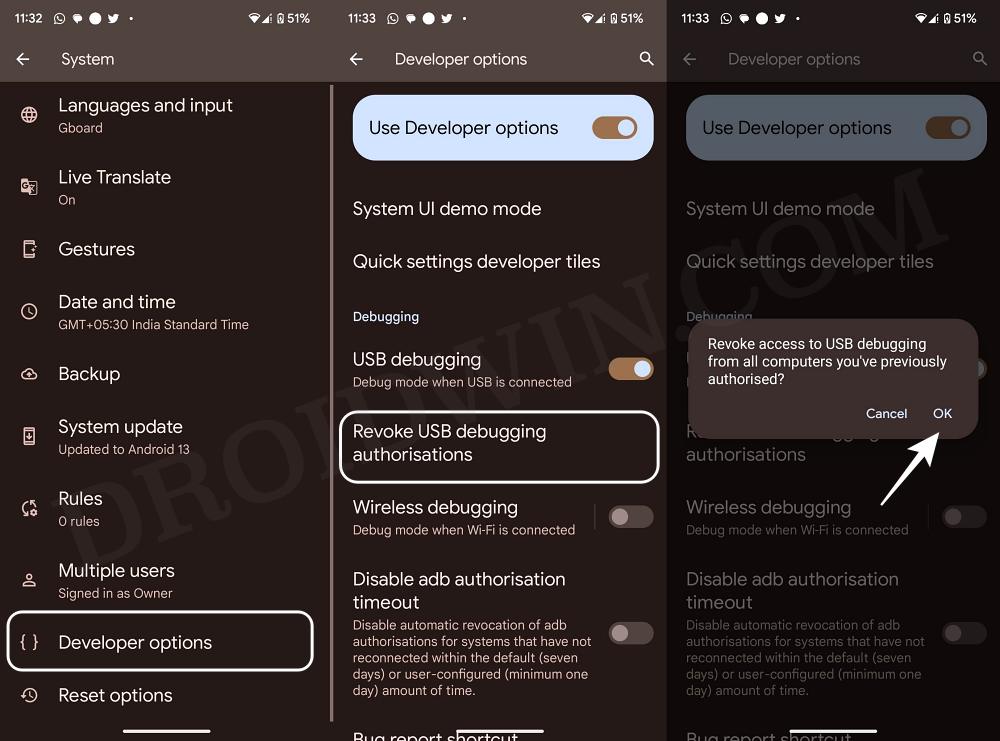
If the aforementioned tweak didn’t work out, then your next course of action should be to remove the Debugging authorization and re-set it up from scratch. Here’s how it could be done
- Connect your device to PC via a USB cable. Then head over to Settings > System > Developer Options.
- Now tap on Revoke Debugging Authorization followed by OK in the confirmation prompt.

- Once done, launch CMD inside the platform-tools folder and then execute the below command:
adb devices
- You will get a USB Debugging prompt, tap OK. Then you will get an RSA fingerprint prompt, tap Allow.
- Again execute the above command and this time your PC will be able to identify the device in ADB mode.
FIX 7: Install Android ADB Interface Drivers
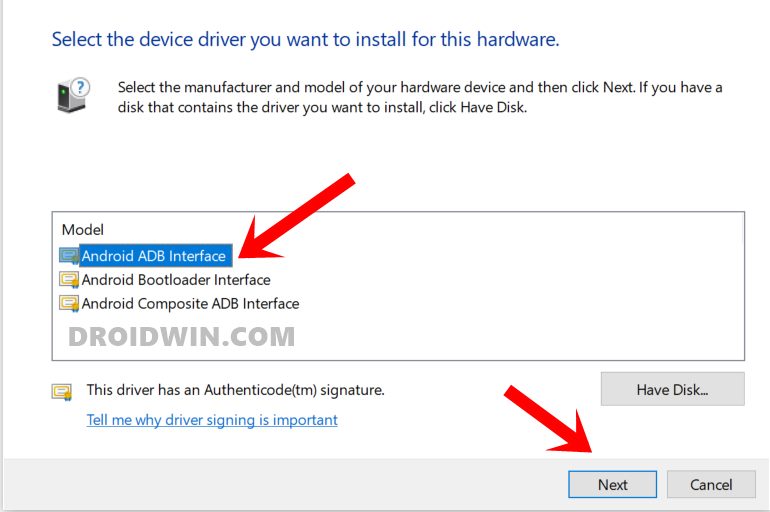
In most cases, these drivers are automatically installed when you connect your device to your PC for the first time. However, there have been a few rare instances wherein it didn’t happen. So in such cases, you could manually install these drivers as well. To do so, refer to our guide on How to Install Android ADB Drivers and execute steps 1 to 14. Once done, check if the Android ADB Commands are now working on your PC or not.
FIX 8: Restart ADB Server
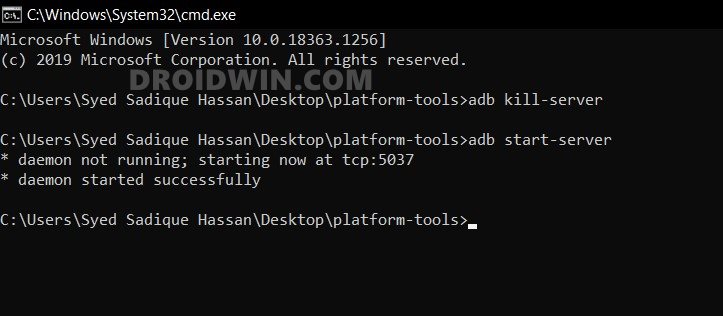
In some cases, you might have to stop the current running ADB server and restart its new instance. So give it a try using the below-given steps and check out the results.
- Launch Command Prompt inside the platform-tools folder.
- Then type in the below command to stop the ADB server.
adb kill-server

- Now type in the below command to restart the ADB server.
adb start-server
FIX 9: Add USB Flags to Windows Registry Editor
In this fix, we will be executing three commands that will add the required USB flags to your Windows Registry Editor on your PC. This fix is mostly aimed at Ryzen PCs, though Intel users could try it out as well.
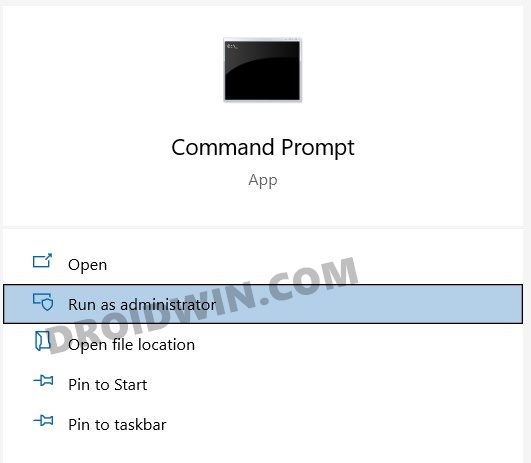
- First off, head over to the Start Menu and search CMD.
- Then launch the Command Prompt as an Administrator.
- Now execute the following three commands in this CMD window, one at a time:
reg add "HKEY_LOCAL_MACHINE\SYSTEM\CurrentControlSet\Control\usbflags\18D1D00D0100" /v "osvc" /t REG_BINARY /d "0000" /f
reg add "HKEY_LOCAL_MACHINE\SYSTEM\CurrentControlSet\Control\usbflags\18D1D00D0100" /v "SkipContainerIdQuery" /t REG_BINARY /d "01000000" /f
reg add "HKEY_LOCAL_MACHINE\SYSTEM\CurrentControlSet\Control\usbflags\18D1D00D0100" /v "SkipBOSDescriptorQuery" /t REG_BINARY /d "01000000" /f
- Once all three commands are executed, reboot your PC. The issue should be fixed.
That’s it. These were the various methods that should help you fix the issue of Android ADB Commands not working on your PC. If you have any queries concerning the aforementioned steps, do let us know in the comments. We will get back to you with a solution at the earliest.
